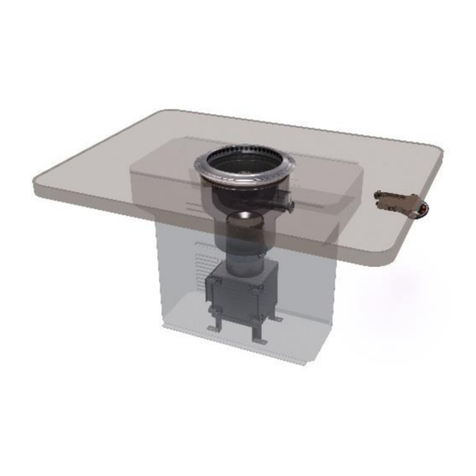
SHINPO SKRD ENO 2 User manual

SKRD EN02
1
SMOKELESS GRILL
OPERATIONAL MANUAL
SKRD
Thank you for purchasing SHINPO Smokeless Grill.
●Before operating this product, please read and understand the instructions contained in this
manual.
●Keep this manual in a place where it can be reached for immediate reference.
●If necessary, please contact us for clarification and/or further instructions.
CONTENT
◆Parts Identification Main Unit・・・・・・・・・・・・・・・・・・・・
2
◆Parts Identification Parts Accessories・・・・・・・・・・・・・・・・・・・・・
3
◆Safety Precautions・・・・・・・・・・・・・・・・・・・・
4
◆Preparation before use・・・・・・・・・・・・・・・・・・・・
8
◆Iron Grill and Crimp Grill Maintenance・・・・・・・・・・・
10
◆Operating Instructions・・・・・・・・・・・・・・・・・・・・・
11
◆Electric Leakage Breaker・・・・・・・・・・・・・・・・・・・・
13
◆Daily Inspections & Maintenance・・・・・・・・・・・・・
14
◆Maintenance of the Nozzle and Flame Sensor Unit・・・・・・・
16
◆Troubleshooting・・・・・・・・・・・・・・・・・・・・
17
◆Safety Features・・・・・・・・・・・・・・・・・・・・・・
18
◆Specifications・・・・・・・・・・・・・・・・・・・・・
19
◆Minimum Clearances・・・・・・・・・・・・・・・・・・・・・・・
20

SKRD EN02
2
Parts Identification-Main Unit
Rating Label
Table Top
Cabinet
Slim Control
Electric Leakage
Breaker
□□□□□□□
LP ガス用
00000kW
□□□□□□□
Model
Gas Type
Power Source
□□□□□□□
都市ガス用
00000kW
□□□□□□□
Gas Supply Valve
ID No

SKRD EN02
3
Parts Identification-Parts & Accessories
Burner Head
H20-5R-35A-01
Grill
Holder
Outer Casing
N20-1D-30A-01
When ordering parts, please indicate the
Model Name, Part Name, and Part Number.
Burner Body
H20-5R-27A-01
Drain Pan
H20-1F-94A-01
Burner Cover
H20-1L-95A-01
Debris Trap
H20-1Q-21A-01
3D Filter
H10-7D-53A-01
Cap
H10-7D-45A-01
Filter Ring
H10-7D-50A-01
Grill Plate
Ceramic Charcoal
A20-1B-01A-01
Sana
H95-1J-01A-01
DF
H20-1Z-04A-01
Top Ring
H20-1C-53A-02

SKRD EN02
4
Safety Precautions
We are providing these instructions with illustrations for clarity and easy understanding in order to avoid any harm
to the user or damage to the property. Insure proper installation and servicing. Have the product installed and
grounded by a qualified technician. Please make sure to understand fully the meaning of each illustration before
you proceed further.
DANGER
Failure to observe this instruction may result in a situation where death or serious
injury (Note 1) is imminent.
WARNING
Failure to observe this instruction may result in a situation where death or serious
injury (Note 1) may occur.
Caution
Failure to observe this instruction may result in a situation where injury (Note 2) to
the user or damage to the property (Note 3) may occur.
Note1: Serious injury means loss of eyesight, injury, burn (low/high temperature), electric shock, broken
bone or poisoning which require hospitalization or long term outpatient treatment.
Note2: Injury means injury, burn or electric shock which does not require hospitalization of long-term
outpatient treatment.
Note3: Property damage means damage to buildings, livestock or pet animals.
The illustrations denote the following precautions:
General
Caution
Fire
Prohibited
Contact
prohibited
Disassembly
Prohibited
General
Prohibition
Must Do
Unplug from Outlet
◆This product is designed for commercial use only, not for household use.
WARNING
◆Ventilation
▽Make sure to keep exhaust fan(s) of appropriate capacity operating
while using the smokeless grill.
▼Failure to observe this may cause incomplete combustion due to
reduced oxygen in the surrounding area.
▼It may also lower the quality of the air within your establishment.
◆Gas Supply
▽Do not use other than the type of gas specified on the Rating Plate (see P.2).
If you move to a new location, check the type of gas supplied to that location.
▼Failure to observe this may result in a risk of fire or explosion.
Gas Supply ⇔Rating Plate on the Main Unit.

SKRD EN02
5
WARNING
◆Power Source
▽Do not use other than the power source specified for this product.
▼Failure to observe this may result in a risk of fire or explosion.
◆Fire Prevention
▽Do not place flammables, except food items to be cooked,
near the heating surface.
▽Do not use any flammable substance such as gasoline,
benzene or spray.
▼Failure to observe these may result in a risk of fire or burn.
▽Never place any burning matter such as meat vegetable
or cigarette into the smoke intake holes.
▽Do not use this roaster when it is not clean.
▽Do not use this roaster without an appropriate amount
of water in the Drain Pan.
▼Failure to observe these may result in a risk of fire.

SKRD EN02
6
WARNING
◆Emergencies
▽If you sense an abnormal combustion, odor or sound, immediately stop
the use, refer to the “Troubleshooting” section of this manual.
▽In an emergency such as earthquake or fire, immediately stop the use
of this product. Before you use the product again, contact your
distributor or us for inspection and, if necessary, repair.
▼Failure to observe these may result in a risk of explosion or fire.
▽In an electric storm, shut the power off or unplug the power cord.
▼Lightning often causes a reverse current of electricity, which may damage the product.
◆Proper Use
▽Do not use this product for other than heating and cooking of food.
▼Failure to observe this may result in a risk of accident.
▽Do not sit, stand or place a heavy object on this roaster.
▼Failure to observe this may result in a damage to the roaster or accident.
▽Place or install this roaster on a level and secure surface only.
▼Failure to observe this may result in a risk of fire or burn.
◆Removable & Replaceable Parts
▽Use only original parts or those approved by us.
▼Failure to observe this may result in incomplete combustion or a damage to the product.

SKRD EN02
7
WARNING
◆Disassembling
▽Do not disassemble this roaster, removable parts excepted. (See P.2 for the list of removable
parts)
▼Failure to observe this may result in a damage to the product, electric shock or injury.
◆Prevention of Burn
▽Do not touch the heating surface or smoke holes
▼The heating surface and smoke holes get extremely hot. Touching these parts
may cause a severe burn.
▽Do not touch any of the heated parts of the product immediately after
use.
▼Make sure that all the heated parts have cooled down to prevent a
burn.
▽Do not place seasoning containers or tableware near the heating
surface.
▼Any object placed near the heating surface may get hot enough to
cause a burn.
▽Do not use charcoal or food items that may crack or burst open while
burning or being heated. (Make necessary preparations with food
items with high water content such as squid to reduce the risk.)
▼Failure to observe this may result in a risk of burn.

SKRD EN02
8
Preparation before Use
◆Setting up the Parts (Refer to P.1,2)
1. Assembly of the filter set
2. Please attach the 3D filter to the bottom
of the outer casing.
3. Please install the Debris Trap and Burner Body
After attaching the Debris Trap to the bottom of the
Outer Casing, insert the tip of the Burner Body onto the
Nozzle (the place where the gas exits). After inserting,
please put the convex side of the back of the Burner
Body into the hole (in 2 places) on the Debris Trap.
4. Please attach the burner head to the
burner body.
After installing the burner head, please confirm that it
is properly seated (no tilting / inclination, etc.)
The burner head is
well seated and is
not on an angle.
5. Mount the Drain Pan onto the Outer
Casing.
6. After installing the drain pan, rotate it
several times, and check that the drain
pan and the outer casing are in close
contact with each other. Please remove
the drain pan when drippings and
waste particles accumulate.
▼If the drain pan is lifted or tilted, or if grime
adheres to the contact surface, it may cause
incomplete combustion.
▽Add water to the drain pan (Approximate
amount 1.8 L)
Do not apply water to the burner head at this
time (please refer to 7.for an estimate of
water quantity)
▼When igniting, if the flame opening is
blocked by water or other obstructions, the
gas may be directed inward toward the
burner body causing a risk of burning the
inside of the equipment.
Burner Body
Outer casing bottom
Burner Body
Drain Pan
Outer Casing
Debris Trap
Burner Head
3D Filter
Outer Casing

SKRD EN02
9
When using a pot or a kettle, please use the Spider Ring Grate specified by Shinpo (sold separately).
◆When using the Large straight-baffled Spider Ring Grate
Remove the Grill Plate, Top Ring, Ceramic Charcoal, DF, Sana, and Burner Cover. Fit
it inside of the top of the drain pan.
◆When using the Small straight-baffled Spider Ring Grate
(Cannot be used in conjunction with the oval top.)
Remove the Grill Plate, Top Ring, Ceramic Charcoal, DF, Sana, and Burner Cover. Fit it inside
of the top of the drain pan
Burner Cover
7. Please pay special attention to not overfill
the drain pain.
▼If the drain pan is overfilled, the excessive water
will flow back into the center of the unit and
permeate the burner mechanism. This will cause
oils to sputter up toward the cooking surface.
8. Mount the Burner Cover, Sana, DF and
Ceramic Charcoal, on the center of Drain
Pan.
9. Mount the Top Ring onto the Outer
Ring.
Top Ring
10.Place the Grill Net using Grill Holder.
Grill Net
Drain Pan
Grill Holder
Pour water to this
level
Outer Ring
Spider Ring Grate
(sold separately)
Burner Cover
Ceramic Charcoal
DF
Sana
W

SKRD EN02
10
Iron Grill and Crimp Grill Maintenance
1. For first time use,
(1) Wash and clean with detergent before use.
(2) To dry completely, using the grill and heat well.
2. Put Cooking oil,
(1) Put some Cooking oil to the surface of grill after dry.
(2) Keep heat the grill and after the smoke comes out, take out from the grills.
The grills are hot, please use grill holder to take out.
(3) Wipe with paper towels as the oil goes into the grills.
(4) For Iron Grill wipe the side and back of grill, too.
3. Daily care,
(1) Soak immediately after use.
Better to soak first to soften the burnt then clean up with brush.
(2) Do not leave the dirty grills for long time. It may cause the rust.
(3) Soak for a night and clean up completely.
(4) After the cleaning, heat and dry well and repeat from 2, put some oil.
(5) Doing this again and again, the surface of grills will be coated and it can avoid the rust.
4. For the rusting,
(1) If the grills are kept in high humidity, it may rust even the grills are taking care.
(2) The stainless products are hardly to get rust. However, if it is not taking care well, it will rust
easily.
(3) If the rust comes out, scrub and polish with a sponge or brush.
Super Net
Plate Grill
Crimp Grill

SKRD EN02
11
Operating Instructions (Slim Control Type)
Before you turn on the power and open the Gas Shutoff, make sure the Burner Control Knob
is at Off position and that every direction in the “Preparation before use” section of this
manual has been precisely followed. Also make sure that the Exhaust Fan is operating
normally.
◆Ignition
①Slowly slide the Burner Control Knob all
the way to Ignition position.
▼When you try to ignite for the first time, you may
have some difficulty due to the air remaining in
the gas pipe.
▼Remove the air completely and try again
②The Igniter makes a clicking sound and
ignite gas. Make sure gas is burning
before you release the knob.
▼If the Burner fails to ignite, slide the Knob back to
Off position.
▼Wait for a while and try again.
▼Make sure you wait long enough to disperse the
gas within the appliance to avoid an explosive
ignition.
◆Adjusting flame force
The flame strength can be adjusted in 3-step of High, Medium and Low by controlling the knob.
①HIGH→MEDIUM
▼Slowly shift the knob in left (in direction of
STOP), and it will stop at position of MEDIUM
making a clicking sound.
②MEDIUM→LOW
▼Further shift the knob in left slowly, and it will
stop at position of LOW making a clicking sound
①②LOW/MEDIUM→HIGH
▼Slowly slide the Burner Control Knob all the way
to IGNITION position.
▼Release your hands, and it will stop at position of
HIGH.
①②③LOW→MEDIUM
▼Slowly slide the Burner Control Knob all the way
to IGNITION position.
▼Shift the Knob in left, and it will stop at position of
HIGH and MEDIUM making a clicking sound.

SKRD EN02
12
◆Extinguishing Fire
▼Slowly slide the Burner Control Knob to
OFF position to turn off the burner.
▼Make sure the Burner Control Knob is at
OFF position
▼Make sure the Burner is off. Close the Gas
Shutoff Cock and turn off the power.
▽Allow the appliance to cool down before you
touch it.
▼Make sure the appliance has cooled down
to a safe level. Clean the appliance
following the directions in the “Daily
Maintenance” section of this manual.

SKRD EN02
13
Electric Leakage Breaker
Please follow the cautionary instructions insure proper installation and servicing in order to avoid any
harm to the user or damage to the property.
DANGER
Do not touch the terminal.
Do not disassemble or modify the product. Failure to observe this may
result in a damage to the product, electric shock or injury.
WARNING
If you need inspection or repair, contact us or ask an electrician for
inspection.
Caution
Contact us or an electrician to retighten screw once a year.
◆Cautionary instructions for operation
⚫Check operation of leakage breaker once a month by pressing the test button.
(※Make sure to turn the handle ON after check completed.)
⚫Do not use the test button turning OFF in daily using.
⚫When leakage breaker turns OFF, firstly remove the cause then turn ON the handle
again. If the breaker turned OFF immediately, it may cause by electric leakage of the load
circuit or other errors of devices. Please contact us, or an electrician for inspection.
⚫Leakage breaker working may cause by electric leakage. Please contact us, or an
electrician for inspection.
Test button
Handle

SKRD EN02
14
Daily inspection and maintenance
▼For safe and efficient operations, please follow the daily inspection and maintenance procedures.
▼Before inspecting and cleaning, please make certain that the main gas valve is closed and the
equipment is cold.
◆Please check that:
①There are no flammable materials such as paper, plastic, oil, etc. in the vicinity of the equipment.
②The burner is not clogged with oil, fat, or sauce.
③Each component is installed correctly.
④Each component is clean.
◆Maintenance
①Inspect and clean the burner body and burner head.
Please be certain to do this on a daily basis.
▼Use a wire brush to clean the burner holes (the holes
where the flames come out). Please be certain to do this
once per day.
※If the burner holes are clogged, the exiting gas will
accumulate toward the inlet of the burner. This situation
is dangerous and will cause combustion
.
▼Cleaning the Burner Body with a wire brush. Tap several
times with a plastic hammer or wooden mallet to loosen
inner rust and particles.
▼When wet, please dry thoroughly or wipe with a clean
dry cloth.
②As needed, wipe off dirt and grime from the Top Ring
with a damp cloth. Once per day, please wash the Top
Ring with a scrubbing sponge using the rough side. Also,
please clean regularly with metal polish.
Rust
Grime
③With the 3D filter removed, thoroughly clean the Outer Casing once per day using a the rough
side of a scrubbing sponge and detergent. Rinse to remove the foam, and wipe it off with a wet
cloth.
④Regardless of the amount of water remaining in the drain pan, please remove and refill the
water once every two usages. Please remove the Drain Pan once per day and rinse off any
sauce or oil adhering to the inside, using a sponge and a neutral detergent.
Please avoid striking with hard objects, as the coating may come off. During washing, the use
of steel wool or alkaline detergent may cause the surface coating to peel off.As corrosion may
occur, please handle carefully.
⑤Please remove Burner Cover, Sana, DF, Ceramic Charcoal, and Debris Trap once per day
and wash thoroughly with the rough side of a scrubbing sponge to remove built up sauce and
grime.
(The lifespan of these parts will be greatly reduced if they are not cleaned on a regular basis.)

SKRD EN02
15
⑥Take out the each Ceramic Charcoal. Brush top, back,
and side part using the wired brush everyday.
The dirty Ceramic Charcoal may break easily.
Never wash in water. Wet Ceramic Charcoal may burst
when they heated.
⑦Please remove the 3D filter once per week and wash it
with the rough side of a scrubbing sponge to remove
built-up oil, fat, and grime.
(Use of the filter in a dirty state will drastically reduce its
functionality and may lead to a fire.)
⑧On a daily basis, please wipe off the accumulated oil on the reachable areas of the FD,
Connecting Tube, and FVD, with a damp cloth.
(The Connecting Tube cannot be disassembled.)
⑨Please clean the Relay Box once per month.。
⑩Grease will accumulate on the exhaust fan blades.
Please check at least once per year, removing oil
adhering to the blades and adjusting the belt. (Please
consult a specialist)
F・D
F・V・D
Cannot be
disassembled
Connecting Tube
Cannot be
disassembled

SKRD EN02
16
Maintenance of the Nozzle and Flame Sensor Unit
①Align the Nozzle Cleaning Rod with the aperture of the nozzle and insert it.
②Insert the Nozzle Cleaning Rod up to the bend in the rod.
③Please remove slowly while performing a corkscrew motion.
④Wipe off the grime adhering to the tip of the Nozzle Cleaning Rod.
Please repeat steps 1 - 4 a few times.。
【Nozzle Maintenance】
If the burner's intensity has declined, it is most likely that dust or an obstruction
is blocking the nozzle aperture.
①②③④
Nozzle
Cleaning
Rod
Nozzle
Remove the Burner
and Debris Trap to
perform maintenance
【UV Sensor maintenance】
If the UV Sensor is abnormally activated and then the fire goes out, it is most likely that there has
some dirt on the UV sensor.
lens
Stainles
s
UV Sensor
①Press the buttons on the upper side latches to
remove the side panels of the cabinet
latches
②When the UV sensor is dirty, wipe the sensor lens with a cotton swab
soaked in detergent or a piece of chopstick on which the tissue paper is
wrapped. Since the lens part is made of glass, do not press it strongly to
avoid damage.
③After the job is completed, replace the side
panel to the cabinet. When installing, lean
on the side panels while pushing on the bar,
push the side plate forward until you hear
the sound of “clink”.

SKRD EN02
17
Troubleshooting
Trouble
Cause
Does not ignite
Fire goes out when the Knob is
released
Pilot light does not extinguish
itself..
Explosive ignition
Unstable Flames
Fire goes out while in operation
Smoke is released in the air
Solution
Reference page
Gas Shutoff Cock is closed
○
○
○
Position the Burner Control Knob to
Off. Open the Gas Shutoff Cock.
10
Insufficient quantity of gas in
the LPG gas tank
○
○
○
Air is present in the gas pipe
○
○
Follow the directions described in this
manual.
10
Improper
gas pressure
Low
○
○
○
Ask for professional servicing.
-
High
○
○
○
○
No electric Power
○
Check the Circuit Breaker.
Ask for professional servicing.
-
Power Switch is not turned
ON.
○
Turn the Power Switch ON.
-
Electric leakage breaker is
turned OFF.
○
Turn the Electric leakage breaker ON.
12
Burner Holes are clogged
○
○
○
○
Follow the directions described in this
manual.
13
Burner is not properly
installed
○
○
○
○
Follow the directions described in this
manual.
7
Malfunction of Safety Device
or Ignition Devise
○
○
○
Ask for professional servicing.
-
Exhaust Air is not properly
discharged.
○
Contact the original contractor.
-
Parts are soiled.
○
○
○
○
Clean soiled parts.
13
Safety Device is activated
○
○
○
Follow the directions described in this
manual.
17
Malfunction of Gas Control
Knob.
○
Ask for professional servicing.
-
If the directions above do not solve your problem(s), please contact your distributor or our
Service Center.
Do not attempt to disassemble or repair the roaster unless you are properly trained and
licensed to do so.
Disassembling or repairing by untrained individual may result in a risk of appliances
malfunction, injury or electric shock.

SKRD EN02
18
Safety Features
▽Misfiring Detector
Prevents gas being discharged when the burner is not lit.
▼When fire goes out for any reasons, this devise detects it and shuts off the supply of gas to the Burner,
preventing gas being discharged into the air.
▽Overheating Detector
When the appliance overheats, this device shuts off the supply of gas and Sounds an alarm.
▼Possible causes for overheating include:
1. Water is not present in the Drain Pan.
2. Parts are soiled with grease and burner flames are being sucked into the exhaust duct.
3. Exhaust Fan is not operating properly.
4. The exhaust air volume is low due to filter clogging, etc.
5. Clogged Burner Holes force gas to flow backward and burn at the Gas intake.
▼You may resume the operation of the appliance after it has cooled down (5 to 10 minutes) and
the alarm sound has stopped. The alarm will stop automatically when the appliance cools
down.
※Allow the appliance to cool down before you attempt to service the appliance.
Shutting Alarm Off
You may stop the alarm manually by turning off theAlarm Switch located next to the Burner Control Knob.
The supply of gas however, however, will not be resumed until the appliance cools down to an acceptable
level.
Make sure to turn the Alarm Switch on again when normal operating conditions are restored (all the causes
for overheating have been removed and the appliance has cooled down to an acceptable level).
The Alarm Switch should be turned on during normal operation. If it is turned off, warning beep will not sound
and undetected overheating may result in a risk of fire.
Make sure the appliance has cooled down to a safe level when you inspect the appliances.
Table Top
Alarm Shutoff Switch
Slim Control
Lamp

SKRD EN02
19
Specifications
Model
SKRD
Gas
Consumption
Natural Gas: 3.15kW
LPG:3.02kW
Operating
Method
Slim Control
Gas
Connection
R1/2 or Rubber Hose Connection (Ø 9.5)
Power
Source
100V~240V
Power
Consumption
Less than 5W
Ignition
Method
Spark Discharge Ignition
Grill Plate
Ø280mm
Burner
Bunsen Burner
Heating
Method
Radiant heat generated by Ceramic Charcoal applied to Grill Plate
Safety
Feature
Overheating Detector/ Flame Sensor

SKRD EN02
20
Minimum Clearances
▽The appliances must be installed as below.
《単位 :㎜》
Grill
Grill
Side
Face
Unit: mm
Table of contents
Other SHINPO Grill manuals
Popular Grill manuals by other brands
Surefire
Surefire SF34LP Assembly, installation instructions and use & care guide
Calflame
Calflame BBQ13P04 owner's manual

Outdoorchef
Outdoorchef Davos 570 Assembly instruction
MasterChef
MasterChef G42602 Assembly manual

Silvercrest
Silvercrest SMRS 450 A1 operating instructions
Hot Shot
Hot Shot 52259 Assembly instructions
