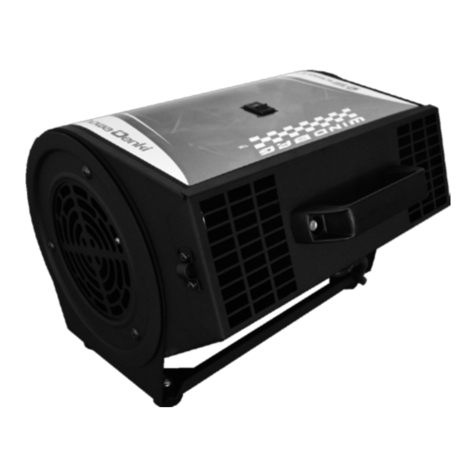
Showa Denki U2S Use and care manual

013(E)-E
Gust Blower
【U2S 】
Operation and Safety Manual
Thank you very much for purchasing this Showa Denki blower.
This Operation Manual describes the specifications for
【
Gust Blower Type U2S
】
.
Please read this Operation Manual carefully (in particular where marked with a symbol) for safe and
efficient use of this blower.
Please keep this Operation Manual accessible for future use.

013(E)-E
-1-
Application
This gust blower is suitable for handling air and other incombustible, non-corrosive, and non-explosive gases.
This gust blower is designed to allow continuous operation. However, please note that frequent or repetitive
ON/OFF operation or use in a high-temperature environment can raise the gust blower to the maximum
allowable temperature. For details, please contact us.
Remove solid matters and impurities to prevent their entry into the gust blower.
Suction and compression pressure
Using the gust blower near its maximum static pressure causes temperature rise due to the compression heat
and the overloading of the motor. Provide a pressure adjusting valve or a bypassnis hole on either the suction
or discharge side to let out the air under such usage conditions.
Temperatures
The maximum allowable ambient temperature and gas temperature at the inlet are 40℃.
The casing temperature while in operation is very high. Avoid touching to prevent burns.
Installation
The gust blower can be installed in any axial direction unless its cooling effect is impaired. Keep the
ventilation grid and openings clean. The direction of flow is indicated with an arrow.
When installing the gust blower in proximity of a wall, secure a minimum of the following clearance
between the gust blower and the wall:
U2S-40T・70T・150
:
20mm
U2S-H220・H370・H750
:
30mm
Ensure ducting does not apply pressure or cause stress deformation to the gust blower.
A built-in silencer reduces noise. To further reduce noise, use an auxiliary silencer (optional accessory).
Thin or metal plating, etc. may conduct and amplify sound; if installing, be sure to install a sound-absorbing
layer between the plate and unit.

013(E)-E
-2-
Wiring
Be sure to disconnect the power supply before starting wiring work. Wiring of the gust blower must be
performed by a qualified electrician.
Ensure that the power supply voltage and frequency are the same as those indicated on the nameplate.
※Wiring for U2S-40T・70T・150
For IE1 products, the metal plates are arranged and wired for the voltage at the time of purchase.
Check that the metal plates are arranged and wired as shown in Table 1 (Fig. 1-2) according to the model,
power supply voltage and frequency to be used.
※Wiring for U2S-H220
・
H370
・
H750
For IE3 products, the metal plate is removed at the time of product delivery.
It is included in the metal plate terminal box.
Connect the metal plates as shown in Table 2 (Figures 3 to 5) according to the voltage in use.
The metal plate may be left over, depending on the voltage used. Use it if changing the voltage.
Model with IE1
electric motor
installed
(Applicable
models:)
U2S-
40T/70T/150
No. of
terminals
50Hz
60Hz
50Hz
60Hz
200V
200/220V
380V/400V
380V/400V
6
Table 1. Connecting outlet line (IE1)
Drawing 1. Δwiring
Drawing 2. Y wiring
:
Metal plate

013(E)-E
-3-
Model with IE3
electric motor
installed
(Applicable
models:)
U2S-H220/H370/
H750
No. of
terminals
50Hz
60Hz
200V
220V
9
9
60Hz
200V
9
60Hz
380V/400V
Table 2. Connecting outlet line (IE3)
:
Metal plate
Figure 3. Δwiring
Figure 4. YY wiring
Figure 5. Y wiring
Power line inlet
Power line inlet
Power line inlet

013(E)-E
-4-
Allowable voltage range is 土5%. The rated motor current is effective at a gas inlet and ambient
temperatures of 40℃. The motor current will rise by 6% at a gas inlet and an ambient temperature of 20℃.
Set the motor protection circuit breaker to the rated current value.
Be sure to connect a grounding wire to prevent electric shock hazards.

013(E)-E
-5-
Current values
Table 3
Voltage compatibility chart for All Models
Manufacturability
Frequency
50Hz
60Hz
Voltage
200V
380V
400V
200V
220V
380V
400V
U2S-40T
〇
〇
〇
〇
〇
〇
〇
U2S-70T
〇
〇
〇
〇
〇
〇
〇
U2S-150
〇
〇
〇
〇
〇
〇
〇
U2S-H220
〇
×
×
〇
〇
〇
〇
U2S-H370
〇
×
×
〇
〇
〇
〇
U2S-H750
〇
×
×
〇
〇
〇
〇
〇:
Manufacturable
×
:
Non-manufacturable
※The wiring method is different for each voltage. Please refer to Tables 1 and 2 for schematics.
Use within the following current values depending on the model.
Table 4
IE1 Electric Motor
(200V class)
Rated current
Schematic (IE code)
Frequency
50Hz
60Hz
Voltage
200V
200V
220V
U2S-40T
1.8
A
2.5
A
2.3
A
Fig. 1(IE1)
U2S-70T
3.0
A
4.0
A
3.8
A
Fig. 1(IE1)
U2S-150
7.0
A
8.8
A
8.5
A
Fig. 1(IE1)
Table 5
IE3 Electric Motor
(200V class)
Rated current
Wiring (IE code)
Frequency
50Hz
60Hz
Voltage
200V
200V
220V
U2S-H220
9.9
A
12.0
A
10.4
A
50Hz Fig. 3(IE3)
60Hz Fig. 4(IE3)
U2S-H370
17.1
A
19.6
A
16.9
A
50Hz Fig. 3(IE3)
60Hz Fig. 4(IE3)
U2S-H750
30.8
A
35.2
A
30.5
A
50Hz Fig. 3(IE3)
60Hz Fig. 4(IE3)
Table 6
IE1 Electric Motor
(380/400V)
Rated Current
Schematic (IE code)
Frequency
50Hz
60Hz
Voltage
380V
400V
380V
400V
U2S-40T
1.3A
1.5A
1.4A
1.3A
Fig. 2(IE1)
U2S-70T
2.0A
2.1A
2.4A
2.2A
Fig. 2(IE1)
U2S-150
4.9A
5.5
A
5.1
A
5.1
A
Fig. 2(IE1)
Table 7
IE3 Electric Motor
(380/400V)
Rated Current
Schematic (IE code)
Frequency
50Hz
60Hz
Voltage
380V
400V
380V
400V
U2S-H220
×
×
6.0
A
6.0
A
60Hz Fig. 5(IE3)
U2S-H370
×
×
9.8
A
9.8
A
60Hz Fig. 5(IE3)
U2S-H750
×
×
17.6
A
17.6
A
60Hz Fig. 5(IE3)
×
:
Non-manufacturable

013(E)-E
-6-
Current values
Depending on the model, frequency, and voltage, vibration may increase even within the rated current
value, making the product unusable.
Please use within the current value where vibration does not occur shown in the tables below.
(
Applicable models: U2S-H370, U2S-H750
)
Suction- and discharge-side current value table
Table 8
IE1 Electric Motor
(200V class)
Discharge side
Suction side
Schematic (IE code)
Frequency
50Hz
60Hz
50Hz
60Hz
Voltage
200V
200V
220V
200V
200V
220V
U2S-40T
1.8
A
2.5
A
2.3
A
1.8
A
2.5
A
2.3
A
Fig. 1(IE1)
U2S-70T
3.0
A
4.0
A
3.8
A
3.0
A
4.0
A
3.8
A
Fig. 1(IE1)
U2S-150
7.0
A
8.8
A
8.5
A
7.0
A
8.8
A
8.5
A
Fig. 1(IE1)
Table 9
IE3 Electric Motor
(200V class)
Discharge side
Suction side
Wiring(IE code)
Frequency
50Hz
60Hz
50Hz
60Hz
Voltage
200V
200V
220V
200V
200V
220V
U2S-H220
9.9
A
12.0
A
10.4
A
9.9
A
12.0
A
10.4
A
50Hz Fig. 3(IE3)
60Hz Fig. 4(IE3)
U2S-H370
17.1
A
19.6
A
16.9
A
13.1
A
18.4
A
16.9
A
50Hz Fig. 3(IE3)
60Hz Fig. 4(IE3)
U2S-H750
30.8
A
35.2
A
30.5
A
22.9
A
32.6
A
30.5
A
50Hz Fig. 3(IE3)
60Hz Fig. 4(IE3)
Table 10
IE3 Electric Motor
(380/400V)
Discharge side
Suction side
Schematic(IE code)
Frequency
50 ㎐
60 ㎐
50 ㎐
60 ㎐
Voltage
380V
400V
380V
400V
380V
400V
380V
400V
U2S-H220
×
×
6.0
A
6.0
A
×
×
6.0
A
6.0
A
60Hz Fig. 5(IE3)
U2S-H370
×
×
9.8
A
9.8
A
×
×
9.8
A
9.8
A
60Hz Fig. 5(IE3)
U2S-H750
×
×
17.6
A
17.6
A
×
×
17.6
A
17.6
A
60Hz Fig. 5(IE3)
×
:
Non-manufacturable
※
IE1 electric motors (380V/400V) not listed.

013(E)-E
-7-
Items to check during equipment commissioning
①
Power supply
①
Electromagnetic switch capacity
②
Installation
③
Connection to the power supply
④
Correct switch connection
De-energization of any one line due to
the disconnection of a power line or
poor switch connection will cause
single-phase operation, and the motor
will burn.
②
Rotational
direction
Rotational direction matches the
arrow-marked plate.
When the motor rotation is in the
reverse, change the two power supply
lines for each other.
③Operating
static pressure
and current
A pressure gage and an ammeter show
that the operating static pressure and
current are below the maximum
operating static pressure and current.
If pressure is above the maximum
operatic static pressure, provide a
bypass hole to let air out.
④
Operating status
No abnormal vibration or noise.
If any, please contact us.
Maintenance inspections
We recommend checking for any deterioration in insulation, and for abnormal vibration or noise every three
months. The motor bearing uses a sealed ball bearing requiring no lubrication. The grease life is roughly one
year, although it varies greatly depending on the operating environment.
Inquiries
For technical inquiries concerning this product, please contact the following.
For troubleshooting or repairs, please contact us using the Contact Form on our website.
http://www.showadenki.co.jp
Showa Denki Co., Ltd., Osaka Headquarters Factory, Promotion Group.
TEL
:
+81-72-870-5708
Table of contents
Other Showa Denki Blower manuals
