SHW ELECTRIC HEIGHT ADJUSTABLE DESK User manual

ASSEMBLY INSTRUCTIONS
ELECTRIC HEIGHT ADJUSTABLE DESK
Phone: 1300 313 495
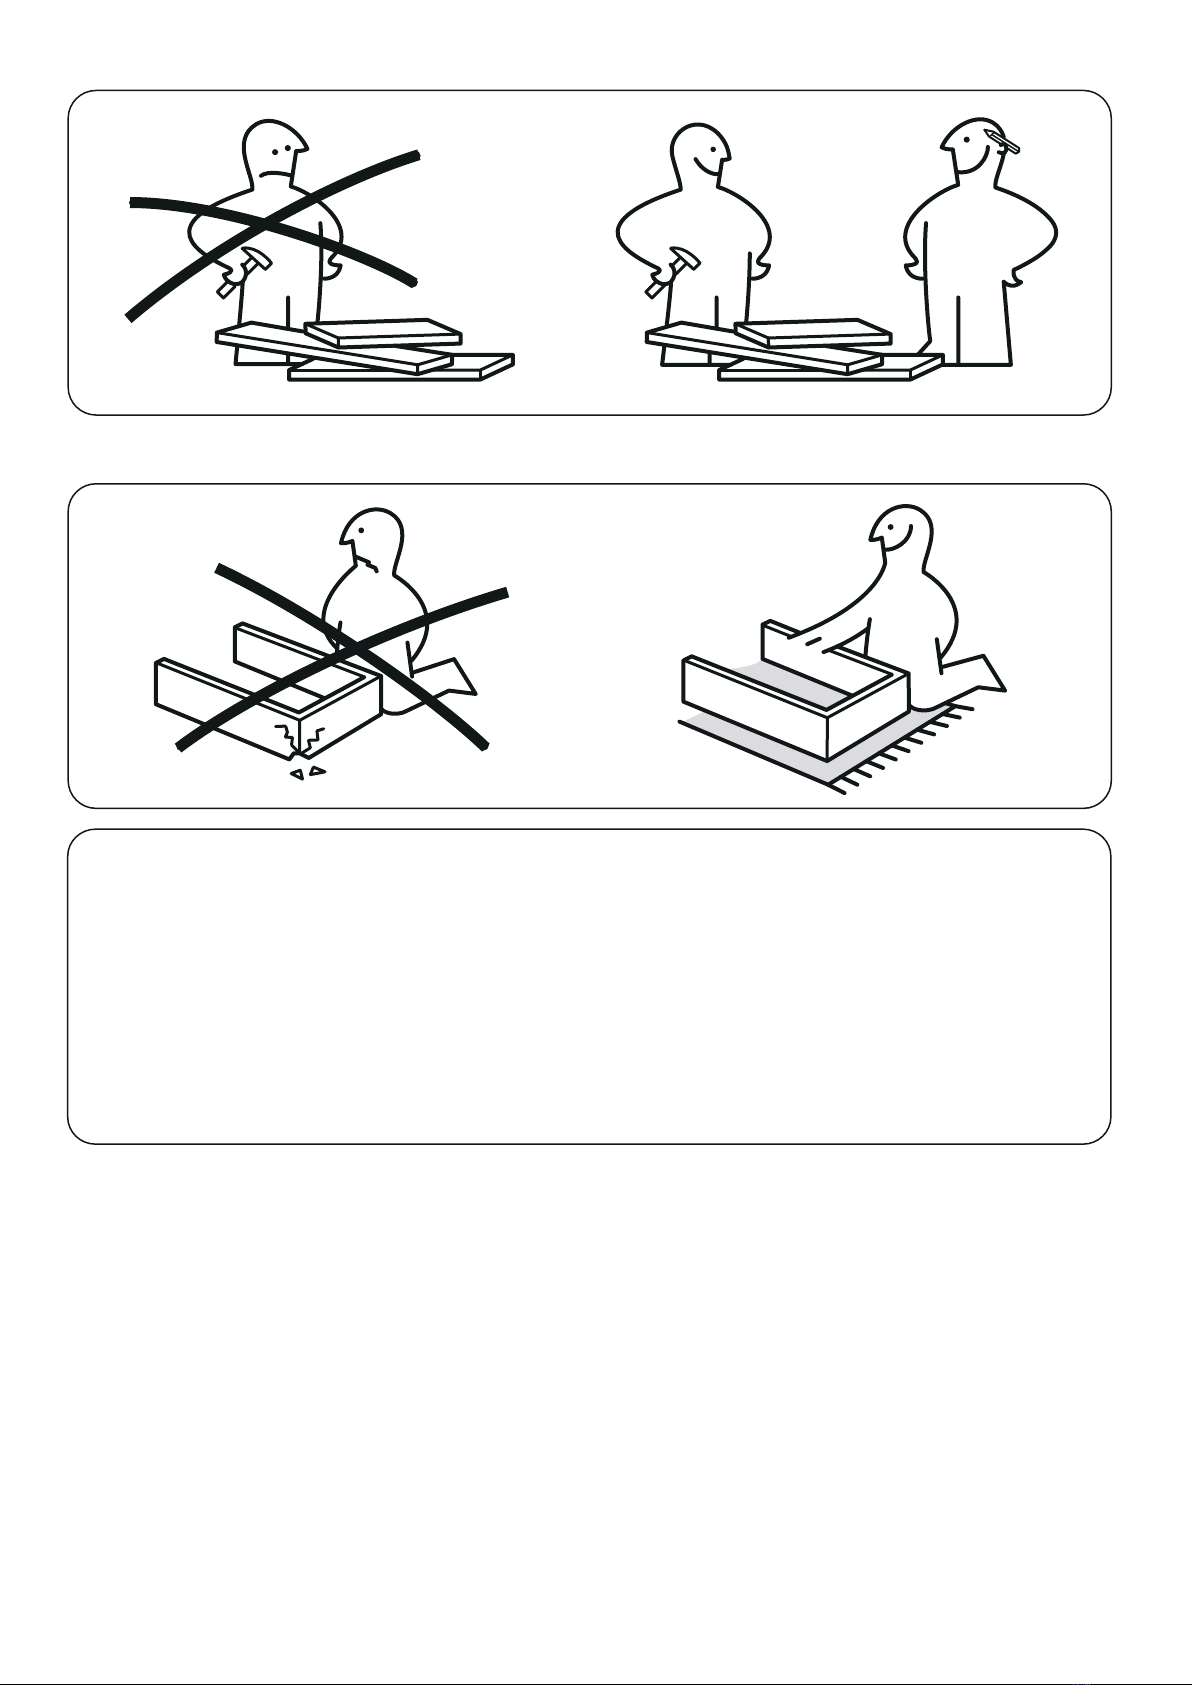
Assemble Item On a Clean Flat Surface
NeedTwoOrMore People To Complete
- Please check you have all hardware before assembling.
- Please ensure you have the name of the item and hardware part required and quantity.
- Please contact us by mail, if you have any questions, and we will reply you ASAP.
- Enjoy your new purchase!
P 1

2
13
4
5
7
9
88
10
6
P 2
11
9
No.
Product Name
QTY
1
2
3
4
5
6
7
8
Left Base
1
Right Base
Left Leg
Right Leg
Cable tray
1
1
1
1
Foot
Beam
4
2
Bracket
1
1
Display
10
1
Desktop
11
1
Controller
A
B
8
C
8
D
12
2
1
M8x40
M4x10
M6x15
M5x20
E
F
M4x15
M4
8
3 100-240 V 1000N 47-63Hz 50w 25mm/s
2 Minutes On,
18 Minutes
off.
Specification
Segments
Input
voltage
Max
Load
Maximum
rate
Maximum
power
Adjustable
Height
Speed Duty
Cycle Foot Horizontal
1100-1700mm
A B
Pre-Assembled
1
G
M5
620-1220mm
C
1
M6x15mm
Ax8
P 3
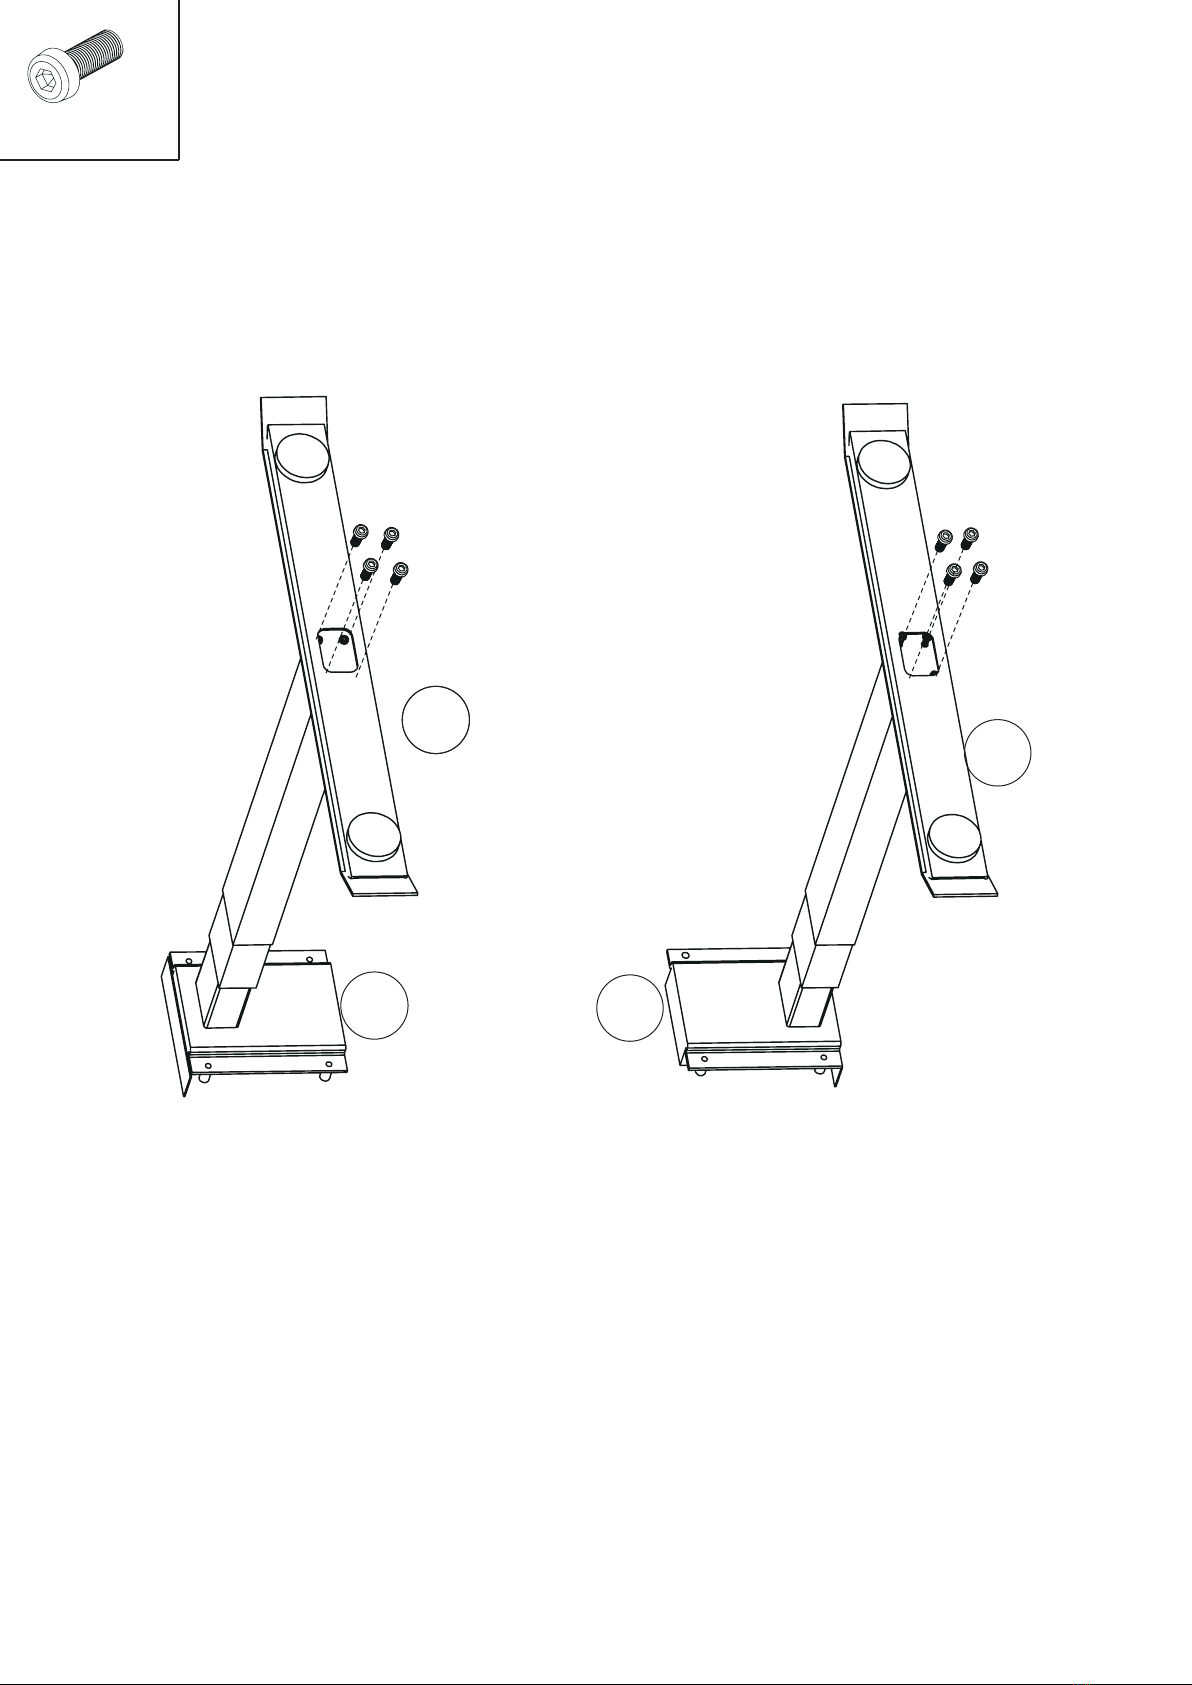
Both Legs assembling,fix the base and leg with
M6 screws(Pre-assembled).
4
2
3
P 4
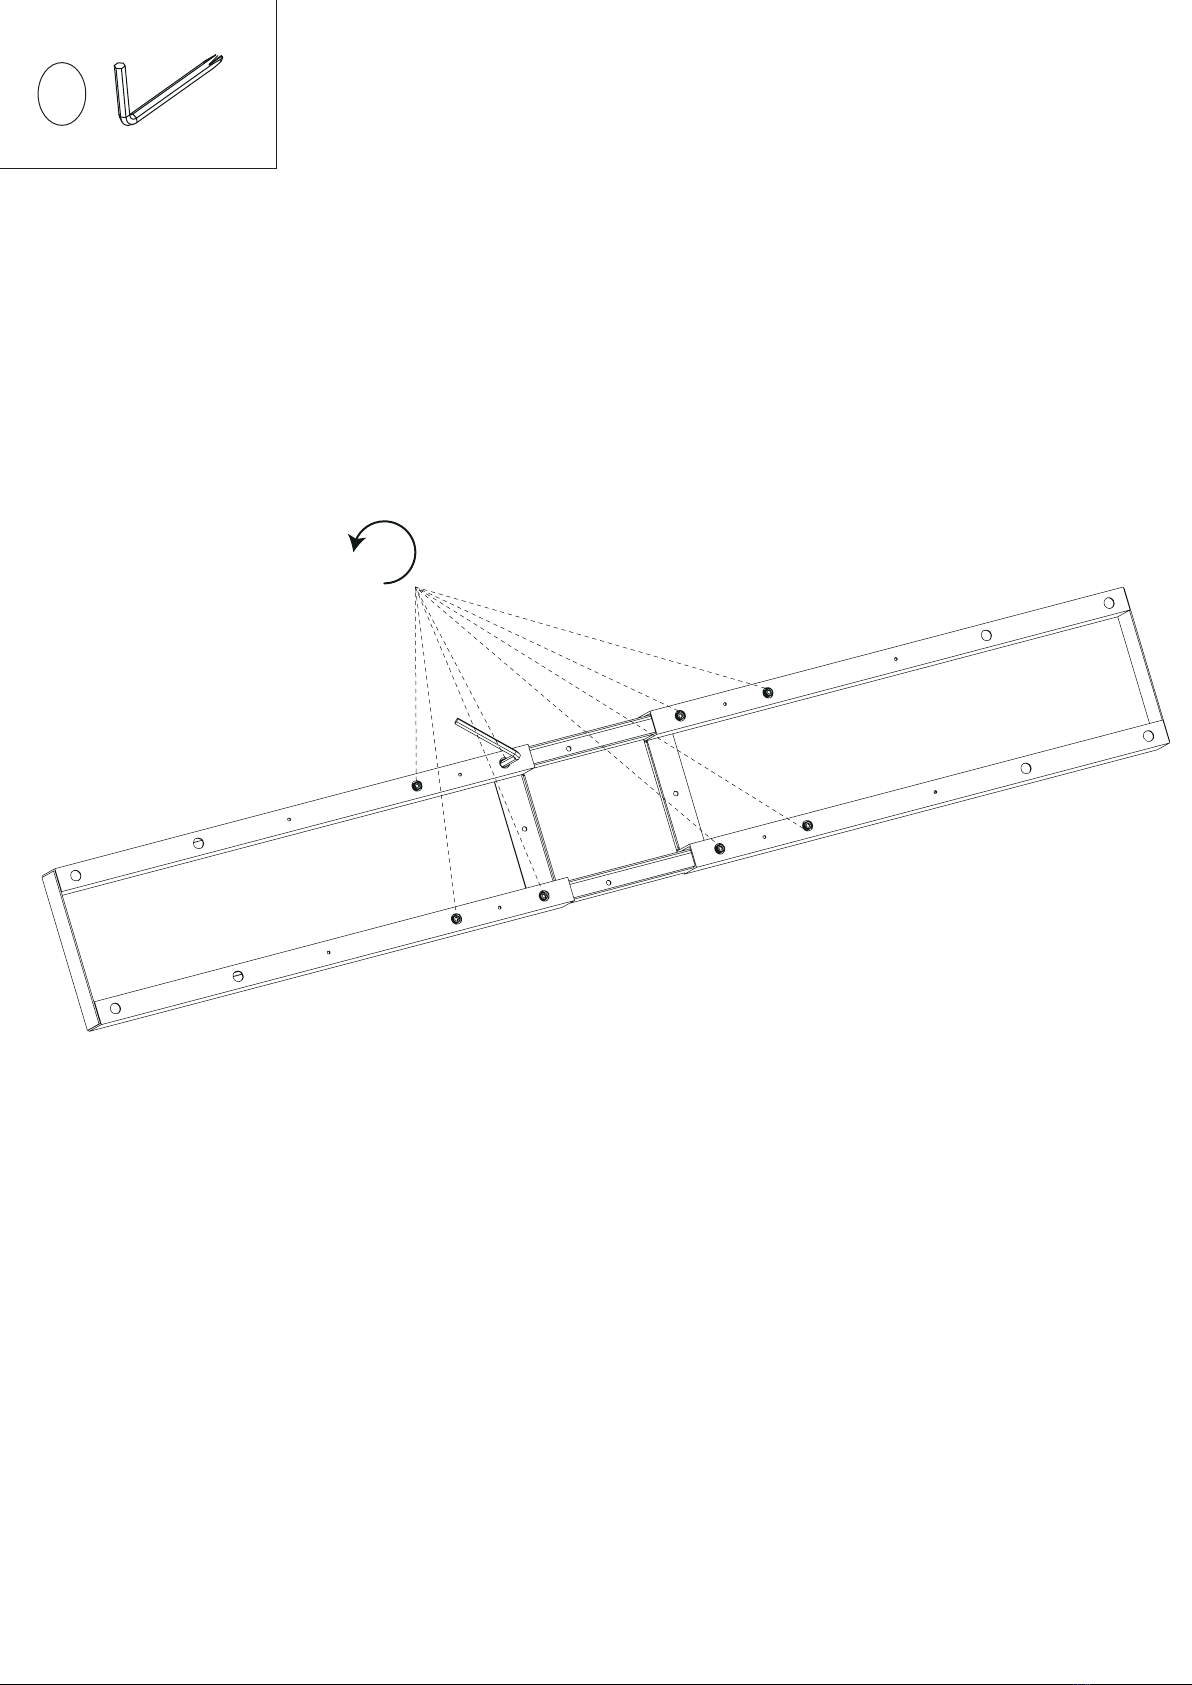
1. Loose screw
2. Adjust to the appropriate width
3. Tighten the screws (recommended 15cm
from the side of the desktop)
M4
F

M8x40
BX8
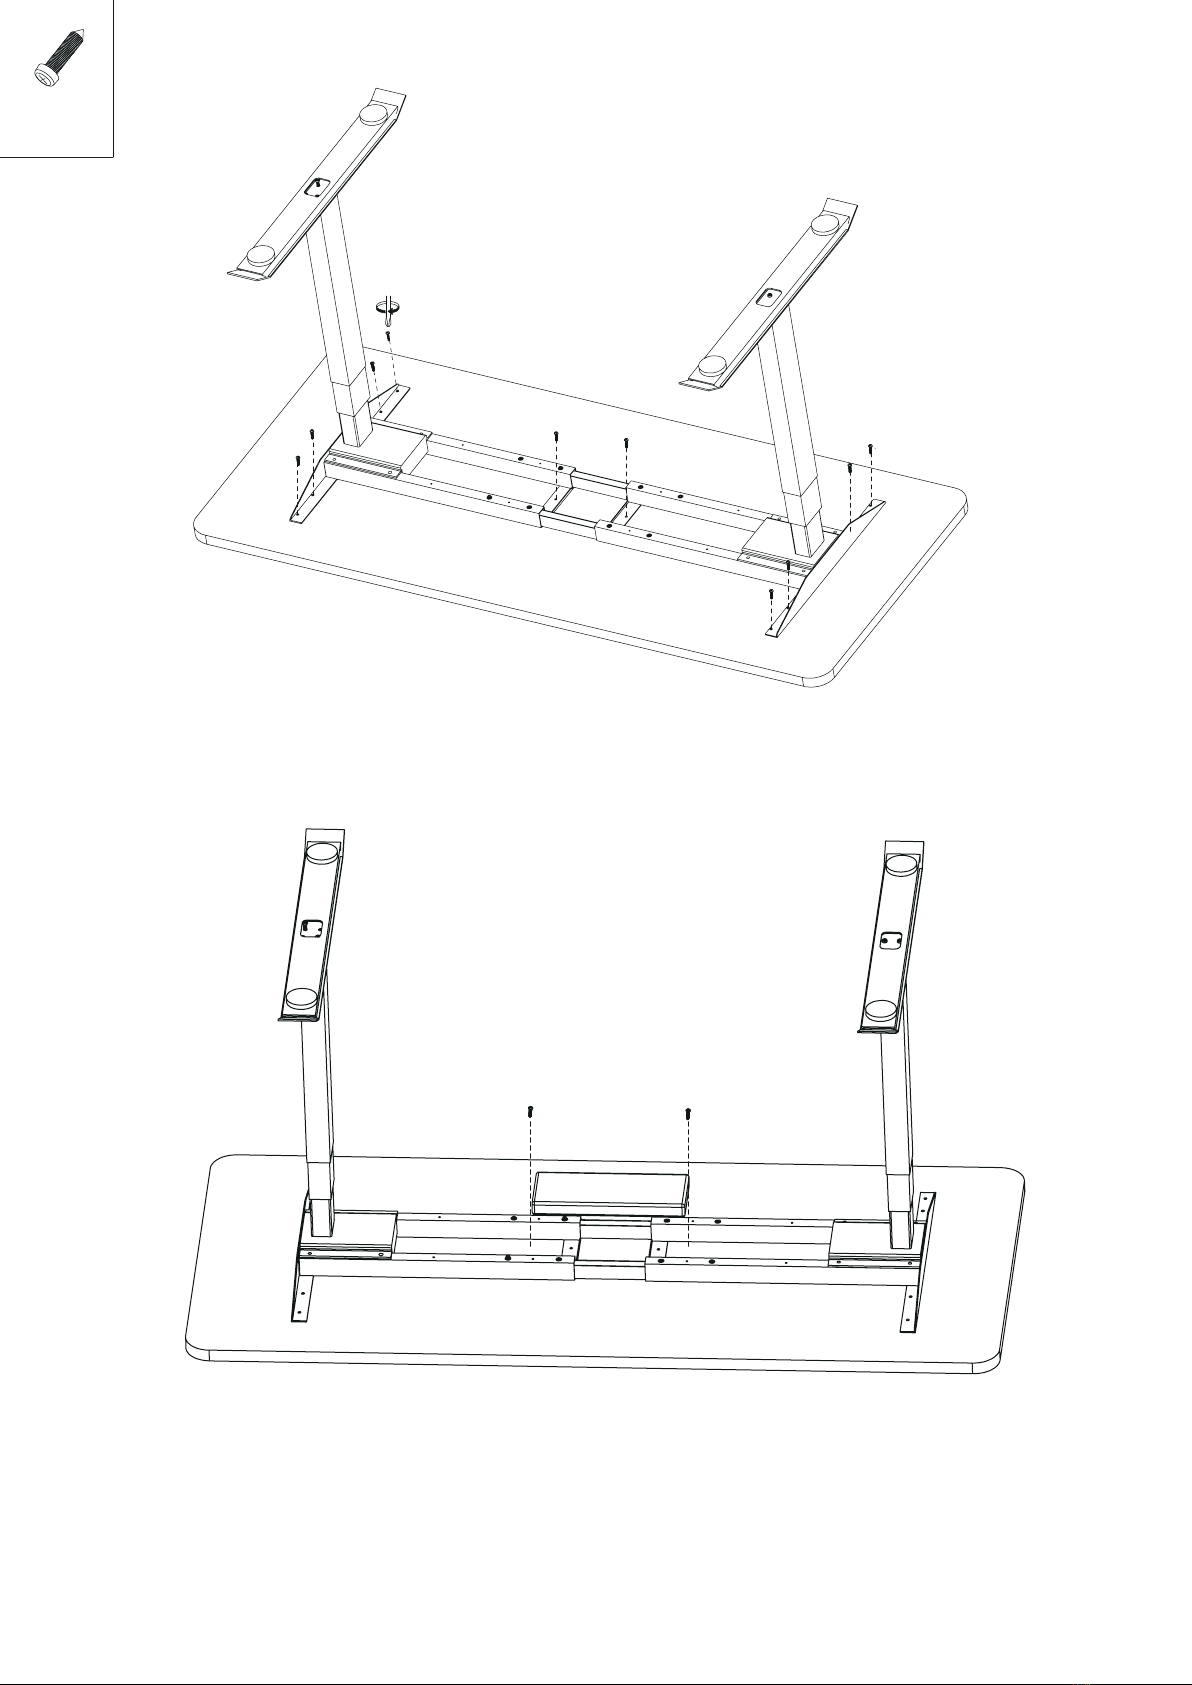
Let two legs stand in right place, then fix the abeam on legs
with M8 screws. Fix the brackets with M8 screws
P5
M5x20
DX12
P 6
Desktop Installation
Controller Box Installation

P7
M1 M2 HS
AC
Put the control box in the cable tray.
-insert the motor plug in M1 M2
-insert the control panel plug in HS
-insert the poweer plug in AC

CX8
M4x10
Optional assemble ways:
sharp screws in any position you like
Fix the control panel under the tablee. You may also install it on other
position with self-tapping screws.
M4x15mm
Ex2
P 8
Install four wire slot boards
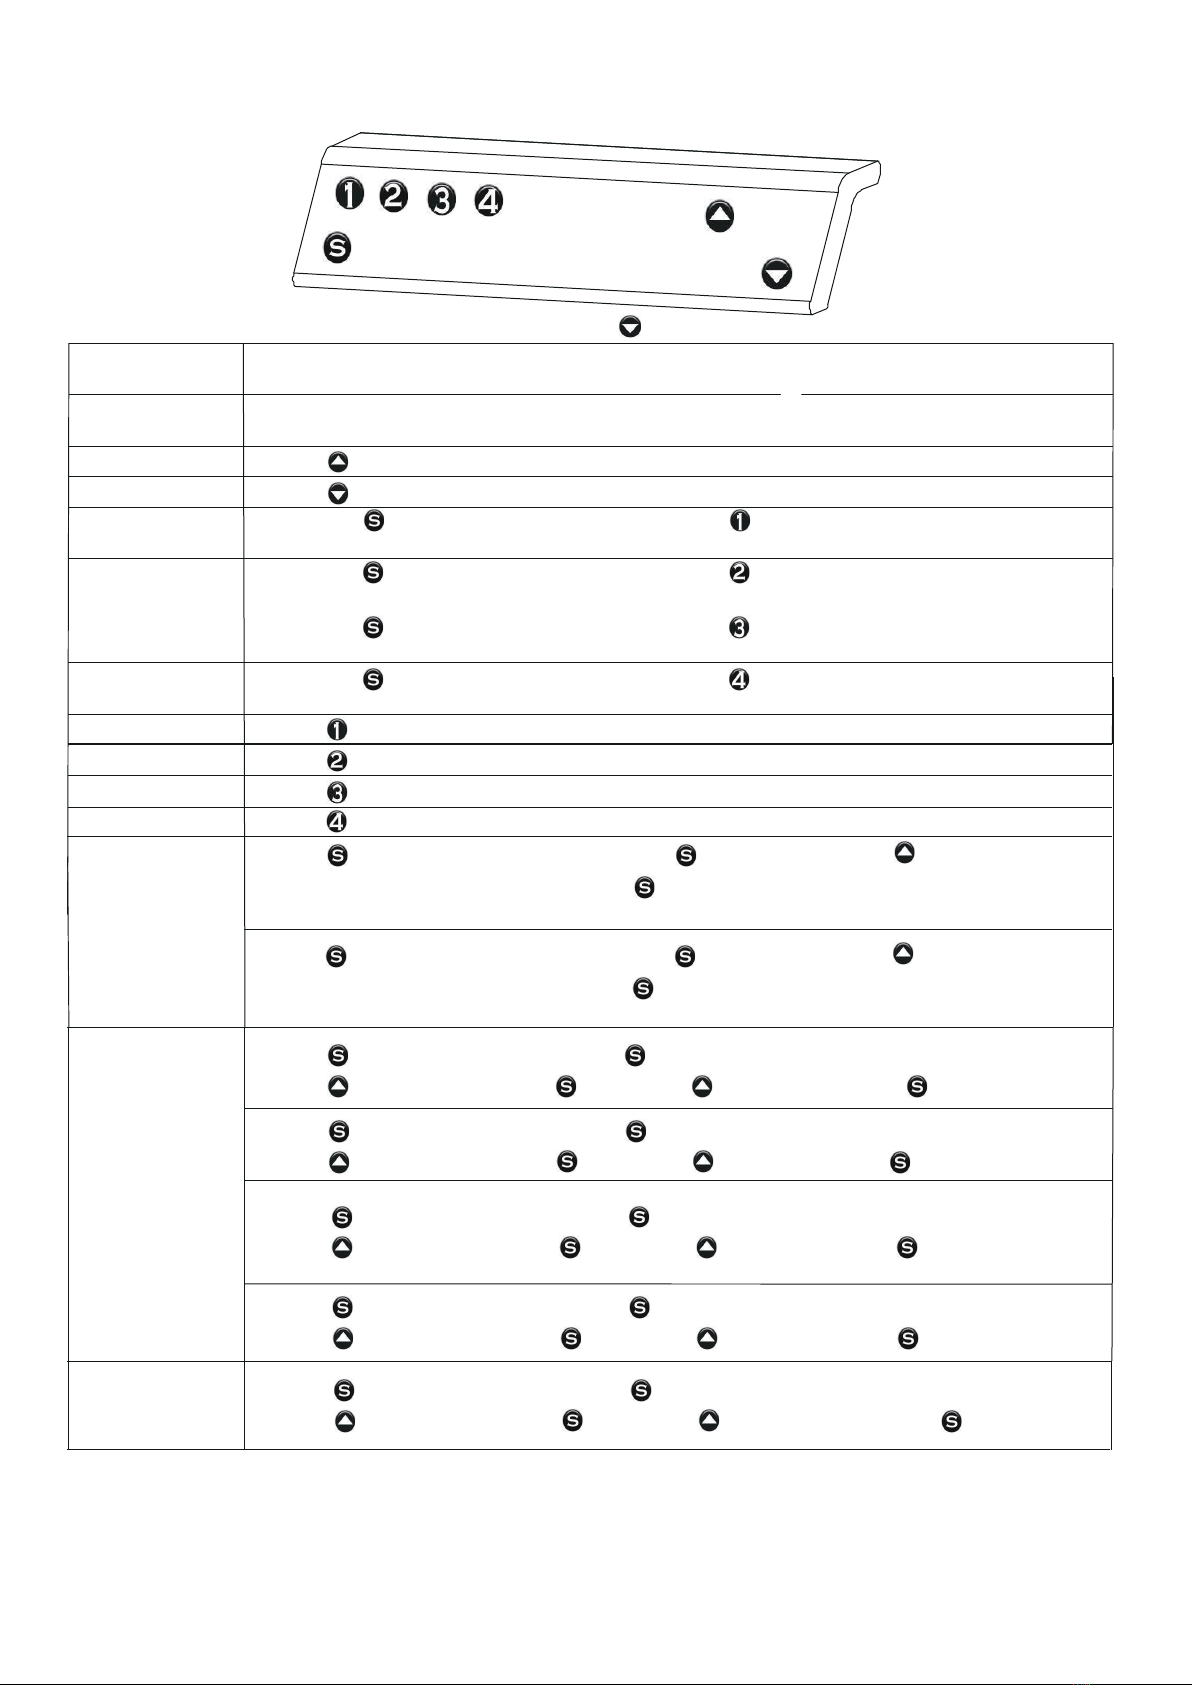
Function
Button operation instruction
Reset
Manu-up
Press and display real height
Manu-down
Press and display real height
Memory Position 1
After press , the interface flashes and set memory position, press until H1 appears, release button and it comes back to
current height.
Memory Position 2
After press , the interface flashes and set memory position, press until H2 appears, release button and it comes back to
current height.
Memory Position 3
After press , the interface flashes and set memory position, press until H3 appears, release button and it comes back to
current height.
Memory Position 4
After press , the interface flashes and set memory position, press until H4 appears, release button and it comes back to
current height.
call memory position 1
Press until 1 appears, release the button, it runs to corresponding height and displays current position.
call memory position 2
Press until 2 appears, release the button, it runs to corresponding height and displays current position.
call memory position 3
Press until 3 appears, release the button, it runs to corresponding height and displays current position.
call memory position 4
Press until 4 appears, release the button, it runs to corresponding height and displays current position.
Press for 3 seconds and it will display S- -, double press , it shows “ln” or “Sl”,
Metric and English
unit conversion
Press for 3 seconds and it will display S--, press it wiill shows “Un”
Press or until it shows “CF”, press to confirm. Press or to choose “OFF”,press to confirm.
Handle brightness set:
3-level adjustable: low,
normal,high
Rebound set;
L1: OFF
L2:Light level
L3: Normal level
L4: Heavy level
P 9
In the condition of “E10, E20 and E60” or basic position mode, long press 3 seconds, loosen it until it shows “rES”,
the desk runs to the bottom and rebounds to certain height, reset finishes and shows lowest position height.
Press or
to choose the English Unit(In) or Metric Unit(SL), press to confirm and it will adjust in three seconds.
Press for 3 seconds and it will display S- -, double press , it shows “ln” or “Sl”, Press or
to choose the English Unit(In) or Metric Unit(SL), press to confirm and it will adjust in three seconds.
L1:
L2:
L3:
L4:
Press for 3 seconds and it will display S--, press it wiill shows “Un”
Press or un�l it shows “CF”, press to confirm. Press or to choose “L”,press to confirm.
Press for 3 seconds and it will display S--, press it wiill shows “Un”
Press or until it shows “CF”, press to confirm. Press or to choose “N”,press to confirm.
Press for 3 seconds and it will display S--, press it wiill shows “Un”
Press or until it shows “CF”, press to confirm. Press or to choose “H”,press to confirm.
Press for 3 seconds and it will display S--, press it wiill shows “Un”
Press or until it shows “Br”, press to confirm. Press or to choose “L”,”N””H” press to confirm.

Protection mode (auto-lock screen mode)
Function Instruction
Over-heating protection Hot: it alarms when continuous working 2 minutes; clear automatically after resting 18 minutes.
Sensorless alarm E1: It alarms when motor hall value cannot be inspected; clear it after press reset or re-power on.
Overload protection E2: overload alarm when running up, clear automatically after 3 seconds; overload alarm when running down, clear it after press
reset or re-power on.
Rebound protection E02: it alarms in reversed compression when running; clear automatically after rebound 4cm; or press any button to clear when
rebounding.
Overvoltage alarm E03: it alarms when voltage is higher than limit value, clear automatically after voltage reduced to set value.
Undervoltage alarm E05: it alarms when voltage is lower than limit value; clear automatically after voltage is higher than set value.
Step out alarm E06: it alarms when height differencebetween left and right leg exceeds the set value; clear it after re-power on.
breaking protection It stops and enters protection state when motor lines or manual control lines are removed or disconnected accidentally; back to
normal after reconnected and alarm cleared.
Precautions
1. Power supply: Ac100v-240v, frequency 50/60Hz;
2. Use environment: 0-40 ° C;
3. Before cleaning, the power plug must be unplugged. When cleaning, wipe the surface dust with a slightly damp cloth.
Be careful not to allow water droplets to flow into the inside of the unit. Do not damage the cable or touch the loose plug.
4. Electrical boxes contain electronic components, metals, plastics, wires, etc., and should be disposed of in accordance
with environmental regulations used by countries. Do not dispose of them in accordance with conventional household waste.
5. Before using the product, please carefully check to make sure the product is completely installed.
6. When using the product for the first time, please familiarize yourself with all the features and program settings of the product.
7. Children are not allowed to play on the product. Children play on the product, and some behaviors are unpredictable.
The dangerous consequences caused by this are irresponsible.
8. Due to the slight noise caused by the structure of the V-ribbed belt or the brake, the use of multiple equipment .
will not have any effect.
9. Do not use corrosive or corrosive materials to clean the equipment. It must be ensured that the use of
detergents does not pollute the environment.
10. In the case of understanding the relevant dangers, children aged 8 and over have defects such as body senses,
and those with unsound minds should use them under proper supervision and guidance.
Children are not allowed to touch and play at will.11. Children must not perform cleaning and user maintenance
without supervision.
12. In the event of damage to the power cord, it must be replaced by the manufacturer or a professional to avoid injury.
13. Please ensure that your operating environment does not have any source of danger, such as not throwing your tools around.
Always handle the packaging materials with care to avoid any possible hazards, such as children playing with plastic bags,
which may pose a choking hazard.
14. If necessary, please keep the original packaging of the equipment for your future transportation.
P10
Table of contents
Other SHW Indoor Furnishing manuals

Popular Indoor Furnishing manuals by other brands

sweeek.
sweeek. LINEAR ILINTVSTAND manual

Pebble Grey
Pebble Grey Halo 201.40.03 instruction manual

Acme Furniture
Acme Furniture Traverse 98295 Assembly instructions

Furniture of America
Furniture of America CM6346-CH Assembly instructions

Diphano
Diphano METRIS 300 INSTRUCTION PAPER

Safco
Safco Soft Tough 6680 Assembly instructions


