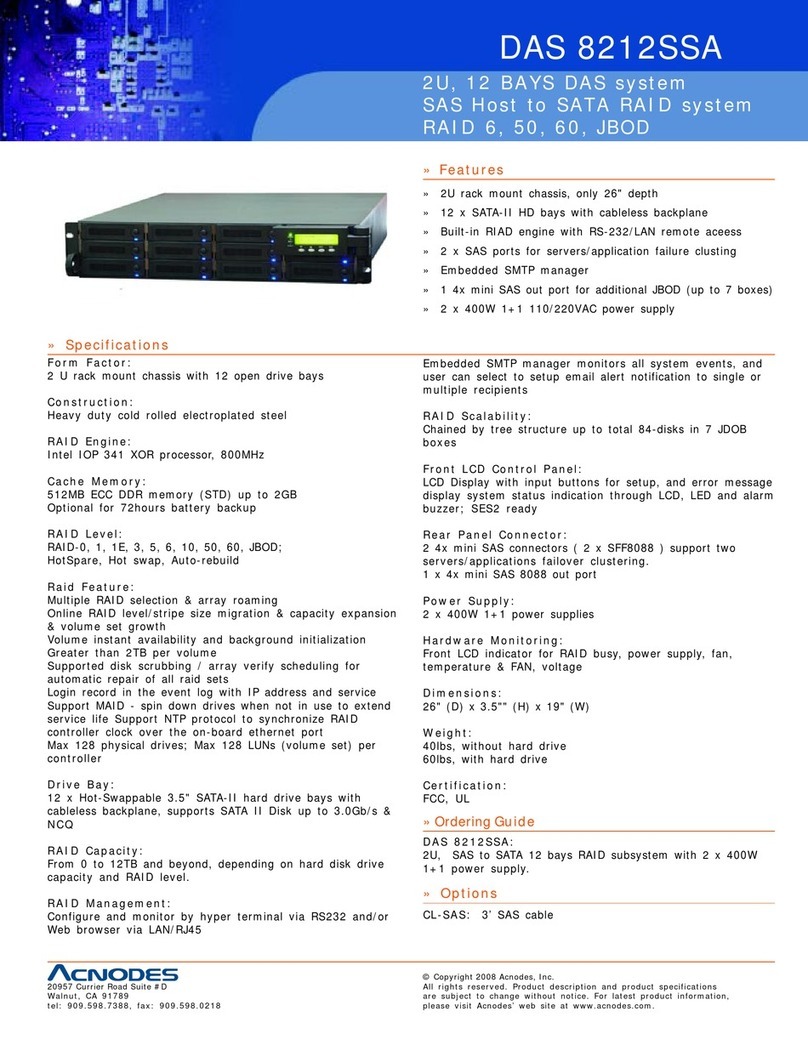
Sichert UNI 82 User manual

Montageanweisung
Mounting Instructions
Berthold Sichert GmbH
Kitzingstraße 1 - 5 | D -12277 Berlin
www.sichert.com
Alle hier enthaltenen Angaben sind nach bestem Wissen richtig und zuverlässig. Sie sind jedoch keine Eigenschaftszusicherung. Der Anwender unserer Produkte muss in eigener
Verantwortung über die Eignung für die vorgesehene Anwendung entscheiden. Unsere Produkthaftung richtet sich ausschließlich nach unseren Verkaufs-, Lieferungs- und
Zahlungsbedingungen. In keinem Fall sind wir haftbar zu machen für irgendwelche zufälligen, indirekten Schäden oder hieraus resultierenden Folgeschäden jeder Art.
All of the above information is believed to be reliable. Users, however, should independently evaluate the suitability of each product for their application. SICHERT
makes no warranties as to the accuracy or completeness of the information, and excludes any liability regarding its use. SICHERT’s only obligations are those in the
Standard Terms and Conditions of Sale, Delivery and Payment and in no case will SICHERT be liable for any incidental, indirect, or consequential damages arising therefrom.
Telefon | Phone: +49 30 74707-0
Telefax | Fax: +49 30 74707-20
Dokument | Document: 59.1809.00.02
Revision | Revision: G
Ersteller | Author: Nee
Gehäuse UNI, 82
Cabinet UNI, 82
Beiliegende Montageanleitungen, Datenblätter und Beiblätter sind zu beachten.Beiliegende Montageanleitungen, Datenblätter und Beiblätter sind zu beachten.
Note also the attached instructions, data sheets and supplementary notes.Note also the attached instructions, data sheets and supplementary notes.
Basismontageanweisung
Basic manual

Seite | Page 2von | of 20
Inhaltsverzeichnis Contents
Seite | Page
1 Außenmaße Outer dimensions 3
2 Lieferumfang Scope of supply 4
3 Schließsystem Locking system 5...6
4 Gehäuseanpassungen Cabinet modications 7...9
5 Erdung Grounding 10
6Hinweise and spezische Ausstattung Notes and specic conguration 11
7 Reinigung und Nachlackierung Cleaning and revarnishing 12
8 Demontage und Montage Disassembly and assembly 13...19
8.1 Abziehen des Gehäusekörpers Remove cabinet from the frame 13
8.2 Demontage Dach und Rückwand Disassembly of roof and rear panel 14...15
8.3 Demontage Gehäusekörper Disassembly of cabinet body 16...17
8.4 Demontage Tür Disassembly of door 18...19
Demontage- und Entsorgungshinweis Disassembly and disposal info 20
Kurzbeschreibung | Key facts and features
Die einwandigen Gehäuse wurden für die Aufstellung im nicht wettergeschützten Bereich konzipiert.
Sie bestehen aus glasfaserverstärktem Polycarbonat (PC-GF5 RAL 7038). Die Außenächen von Tür
und Rückwand sind mit einer Prolierung versehen, um das Bekleben mit Plakaten zu erschweren.
Haupt-Eigenschaften:
Türen vorn oder hinten mit Türanschlag links oder rechts,>120° Öffnungswinkel mit Türfeststeller
Dreipunkt-Verriegelung mit Schwenkhebel Schließanlage oder Griffmuschel
Aufstellbar in Reihe (Seite-an-Seite, Rücken-an-Rücken)
Ausstattbar mit tiefenverstellbarem Aluminium-Gerüst (UNI) oder Gerüst aus Edelstahl (82)
The Cabinets are single-wall cabinets with one or two doors (standard). They are designed for
installation in non-weatherproof areas and are made of glass-reinforced polycarbonate (PC-GF5
RAL 7038). Textured surfaces on the door and the rear panel prevent unwanted billposting.
Main features:
Front or rear doors, left or right-hinged, an opening angle of >120°, with a door-stay
3-point locking system with a swivel handle or grip handle
Can be installed in series (side-by-side, back-to-back)
Can be tted with depth-adjustable UNI frame (aluminium) or frame made of stainless steel (82)
Zeichenerklärung | Explanation of symbols
Anweisung beachten
Refer to instruction
Gebot
Mandatory action
Warnung
Warning
12Arbeitsschritte
Working steps AVariante
Version AA11Teil / Montagegruppe
Part / assembly group

Seite | Page 3von | of 20
1 Außenmaße Outer dimensions
UNI 4
442
698
848
998
400
310
UNI 6 UNI 8
UNI 11
Gewicht Leergehäuse: 20 bis 73 kg (abhängig von Gehäusevariante)
Tare weight (empty cabinet): 20...73 kg (depending on the type)
82 C, 82 A-S, 82 S
442
998
310
82 (Standard)
754
998
310
82/400
754
998
400
(Maße in mm)
(Dimensions in mm)
82 C-K, 82 A-K
442
310
82/2 (= Tür statt Rückwand)
(= door instead of back panel)
698
594
754
1511
1131
UNI 15
Bezeichnung Gehäuse UNI | Type name of cabinet UNI
UNI [ Breite | width ] / [ Höhe | height ] / [ Tiefe | depth ]
(UNI 11/998/310 oder | or UNI 11/10/3)
UNI
82

Seite | Page 4von | of 20
2 Lieferumfang Scope of supply
(Gehäuse mit Sockel) (Cabinet with plinth)
Einzelteile
Components
Der Befestigungssatz zum Sockel oder Montagerahmen
ist Lieferumfang des Sockels bzw. Montagerahmens.
Fixing kit for plinth or mounting frame is delivered
with plinth respective mounting frame.
Beipacks und Zubehör entsprechend der Gehäuseausführung.
Kits and accessories according to version of cabinet.
Entsorgungshinweis beachten
Please follow the advice for disposal
Transportverpackung
Transport package
Typische Verpackungsart
(Abweichungen möglich)
Typical type of packaging
(variations are possible)
Beiliegende Dokumente beachten.
Please observe all attached documents.
Gehäuse
Cabinet
Das Gehäuse wird standardmäßg
vormontiert geliefert.
The cabinet is delivered pre-mounted
as standard.
Notschlüssel (in einigen Varianten)
Emergency key (for some versions)

Seite | Page 5von | of 20
Nur die mitgelieferte Schraube verwenden!Nur die mitgelieferte Schraube verwenden!
Use the supplied screw only!Use the supplied screw only!
3 Schließsystem Locking system
(Standardschließungen) (Standard locking systems)
Schwenkhebel Doppelschließanlage
Swivel handle double locking mechanism
0° 0°
0°
Schwenkhebel Einfachschließanlage
Swivel handle single locking mechanism
Hinweise des Schließsystemherstellers beachten.
Observe locking system manufacturer‘s notes.
90° rechts
90° right side
ÖffnungsrichtungÖffnungsrichtung
Opening directionOpening direction
(Schwenkhebel GDZn)
(Swivel handle made of GDZn)
(Schwenkhebel PA6)
(Swivel handle made of PA6)
Einstellung Prolhalbzylinder (nach DIN 18252)
Setting of lock cylinder (according to DIN 18252)
Zylinderlänge:
Length of cylinder:
a) 40 mm
b) 45 mm a)
b)
1x1x
(Position Blindzylinder)
(Place for dummy cylinder)

Seite | Page 6von | of 20
2x2x
Griffmuschel mit Einbausicherung fürGriffmuschel mit Einbausicherung für
Grip handle with lockGrip handle with lock
Bei schwergängiger
Griffmuschel etwas lockern
Loosen if the grip handle
does not rotate smoothly
30°
45°
2x2x
M5M5
St VzSt Vz
offen | unlocked
Nur für DEUTSCHE TELEKOM (Schließsystem 81, Bauform 7 bzw. 23):
(For DEUTSCHE TELEKOM only)
Länge Prolhalbzylinder: 40 mm
Einfachschließanlage
(Kunststoff)
30° rechts
(Metall)
45° rechts
Doppelschließanlage
30° rechts
PA6GF30
St Vz
A2
PA6GF30

Seite | Page 7von | of 20
4 Gehäuseanpassungen Cabinet modications
Ändern der Türaufschlagrichtung
Changing the door opening side
Dach und Tür entfernen.
Remove roof and door.
1
Tür 180° gedreht einsetzen und Türfeststeller nach unten versetzen.
Rotate the door 180°, attach into cabinet and move door stay from top to bottom.
2
Schwenkhebel-Schließsystem (falls vorhanden) 180° gedreht einsetzen.
Rotate the swivel handle system 180° (if any).
3
Seitliche Durchführungen (bei einigen Ausführungen)
Side entries (some versions)
Umrüstung auf Schutzart IP 44
Change to IP protection grade 44
Dachdichtung entfernen.
Remove seal between roof and body of cabinet.
4x Sollbruchstelle Ø 60 mm4x Sollbruchstelle Ø 60 mm
4x predetermined4x predetermined breaking area Ø 60 mmbreaking area Ø 60 mm
Siehe Seite 18+19.
See page 18+19.
Siehe Seite 14+15.
See page 14+5.

Seite | Page 8von | of 20
Tiefenverstellung Grundgerüst UNI
Depth adjustment of basic frame UNI
Nur lockernNur lockern
Loosen onlyLoosen only
Gerüst zuerst nach oben heben.Gerüst zuerst nach oben heben.
First lifting the frame.First lifting the frame.
4x4x
M6M6
St VzSt Vz
A
A
A
4x4x
M6M6
St VzSt Vz
B
Nur lockernNur lockern
Loosen onlyLoosen only
Positionen Seitenprole
Positions of side proles
Gehäusetiefe
Cabinet depth
310 mm
112626
10 mm
116
Gehäusetiefe
Cabinet depth
400 mm
Abschließend wieder festschrauben.
Finally screw tight again.
B
AlMg3 AlMg3
A2
A2
AlMgSi

Seite | Page 9von | of 20
Verstellung Prolstreben UNI
Adjustment of prole braces UNI
C
C
Nur lockernNur lockern
Loosen onlyLoosen only
2x2x
M5M5
St VzSt Vz
Abschließend wieder festschrauben.
Finally screw tight again.
2 Querstreben bei UNI 11+15 im Grundgerüst enthalten.
2 Horizontal proles included for UNI 11+15 basic frame.
Z410

Seite | Page 10 von | of 20
5 Erdung Grounding
(Standardgerüste) (standard frames)
Ist ein Banderder vorhanden, muss ein Übergang Band-zu-Runderder
durch einen Bandstahlverbinder montiert werden (59.1417.00.00).
If a grounding strip is available an accessory adapter unit (59.1417.00.00)
has to be used to connect the ground strip to the ground.
StaberderanschlussStaberderanschluss
Ground rod holderGround rod holder
2x2x
M6M6
A2A2
Ø 8...10 mm
Nachrüstsatz 82 (für einige Ausführungen)
Upgrade kit 82 (for some versions)
59.2514.05.00
UNIUNI
8282
St Fz
St Vz
GDZn
GDZn
A2
St Vz

Seite | Page 11 von | of 20
6 Hinweise und Notes and
spezische Ausstattung specic conguration
Seite | Page 11 von | of 20
Nach der Kabeldurchführung sind alle Öffnungen abzudichten.
After installation of cabling the openings are to be sealed.
Ausstattung (entsprechend Version oder nach Kundenwunsch)
CongurationConguration (depending on version or customized)(depending on version or customized)
Boden mit Kabeldurchführung (oder offen)
Base plate with cable entry (or open)
Je nach Bodenvariante werden benötigte Öffnungen: gebohrt, herausgeschlagen,
Stopfen entfernt oder Tüllen aufgeschnitten (1 mm kleiner als Kabel-ø).
Depending on the type of base plate the openings required are created by: drilling,
knocking out of predetermined entry points, removing plugs or cutting of grommets
(1 mm less than cable ø).
Grundgerüst und
Gerüsterweiterungen
Basic frame and
additional frame parts
Gestell oder Montageplatte
Frame or mounting plate
1
2
4
Zubehör
Accessory
3
2
3
4
2
GummitüllenGummitüllen
Rubber grommetsRubber grommets
FührungselementeFührungselemente
Cable managementCable management
MontageplatteMontageplatte
Mounting plateMounting plate
19“-Gestell19“-Gestell
19“ rack19“ rack
1
2
Gestell für EVsGestell für EVs
Rack for cable headsRack for cable heads
(Beispiel: UNI 8/10/4)
(Sample: UNI 8/10/4)
Beiliegende Montageanleitungen, Datenblätter und Beiblätter sind zu beachten.Beiliegende Montageanleitungen, Datenblätter und Beiblätter sind zu beachten.
Note also the attached instructions, data sheets and supplementary notes.Note also the attached instructions, data sheets and supplementary notes.

Seite | Page 12 von | of 20
7 Reinigung und Cleaning and
Nachlackierung revarnishing
Artikel | Article Gehäusebeschichtung
Cabinet coating
SiNr. | Part number
Graftientferner, 1 kg
Grafti cleaner kit, 1 kg
Antigrafti-Lack
Anti-grafti coating
OXXW-000099
Verdünner (Vorbehandlung Neulackierung)
Thinner (pretreatment re-coating)
Antigrafti-Lack
Anti-grafti coating
OXXW-000010
Reparaturset Antigrafti-Lack (RAL 7038), 1 kg
Repair kit anti-grafti (RAL 7038), 1 kg
Antigrafti-Lack
Anti-grafti coating
OXXW-000100
Reparaturset Lack (RAL 7038), 1 kg
Repair kit (RAL 7038), 1 kg
Standard-Lack
Basic coating
OXXW-000004
Keine Lösungsmittel oder lösungsmittelhaltigen Reinigungsmittel wie Benzin,
Nitroverdünnung, Terpentinersatz usw. verwenden!
DO NOT use solvents or solvent-containing cleaning agents such as petrol,
cellulose thinner, white spirit etc.!
Reinigung mit pH-neutralem und lösungsmittelfreiem Haushaltsreiniger.
Cleaning with pH-adjusted and solvent-free household cleaner.
Normaler Schmutz und Plakatierung
Normal dirt and posting
Graftientfernung (nur bei Antigrafti-Lack)
Grafti remove (only for anti-grafti coating)
Reinigung mit Graftientferner.
Cleaning with grafti-remover.
NachlackierungNachlackierung
RevarnishingRevarnishing
Nachlackierung mit Reparaturset oder Reparaturset Antigrafti-Lack mit Verdünner.
Revarnishing with repair kit or repair kit anti-grafti with thiner.
Beiliegende Verarbeitungs- und Sicherheitshinweise beachten!
Carefully read the attached instruction and safety guidelines before use!
Beiliegende Verarbeitungs- und Sicherheitshinweise beachten!
Carefully read the attached instruction and safety guidelines before use!
ReinigungReinigung
CleaningCleaning

Seite | Page 13 von | of 20
8 Demontage und Montage Disassembly and assembly
8.1 Abziehen des Gehäuses Remove cabinet from the frame
UNIUNI
8282
A
A
B
B
8x8x
M5M5
A2A2
C
4x4x
M6M6
St VzSt Vz
A
Nur bei UNI 11+15
UNI 11+15 only
C
C
4x4x
M5M5
St VzSt Vz
B

Seite | Page 14 von | of 20
8.2 Demontage Dach und Rückwand Disassembly of roof and rear panel
3x3x
M6M6
St VzSt Vz
B
TPE-VTPE-V
B
A2A2
PCGF5PCGF5
3x3x
M5M5
St VzSt Vz
A
8x8x
M5M5
St VzSt Vz
+
Nur bei Ausführung mit
erhöhtem Zugriffsschutz:
For version with
enhanced access
protection only:
UNI 4, UNI 6, UNI 8, 82
TPE-VTPE-V
PCGF5PCGF5
+
A
AA
+
+
+
2x2x
PA6GF30PA6GF30

Seite | Page 15 von | of 20
UNI 11, UNI 15
CCCC
CCCC
8x8x
M5M5
St VzSt Vz
C
12x12x......16x16x
M5M5
St VzSt Vz
D
PCGF5PCGF5
TPE-VTPE-V
D
D
D
TPE-VTPE-V
PCGF5PCGF5
PCGF5PCGF5
EN AW-6060 T66EN AW-6060 T66
St Fe/ZnSt Fe/Zn TPE-VTPE-V
TPE-VTPE-V
2x2x
PA6GF30PA6GF30

Seite | Page 16 von | of 20
8.3 Demontage Gehäusekörper Disassembly of cabinet body
UNI 4, UNI 6, UNI 8, 82
4x4x
M5M5
St VzSt Vz
A
82
8x8x
M5M5
St VzSt Vz
B
B
B
1x
PA6GF30
CuZn37
St Fe/ZnSt Fe/Zn
C
C
PCGF5PCGF5
St VzSt Vz
8x8x
M6M6
St VzSt Vz
CSt VzSt Vz
UNI
A
A
B
B
B
B
4x4x
4x4x
St VzSt Vz
Nur bei Ausführung mit
erhöhtem Zugriffsschutz:
For version with
enhanced access
protection only:
2x2x
M5M5
St VzSt Vz
+
+
+
+
St VzSt Vz

Seite | Page 17 von | of 20
UNI 11, UNI 15
24x24x
M5M5
St VzSt Vz
D
St Fe/ZnSt Fe/Zn
2x2x
PA6GF30PA6GF30
D
PEPE
St Fe/ZnSt Fe/Zn
St VzSt Vz
St VzSt Vz
D
D
D
E
E
D
PCGF5PCGF5
St VzSt Vz
8x8x
M6M6
St VzSt Vz
ESt VzSt Vz
UNI
4x4x

Seite | Page 18 von | of 20
TPE-VTPE-V
8.4 Demontage Tür Disassembly of the door
PESPES
A
A
8x8x
M5M5
St VzSt Vz
A
PCGF5PCGF5
Standard Schwenkhebel
Standard swivel handle
B
4x4x
M4M4
St VzSt Vz
B
2x2x......3x3x
M5M5
St VzSt Vz
C
St Fe/ZnSt Fe/Zn
St Fe/ZnSt Fe/Zn
St Fe/ZnSt Fe/Zn
82
C
A2A2
82
A
A
UNI
St VzSt Vz
St Fe/ZnSt Fe/Zn
St VzSt Vz
C
C
St Fe/ZnSt Fe/Zn
PA6GF30PA6GF30
St Fe/ZnSt Fe/Zn
St VzSt Vz
PAPA
PAPA
St VzSt Vz
(*)(*)
GDZnGDZn
PA6GF30PA6GF30
St VzSt Vz
CuZnCuZn
(*)(*)
entsprechend Ausführungentsprechend Ausführung
depending on versiondepending on version
C
C
St VzSt Vz
St VzSt Vz
PA6GF30PA6GF30
St Fe/ZnSt Fe/Zn

Seite | Page 19 von | of 20
Ausführung mit erhöhtem Zugriffsschutz
Version with enhanced access protection
St Fe/ZnSt Fe/Zn
St Fe/ZnSt Fe/Zn
St VzSt Vz
St VzSt Vz
St VzSt Vz
UNI
Dokumentenhalter
Document holder
1x1x......10x10x
M5M5
St VzSt Vz
D
D
D
D
(in einigen Ausführungen 82)(in einigen Ausführungen 82)
(some versions 82)(some versions 82)
82
D
PA6PA6
PVCPVC
PVCPVC
St VzSt Vz

Berthold Sichert GmbH
Kitzingstraße 1 - 5 | D -12277 Berlin
www.sichert.com
Alle hier enthaltenen Angaben sind nach bestem Wissen richtig und zuverlässig. Sie sind jedoch keine Eigenschaftszusicherung. Der Anwender unserer Produkte muss in eigener
Verantwortung über die Eignung für die vorgesehene Anwendung entscheiden. Unsere Produkthaftung richtet sich ausschließlich nach unseren Verkaufs-, Lieferungs- und
Zahlungsbedingungen. In keinem Fall sind wir haftbar zu machen für irgendwelche zufälligen, indirekten Schäden oder hieraus resultierenden Folgeschäden jeder Art.
All of the above information is believed to be reliable. Users, however, should independently evaluate the suitability of each product for their application. SICHERT
makes no warranties as to the accuracy or completeness of the information, and excludes any liability regarding its use. SICHERT’s only obligations are those in the
Standard Terms and Conditions of Sale, Delivery and Payment and in no case will SICHERT be liable for any incidental, indirect, or consequential damages arising therefrom.
Telefon | Phone: +49 30 74707-0
Telefax | Fax: +49 30 74707-20
Dokument | Document: 59.1809.00.02
Revision | Revision: G
Ersteller | Author: Nee
Berthold Sichert GmbH | Kitzingstraße 1 - 5 | D -12277 BerlinBerthold Sichert GmbH | Kitzingstraße 1 - 5 | D -12277 Berlin
Telefon | Phone:+49 30 74707-0
Telefax | Fax: +49 30 74707-20
Service, Ersatzteilbestellung, ZubehörService, Ersatzteilbestellung, Zubehör
Service, spare part and accessory orderService, spare part and accessory order
Seite | Page 20 von | of 20
Baugruppen können vereinzelt und Materialien entsprechend Sorte separiert werden.
Metall- und Kunststoffteile sortenrein und fachgerecht entsorgen.
Bitte beachten Sie für alle Produkte die jeweils gültigen Entsorgungsrichtlinien.
Assemblies can be disassembled and materials can be sorted by type. Metal and synthetic parts
should be unmixed and disposed of correctly.
Please take special note of any regulations regarding the disposal of any products.
Demontage- und Entsorgungshinweis | Disassembly and disposal information
Table of contents
Popular Storage manuals by other brands
OCZ
OCZ IBIS HSDL 3.5 datasheet

ABSCO SHEDS
ABSCO SHEDS 30081LK-PTX instruction manual

Lenovo
Lenovo ThinkStation P920 manual

Western Digital
Western Digital WD1000FYPS Compatibility guide

Clearcrypt
Clearcrypt Secure USB3.0 Flash Drive user manual
Victorinox
Victorinox SwissFlash Flight SwissFlash Flight 16GB supplementary guide
