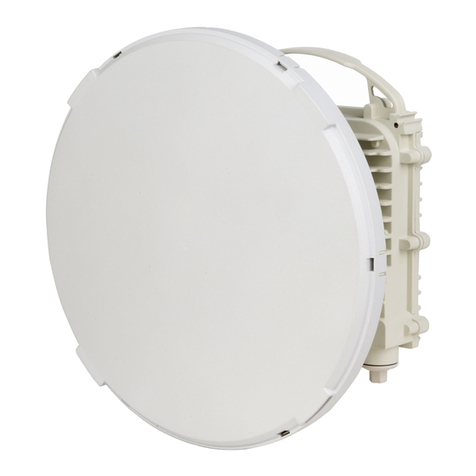
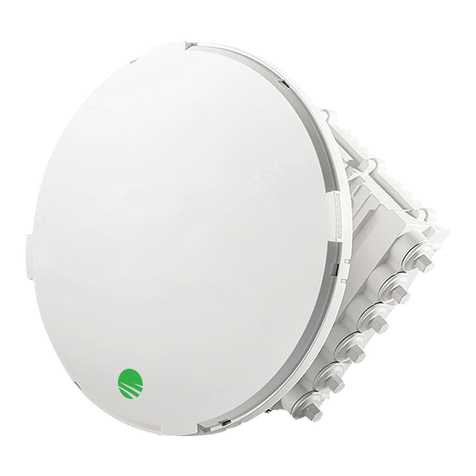
Siklu EtherHaul-5500FD Series User manual

© ALL RIGHTS RESERVED TO SIKLU COMMUNICATION LTD.
EtherHaul-5500FD™
Gigabit Ethernet Wireless Solution
Installation Manual
EH-5500FD-INST-01, Issue 3
July 2017

EH-5500FD Installation Manual
Page 2
Trademarks
Siklu, the Siklu logo, and EtherHaul are all trademarks of Siklu Communication Ltd.
All other product names and trademarks mentioned in this document are trademarks or
registered trademarks of their respective companies.
Copyrights
Copyright © 2017 Siklu Communication Ltd. All rights reserved.
No part of this publication may be reproduced or distributed in any form or by any
means, or stored in a database or retrieval system, without the prior written consent of
Siklu.
Disclaimers
The information contained in this document is subject to change without notice.
Siklu assumes no responsibility for any errors that may appear. Siklu makes no
warranties, expressed or implied, by operation of law or otherwise, relating to this
document, the products or the computer software programs described herein.
This document was originally written in English. Please refer to the English language
version for a full and accurate description of all products and services described herein.

EH-5500FD Installation Manual
Page 3
Safety and Regulatory Notices
The following are mandatory notices for installation and operation of EtherHaul
Wireless Backhaul Link. Indications appearing here are required by the designated
government and regulatory agencies for purposes of safety and compliance.
General
Do not install or operate this System in the presence of flammable gases or fumes.
Operating any electrical instrument in such an environment is a safety hazard.
European Commission
This product has been designed to comply with CE markings in accordance with the
requirements of European Directive 1995/5/EC.
This product has been designed to comply with the requirements of European
Directives.
This equipment must be permanently earthed for protection and functional purposes.
To make a protective earth connection, use the grounding point located on the ODU
using a minimum amount of 16AWG grounding cable or according to local electrical
code.
This apparatus is intended to be accessible only to authorized personnel. Failure to
prevent access by unauthorized personnel will invalidate any approval given to this
apparatus.
This product is in full compliance with the following standards:
RF EN 302 217-3 1.3.1
E-Band FCC part 101; V-Band FCC Part 15.255
EMC EN 301 489-4
Safety IEC 60950
Operation EN 300 019-1-4 Class 4.1E
Storage EN 300 019-1-1 Class 1.2
Transportation EN 300 019-1-2 Class 2.2
FCC/IC Regulatory Statements
This equipment has been tested and found to comply with the limits for a Class B digital
device, pursuant to Part 15 of the FCC Rules and IC RSS standards. These limits are
designed to provide reasonable protection against harmful interference in a residential
installation. This equipment generates uses and can radiate radio frequency energy and,
if not installed and used in accordance with the instructions, may cause harmful
interference to radio communications. However, there is no guarantee that interference

EH-5500FD Installation Manual
Page 4
will not occur in a particular installation. If this equipment does cause harmful
interference to radio or television reception, which can be determined by turning the
equipment off and on, the user is encouraged to try to correct the interference by one
or more of the following measures:
Reorient or relocate the receiving antenna.
Increase the separation between the equipment and receiver.
Connect the equipment into an outlet on a circuit different from that to
which the receiver is connected.
Consult the dealer or an experienced radio/TV technician for help.
Note:
Changes or modifications to this equipment not expressly approved by Siklu LTD or
the party responsible for compliance could void the user's authority to operate the
equipment.
Caution:
Outdoor units and antennas should be installed ONLY by experienced installation
professionals who are familiar with local building and safety codes and, wherever
applicable, are licensed by the appropriate government regulatory authorities.
Failure to do so may void the product warranty and may expose the end user or the
service provider to legal and financial liabilities. Siklu LTD and its resellers or
distributors are not liable for injury, damage or violation of regulations associated
with the installation of outdoor units or antennas.
Prudence: Les unités extérieures et les antennes doivent être installeés par des professionnels
d'installation expérimentés qui sont familiers avec les normes locales et les codes de
sécurité et, si applicable, sont agréées par les autorités gouvernementales de
réglementation. Ne pas le faire peut annuler la garantie du produit et/ou exposer
l'utilisateur ou le fournisseur de services à des obligations juridiques et financieres. Les
revendeurs ou distributeurs de ces équipements ne sont pas responsables des blessures,
des dommages ou violations des règlements liés à l'installation des unités extérieures ou
des antennes. L'installateur doit configurer le niveau de puissance de sortie des antennes
conformément aux réglementations nationales et au type d'antenne.

EH-5500FD Installation Manual
Page 5
About this Document
This document is the Installation Manual for the EtherHaul-5500FD wireless Link.
It provides product overview and details the installation and initial setup.
For instructions how to use the product’s features, refer to the “EtherHaul Operation,
Administration and Maintenance Manual”.
Note:
Features and functionality described in this document may be available for specific
product models or starting from specific SW version.
Please review the individual product’s release notes to verify if a specific feature is
supported in the product you use.
Applicable Products and Releases
E-Band
oEH-5500FD, minimum SW release 7.4.0
Audience
This document assumes a working knowledge of wireless backhaul platforms and their
operating environments.
This document is intended for use by all persons who are involved in planning, installing,
configuring, and using the EtherHaul system.
Conventions
The following conventions are used in this document in order to make locating, reading,
and using information easier.
Special Attention
Hint:
Informs you of a helpful optional activity that may be performed at the current
operating stage.
Note:
Provides important and useful information or describes an activity or situation that
may or will interrupt normal operation of the EtherHaul system, one of its
components, or the network.

EH-5500FD Installation Manual
Page 6
Caution:
Describes an activity or situation that requires special attention.
Text Conventions
Document References
Italicized text is used to reference sections or chapters
in this document. In many cases, references use
clickable hypertext links that enable immediate access
to referenced objects.
Command Input
Monospace text is used to help delineate command line
user input or text displayed in a command window.

EH-5500FD Installation Manual
Page 7
TABLE OF CONTENTS
1Introduction to the EtherHaul System........................................................10
1.1 Main Features................................................................................................................10
1.2 Functional Description ..................................................................................................11
1.3 Technical Specifications................................................................................................12
1.4 Management ..................................................................................................................12
2Installing the EtherHaul System.................................................................13
2.1 Preparing the Site ..........................................................................................................13
2.1.1 Physical and Environmental Requirements......................................................13
2.1.2 Cabling Requirements ......................................................................................14
2.2 EtherHaul Package Content...........................................................................................15
2.3 Unpacking the EtherHaul ..............................................................................................15
2.4 Required Tools ..............................................................................................................16
2.5 Preparing for Installation...............................................................................................16
2.6 Installing the ODU with a 1ft (31cm) Antenna .............................................................17
2.6.1 Attaching the ODU to the Antenna ..................................................................17
2.6.2 Mounting the ODU using the 1ft Mounting Bracket........................................18
2.7 Installing the ODU with a 2ft (65cm) Antenna .............................................................20
2.7.1 Attaching the 2ft Adapter to the ODU..............................................................20
2.7.2 Mounting the ODU to a 2ft Antenna................................................................20
2.8 Connecting the Cables...................................................................................................23
2.8.2 Grounding the EtherHaul..................................................................................25
2.8.3 Preparing the Cables.........................................................................................26
2.8.4 Powering up the ODU ......................................................................................26
2.9 System LEDs.................................................................................................................27
2.10 Aligning the Antenna.....................................................................................................28
2.10.1 Setting the ODU to Alignment Mode...............................................................28
2.10.2 Performing the Alignment................................................................................29
2.11 Link Up Verification .....................................................................................................31
3Performing Basic Setup Using the Web-Based Management..................32
3.1 Connecting to the ODU Using the Web-Based Management .......................................33
3.2 Main Page......................................................................................................................34
3.3 General Configuration Commands................................................................................36
3.3.1 Apply................................................................................................................36
3.3.2 Save Configuration...........................................................................................36
3.3.3 Rollback............................................................................................................36

EH-5500FD Installation Manual
Page 8
3.3.4 Reboot...............................................................................................................37
3.3.5 Copy To Remote...............................................................................................37
3.4 Quick Configuration Wizard .........................................................................................37
3.4.1 Quick Configuration: Step 1 –System.............................................................37
3.4.2 Quick Configuration: Step 2 –Radio ...............................................................38
3.4.3 Quick Configuration: Step 3 –Eth Ports..........................................................39
3.4.4 Quick Configuration: Step 4 –Network...........................................................40
3.5 Radio Page.....................................................................................................................41
3.5.1 Settings.............................................................................................................41
3.5.2 Advanced Settings............................................................................................43
3.5.3 Maintenance......................................................................................................43
3.5.4 Modulation Table .............................................................................................44
3.5.5 Statistics............................................................................................................44
3.6 Default Bridge Configuration........................................................................................44
4Commissioning and Acceptance Procedure.............................................45
4.1 Installation Verification and Testing.............................................................................45
4.1.1 Physical Installation Verification .....................................................................45
4.1.2 RF Link Test.....................................................................................................45
4.1.3 Link Errors Test................................................................................................45
4.1.4 Ethernet Services Test [Optional].....................................................................46
4.1.5 Management Verification.................................................................................46
4.1.6 Recording ODU Configuration.........................................................................46
4.2 EtherHaul Commissioning and Acceptance Form ........................................................46

EH-5500FD Installation Manual
Page 9
TABLE OF FIGURES
Figure 1-1 Hitless Adaptive Bandwidth, Coding and Modulation ..........................................11
Figure 1-2 EH-5500FD Functional Block Diagram ................................................................12
Figure 2-1 Attaching the ODU to the Antenna........................................................................17
Figure 2-2 Setting ODU Polarization ......................................................................................17
Figure 2-3 EtherHaul Mounting Assembly Components ........................................................18
Figure 2-4 Quick Release Hooks.............................................................................................19
Figure 2-5 2ft Adapter .............................................................................................................20
Figure 2-6 EtherHaul ODU installed on 2ft Antenna..............................................................21
Figure 2-7 Antenna Option #1: Mounting Instructions for 2ft Antenna (EH-ANT-2ft)..........21
Figure 2-8 Antenna Option #2: Mounting Instructions for 2ft Antenna (EH-ANT-2ft-A) .....22
Figure 2-9 EtherHaul Connection Panel Details......................................................................23
Figure 2-10 Grounding Scheme...............................................................................................25
Figure 2-11 All-Weather Connecting Cable Shell Assembly..................................................26
Figure 3-1 Launching the Web-Based Management ...............................................................33
Figure 3-2 Entering Username and Password..........................................................................33
Figure 3-3 Web-Based Management Main Page.....................................................................33
Figure 3-4 Copy To-Remote icon............................................................................................37
Figure 3-5 Quick Config Page: Step 1 - System......................................................................37
Figure 3-6 Quick Config Page: Step 2 - Radio........................................................................38
Figure 3-7 Quick Config Page: Step 3 –Eth Ports..................................................................39
Figure 3-8 Quick Config Page: Step 4 –Network...................................................................40
Figure 3-9 Radio Page: Settings ..............................................................................................41
Figure 3-10 Radio Page: Advanced Settings...........................................................................43
Figure 3-11 Radio Page: Maintenance.....................................................................................43
Figure 3-12 Radio Page: Modulation Table.............................................................................44

EH-5500FD Installation Manual
Page 10
1 Introduction to the EtherHaul System
This chapter provides a brief overview of the EtherHaul product line.
The EtherHaul-5500FD product line delivers high power, carrier-grade wireless point-to-
point multi-gigabit Ethernet services utilizing the light-licensed 71-76GHz and 81-86GHz
E-band spectrum (FDD).
The EtherHaul is based on Siklu’s revolutionary integrated-silicon technology, which
results in a highly reliable, zero footprint, and low-cost radio.
The EH-5500FD brings 5Gbps full duplex throughput for demanding networks in the
metro, aggregation and trunking applications.
1.1 Main Features
Siklu’s EtherHaul wireless backhaul radio link operates in the E-band spectrum, which
provides clear technological and economic advantages over the existing lower frequency
bands. Taking advantage of the new spectrum, the EtherHaul enables easy migration to
support Gigabits throughput, enabling operators to enhance bandwidth capacity on a
“pay as you grow” basis. Supporting point-to-point, daisy-chain, ring, and mesh
configurations, the EtherHaul system offers carrier class availability and services.
The following are some of the main features of the EtherHaul (availability of features
depends on platform):
All-Outdoor Packet Radio
Operates in the light-licensed 71-76/81-86 GHz E-Band
Up to 5 Gbps full duplex throughput
High gain narrow beam-width directional antenna
Low latency
Spectral Efficiency
1250 MHz channel bandwidth
Advanced hitless/errorless Adaptive Bandwidth, Coding and Modulation
(ABCM) for a large dynamic range
Configurable center frequency across the entire band
Carrier Grade:
CLI, SNMP and web-based local and remote management
Extremely high reliability with very high MTBF
Designed for ultra-low MTTR without the need for antenna realignment
Green Design:
Zero footprint, all-outdoor, extremely light weight

EH-5500FD Installation Manual
Page 11
low power consumption
IEEE 802.3at complaint Power over Ethernet
Quick and Easy Installation
Rapid and flexible deployment
Precise antenna alignment
Minimal site preparation
Adaptive Bandwidth, Coding and Modulation
The EtherHaul family implements hitless/errorless adaptive bandwidth, coding and
modulation adjustment to optimize the over-the-air transmission and prevent weather-
related fading from disrupting traffic on the link. The EtherHaul can gain up to 22 dB in
link budget by dynamically adapting the modulation profile.
Figure 1-1 Hitless Adaptive Bandwidth, Coding and Modulation
1.2 Functional Description
The EtherHaul is an all-outdoor system comprised of the following functional blocks:
RFIC: Siklu’s integrated Silicon Germanium (SiGe) transceiver operating at 71-
76/81-86 GHz.
Modem/Baseband ASIC: modem/baseband ASIC includes the modem and FEC
engines
Interfaces: The network interface consists of 1 integrated 100/1000 Ethernet
port (PoE in and management) and 1 integrated SFP+ for 10G
Host processor (CPU) the host processor controls the system responsible for the
control plane, and the antenna alignment.
Antenna: Siklu’s self-designed 1ft innovative antenna, as well as 2ft antenna
option for longer range higher availability.

EH-5500FD Installation Manual
Page 12
Figure 1-2 EH-5500FD Functional Block Diagram
1.3 Technical Specifications
For detailed technical specifications please refer to the datasheet.
For detailed supported features list please refer to the product’s release notes.
1.4 Management
You can manage an EtherHaul system using a Web-Based Element Management System
(Web EMS) or a Command Line Interface (CLI). The CLI is compatible with SNMP.
The system supports out-of-band management only. To manage the radio, use the
100/1000 RJ45 port.

EH-5500FD Installation Manual
Page 13
2 Installing the EtherHaul System
This chapter describes how to install and perform the basic setup for EtherHaul outdoor
unit (ODU) in an EtherHaul wireless network, including:
Preparing the Site
EtherHaul Package Content
Unpacking the EtherHaul
Required Tools
Preparing for Installation
Mounting the EtherHaul
Installing the ODU with a Two-Foot Antenna
Connecting the Cables
System LEDs
Aligning the Antenna
Link Up Verification
The installation of the EtherHaul system is followed by initial system setup that will be
described in the next chapter.
Caution:
The installation and maintenance of the EtherHaul link should only be done by
service personnel who are properly trained and certified to carry out such
activities.
Caution:
It is the responsibility of the installer to insure that when using the outdoor
antenna kits in the United States (or where FCC rules apply), only those
antennas certified with the product are used. The use of any antenna other
than those certified with the product is expressly forbidden in accordance to
FCC rules CFR47 part 15.204.
2.1 Preparing the Site
Carefully select and prepare each EtherHaul ODU site to make device installation and
configuration as simple and trouble-free as possible. During site selection and
preparation, always consider the long-term needs of both your network and your
applications.
2.1.1 Physical and Environmental Requirements
Each EtherHaul ODU site should adhere to the following requirements:

EH-5500FD Installation Manual
Page 14
There must be a clear, unobstructed line-of-sight between ODU.
The EtherHaul ODU should be mounted on a fixed, stable, permanent
structure. A reinforced steel mounting pole is required, with a diameter
measuring from 2-4 inches (1ft antenna) or 2-4.5 inches (2ft antenna).
Caution:
Do not mount the EtherHaul device on a structure that is temporary or easily moved.
Doing so may result in poor service or equipment damage.
You must mount the EtherHaul ODU in a site that is easily accessible to
authorized personnel, and only authorized personnel.
Operating temperature: between -45° and +55°C.
Relative humidity: 0 to 100%.
Maximum altitude: 4,500m.
Ingress Protection rating: IP67.
2.1.2 Cabling Requirements
Ensure that your power connection cable matches the EtherHaul power
connector pin-outs.
Install the EtherHaul ODU where network connections are ready for
operation and easily accessible.
All cabling connected to the ODU should be outdoor-grade, with UV
protection.
You should use shielded outdoor Cat5e cables terminated with metallic RJ45
connectors.
In order to protect indoor equipment, you must install surge protection
circuits on all copper cables on their entrance to the building.
Install the EtherHaul ODU in a location where proper electrical outdoor
grounding is readily available. Typically, the grounding connection is
attached directly to the mounting pole. If not already present, then suitable
structure-to-earth grounding connections must be created before
installation. Ground the ODU using a minimum quantity of 16AWG
grounding cable or according to local electrical code.

EH-5500FD Installation Manual
Page 15
Caution:
Improper electrical grounding can result in excessive electromagnetic interference or
electrical discharge.
This equipment must be permanently earthed for protection and functional
purposes. To make a protective earth connection, use the grounding point located on
the ODU using a minimum amount of 16AWG grounding cable or according to local
electrical code.
Siklu will not be held responsible for any malfunction or damage in the event that the
ODU is not properly grounded.
2.2 EtherHaul Package Content
An EtherHaul link consists of two ODUs, two antennas and two mounting assemblies.
The EtherHaul packages include the following components:
Package
Description
Quantity
EtherHaul ODU
EtherHaul ODU with
external antenna interface
1
Connecting cable All-
Weather shells
3
Unit grounding cable (90
cm)
1
DC cable terminal block
connector
1
2.3 Unpacking the EtherHaul
The EtherHaul package content should be examined carefully before installation.
When you unpack the components of the EtherHaul, it is important to use care so as to
avoid damaging or scratching the antenna radome:
Do not touch the radome when unpacking the ODU.
Do not rest the ODU face down or touch the radome. It is crucial to prevent
contact between the radome and other objects.

EH-5500FD Installation Manual
Page 16
2.4 Required Tools
Ensure that you have the following tools with you when performing an EtherHaul
installation:
Standard handheld digital voltage meter (DVM) with probes
Standard open-end wrench, 13 millimeter
8mm Allen key for ODU installation with 2ft antenna
Philips screwdriver, medium size head for grounding connection
Cable ties (for securing network and optional power cables)
Cutter
Cable labeling
2.5 Preparing for Installation
The expected receive signal strength should be calculated prior to installing the link for
each antenna ODU (read from the DVM) prior to installation, based on the network link
budget.
Calculating the expected RSSI:
Where:
Ptx –ODU’s Tx Power (typically +5dBm)
Gant1 –Gain of antenna 1 (typically 35dBi)
Gant2 –Gain of antenna 2 (typically 35dBi)
LFS –Loss of Free Space = 92.45+20*Log (DKm*FGHz)+
-D - Link distance in Km
-F –Frequency in GHz
Attatm –Attenuation due to Atmospheric Gases (dB/Km)
For E-band links, the Attenuation due to Atmospheric Gases is typically
0.5dB/Km.
Refer to EtherHaul Link Budget Calculator for on-line calculation of expected
availability and expected RSSI.
RSSI = Ptx + Gant1 –LFS –Attatm + Gant2

EH-5500FD Installation Manual
Page 17
2.6 Installing the ODU with a 1ft (31cm) Antenna
2.6.1 Attaching the ODU to the Antenna
1. Unpack the ODU, place it on a clean unobstructed work surface area, and
remove the plastic cap protecting the waveguide interface.
2. Unpack the antenna, keeping the plastic protective cover in place, and remove
the plastic cap protecting the antenna feed.
3. Place the antenna on top of the ODU while aligning the guiding pin on the
antenna to the guiding hole on the ODU.
4. Gently rotate the antenna till you notice the guiding pin is in place.
5. Turn the locking ring clock-wise, securing the antenna to the ODU.
Figure 2-1 Attaching the ODU to the Antenna
6. Use medium-size screwdriver to tighten the locking ring is place.
7. Flip the ODU, placing it on the antenna plastic protecting cover.
8. Use 7mm Hex screwdriver to attach the quick release plate to the back of the
ODU using 4x 7mm screws.
9. The arrow on the quick release plate should point to “V” on the back of the
ODU, indicating vertical polarization. You may chose Horizontal polarization if
required.
Figure 2-2 Setting ODU Polarization

EH-5500FD Installation Manual
Page 18
2.6.2 Mounting the ODU using the 1ft Mounting Bracket
1. Unit mounting screws and bolts
6. Azimuth adjustment lock bolts
2. Back mounting bracket
7. Elevation adjustment lock bolts
3. Front mounting bracket
8. Azimuth fine adjustment screw (± 8)
4. Quick release plate (attached to ODU)
9. Elevation fine adjustment screw (± 16)
5. Quick release hooks
10. Elevation screw tension band and pin
Figure 2-3 EtherHaul Mounting Assembly Components
Note:
Torque level for tightening the nuts and bolts is 8nm.
1. Prior to mounting, unpack the mounting kit package and attach the two unit
mounting screws () to the front mounting bracket (), securing them with
mounting bolts.
2. Assemble the back () mounting bracket to the front () mounting bracket
using one bolt and separate them by about 120 degrees so that the assembly
can to be attached to the mounting pole.

EH-5500FD Installation Manual
Page 19
3. Place the assembly on the mounting pole and rotate the front and back
mounting brackets to close the assembly on the pole. Replace the unit mounting
bolt that was removed.
4. Ensure that both front and back mounting brackets are attached evenly to the
pole, and are completely level.
5. Use the 13mm open wrench to tighten the nuts on both unit mounting bolts.
Temporarily tighten the unit mounting bolts at this stage to keep the unit from
moving freely.
6. By default, the ODU is delivered with the quick release plate () securely
attached in a vertical polarization. If necessary, change the ODU polarization to
match the orientation of the remote ODU by removing the quick release plate,
changing its orientation, and reattaching. For ease of reference, the markings V
(vertical) and H (horizontal) are engraved on the back side of the ODU.
7. Examine the position scales of both the Azimuth adjustment lock bolts () and
the elevation adjustment lock bolts (), found on the front mounting bracket,
and ensure that they are positioned at 0 degrees (in the middle of the scale).
8. Position the quick release hooks () onto the top elevation adjustment lock bolt
() and carefully set the ODU in place on the front mounting bracket and slide it
firmly inwards.
Hint:
Mount the ODU by attaching the interior quick release hook (A) in place before
attaching the exterior hook (B). The interior hook is the one located farthest from the
tightening nut, as shown below.
A. Interior Quick Release Hook B. Exterior Quick Release Hook C. Elevation Position Slot
Figure 2-4 Quick Release Hooks
9. Unlock the Azimuth adjustment lock bolts () and the elevation adjustment lock
bolts ().
10. Stretch the elevation screw tension band () slightly and connect it to its
mating tension pin, located on the quick release plate.

EH-5500FD Installation Manual
Page 20
2.7 Installing the ODU with a 2ft (65cm) Antenna
2.7.1 Attaching the 2ft Adapter to the ODU
1. Unpack the ODU, place it on a clean unobstructed work surface area, and
remove the plastic cap protecting the waveguide interface.
2. Unpack the cross-shaped metal adapter plate (shipped with the antenna) and
attach it to the ODU using the supplied Phillips-head screws.
3. Note that the 3 longer screws go on the outer perimeter while the 3 shorter
ones go next to the feeder.
Figure 2-5 2ft Adapter
2.7.2 Mounting the ODU to a 2ft Antenna
1. Unpack the antenna and place it on a clean unobstructed work surface area with
its protective housing.
2. Use care to avoid damaging or scratching the antenna radome.
3. Remove the protective tape on the antenna feed.
4. Unpack the antenna mounting kit and assemble it according to the antenna
mounting kit installation instructions that can be found on the mounting kit
package.
5. Position the Azimuth and Elevation Adjustment Lock Bolts at 0 degrees (in the
middle of the scale) and unlock them to allow free movement during alignment.
6. Mount the antenna on a fixed reinforced steel mounting pole with 2-4.5 inches
diameter.
7. Install the 2ft antenna according to the antenna installation instructions that can
be found on the mounting kit package.
8. Attach the ODU to the antenna and tight the 4 locking bolts using 8mm Allen
key.
9. Make sure you install the ODU with the required polarization (note the
polarization arrow on the back of the ODU).
Table of contents
Other Siklu Network Router manuals
Popular Network Router manuals by other brands

Vigitron
Vigitron MAXIINET VI3010 Operational manual

NETGEAR
NETGEAR DGFV338 - ProSafe Wireless ADSL Modem VPN Firewall... Reference manual
HPE
HPE Aruba 2930F 24G Setup guide and safety/regulatory information
ZyXEL Communications
ZyXEL Communications Prestige 100L Quick start manual
Paradyne
Paradyne Hotwire 6381 installation instructions
ADTRAN
ADTRAN NetVanta 3448 quick start
