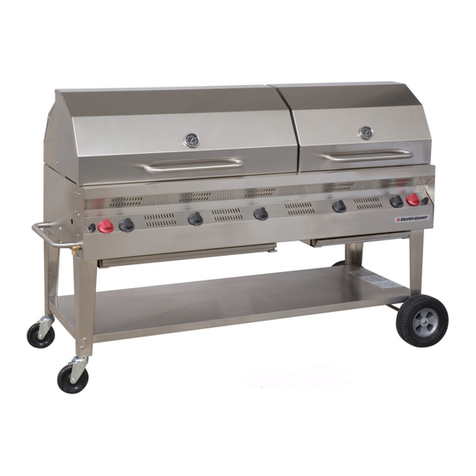
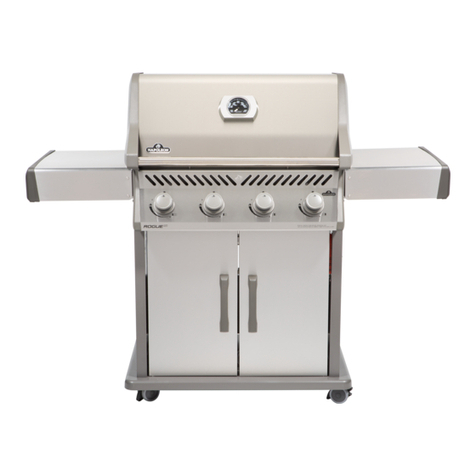
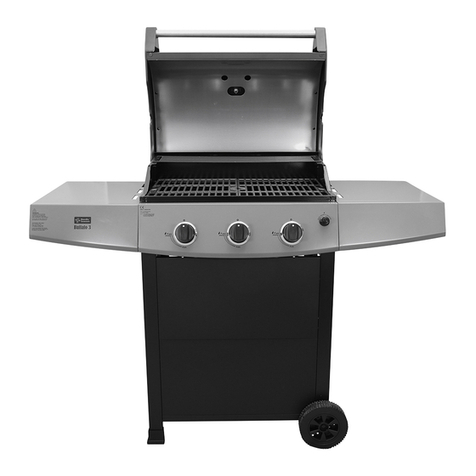
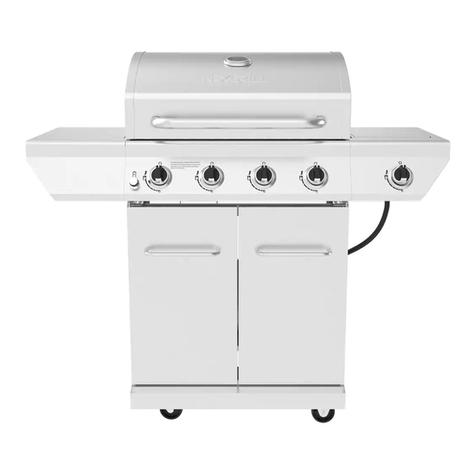
SILVER GIANT SGC-36 User manual

SGC-60
SGC-36

- 1 -
PROPANE MODELS:
SGC-36/SGC-48/SGC-60/SGC-72/SGR-24
BARBECUE - CARE AND USE
RETAIN FOR FUTURE REFERENCE
FOR YOUR SAFETY
If you smell gas:
• Shut off gas supply to appliance
• Extinguish any open flame
• If odour continues, immediately call your gas supplier
CAUTION:
•FOR OUTDOOR USE ONLY
•IF STORED INDOORS, DETACH AND LEAVE CYLINDER OUTDOORS
•THIS APPLIANCE MUST NOT BE OPERATED UNATTENDED
•SURFACES WILL BE HOT WHEN UNIT IS IN OPERATION
SPECIAL CARE MUST BE TAKEN TO KEEP SMALL CHILDREN AWAY FROM HEATED SURFACES
INSTALLATION:
•In Canada, this appliance must be installed in accordance with the local code and the relevant CGA
standards:
CAN/CGA-B149.2 Propane Gas Installation Code
and
Local Codes where applicable
•In the USA, this appliance must be installed in accordance with the local code and the relevant national
code:
ANSI Z223/1 Latest Edition National Fuel Gas Code
•The appliance must be located away from combustible surfaces by at least 45cm (18”) from each side,
and 45cm (18”) from the rear.
•DO NOT operate this appliance under any overhead roof or foliage.
•This appliance is for OUTDOOR USE ONLY. DO NOT operate in garage, shed, balcony or other
such enclosed areas.
•DO NOT restrict the flow of air to the appliance.
•This outdoor cooking gas appliance is not intended to be installed in or on recreational vehicles and/or
boats.
FOR YOUR SAFETY:
1. Do not store or use gasoline or other flammable vapours and liquids in the vicinity of this or any
other appliance.
2. An LP cylinder not connected for use shall not be stored in the vicinity of this or any other
appliance.

- 2 -
PROPANE GAS CYLINDER
SPECIFICATION
•All propane gas cylinders used with this appliance must be constructed and marked with the
specifications for LP Gas Cylinders in accordance with the Canadian Transport Commission (CTC) for
use in Canada, or the U.S. Department of Transport (DOT) for use in the USA. Cylinders shall have a
collar to protect the cylinder valve.
•All propane gas cylinders used with this appliance must be inspected at every filling and re-qualified
by a licensed service outlet at the expiry date (10 years), in accordance with the DOT (USA) and CTC
(Canada) codes for Propane Gas Cylinders.
•All propane gas cylinders used with this appliance must be equipped with a shutoff valve terminating
in a cylinder valve outlet No 510, specified in the Standard for Compressed Gas Cylinder Valve Outlet
and Inlet Connection (USA) AINSI/CGA-V-1-1977 (Canada) CSA B96.
•Recommended vapour propane cylinder sizes: 30 – 100 lbs. (BBQ bracket will support up to 30 LBS cylinder)
•The outdoor grill must be isolated from the gas supply piping system by closing its individual manual
shutoff valve during any pressure testing of the gas supply piping system at test pressures equal to or
less than ½ psi (3.5Kpa).
HANDLING
•Government regulations prohibit shipping full propane gas cylinders. You must take your new
cylinder to a propane gas dealer for filling.
•A filled propane gas cylinder is under high pressure. Always handle carefully and transport in the
upright position and keep the area well ventilated. Protect the valve from accidental damage.
•Do not tip the propane gas cylinder while connecting it to the regulator. Fasten the cylinder securely
during transport, use and storage.
•If the cylinder is tipped after it is connected to the regulator, shut off the gas, disconnect the regulator
and have it checked before using again.
STORAGE
•Store the propane gas cylinder outdoors in a well-ventilated place.
•Do not store the propane gas cylinder in direct sun, near a source of heat or combustion.
•If you intend to store the grill indoors, disconnect and remove the propane gas cylinder first.
•Disconnected cylinders must have plugs installed and must not be stored in a building, garage or any
other enclosed area.
•Keep out of the reach of children.
•When the propane gas cylinder is connected to the gas grill, the gas grill and propane gas cylinder must
be stored outside in a well ventilated place.
OPERATION
•Never connect your gas grill to a propane gas cylinder without the regulator provided, and NEVER
CONNECT TO AN UNREGULATED LP GAS SUPPLY. The gas regulator supplied with the
appliance must be used.
•Avoid damage to the valve on the propane gas cylinder. The valve has a Left-hand thread. Turn the
POL fitting counterclockwise to connect it to the valve, and clockwise to disconnect it.
•Always leak test the propane gas cylinder to regulator connection when connecting the propane gas
cylinder to the appliance. Use a soap and water solution, never an open flame.
•Do not operate appliance if the smell of propane gas is present. Extinguish all flame and determine
source of propane gas before proceeding. Do not ignite the appliance until the propane gas leak has
been found and sealed.
•Always shut off the propane gas cylinder valve when the appliance is not in use.

- 3 -
HOSE & REGULATOR
•The hose and regulator assembly supplied with your gas barbecue is specifically designed for your
model. No modifications, additions or substitutions should be attempted.
•The pressure regulator is factory set at an outlet pressure of 11 inches water column (W.C.).
•Protect the hose from dripping grease and do not allow the hose to touch any hot surface, including the
base of the barbecue.
•Inspect the hose periodically, when replacing propane gas cylinder. If the hose is cracked, cut or
damaged in any way, the appliance must not be operated.
•For repair or replacement of regulator/hose assembly, contact your dealer or approved service centre.
ANNUAL MAINTENANCE & INSPECTION
To ensure safe and efficient performance, this appliance should be inspected and cleaned at least once per
year or after any period of storage exceeding one month.
•Burners (see Figure 1a) may be removed and inspected for cracks and deterioration.
•Venturis (see Figure 1b) should be cleaned out using a bottlebrush to eliminate any blockage, insect
webs or debris.
•The hose should be inspected. See “Gas Supply Hose”.
•After reconnecting the hose, leak test as per “Leak Testing”.
•Burners should produce a uniform and stable blue flame from each flame port. Some traces of yellow
flame are considered normal.
•To clean interior, remove cooking grids (see Figure 2) and flavour plates (see Figure 3). Ensure that
burners do not fill with water during cleaning. Hard deposits can be removed with a non-metallic
brush and surfaces washed with soap and water.
•Exterior Finish - use a degreasing solution to clean, rinse surfaces thoroughly and use a stainless steel
polish to restore the finish.
•If a problem is found with the regulator, hose, burners, or control valves, do not attempt repair. See
your dealer or approved service centre for repairs or replacement parts.
Figure 1a Figure 1b Figure 2 Figure 3
REGULAR MAINTENANCE
Cleaning the Cooking Grids and Flavour Plates:
After you have finished cooking, prepare for the next meal by burning off any residue of food from the
cooking grids and flavour plates in the following manner:
•Remove all food from the grids and turn all the control knobs to the HIGH position. Leave for five (5)
to ten (10) minutes or until the smoking stops. Turn the gas valve off, then turn the control knobs off.
•Use a non-metallic brush or scrubber to clean the cooking grills -remember the barbecue may still be
hot.
•You do not have to wash the grills after each cooking, but if you wish, use a suitable degreasing soap,
then rinse thoroughly. Do not use an oven cleaner.
•For a thorough cleaning, wait until the barbecue is cold and remove the cooking grills for washing in
a suitable degreasing solution. The flavour plates may be removed and washed in a similar manner.
•The stainless drip pans may be removed and washed with the same degreasing solution.
•The grease tray is provided with a drain valve (see Figures 4a and 4b) that must be kept clean to
ensure proper operation. During periods of prolonged cooking a suitable heat proof container may be
used to catch drippings.

- 4 -
Figure 4a Figure 4b, drain valve
enlarged to show detail
LEAK TESTING
All factory-made connections have been thoroughly tested for gas leaks and the burners have been flame
tested. However, shipping and handling may have loosened the gas fittings.
As a safety precaution:
•Test all fittings for leaks before using your gas barbecue.
•Test the cylinder valve for leaks each time the cylinder is filled.
•Test for leaks every time you disconnect and reconnect a gas fitting.
•DO NOT SMOKE!
•Never test for leaks with a lighted match or open flame.
•Test for leaks outdoors.
•Apply a soap and water solution and watch for signs of bubbling (possible leaks).
TO TEST FOR LEAKS
•Insert regulator adapter fitting into the tank valve and tighten by rotating QCC1 in a clockwise
direction. Tighten until fitting is threaded fully into cylinder “shutoff” valve with hand-wheel.
•Check that appliance is turned off at the controls for each burner. Extinguish any open flame or
cigarettes in the area.
•Prepare a soap solution of one part water, one part liquid detergent.
•With a full gas cylinder, open cylinder all the way.
•Brush the soap solution on each connection between the orifice and cylinder valve.
•A leak is identified by a flow of bubbles from the area of the leak.
•If a leak is detected, close the gas cylinder “shut-off” valve and tighten the QCC1 fitting and retest
again with the soap solution.
•If the leak persists, contact your barbecue dealer for assistance. DO NOT attempt to operate the
appliance if a leak is present.
Typical LP–gas cylinder valve/connection:

- 5 -
WARRANTY
The Company warrants its new gas barbecues (parts other than the burners and stainless steel
body) to be free from defects in workmanship and material for a period of 12 months from the date of
purchase where verified by a retail sales receipt. In all other cases reference will be made exclusively to
the product manufacturing code.
The burners and stainless steel body carry a lifetime warranty. Performance of this equipment is
further warranted to be in accordance with stated ratings when properly installed under normal conditions
of operation, using specified inlet pressure.
This warranty does not extend to anyone except the first purchaser at retail. Any implied warranty
which the purchaser may have, including merchantability and fitness for a particular purpose, shall not
extend beyond the applicable warranty period. In no event shall the Company be liable for incidental or
consequential damages.
This warranty is null and void in all cases where repair or replacement parts other than the original
manufacturer’s parts are used. To ensure safe and efficient operating, only Flagro replacement parts should
be installed.
The Company will not be responsible for any damages or losses, direct or indirect, arising in
contract or in tort from any cause whatsoever including improper installation, accident, misuse, abuse,
alterations, misapplication or careless handling, nor for labour, transportation or other charges incurred in
the replacement or repair of conditions, expressed or implied, under the Sale of Goods Act or otherwise
applicable except as expressly stated herein. The Company will not be responsible for any statements that
re made or published, written or oral, which are misleading or inconsistent with the facts as published in the
literature or specifications furnished by the Company.
Warranty Claim Procedures:
To obtain warranty service, you may contact the retailer from which the equipment was purchased
or the authorized Flagro barbecue warranty depot for your area. Written permission must be obtained from
the Company before returning any equipment claimed defective for inspection.
Any new equipment that proves defective within the warranty period will, if returned to the
factory with transportation charges prepaid, be repaired or replaced, free of charge, F.O.B. factory, St
Catharines, Canada. The Company may issue credit in the amount of the invoice value of the defective
equipment in lieu of repair or placement. The Company reserves the right to substitute new or improved
equipment on any replacements.
The provisions of this additional written warranty are in addition to and not a modification of or
subtraction from the statutory warranties and other rights and remedies provided by any provincial law.
Scope of Coverage Period of Coverage Type of Failure Covered
Burners, grids, flavour plates,
Stainless body Lifetime Defective materials or
workmanship
All other components
(i.e. valves, knobs, igniters)
One year from date of
purchase
Defective material or
workmanship
Proudly manufactured in Canada by:
Flagro Industries Limited
26 Benfield Drive, St Catharines,
Ontario Canada L2S 3V5
Telephone: (905) 685-4243 Fax: (905) 685-0113
Website: www.flagro.ca

- 6 -
LIGHTING INSTRUCTIONS
1. Ensure all burner knobs are in the OFF position. Connect the hose assembly to the propane gas
cylinder. Check all connections and hoses for leaks with a soap and water solution.
2. CAUTION: If hood is being used, open before attempting to light the grill.
3. Turn the “red” crossover ignition burner control knob (see Figure 5) to the HI position. Allow 3-5
seconds for propane gas to flow into the burner, and then press the igniter button several times to
light the burner.
If the burner fails to light with the igniter button after several attempts, turn the gas off, and wait five
(5) minutes. Turn on the gas and use long reach butane lighter or long match to light through the
ignition hole located on the right hand side of the grill body (see Figure 5).
4. Once the crossover burner is lit, any main burner may be lit by simply turning the control knob for
each burner to the HI position.
“Red” crossover ignition button
Ignition hole located on right side
of grill body
Figure 5
5. Pre-Heating your BBQ - because our BBQ’s have such high BTUs, it is important that the
operator only have the Main Gas Valves on the HIGH position for 10 minutes maximum. If the
operator doesn’t follow these instructions, he/she may cause permanent damage to the BBQ and
will not be warranted by the manufacturer

- 7 -
QCC1 CONNECTION NOTICE
All barbeques manufactured today are equipped with QCC1 connectors that are pressure sensitive. To
ensure trouble free lighting, please follow these easy steps:
1. All control knobs must be in the OFF
position.
2. SLOWLY open valve on propane cylinder to
allow fuel to reach the appliance.
1. Follow lighting instructions above.
2. If the barbeque does not light or reach
operating temperature within 5 to 10 minutes,
the QCC1 valve may have restricted the flow
of fuel. If this occurs, it will be necessary to
turn the control valves OFF and disconnect
the cylinder to allow the QCC1 valve to reset
itself.
3. Reconnect the propane cylinder and repeat
step 1.
.
SHUT-DOWN
1. Close the propane cylinder valve and allow burners to burn any remaining gas in the line and manifold.
2. Turn all the control valves to the OFF position.

PARTS LIST
SGC-36(N)/SGC-48(N)/SGC-60(N)/SGC-72(N)/SGR-24(N)
BARBECUES
04/24/09
Pg. 1
SGCP-3601 Stainless Steel Cooking Grid – 21” x 12”
SGRP-3601 Stainless Steel Cooking Grid – 1 ” x 12”
SGCP-3602L Flavour Plate – 21" (Large)
SGCP-3602S Flavour Plate – 21” (Small)
SGRP-3602L Flavour Plate – 1 " (Large)
SGRP-3602S Flavour Plate – 1 ” (Small)
SGCP-3603 Stainless Steel Burner – 21”
SGRP-3603 Stainless Steel Burner – 1 ”
SGCP-3602B Flavour Bar – 21” x 2” x 2”
SGRP-2402B Flavour Bar – 1 ” x 2” x 2”
SGCP-2404 Crossover Burner c/w Shield (SGR-24/SGC-60)
SGCP-3604 Crossover Burner c/w Shield (SGC-36/60/72/)
SGCP-4 04 Crossover Burner c/w Shield (SCG-4 )
SGCP-3605 Igniter Electrode
SGCP-3606 Igniter Button
SGCP-3606A Pulse Igniter 2007 >
SGCP-3607 Gas Control Valve – Main (LP)*
SGCP-3607N Gas Control Valve – Main (NG)*
SGCP-360 Gas Control Valve – Crossover
O-3607 Main Orifice (LP) – All LP Models
O-3607N Main Orifice (NG) – All NG Models
SGCP-2409 Orifice Assembly (LP) – Crossover (SGR-24/SGC-60)
SGCP-2409N Orifice Assembly (NG) – Crossover (SGR-24N/SGC-60N)
SGCP-3609 Orifice Assembly (LP) – Crossover (SGC-36/60/72)
SGCP-3609N Orifice Assembly (NG) – Crossover (SGC-36N/60N/72N)
SGCP-4 09 Orifice Assembly (LP) – Crossover (SGC-4 )
SGCP-4 09N Orifice Assembly (NG) – Crossover (SGC-4 N)
SGCP-3610 Control Knob Assembly – Main (Black)
SGCP-3611 Control Knob Assembly – Crossover (Red)
SGCP-3612N Hose Assembly c/w ½” Quick Disconnect – ½” x 10ft
SGCP-3612 Hose Assembly 4-ft (SGC-36/4 /60/72)
SGCP-3613 Regulator fitted with QCC1
SGRP-2414 Valve Manifold Assembly (SGR-24/SGC-60)
SGCP-3614 Valve Manifold Assembly (SGC-36/60/72)
SGCP-4 14 Valve Manifold Assembly (SGC-4 )
SGCP-6014L Valve Manifold Assembly – Left (SGC-60/72)
SGCP-2415R Grease Pan- 1.5” Deep (SGC-60)

PARTS LIST
SGC-36(N)/SGC-48(N)/SGC-60(N)/SGC-72(N)/SGR-24(N)
BARBECUES
04/24/09
Pg. 2
SGCP-3615R Grease Pan- 1.5” Deep (SGC-36/60/72)
SGCP-4 15R Grease Pan- 1.5” Deep (SGC-4 )
SGRP-2415R Grease Pan- 1.5” Deep (SGR-24)
SGCP-3627R Grease Tray Rails- 2pc set L&R (1.5”- Deep Pan)
SGRP-2427R Grease Tray Rails- 2pc set L&R (1.5”- Deep Pan)
SGCP-3627RM Grease Tray Rail for SGC-60/72 (Middle)
** When ordering replacement grease pan, models built
before 2005 will also require matching grease tray rails
SGCP-361 Stainless Handle
SGCP-3619 Stainless Leg – Right (Front)
SGCP-3619B Stainless Leg – Right (Back)
SGCP-3620 Stainless Leg – Left (Front)
SGCP-3620B Stainless Leg – Left (Back)
SGCP-3621 Stainless Bottom Shelf (SGC-36)
SGCP-4 21 Stainless Bottom Shelf (SGC-4 )
SGCP-6021 Stainless Bottom Shelf (SGC-60)
SGCP-7221 Stainless Bottom Shelf (SGC-72)
SGRP-2421 Stainless Bottom Shelf (SGR-24)
SGRP-3621 Stainless Bottom Shelf (SGR-36)
SGCP-3623 Wheel Shaft (SGC Series)
SGRP-3623 Wheel Shaft (SGR Series)
SGCP-3624 Pneumatic Wheel
SGCP-3625 Caster Wheel
SGCP-3626 Thermometer
SGCP-3626A Stainless Steel Thermometer 2007
SGCP-242 Inner Valve Shield (SGC-60/SGR-24)
SGCP-362 Inner Valve Shield (SGC-36/60/72)
SGCP-4 2 Inner Valve Shield (SGC-4 )
SGCP-2429 Crossover Burner Gas Line (SGC-60/SGR-24)
SGCP-3629 Crossover Burner Gas Line (SGC-36/60/72)
SGCP-3629L Crossover Burner Gas Line – Left (SGC-60/72)
SGCP-4 29 Crossover Burner Gas Line (SGC-4 )
SGCP-3630 Cylinder Bracket Kit
SGCP-3631 Grease Drain Valve
SGCP-2432 Flavour Bar Rails – 2pc set (2 FT)
SGCP-3632 Flavour Bar Rails – 2pc set (3 FT)
SGCP-4 32 Flavour Bar Rails – 2pc set (4 FT)

Parts Catalogue
1
2
34
5
2
6
87
9
10 11
12 13

PARTS CATALOGUE
26
27
14
15
16
17
18
19
20
22
21
23
24
25

SGC - PARTS CATALOGUE
Part Number
Description
Item #
NOTES
Part Number
Description
Item #
NOTES
SGCP-3626A S.S. THERMOMETER 1 SGCP-4815R GREASE PAN - 1.5" DEEP 20B 4FT
SGCP-3618 S.S. HANDLE 2 SGRP-2427R GREASE TRAY RAILS 2 SET 21 SGR-24
SGCP-3610 MAIN KNOB (BLACK) 3 SGCP-3627R GREASE TRAY RAILS 2 SET 21A
SGC-
36,48,60,72
SGCP-3611 CROSSOVER KNOB (RED) 4 SGCP-3631 GREASE DRAIN VALVE 22
SGCP-3606A PULSE IGNITOR 5 50-8C BRASS ELBOW 23 NG
SGCP-3625 CASTER WHEEL 6 50-6C BRASS ELBOW 23A LP
SGCP-3624 PNEUMATIC WHEEL 7 SGCP-3605 IGNITOR ELECTRODE 24
SGCP-3623 WHEEL SHAFT 8 SGRP-2414 VALVE MANIFOLD ASSEMBLY 25
SGR-
24/SGC-60
SGRP-2421 STAINLESS BOTTOM SHELF -24 9 SGCP-3614 VALVE MANIFOLD ASSEMBLY 25A SGC-36/72
SGCP-3621 STAINLESS BOTTOM SHELF -36 9A SGCP-4814 VALVE MANIFOLD ASSEMBLY 25B SGC-48
SGCP-4821 STAINLESS BOTTOM SHELF-48 9B SGCP-3607 GAS CONTROL VALVE- MAIN LP 26
SGCP-6021 STAINLESS BOTTOM SHELF-60 9C SGCP-3607N GAS CONTROL VALVE- MAIN NG 26A
SGCP-7221 STAINLESS BOTTOM SHELF-72 9D SGCP-3608
GAS CONTROL VALVE -
CROSSOVER 27
SGCP-3620B STAINLESS LEG -BACK LEFT 10 SGCP-3612 3/8" HOSE 4FT 28
SGCP-3620 STAINLESS LEG- FRONT LEFT 11 SGCP-3613 REG. WITH QCC1 28A
SGCP-3619B STAINLESS LEG -BACK RIGHT 12 SGCP-3612N 1/2" NG HOSE 10FT/QD 29
SGCP-3619 STAINLESS LEG - LEFT RIGHT 13
SGCP-2433 COOKING GRID RAILS (2PC SET) 14 2FT
SGCP-3633 COOKING GRID RAILS (2PC SET) 14A 3FT
SGCP-4833 COOKING GRID RAILS (2PC SET) 14B 4FT
SGCP-2432 FLAVOUR BAR RAILS (2PC SET) 15 2FT
SGCP-3632 FLAVOUR BAR RAILS (2PC SET) 15A 3FT
HOSE AND REGULATOR
SGCP-4832 FLAVOUR BAR RAILS (2PC SET) 15B 4FT
SGCP-2404
CROSSOVER BURNER (SGR-24/SGC-
60) 16
PROPANE NATURAL GAS
SGCP-3604 CROSSOVER BURNER (SGC-36/60/72) 16A
SGCP-4804 CROSSOVER BURNER (SGC-48) 16B
SGCP-3601 SS COOKING GRID (21x12) 17 21"
SGRP-3601 SS COOKING GRID (18x12) 17A 18"
SGCP-3602B SS FLAVOUR BARS 21" 18 21"
SGRP-2402B SS FLAVOUR BARS 18" 18A 18"
SGCP-3603 SS BURNER 21" 19 21"
SGRP-3603 SS BURNER 18" 19A 18"
SGRP-2415 GREASE PAN - 1.5" DEEP 20 2FT
SGCP-3615R GREASE PAN - 1.5" DEEP 20A 3FT
28
29
28A
This manual suits for next models
4
Table of contents
Other SILVER GIANT Grill manuals
