Myron Mixon Smokers Pitmaster Q3 47102 Installation instructions

Instructions for Assembly and Operation
Barrel Grills
Model # 47102, 47103 & 47104
Serial #
Sizes: 24, 30 & 36 inch
Ver. 103014
Please read this entire manual before assembly, installation of your PitmasterQ3 Pellet Grill. Failure to
follow these instructions could result in property damage, bodily injury or even death. Contact your local
building or re ofcial about restrictions and installation inspection requirements in your area.
IMPORTANT, RETAIN FOR FUTURE REFERENCE: READ CAREFULLY. If you are assembling this unit for
someone else, provide this manual for the owner to read and save for future reference.
SAVE THESE INSTRUCTIONS.
RESIDENTIAL PELLET GRILL
FOR OUTDOOR USE ONLY!
Barrel Grill

2Myron Mixon Pitmaster Q3 www.pitmasterQ3.com | 1-877-575-3173
BARREL GRILL
A MoJack Distributors, LLC product
3535 N Rock Road
Wichita, KS 67226
1-877-466-5225
www.pitmasterQ3.com
Register your Grill online at www.pitmasterQ3.com to validate your warranty.
Also sign up for the Q3 Pellet Club to reorder your favorite avors of the Myron Mixon Wood Pellets.
STOP! DO NOT RETURN THE PRODUCT TO THE STORE. CALL OR EMAIL US FIRST.
Customer Service: 1-877-575-3173
General: 1-877-575-3173

3
www.pitmasterQ3.com | 1-877-575-3173 Myron Mixon Pitmaster Q3
A MAJOR CAUSE OF FIRES IS FAILURE TO
MAINTAIN REQUIRED CLEARANCES (AIR SPACES)
TO COMBUSTIBLE MATERIALS. IT IS OF UTMOST
IMPORTANCE THAT THIS PRODUCT BE INSTALLED
ONLY IN ACCORDANCE WITH THESE INSTRUCTIONS.
WARNING! Assemble and operate this grill ONLY per the instructions in this Owner’s Manual.
WARNING! This grill is intended for OUTDOOR USE ONLY.
WARNING! Never use heating fuel pellets in the grill, due to the potenial hazardous contaminants and additives that may be present.
WARNING! Use ONLY MYRON MIXON PITMASTER Q3 BRAND BBQ WOOD PELLETS, which are specially made to work in our
grills. Myron Mixon PitmasterQ3 wood pellets are rated for 8500 BTU per LBS with an ash content of 3%.
CAUTION! Always store wood pellets in a dry location, away from heat-producing appliances and other fuel containers.
CAUTION! Keep the grill clean – See the cleaning instructions in this Owner’s Manual.
CAUTION! Do not use accessories not specied for use with this grill.
CAUTION! Unattended cooking leads to cooking res. Improper use can cause uncontrolled re. To reduce re risk:
Use only Myron Mixon Pitmaster Q3 wood pellets.
This appliance is intended to burn wood pellet fuel only.
Operate only per Manufacturers Instructions.
Never use gasoline or lighter uid.
Always store wood pellets away from heat-producing appliances and other fuel containers.
Keep the appliance clean – See Instruction Manual for cleaning and proper operation.
If Fire Occurs: Call Fire Department
DO NOT try to move the appliance, try to smother re, or put water on the re.
DANGER! Hazardous voltage is present which can shock, burn or cause death. Disconnect the power cord before servicing the grill
unless otherwise noted in the Owner’s Manual.
DANGER! Never use or store ammable liquids near the grill.
DANGER! Never use gasoline or lighter uid to manually light your grill. Use ONLY Alcohol Gel for this procedure AND according to the
instructions in the Owner’s Manual.
WARNING! When operating this grill, maintain a MINIMUM distance of 12 inches from the grill to combustibles.
WARNING! When operating this grill under overhead combustibles a MINIMUM of 40 inches is required.
HAZARDOUS VOLTAGE CAN SHOCK, BURN OR CAUSE DEATH.
DISCONNECT POWER CORDBEFORE SERVICING.
DANGER

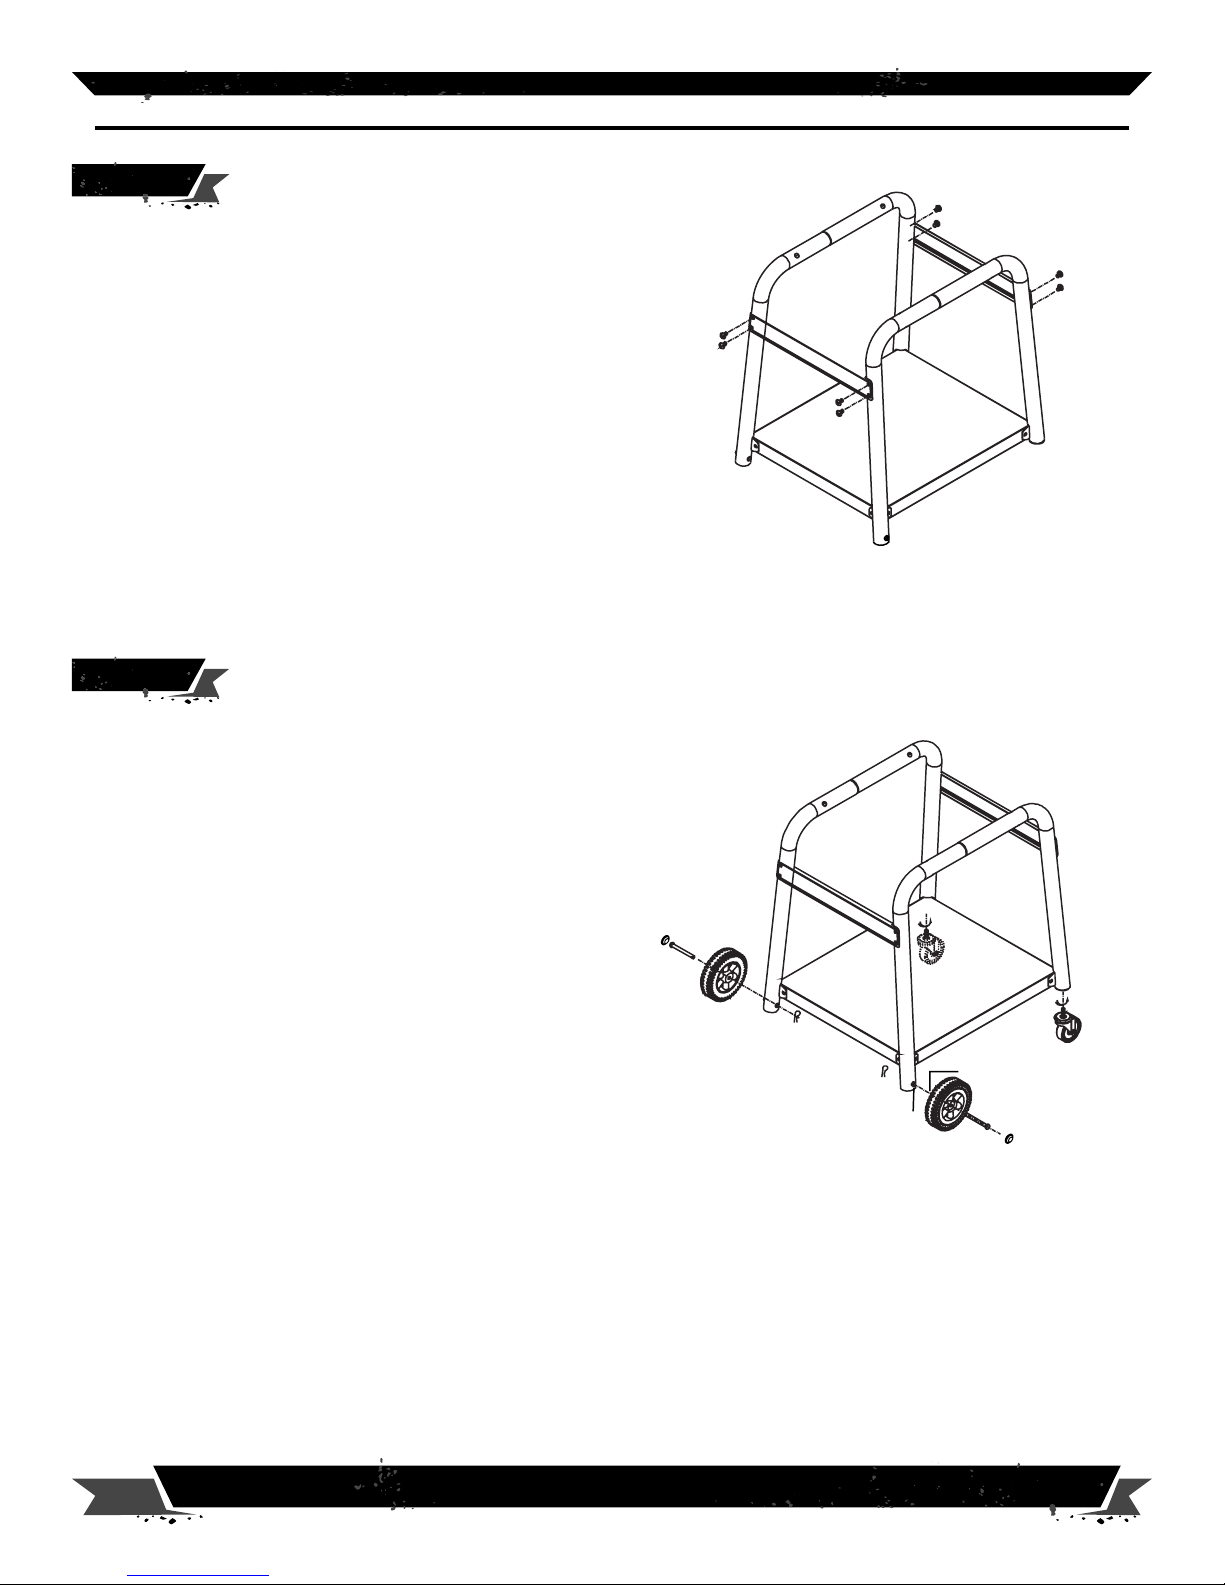
4Myron Mixon Pitmaster Q3 www.pitmasterQ3.com | 1-877-575-3173
• Operate only per manufactures instructions.
• Do not leave the grill uncovered and exposed to weather elements. When nished with the grill, protect it with a grill cover or store
in a covered area.
• Due to the electrical plug component, DO NOT USE the grill if directly exposed to wet weather elements.
• Minimum distance from the back and ends of the grill to combustible materials is 12 inches. Overhead clearance is 40 inches.
• Use caution when assembling and operating your grill to avoid scrapes or cuts from sharp edges.
• Only use wood pellets with Myron Mixon Wood Pellet Grill. Do not use gasoline, kerosene, charcoal or wood. Use of any of these or similar products
could cause an explosion possibly leading to severe bodily injury.
• Do not use lighter uid.
• Do not use accessories not specied for use with this appliance.
• Keep children & pets away from grill. Supervision is necessary and do not leave grill unattended when in use. Use caution when
moving grill to prevent strains. Keep grill at least 15 feet from any combustible material (decks, buildings, fences, trees, bushes, etc.)
• Never move grill when it is in use or when it contains hot ashes, keep the grill in a level position at all times while in use.
• Do not place grill near ammable liquids, gases or where ammable vapors may be present.
• When opening grill, rst open slightly to let a small amount of air in for a few seconds. This prevents large amounts of oxygen from getting to suffocated
pellets which may cause dangerous ash back.
• When this product is not properly installed or assembled, a re may result. To reduce the risk of re, follow the proper installation instructions.
• Disposal of ashes – Ashes should be placed in a metal container with a tight tting lid. The closed container of ashes should be placed on a non-
combustible oor or on the ground, well away from all combustible materials, pending nal disposal. When the ashes are disposed by burial in soil or
otherwise locally dispersed, they should be retained in the closed container until all cinders have thoroughly cooled.
• Use caution since ames can are-up when fresh air suddenly comes in contact with re. When opening the lid, keep hands, face and body safe from
hot steam and ame are-ups.
• Removing excess fat before cooking will help prevent are-ups.
• Keep your grill clean to help prevent are-ups. Regularly clean out the ashes from the rebox and inside of the grill.
• Do not exceed a temperature of 615˚ F.
• Always wear oven mitts to protect hands from burns, especially when adjusting dampers. Avoid touching hot surfaces.
• When opening lid, make sure it is pushed all the way back so it rests against the lid support bracket. Use extreme caution as hood could fall back to a
closed position and cause bodily injury.
• Close lid and vent to help suffocate ame.
• Always hold an open lid from the handle to prevent it from closing unexpectedly.
• Never leave ashes unattended. Before grill can be left unattended, coals and ashes must be removed. Use caution to protect yourself and property.
Carefully place remaining ashes in a noncombustible metal container and saturate completely with water. Allow coals and water to remain in metal con-
tainer 24 hours prior to disposing.
• If your grill ame goes out, i.e. the temperature drops quickly, please see troubleshooting section in this manual.
• When cooking, make sure to keep the water pan positioned and lled with a liquid of your choice, an example is apple juice or water.
Replace the water pan after every cook.
• Do not cook without the water pan in position. This causes unequal heat distribution and a potential hot spot above the opening.
Formation and removal of creosote and grease build-up in the product:
• Creosote–Formation and need for removal. When wood pellets are burned slowly, they produce tar and other organic vapors that combine with
expelled moisture to form creosote. The creosote vapors condense in a relatively cool oven ue or exhaust hood of a slow burning re. As a result,
creosote residue accumulates on the ue lining and exhaust hood. When ignited, this creosote make an extremely hot re. The grease or creosote
should be inspected at least twice a year to determine when grease and/or creosote buildup has occurred. When grease or creosote has accumulated,
it should be removed to reduce the risk of re.
CAUTION! Unattended Cooking Leads To Cooking Fires. Improper Use Can Cause Uncontrolled Fire. To Reduce Fire Risk:
• Use only myron mixon pitmaster q3 wood pellets. • This appliance is intended to burn wood pellet fuel only.
• Operate only per manufacturers instructions. • Never use gasoline or lighter uid.
• Always store wood pellets away from heat-producing appliances and other fuel containers.
• Keep the appliance clean – see instruction manual for cleaning and proper operation.
If Fire Occurs :
• Call Fire Department. • DO NOT try to move appliance, try to smother re, or put water on the re.
WARNING: FOR OUTDOOR USE ONLY
This appliance is NOT intended for indoor use.
Use only Myron Mixon Wood Pellets with this pellet smoker grill.
Do not use pellet fuel labeled as having additives.
Please read this entire manual before you install the product.
Failure to follow instructions may result in property damage, bodily injury, or even death.
WARNING!
REMOVE ALL DECALS FROM THE GRILL
BEFORE HEATING.
WARNING!
DO NOT LEAVE EXPOSED TO WEATHER
ELEMENTS. GRILL CONTAINS SENSITIVE
ELECTRONICS THAT MAY BE DAMAGED.

5
www.pitmasterQ3.com | 1-877-575-3173 Myron Mixon Pitmaster Q3
Join the PitMaster Q3 Pellet Clubby visiting
www.pitmasterQ3.com/Q3pelletclub or call customer service.
We’ll send your favorite flavor of pellets automatically.
Scan with your
Smartphone to
Register your
Grill!
cUSTOMER SERVICE 1-877-575-3173
Apple
Cherry
Mesquite
Hickory
Peach
Oak
Blend
PorkBeef ChickenFish
PELLET FLAVOR
WARRANTY INFORMATION

6Myron Mixon Pitmaster Q3 www.pitmasterQ3.com | 1-877-575-3173
LIMITED WARRANTY:
The Myron Mixon Pitmaster Q3 wood pellet grill is produced by MoJack Distributors, LLC. referred to as “MoJack”. All warranty and
service claims will be addressed by MoJack, Distributors, LLC. For one year of use, MoJack warrants the product against failure due to
defect in material or workmanship when product is used properly. MoJack will replace any defective part at no cost. This warranty does
not cover any product that has been altered or adjusted, or any product that has been misused or abused. THIS IS THE CUSTOMER’S
SOLE AND EXCLUSIVE REMEDY. MOJACK DISCLAIMS ALL IMPLIED WARRANTIES, INCLUDING THE WARRANTY OF
MERCHANTABILITY AND FITNESS FOR A PARTICULAR PURPOSE. MOJACK SHALL NOT BE LIABLE FOR ANY INCIDENTIAL
OR CONSEQUENTIAL DAMAGES. SOME STATES OR PROVINCES DO NOT ALLOW THE EXCLUSION OR LIMITATION OF THE
IMPLIED WARRANTIES OR THE REMEDIES FOR BREACH OF THE IMPLIED WARRANTIES, SO THESE EXCLUSIONS MAY NOT
APPLY TO YOU. THIS LIMITED WARRANTY GIVES YOU SPECIFIC LEGAL RIGHTS, AND YOU MAY ALSO HAVE OTHER RIGHTS
WHICH VARY FROM STATE TO STATE OR PROVINCE TO PROVINCE
What does this warranty cover?
This warranty covers against a failure due to a defect in material or workmanship within one year of purchase.
What does this warranty NOT cover?
This warranty does not cover any grill which has been altered or adjusted in any way from its original model. It will not cover any grill which
has been damaged due to misuse, abuse, accident or negligence. This warranty does not cover incidental or consequential damages.
What is the period of coverage?
One-year warranty from date of purchase for the original owner.
What will MoJack do to correct problems?
We will replace any defective part (within the coverage period) at no charge.
How can I get service?
In order to be eligible for service under this warranty you MUST register your grill within thirty (30) days of purchasing. After the thirty
(30) day period, you must provide proof of purchase (receipt) to register the product. Please register your new pellet grill by
visiting www.pitmasterQ3.com or by calling our toll-free number 1-877-466-5225.
How do I contact MoJack about a warranty issue?
You can contact us from our website at www.pitmasterQ3.com or by calling our toll-free number 1-877-575-3173.
Do I have other rights under State Law?
This warranty gives you specic legal rights, and you may also have other rights which vary from state to state.
What is the return policy?
Please do not return to store. Contact the Customer Service toll-free number 1-877-575-3173.
How do I contact?
You can call Customer Service toll-free number 1-877-575-3173.
Congratulations on your purchase of your new Myron Mixon Pitmaster Q3 Wood Pellet Grill. With proper set-up, operation and
maintenance, this appliance will provide you with years of delicious food and cooking enjoyment.
IMPORTANT!
When you unpack your grill, remove all parts and packaging material from the box and inside the grill. Make sure you have all the items
in the parts list. Carefully check the unit and make sure there is no damage.
If you have any problems with this product or there are missing or damaged parts, please call customer service toll free 1-877-575-3173
(Monday–Friday, 8:00am–5:00 pm, CST).
Note: do not return the unit to the store before calling the toll free number. Do not dispose of your cartons until you are completely
satised with your new wood pellet grill.
WARRANTY INFORMATION
INTRODUCTION

7
www.pitmasterQ3.com | 1-877-575-3173 Myron Mixon Pitmaster Q3
PARTS & TOOLS
Hopper / Burner Assembly Components
(pre-assembled)
Part # Part name Qty
26 Firebox 1
27 Autostart hot rod 1
28 Auger 1
29 Draft inducer fan 1
30 Auger drive motor 1
31 Pellet hopper 1
32 Primary circuit board 1
33 Fuse 1
Part # Part Name Qty
1 Grill 1
2/3 Pre-assembled 1
side shelf with brackets
4/5 Caster legs 2
6/7 Wheel legs 2
8 Casters 2
9 Wheels 2
10 Bottom shelf 1
11 Side bars 2
12 Door 1
13 Door handle 1
14 Right door hinge 1
15 Paddle vent 1
16 Porcelain grates 1or 2*
17 Grease drain pan 1
18 Heat baffle 1
19 Grease bucket 1
20 Wheel cap 2
21 Fan 1
22 Thermostat 1
23 Temperature sensor rod 1
24 Left door hinge 1
25 Hopper / burner 1
assembly
see below for components
24” Barrel has 1 grate.
30” and 36” Barrels have 2 grates.
*

8Myron Mixon Pitmaster Q3 www.pitmasterQ3.com | 1-877-575-3173
PARTS & TOOLS
34
35 36
37 38 39
40
41
42
Hardware Kit, Part #: HK 24 Barrel
Hardware Kit Components
Part # Part Name Qty
34 Screws 1/4"22
35 Wheel axles 2
36 Nuts 1/4"4
37 Axle washers 2
38 Flat washers 1/4"6
39 Spring washers 1/4"6
40 Bolts 1/4"4
41 Axle pins 2
Part # Part Name Qty
42 Open end wrench 1
for installing casters,
legs and grill
Tools Supplied

9
www.pitmasterQ3.com | 1-877-575-3173 Myron Mixon Pitmaster Q3
ASSEMBLY INSTRUCTIONS
Parts required:
Bottom shelf (10)
Hardware required:
8 x Screws 1/4” (34)
Align the holes in the brackets of the caster legs and wheel
legs with the holes in the bottom shelf (10).
Insert the 1/4” screws (34) through the holes in each leg
bracket, then through the holes in the bottom shelf. Leave
the screws loose for now.
STEP 2 Attach the Legs to the Bottom Shelf
Parts required:
Caster legs (4/5)
Wheel legs (6/7)
Insert wheel leg (6) in caster leg (4). Insert wheel leg (7)
in caster leg (5).
Note: The bracket on the lower part of each pair of legs
should face the same side.
STEP 1 Connect the Legs
Caster leg
Wheel leg
OVERVIEW
Some components come pre-assembled, but you will need to complete the following assembly:
• Connecting the legs
• Attaching the side bars to the legs
• Attaching the wheels and castors to the legs
• Mounting the legs on the grill
• Attaching the side shelf assembly to the grill
• Attaching the door handle to the door
Note: The hopper / burner assembly has been mounted to the grill but is not shown in the diagrams below for clarity.
Unpack the package, and take out the parts, hardware bag and tools.
Bottom shelf
Leg assembly
Screw
Bracket

10 Myron Mixon Pitmaster Q3 www.pitmasterQ3.com | 1-877-575-3173
Parts required:
2 x Casters (8)
2 x Wheels (9)
2 x Wheel Caps (20)
Hardware required:
2 x Wheel axles (35)
2 x Axle washers (37)
2 x Axle pins (41)
Tools required:
Open end wrench (42)
Before mounting, note that one end of the axle holder in the
centre of each wheel is longer than the other. With the long
end of the axle holder towards the inside, insert a wheel
axle (35) through each wheel (9) and wheel leg (6/7). Put an
axle washer (37) on the other side, then insert the axle pin
(41) through the hole in the wheel and wheel axle. Apply the
wheels caps.
Turn over the assembled legs/bottom shelf, then use the
provided open end wrench to mount a caster (8) on each
caster leg (4/5) by clockwise turning the hex nut on the
caster into the threaded hole at the bottom of the leg tube.
STEP 4 Attach the Wheels and Casters to the Legs
ASSEMBLY INSTRUCTIONS
Parts required:
2 x Side bars (11)
Hardware required:
8 x Screws 1/4” (34)
Align the four holes in each side bar (11) with the holes near the
top of each leg assembly.
Insert a 1/4” screw (34) through each hole in the side bar, then
through the corresponding hole in the leg assembly. Tighten
screws. Also, tighten screws installed in Step 2.
STEP 3 Attach the Side Bars to the Legs
Screw Side bar
Caster leg
Caster
Wheel leg
Axle pin
Axle
washer
Long end
of axle holder
Wheel axle
Wheel
Wheel cap

11
www.pitmasterQ3.com | 1-877-575-3173 Myron Mixon Pitmaster Q3
Parts required:
Grill (1)
Hardware required:
4 x Nuts 1/4” (36)
4 x Flat washers 1/4” (38)
4 x Spring washers 1/4” (39)
4 x Bolts 1/4” (40)
Tools required:
Open end wrench (42)
Take the porcelain grill (16) and grease drain pan (17)
out of the grill (1), if you haven’t already done so.
Place the grill on the legs.
Note: The two wheel legs should be at the same side as the paddle vent (15).
After aligning the holes in the grill and the legs, insert a 1/4” bolt (40) through each leg tube, then through the grill.
Put a 1/4” at washer (38) and a 1/4” spring washer (39) on each bolt inside the grill, then put on a 1/4” nut (36)
and tighten it.
STEP 5 Mount the Legs on the Grill
STEP 8 Position the Heat Bafe, Grease Pan, Water Pan and Grates.
ASSEMBLY INSTRUCTIONS
Paddle
vent
Washers
Nut
Grill
Bolt
Hardware required:
4 x Screws 1/4” (34)
Align the four holes in the side shelf bracket (2/3) with
the holes in the grill (1).
Put a 1/4” screw (34) through each hole and tighten it.
STEP 7 Attach the Side Shelf Assembly to the Grill
Screw
Door handle
Door
Screw Washers
Hardware required:
4 x Screws 1/4” (34)
Align the four holes in the side shelf bracket (2/3) with the holes in the grill (1).
Put a 1/4” screw (34) through each hole and tighten it.
STEP 6 Attach the Lid

12 Myron Mixon Pitmaster Q3 www.pitmasterQ3.com | 1-877-575-3173
CAUTION!
DO NOT leave the grill in the rain without a cover. The thermometer contains sensitive electronics.
For outdoor use only. Minimum distance from the back and ends of the grills to combustible materials is 12 inches
overhead clearance is 40 inches.
When operating this grill, maintain a minimum clearance of 12” from grill to combustibles.
DO NOT use or store ammable liquids near this grill.
This grill is approved to use on combustible surfaces
While performing the Initial Firing Instructions, DO NOT leave grill unattended.
Operate only per manufacturers instructions.
Never use gasoline or lighter uid.
Always store wood pellets away from heat-producing appliances and other fuel containers.
Keep the appliance clean – see instruction manual for cleaning and proper operation.
If re occurs: Call re department. DO NOT try to move appliance, try to smother re, or put water on the re.
INITIAL FIRING INSTRUCTIONS
(To be used on initial ring or anytime the grill runs out of pellets)
1) Open the door and remove the cast iron grate/porcelain coated grate, grease drain pan/water pan, and heat bafe from inside the grill.
2) Make sure the dial is in the OFF position. Plug the Power cord into an appropriate, grounded electrical outlet.
3) Open the Pellet Hopper Lid and locate the Auger. Make sure there are no foreign objects in the Auger. Turn the dial ON and look into
the Pellet Hopper to conrm the Auger is turning. At the same time, place your ngers over Firepot and feel the air movement from
the fan. Look to see if the Hot Rod is getting hot. DO NOT TOUCH IT! Turn the dial OFF.
4) Fill the Pellet Hopper with PITMASTER Q3 Pellets. Never use “heating fuel pellets” in the grill. Warning: Only use Myron Mixon
Pitmaster Q3 wood pellets which are specically made to work with our grills. Myron Mixon Pitmaster Q3 wood pellets are rated for
8500 BTU/ lbs. with and ash content of 3%. Fill the hopper completely with pellets. Turn the Dial ON, set the temperature to 350 de-
grees. NOTE: During initial charging of the auger, it will take time for the pellets to travel from the Pellet Hopper to the Firepot. When
the pellets begin to fall into the Firepot, turn the Temperature setting to OFF, wait 15 seconds before proceeding to Step 5.
5) Turn the Temperature setting to ON, set the temperature Dial to SMOKE. Let the pellets come to a full ame. Once you see ames
come out of the Firepot, turn the dial OFF, and let the grill cool down. Position the Heat Bafe, the Grease Drain Pan/water pan, and
the cast iron grates/porcelain coated grates in their proper locations.
6) With the Door/Lid OPEN, turn the dial ON, and set the temperature Dial to SMOKE. In approximately 2 minutes, you will notice
whitish-gray smoke coming out of the grill as the pellets ignite. After assuring the pellets have ignited, close the door and set the
temperature to the 350 degrees setting.
7) Before cooking the rst batch of food in your new PITMASTER Q3 grill, you will need to season the grill. With the Temperature on
350 DEGREES, run for 45 minutes at this setting with the Door CLOSED. This must be done before cooking any food on the grill.
8) Water pan should always be inserted when grill is in use. For wet smoking, ensure the water pan is lled with a liquid of your choice.
For neutral avor use water.
9) Make sure to season the cast iron grates.
INITIAL FIRING INSTRUCTIONS
ATTENTION!
Never use “heating fuel pellets” in your Myron Mixon PITMASTER Q3 grill!
1) Always start your grill on SMOKE with the DOOR OPEN!
2) If the Grill runs out of pellets, turn the grill OFF immediately!
3) Follow the “Initial Firing Instructions” below before using your grill.
WARNING!
Many parts of the Grill will become very hot during operation. Care must be taken to avoid burns, both during operation and afterwards,
while the Grill is still hot. It should never be left unattended when young children are present. Never move the Grill when it is operating.
Let it thoroughly cool before moving or attempting to transport.

13
www.pitmasterQ3.com | 1-877-575-3173 Myron Mixon Pitmaster Q3
OPERATING INSTRUCTIONS
The temperature dial can be changed at any time to increase or decrease the cooking temperature of the grill. The grill will take an
average of 5 minutes to warm up. See the table below to set temperature in these ranges:
GRILLING 400º F
BAKING 275º - 300º F
SMOKING 180º - 200º F
Cure the Cast Iron Grates by:
1) Clean & Rinse the new cast iron grates with soap and warm water.
2) Dry the grates completely.
3) Apply vegetable oil to a paper towel and rub vigorously into the cast iron. leave a light coating of oil on the surface of the grates.
4) Turn the grill to approx. 200 degrees and put the grates in place.
5) Close the lid and leave the grill grates in place for 2 hours.
6) Turn the grill off, and allow the grates to cool. The grill grates are now seasoned.
Temperature uctuation may be a result of:
• The outside temperature effects cooking times. If it is hot outside, cooking times will be less. If it is cold, wet or windy, it will take longer
to cook food.
• Temperature will uctuate if lid is open, the grill is designed to operate with the lid closed and cooking with the lid open will increase
cooking times.
• Check the pellet hopper on occasion for pellet distribution into the bottom of the hopper. The lid gauge may not match the digital
gauge, varying by 5-10 degrees. TIP: use a meat thermometer to get the most accurate heat measurement of the food.
Water pan should always be placed in position when the grill is in use. This allows for even heat distribution. For wet smoking, ensure
the water pan is lled with a liquid of your choice. For a neutral avor use water.
CONTROL SEQUENCE SHUTDOWN: The control for this grill comes with an automatic shut down cycle. When nished cooking on
your grill set the Temperature/Dial Knob to the OFF position, this will leave the Fan running for 5 minutes to burn any excess pellets in
the re pot. After the fan runs for 5 minutes the controller will power off and the fan and it will stop running. CAUTION! The main power
switch will shut the power off to the controller and the Temperature/Dial Knob switch will cut off power to the grill components only.
When servicing the controller or any parts ensure that the power supply is disconnected to avoid a shock hazard.
CARBON MONOIXDE:
WARNING! Follow these guidelines to prevent this colorless, odorless gas from poisoning you, your family or others.
• Know the symptoms of carbon monoxide poisoning: headache, dizziness, weakness, nausea, vomiting, sleepiness and confusion.
Carbon monoxide reduces the blood’s ability to carry oxygen. Low blood oxygen levels can result in loss of consciousness and death.
• See a doctor if you or others develop cold or u-like symptoms while cooking or in the vicinity of this Grill. Carbon monoxide poisoning,
which can easily be mistaken for a cold or u, is often detected too late.
• Alcohol consumption and drug use increase the effects of carbon monoxide poisoning.
CAUTION! Grease res are caused by not properly maintaining the Grill by failing to clean your Grease Drain Pan, V-shaped Grease
Drain and Grease Drain Tube on a consistent basis. (See Section for maintenance instructions) In the unlikely event of a grease re
while cooking, turn the Switch OFF and Keep the Door closed until the re is completely out. Never keep the Door open during a grease
re. If it does not go out, lightly sprinkle baking soda on the re. CAUTION! Be careful not to burn yourself. If this does not work then
carefully remove the food from the Grill and keep the Door closed until the re is completely out. Again, be careful not to burn yourself.
When the Grill is completely cool, remove the Porcelain Grill and replace the foil on the Grease Drain Pan. Clean any grease accumula-
tion from the V-shaped Grease Drain and the Grease Drain Tube. Replace the Grease Drain Pan and the Porcelain Grill in their proper
positions, restart the Grill and resume cooking.

14 Myron Mixon Pitmaster Q3 www.pitmasterQ3.com | 1-877-575-3173
CLEANING AND MAINTENANCE
1. CREOSOTE AND GREASE: Formation and need for removal.
• When wood pellets are burned slowly, they produce tar and other organic vapors that combine with expelled moisture to form creo-
sote. The creosote vapors condense in the relatively cool ue exhaust of a slow burning re. As a result, creosote accumulates on the
ue lining. When ignited, creosote makes an extremely hot re. Airborne grease particles will travel through the cooking chamber and
some of this airborne grease will accumulate on the ue lining, similar to the creosote, which could be contributory to a re.
• The ue exhaust should be inspected at least twice a year to determine when a creosote and/or grease buildup has occurred.
• Also, grease drippings from the food will fall onto the Grease Drain Pan and be channeled into the Grease Drain and then out of the
Grill through the Grease Drain Tube, to be collected in the Grease Bucket. Grease will accumulate in all of these locations.
• The Grease Drain, the Grease Drain Tube and the Grease Bucket should be inspected at least twice a year for signs of grease
buildup.
• When creosote or grease has accumulated, it should be removed to reduce the risk of re.
2. Cleaning Grease from your Grill:
• CAUTION! Turn the Switch OFF (o) and disconnect the Power Cord.
• CAUTION! Accumulated grease is easier to clean off when the Grill is still warm –not hot. Be Careful not to burn yourself. Gloves are
recommended
• Periodically, clean the grease out of the V-shaped Grease Drain and Grease Drain Tube. If too much grease is allowed to build up in
the V-shaped Grease Drain, or is allowed to plug the Grease Drain Tube, a grease re could result. We recommend cleaning these
locations regularly.
• Remove the Porcelain Grill and the Grease Drain Pan. This will provide access to the V-shaped Grease Drain and Grease Drain Tube
opening inside the Grill. Scrape the grease accumulation from the inside the V-shaped Grease Drain and Grease Drain Tube, using a
stiff, non-metallic tool. Much of the loosened grease can be pushed down through the Grease Drain Tube and will fall into the Grease
Bucket. Wipe up remaining grease residue with paper towels or disposable rags. Paper towels or disposable rags can also be used to
wipe some of the grease off of the interior surfaces of the Grill.
• Line your Grease Bucket with aluminum foil for easy clean-up. Empty it occasionally, depending on amount of use. Change the alumi-
num foil on the Grease Drain Pan frequently (sometimes, after each use, depending upon what was cooked). Clean foil on the Grease
Drain Pan will make your food taste better and reduce the risk of a grease re.
3. Cleaning outside surfaces:
• CAUTION! Turn the Switch OFF (o) and disconnect the Power Cord.
• Use a disposable rag or cloth, dampened with warm soapy water to wipe the grease from the outside of the Grill. DO NOT use oven
cleaner, abrasive cleansers or abrasive cleaning pads on the outside Grill surfaces.
4. Outside Storage:
• CAUTION! If the Grill is stored outside during the rainy season, care should be taken to ensure that water does not get into the
Pellet Hopper. Wood pellets, when wet, expand greatly and will jam your Auger. A Pitmaster Q3 Grill Cover to protect the Grill is highly
recommended! Covers are available on our Web Site – www.pitmasterQ3.com.
5. Cleaning the Porcelain Grill:
• CAUTION! The cleaning of the Porcelain Grill works best while they are still warm. Be careful not to burn yourself. We recommend
keeping a long-handled cleaning brush near the Grill. After removing your food, give the Porcelain Grill a quick brushing.
6. Cleaning the ash from inside and around the Firepot:
• CAUTION! Turn the Switch OFF (o) and disconnect the Power Cord.
• WARNING! Make sure that the Grill is COLD before cleaning the ash.
• WARNING! Disposal of ashes should be done only per the following instructions.
• Excess ash in the Firepot may cause your re to go out, especially in the “SMOKE” setting. The Firepot should be inspected occasion-
ally, and cleaned to remove the ash buildup. Again, cleaning the ash from in and around the Firepot should be done only when the
Grill is COLD
• Remove the Porcelain Grill, Grease Drain Pan and Heat Bafe to provide access to the Firepot and the interior of the Grill. Much of
the ash outside of the Firepot can be swept to the open area at the right of the Firepot using a small whisk broom. It can be removed
from the Grill with a small metal replace shovel or other similar tool. Dispose of the ashes per the following instructions.
(CONT. NEXT PAGE)

15
www.pitmasterQ3.com | 1-877-575-3173 Myron Mixon Pitmaster Q3
CLEANING AND MAINTENANCE (CONT.)
WARNING! A shop vac cleaner is the best way to remove ashes from the Firepot but this must be done with extreme care to avoid the
risk of re. Again, cleaning the ash from the Firepot should be done only when the Grill is COLD. A utility-type vacuum cleaner, having
a metal collection canister without a bag would be best for this task. However, almost any vacuum cleaner will work safely if this
procedure is properly followed.
After assuring that the ash in the Firepot is COLD, vacuum the ash from the inside of the Firepot.
A) If your vacuum cleaner is a bagless model, empty any previously accumulated debris from the collection chamber. Then vacuum the
ash from the inside of the Firepot. Once the Firepot is clean, empty the collection chamber into the metal container described below
without delay. Make sure that there is no remaining ash residue left in the collection chamber
B) If your vacuum cleaner is a model that uses a disposable bag, install an unused one in the machine. Then vacuum the ash from the
inside of the Firepot. Once the Firepot is clean, remove the bag from the vacuum cleaner and place it in the metal container de-
scribed below without delay.
DISPOSAL OF ASHES:
WARNING! Ashes should be placed in a metal container with a tight-tting lid. The closed container of ashes should be placed on a
non-combustible oor or on the ground, well away from all combustible materials, pending nal disposal. When the ashes are disposed
of by burial in soil or otherwise locally dispersed, they should be retained in the closed container until all cinders have thoroughly
cooled.
TROUBLESHOOTING
The grill fails to ignite:
If the grill does not ignite or the re goes out in the rebox while cooking, rst try re-ring the grill:
Turn the power switch to OFF.
Remove the cast iron grates, grease drain pan and heat bafe. Also remove any food. Remove all unburned pellets and ash from the rebox.
Restart the grill and conrm that the ignition cycle is working. The hot rod should turn red and the pellets should fall from the auger into
the rebox. Put the cast iron grates, grease drain pan and heat bafe back in position.
If the above procedure doesn’t work, try these additional tips:
Verify power at the electrical outlet: if the power cord is connected to a Ground Fault Interrupter, check and restart if necessary. Check
the power cord fuses: disconnect the power cord from the electrical outlet, remove the control and check the fuse on back. Replace if
the fuse is blown. Be sure to reinstall the control.
Verify that the hot rod, draft inducer fan and auger drive are working: unplug the hot rod connector; plug the power cord into an appro-
priate, grounded electrical outlet and turn the power switch to ON. Check that the draft inducer fan and auger drive motor are working.
If one is not working, it needs to be replaced. If both are operating, the hot rod needs to be replaced.
If the problem is the hot-rod, the grill can still be used by following the manual “Initial Firing Instructions” in the Manual.
Sudden temperature drop:
This issue is typically caused by too many pellets in the Firebox and the re goes out.
• Remove the Grease Drain Pan and Heat Bafe to get access to Firebox.
• Check the Firebox for unburned pellets. If so, remove the unburned pellets from the Firebox.
• Replace components and rere grill.
Sudden temperature increase:
This issue is typically caused by not inserting the standard 2 lb. aluminum loaf pan. Make sure to position the loaf pan when cooking.
NO pellets are delivered to the Firebox:
Verify that there are pellets in the pellet hopper. Note that it can take up to seven minutes for pellets to travel from the pellet hopper to
the rebox.
If this doesn’t x the problem, follow this procedure to check that the auger drive motor and draft inducer fan are working: Disconnect
the power cord from the electrical outlet.
Unplug the auger drive motor (orange/white wire pair) and the draft inducer fan (purple/white wire pair).
Then reconnect both pairs. See the wiring diagram in the next section.
Plug the power cord into an appropriate, grounded electrical outlet and turn the power switch to ON. If the auger drive motor is working,
the problem is the digital control, which will need to be replaced.
(CONT. NEXT PAGE)

16 Myron Mixon Pitmaster Q3 www.pitmasterQ3.com | 1-877-575-3173
TROUBLESHOOTING (cont.)
If the auger drive motor is not working, but the draft inducer fan is working, the problem is the auger system, which needs to be
checked:
• Turn the power switch to OFF.
• Locate the small fan blade on the back of the auger motor drive.
• Turn the power switch to ON and watch to make sure the fan blade turns. if it doesn’t turn it needs to be replaced. If it turns a bit and
then stops, turn the power switch to OFF and see if it unwinds slightly, indicating a jam that needs to be cleared. See the section
below for how to clear auger jams.
The Auger Jams:
If foreign objects or wet pellets jam the auger system, it needs to be removed and cleared: Making sure the power switch is OFF and
the power cord is disconnected, remove any covers necessary to access the auger drive motor.
Remove the screw connecting the auger drive motor shaft to the auger shaft and the screw retaining the auger bushing into the auger
tube. With a small pipe wrench or locking pliers on the auger shaft, turn the auger counter clockwise. It will turn hard until it breaks free.
Remove the auger and clean all pellets, ash or foreign objects from the auger, auger tube and rebox. A shop-vac will help. Sand the
outside surfaces of the auger with medium grit sandpaper. Sand the inside of the auger tube, if necessary. Vacuum sanding grit out of
the auger tube and rebox when nished. Reinstall the auger bushing and the auger into the auger tube, making sure the auger rotates
freely. Re-attach the auger shaft to the auger drive motor shaft.
The grill doesn’t re on smoke setting:
This procedure to clean excess ash from the rebox: Open the door and remove the cast iron grates, grease drain pan and heat bafe.
Remove all unburned pellets and ash from the rebox. A shop-vac will help. MAKE SURE THE GRILL IS COLD AS HOT ASH CAN
CAUSE A FIRE.
Put the cast iron grates, grease drain pan and heat bafe back in position and follow the INITIAL FIRING INSTRUCTIONS.
How to change the Fuse:
There will be an extra fuse zip tied to the fuse cylinder is found on the back side of the control panel. Remove the screws holding the
control panel in place. On the back side of the control panel will be the fuse location.
If you are missing or require parts or need service help, please email [email protected]
or call our customer service department at 1-877-575-3173 (Monday – Friday, 8:00 am – 5:00 pm, CST)
Extra fuse zip tied
to fuse cylinder
Remove old fuse from cylinder
and place the new fuse inside
the cylinder

17
www.pitmasterQ3.com | 1-877-575-3173 Myron Mixon Pitmaster Q3
If you are missing or require replacement parts, please call customer service at 1-877-575-3173
(Mon – Fri, 8:00 am – 5:00 pm, CST)
Identify the required part(s) and have the replacement part number ready when you call.
Replacement Parts
34
35 36
37 38 39
40
41
42
Hardware Kit, Part #: HK 24 Barrel
Hardware Kit Components
Part # Part Name Qty
34 Screws 1/4"22
35 Wheel axles 2
36 Nuts 1/4"4
37 Axle washers 2
38 Flat washers 1/4"6
39 Spring washers 1/4"6
40 Bolts 1/4"4
41 Axle pins 2
Part # Part Name Qty
42 Open end wrench 1
for installing casters,
legs and grill
Tools Supplied
The following parts are available for
replacement:
• Casters (8)
• Wheels (9)
• Door (12)
• Door Handle (13)
• Right Door Hinge (14)
• Wheel Caps (20)
• Fan (21)
• Temperature Sensor Rod (23)
• Left Door Hinge (24)
• Autostart Hot Rod (27)
• Auger Drive Motor (30)
• Pellet Hopper (31)
• Primary Circuit Board (32)
• Fuse (33)

18 Myron Mixon Pitmaster Q3 www.pitmasterQ3.com | 1-877-575-3173

19
www.pitmasterQ3.com | 1-877-575-3173 Myron Mixon Pitmaster Q3

This manual suits for next models
10
Table of contents
Other Myron Mixon Smokers Grill manuals