CONTENTS
TO
USE THE MACHINE page
MACHINE AND ACCESSORIES
.........................................
2
SETTING UP THE MACHINE
............................................
5
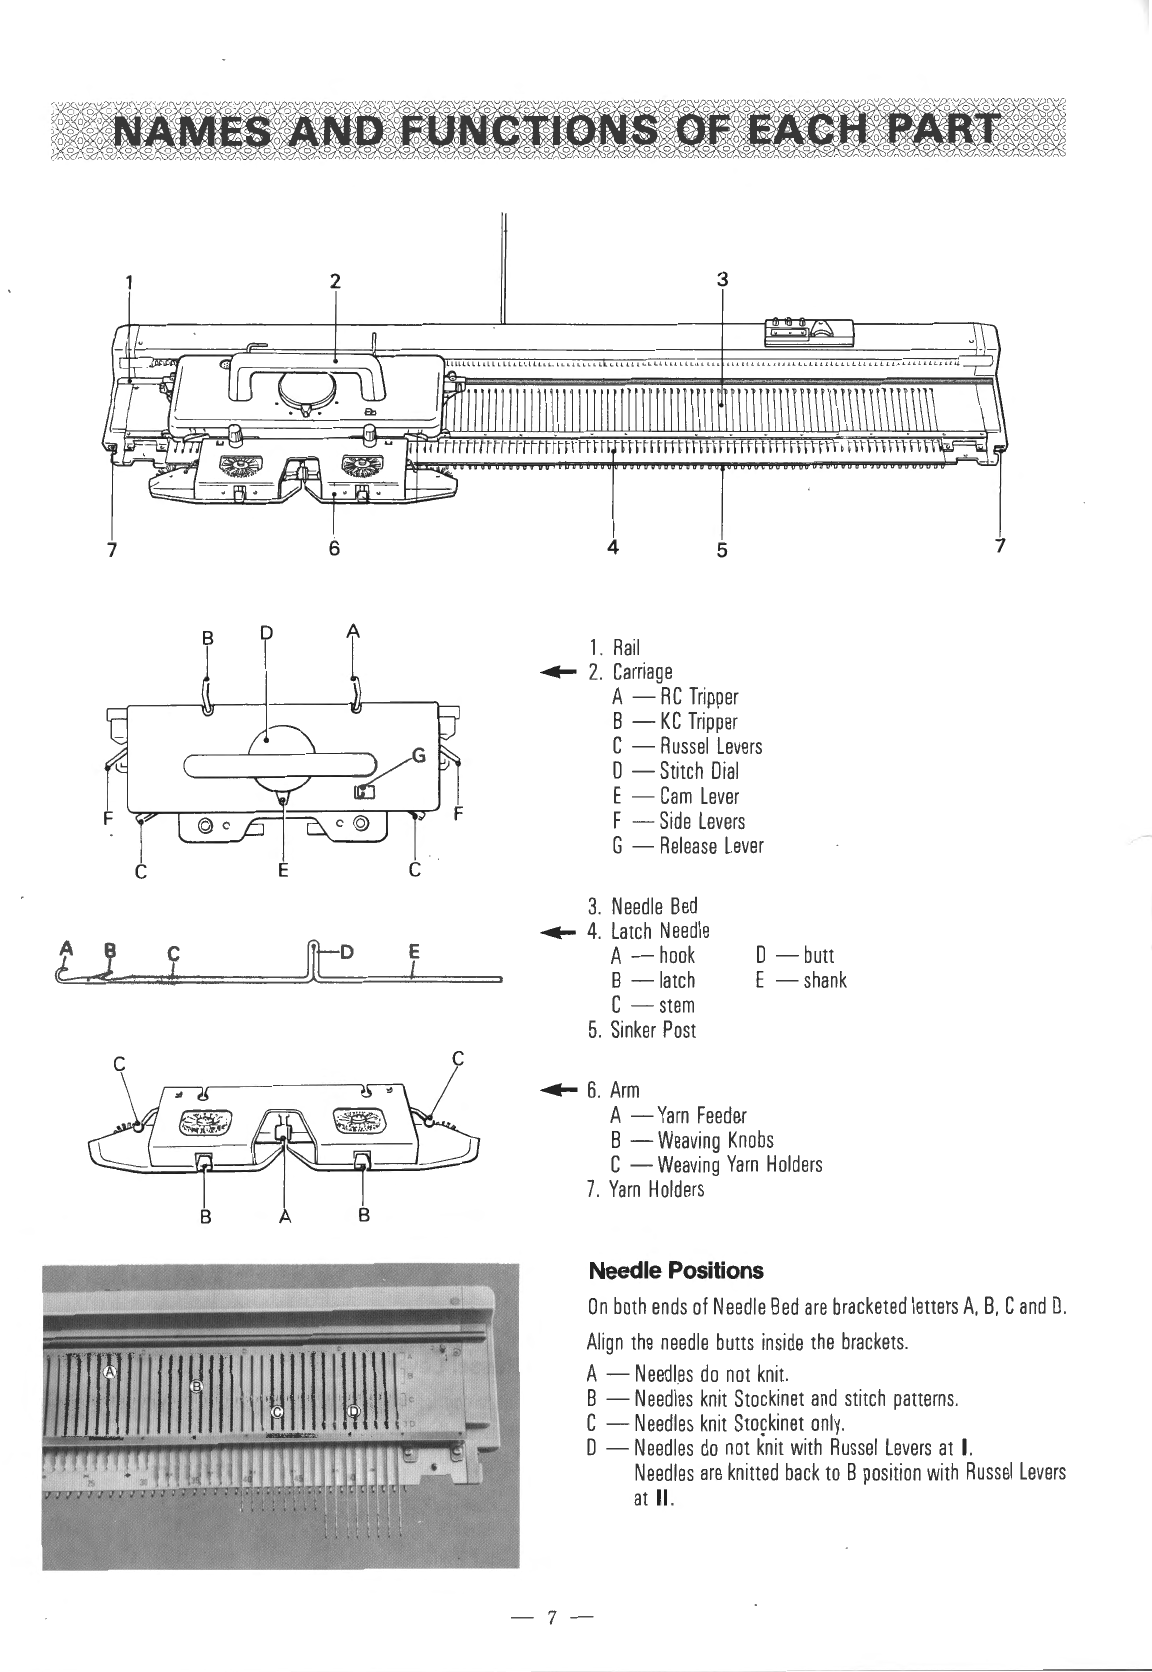
NAMES
AND
FUNCTIONS OF EACH PART
...............................
7
Needle Positions . . . . . . . . . . . . . . . . . . . . . . . . . . . . . . . . . . . . . . . . . . . . . . . . . . . . . 7
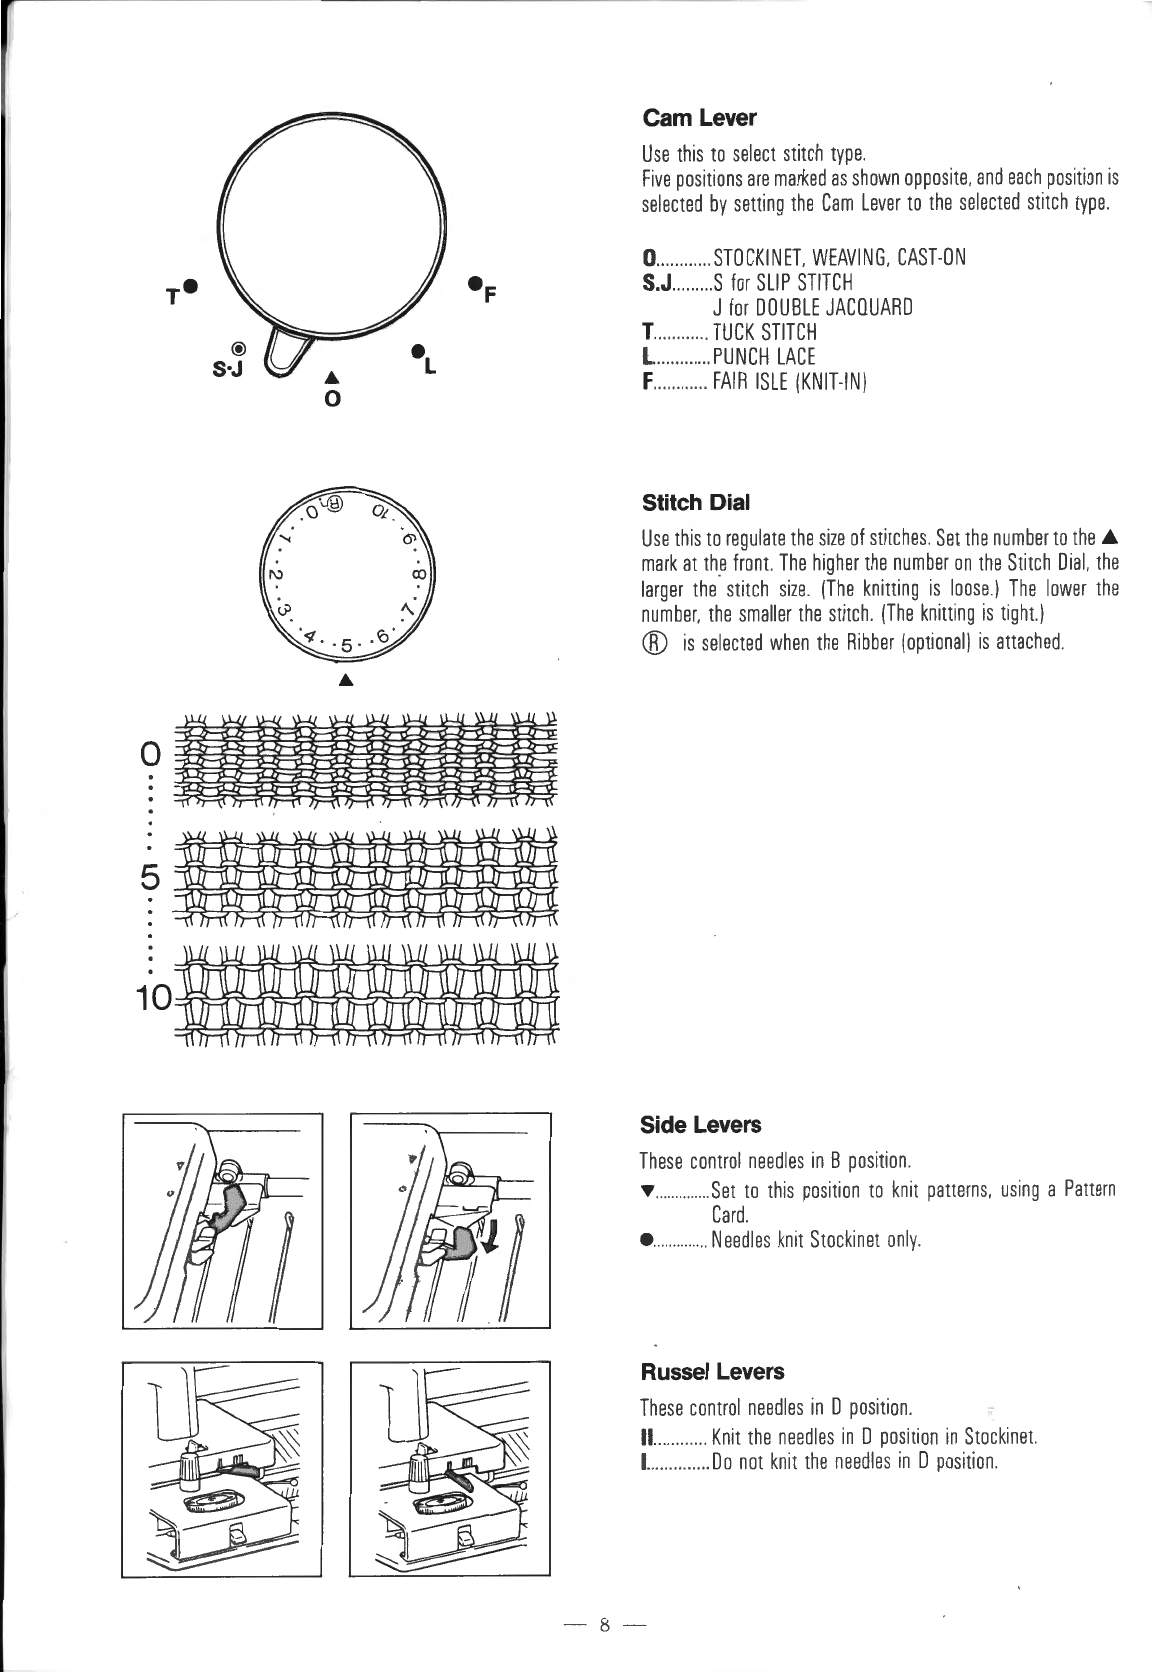
Cam Lever
..........................................................
8
Stitch Dial
.................................................
-. . . . . . .. . . 8
Side Levers . . . . . . . . . . . . . . . . . . . . . . . . . . . .. . . . . . . . . . . . . . . . . . . . . . . . . . . . . . 8
Russel Levers . . . . . . . . . . . . . . . . . . . . . . . . . . . . . . . . . . . . . . . . . . . . . . . . . . . . . . . . 8
Release Lever . . . . . . . . . . . . . . . . . . . . . . . . . . . . . . . . . ... . . . . . . . . . . . .. . . . . . . . . 9
Tuck Brushes . . . . . . . . . . . . . . . . . . . . . . . . . . . . . . . . . . . . . . . . . . . . . . . . . . . . . . . . 9
Weaving Knobs . . . . . . . . . . . . . . . . . . . . . . . . . . . . . . . . . . . . . . . . . . . . . . . . . . . . . . 9
Row Counter and Feeding Trippers
.....................................
9
YARN PREPARATION
.................................................
10
THREADING THE YARN
...............................................
11
YARN
AND
STITCH DIAL
..............................................
12
CAST-ON
AND
KNITTING
.............................................
13
Cast-on
(1)
.........................................................
13
Cast-on
(2)
.........................................................
15
Knitting Stripe Pattern
...............................................
17
Moving the Carriage without Knitting
..................................
19
Removing the Knitting
..............................................
: 19
TO KNIT PATTERNS USING THE PATTERN CONTROLLER, EC1 . . . . . . . . .
20
(See page
20
for the contents
of
this section.)
HELPFUL HINTS . . . . . . . . . . . . . . . . . . . . . . . . . . . . . . . . . . . . . . . . . . . . . . . . . . . . .
45
(See page
45
for the contents
of
this section.) -
MAINTAINING THE MACHINE
.........................................
55
REPACKING THE MACHINE
...........................................
56
DRAWING A PATTERN ON THE DESIGN CARD
.........................
57
TO KNIT GARMENTS . . . . . . . . . . . . . . . . . . . . . . . . . . . . . . . . . . . . . . . . . . . . . . . . .
58
(See page
58
for the contents
of
this section.)
TO
USE THE CHUNKY RIBBER, SR155
......
...........................
85
(See page
85
for the contents
of
this section.)
- 1 -