Silverline 196595 User manual

Users Manual
32cc Backpack Brush Cutter
Product Code 196595
© March 2007
• This guarantee becomes effective at the date of retail purchase.
PLEASE KEEP YOUR RECEIPT.
• If this product develops a fault within 30 days of purchase, return it to the
stockist where it was purchased, with your receipt, stating details of the fault.
You will receive a replacement or refund.
• If this product develops a fault within 1 year of purchase return it to;
Silverline Tools Service Centre
PO Box 2988
Yeovil
BA21 1WU
Include your original receipt, details of the fault, your name and address, place and
date of purchase. We do not refund carriage. All product should be in a suitably
clean and safe state for repair, and should be packaged carefully to prevent damage
or injury during transportation. We may reject unsuitable or unsafe deliveries.
• You must provide proof of purchase before any work can be carried out.
• All work will be carried out by Silverline Tools or its authorised repair agents.
• Any parts which are replaced will become the property of Silverline Tools.
• The repair or replacement of the product will not extend the period of guarantee.
• The repair or replacement of your product under guarantee provides benefits which
are additional to and do not affect your statutory rights as a consumer.
What is covered:
• The repair of the product, if found to be defective due to faulty materials or workmanship
within 1 year of purchase. If any part is no longer available or out of manufacture,
Silverline Tools will replace it with a functional replacement part.
• Use of the product in the UK.
What is not covered:
Silverline Tools does not guarantee repairs required as a result of:
• Normal wear and tear e.g. blades, brushes, belts, bulbs, batteries etc.
• Accidental damage, faults caused by negligent use or care,
misuse, neglect, careless operation or handling of the product.
• Use of the product for anything other than normal domestic purposes.
• Change or modification of the product in any way.
• Use of parts and accessories which are not Silverline Tools genuine components.
• Faulty installation (except installed by Silverline Tools).
• Repairs or alterations carried out by parties other than
Silverline Tools or its authorised repair agents.
Silverline Tools 1 Year Guarantee
Thank you for choosing this product

INTRODUCTION
This manual is an integral part of the tool and should be kept
with it at all times. If the product is resold this manual should be
included in the sale.
Safety Messages:
A safety message is to alert you to potential dangers that could
hurt you or others. Each safety message is preceded by one of
three words DANGER, WARNING or CAUTION.
These Words Mean:
DANGER: YOU WILL BE KILLED OR SERIOUSLY INJURED IF
YOU FAIL TO FOLLOW THE INSTRUCTIONS.
WARNING: YOU CAN BE KILLED OR SERIOUSLY INJURED IF
YOU FAIL TO FOLLOW THE INSTRUCTIONS.
CAUTION: YOU CAN BE SERIOUSLY INJURED IF YOU FAIL
TO FOLLOW INSTRUCTIONS.
Each safety message tells you what the hazard is, what can
happen and what you can do to avoid and reduce injury.
There are other important messages preceded with the word
NOTICE.
NOTICE: MEANS YOUR TOOL OR OTHER PROPERTY
COULD BE DAMAGED IF YOU FAIL TO FOLLOW
INSTRUCTIONS.
The purpose of these messages is to help prevent damage to
you, your tool, other property and the environment.
GENERAL SAFETY INSTRUCTIONS
Even when used as prescribed it is not possible to eliminate all
residual risk factors. Use with caution.
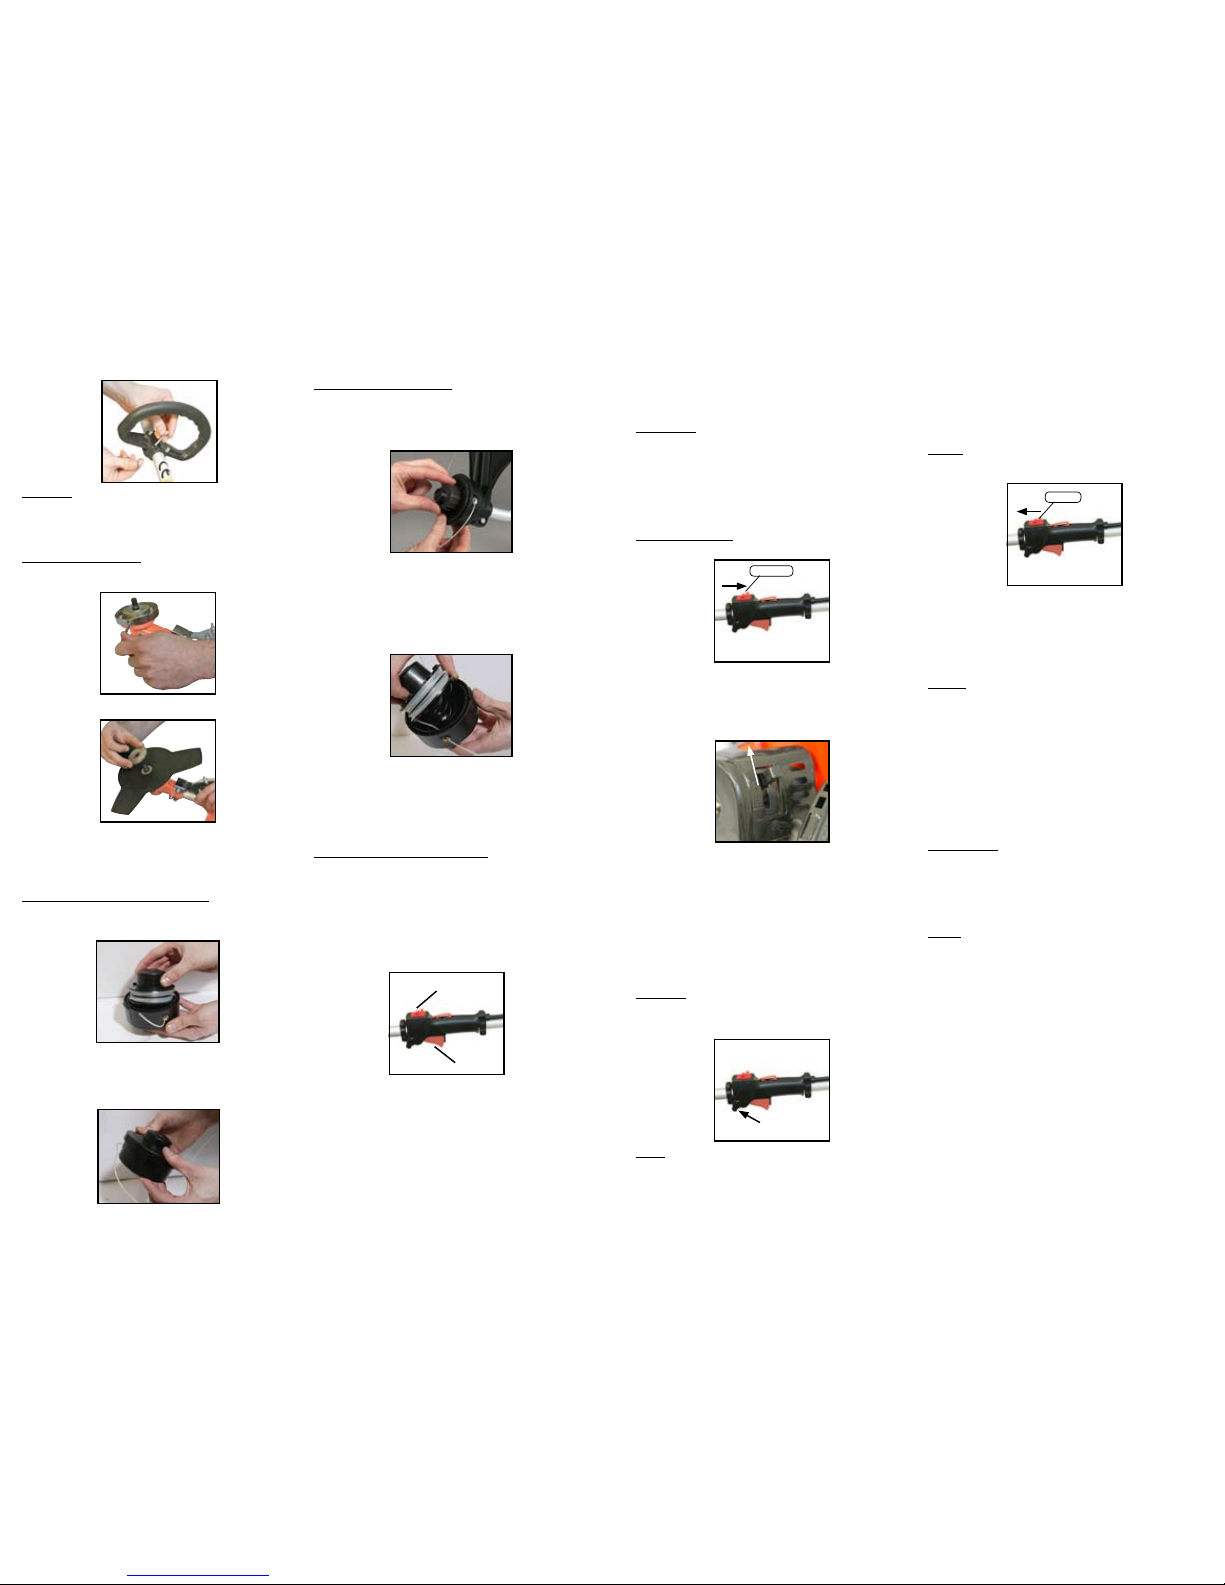
Keep guards in position
• Always keep guards in position, in good working order, correctly
adjusted and aligned. Never attempt to use a tool without
any guards supplied with it.
Remove adjusting keys
• Always check to see that keys, adjusting wrenches and
screwdrivers have been removed from the tool prior to
use.
Clean work area
• Accidents occur where work areas are cluttered or dirty. Keep
work areas clear of any un-necessary obstructions at all times.
Avoid working in areas where the floor may be slippery.
Dangerous environment
• Do not use tools in damp or wet conditions, or expose
them to rain. Provide adequate surrounding work space for tools
where there is a risk of explosion or fire from combustible
material, flammable liquids, flammable gasses or dust of an
explosive nature.
Children & pets
• Children and pets should be kept at a safe distance from the
work area AT ALL TIMES. Make sure the workshop is child
proof; lock all tools away where children can’t get access to
them. Remove batteries from all cordless tools.
Use the correct tool
• Do not force or attempt to use a tool for any other
purpose than its intended use.
Wear correct clothing and footwear
• Do not wear loose, highly flammable clothing, neckties, jewellery
or other items which may get caught in moving parts. Wear non-
slip footwear, cover or tie back long hair. Use safety footwear if
necessary.
Protect your head
• Wear safety goggles at all times, every day glasses are not
designed to offer any protection when using this product.
Normal lenses are not impact resistant and could shatter. Use
an approved face or dust mask when operation creates dust.
Hearing protection must be used at all times as the tool noise
level exceeds 80dB (A). Use a hard hat where there is a risk
of falling objects or a possibility of striking you head on level
obstructions.
Protect your self from vibration
• Many hand held power tools create vibration. Vibration can
cause disease. Wearing gloves will help maintain good blood
circulation in the fingers.
Safe working practice
• Always keep both hands on the power tool when using it. Never
over reach. Keep a proper footing at all times to ensure correct
balance.
Accessories
• The use of any accessories other than those mentioned in this
instruction manual is strictly prohibited. The attempt to use other
accessories other than those already supplied with this tool
could be dangerous and will invalidate your warranty.
Never stand on your power tool
• Standing on your tool could cause serious injury if the
tool is accidentally tipped or if the cutting tool is accidentally
contacted. Do not store materials above or near to the tool so
that it is necessary to stand on the tool to reach them.
Switch off before connecting
• Ensure the engine is stopped before connecting any of
the accessories to the main body. If the power tool stops
unexpectedly make sure the engine is not running before
attempting to check the tool.
Check for damaged or missing parts
• Before each use check if any part of the power tool is damaged
or missing, check carefully that it will operate properly and
perform its intended function. Check the alignment of moving
parts for binding. Any guard or other part that is damaged
should be immediately repaired or replaced. Check any other
condition that may affect the safety of the tool. DO NOT USE IF
THE TOOL IS FOUND TO BE DEFECTIVE.
Direction of feed
• Feed work into the blade or cutter against the direction of
rotation of the blade or cutter only.
Running the engine:
• When the tool is new, run the engine at a moderate RPM
• Do not maintain high engine speed until the engine is run in.
• The engine will not be capable of developing maximum power
until the end of the running in period.
• When first using the tool, stop and make sure that all
nuts and screws are securely fastened and tighten them
as necessary.
Servicing:
• It is recommended that you get your tool serviced shortly after
its first use.
• From thereafter, service the product regularly.
• Do not attempt to alter any of the components of this tool. To do
so would not only INVALIDATE YOUR GUARANTEE BUT MAY
ALSO RESULT IN INJURY TO YOURSELF, OTHERS
AROUND YOU OR THE UNIT.
STORAGE
• When you finish working, clean the tool completely,
making sure there is no grass or dirt wrapped in the
cutting tools.
• Be aware not to hit or cut the fuel tank while you put it onto
the ground.
• Do not let the tool fall or it may be damaged.
• Store the tool away from direct sunlight.
• Do not store in a nylon bag as this can encourage the formation
of mould.
Whenever the machine is not in use for an extended period
of time, proceed as follows:
• Empty the fuel tank completely.
• Protect all metal engine parts from corrosion by coating them
with oil.
• Remove the spark plug, put a few drops of oil into the cylinder
and then pull the recoil starter 2 to 3 times in order to distribute
the oil evenly. Replace the spark plug.
Never leave the tool running unattended
• Always wait until the power tool has come to a complete stop
before leaving it.
WARNING: THIS MACHINE CAN CAUSE DEATH OR SERIOUS
INJURY. FOLLOW THE INSTRUCTIONS IN THIS BOOKLET AT
ALL TIMES.
CAUTION: ALWAYS WEAR THE CORRECT PERSONAL
PROTECTIVE EQUIPMENT FOR THIS PRODUCT. MAKE SURE
BEFORE USE THAT ALL PROTECTIVE EQUIPMENT IS IN A
GOOD WORKING ORDER AND FREE OF ANY DEFECTS.
PRIOR TO USE
THIS PRODUCT PRODUCES POISONOUS
EXHAUST FUMES AS SOON AS
THE ENGINE IS RUNNING. THESE
GASES MAY BE COLOURLESS AND
ODOURLESS. TO REDUCE THE RISK
OF SERIOUS OR FATAL INJURY,
NEVER RUN THE MACHINE INDOORS,
OR IN POORLY VENTILATED AREAS.
ENSURE PROPER VENTILATION WHEN
WORKING IN TRENCHES OR OTHER
CONFINED AREAS.

ADDITIONAL SAFETY INSTRUCTIONS FOR BRUSH CUTTER
• Before using this brush cutter, make sure that you are familiar
with all aspects of the tool. Failure to understand all aspects of
this tool, its controls and limitations could result in serious injury
and or death.
• The brush cutter trimmer must NEVER be left
unattended.
• Never use this tool if it is not fully equipped or has been subject
to any modifications.
• Do not use this product when other people or animals are in the
close vicinity of the work area.
• Check all attachments prior to use for excessive wear or
damage. If on inspection the head of the attachment is showing
signs of wear or damage; do not use.
• Check that the machine is free from grass/brush build
up before use.
• When transporting the tool it is vital that the engine is switched
off and all attachments are separated from the main body of the
tool.
• Make sure that when using, the tool is held properly in both
hands at all times.
• Be aware of the cutter head and the direction you are cutting in.
• Never attempt to use this product with the cutting blade working
towards you.
• Be aware of rebounds, kickback and any foreign objects that
may be thrown up when using this product.
• Do not attempt to repair this machine.
• This tool should be stored in a safe dry location. Before putting
the tool into storage ensure that the built up pressure in the fuel
tank is released by slowly opening the fuel cap. To prevent
potential fire hazards this tool should be stored at least 3m away
from any flammable materials.
WARNING: THIS MACHINE CAN CAUSE DEATH OR SERIOUS
INJURY. FOLLOW THE INSTRUCTIONS IN THIS BOOKLET AT
ALL TIMES.
CAUTION: ALWAYS WEAR THE CORRECT PERSONAL
PROTECTIVE EQUIPMENT FOR THIS PRODUCT. MAKE SURE
BEFORE USE THAT ALL PROTECTIVE EQUIPMENT IS IN A
GOOD WORKING ORDER AND FREE OF ANY DEFECTS.
PRIOR TO USE
CAUTION: Before using this machine a check should be performed
on all of the points listed below. It is important to check before
use that the product is in good working order. If any defects are
detected, the brush cutter should not be used.
• Check all screws and fixings.
• Check the main body of the tool. A full inspection of the main
body of the tool is required before every use. Check the fuel
tank and cap are in a good working condition, and that the seal
around the fuel cap is air tight. Check the triggers are intact and
the shaft is free from defects.
• Check the head for wear and tear. If the head is showing signs of
wear and tear the head should not be used.
ASSEMBLY
Assembling drive shaft
• Insert the flexible shaft into the pipe of the drive shaft
and tighten the joint pipe bolt using the hex key provided.
NOTE: Make sure to align the square end of flexible inner shaft with
square hole of drive shaft by slightly rotating drive shaft, so they are
connected firmly.
• Lift the sprung holding pin (Fig.A).
• Insert flexible shaft, ensuring square shaft is inserted into square
hole in clutch case.
• Ensure that holding pin engages with hole in flexible
shaft coupling.
Attaching throttle cable and stop cord
• Put throttle cable and stop cord through cable passage of
shaft grip, then connect each terminal of stop cord with
corresponding engine terminals (Fig.B).
• Pass throttle cable through cable guide.
• Remove air filter cover
• Place throttle cable in carburettor attachment. Ensure that the
end of the throttle cable seats within recess in carburettor
attachment (Fig.C).
• Adjust tension assembly until slack is removed from
throttle cable. Screw lock nut out until tight against cable guide.
• Finally clamp the connected throttle cable and stop cord
together to flexible shaft with two wire clamp bands provided.
• Replace air filter cover (Fig.D).
Fitting the handle
• Remove the handle bracket (Fig.E).
• Position the handle on the shaft and loosely fasten in place
with the handle bracket.
• Adjust the position of the handle to a comfortable working
position and tighten.
Holding pin
Product Familiarisation
32cc Backpack Brush Cutter
1. Harness
2. Fuel tank
3. Flexible shaft
4. On/Off switch
5. Lock off switch
6. Auxiliary handle
7. Drive shaft
8. Cutter cover
9. Cutter assembly
10. Blade/trimmer spool
11. Spark plug
12. Starter re-coil
13. Fuel primer bulb
14. Air filter
15. Choke lever
16. Exhaust cover
1.
3.
5.
4.
2.
7.
9.
10.
8. 6.
11.
15.
12.
14.
16.
13.
SPECIFICATION:
Fuel ratio: 25:1
Motor: Air cooled 2 stroke
Fuel type: Unleaded 2 stroke
Fuel capacity: 1Ltr
Power: 850W
Cutting width: 255mm
Spark plug: BM6A
Max speed: 8500RPM
Max torque: 1.4N/m
No load speed: 1000RPM
Sound pressure: 100dB
Sound power: 110dB
Weighted vibration: 7.5m/s2
Fig.A
Fig.B
Fig.C
Fig.D

OPERATING INSTRUCTIONS
NOTE: Adjust shoulder belt length before starting engine to ensure
a comfortable working position.
Filling with fuel
NOTE: This engine uses a fuel mix of 25 parts of regular gasoline
to 1 part of two stroke oil.
• The fuel should be premixed prior to pouring into the fuel tank.
• It is recommended a quality two cycle oil be used in the fuel mix.
WARNING:Failure to mix oil with gasoline will result in seizure and
severe damage to the engine.
• Be sure to check bolts and other fasteners to see if any of them
have become loose or missing.
Starting the brush cutter
• Move the throttle lever to start position (Fig.M).
WARNING: To ensure the blade does not turn when starting the
machine, check the throttle lever is at a low setting.
• Do not wrap starting rope around your hand.
• Always guide starting rope back into holder to prevent
damage to the starting mechanism.
• Set the choke lever to CLOSE (Fig.N).
• Pull the recoil starter briskly, taking care to keep firm hold
of the machine.
• When you hear the engine fire, move the
choke lever back to the open position.
• Then pull the recoil starter briskly, the engine should start
after 5 or 6 pulls.
• After starting the engine, allow it 2 to 3 minutes to warm up
before subjecting it to any load.
• Lock off switch must be depressed to release throttle trigger.
WARNING: The blade may turn and the flexible shaft may swing
as the engine starts. Do not let the blade touch any object when
engine starts.
Adjustments
• Idle speed can be adjusted by the adjustment screw.
• If the blade keeps turning at idling speed, turn the idle speed
screw counter-clockwise (Fig.O).
Cutting
• The blade turns counter-clockwise, therefore operate the
cutter from right to left for efficient cutting.
• When working on a slope. The blade should follow the contour
of the slope from top to bottom
WARNING: If the cutter should strike against stones or the like, stop
engine and cutter and make sure that the cutter and related parts
have not been damaged.
NOTE: When grass or vine twines round the cutter, stop the engine
and blade and remove grass or vine.
Stopping
• Decrease the engine speed, and depress the stop button
until engine had stopped (Fig.P).
CAUTION: Silencer and engine cover will remain hot for some time
after operating. Allow all parts to cool before handling.
MAINTENANCE
CAUTION: Before performing any maintenance or cleaning
procedures, ensure that engine has stopped, and that all engine
parts have fully cooled.
Cleaning
• Remove spark plug, and clean carbon deposits from spark
plug gap.
(Proper spark plug gap is 0.6mm or 0.023")
• Clean the cylinder exhaust port and silencer.
• Remove any grass or dust that has entered into the cylinder
cover or the fan case cover.
NOTE: If not removed it may cause over heating or fire.
• Inspect carefully for any fuel or oil leaks.
• Check all nuts, bolts, screws etc, making sure they are
tightened and secured as they should be.
• When lubricating flexible shaft, apply grease in the flexible
pipe of the clutch side.
NOTE: It is recommended to apply grease regularly.
Cleaning the filter
• Remove the set screw from air filter cover.
• Remove filter cover.
• Remove filter element.
• Filter can be cleaned with a water/detergent mixture.
• Add a few drops of light oil to the filter element,
and re-assemble.
Storage
• Completely drain the fuel out of the tank and the carburetor.
• The engine should be stored higher then the gear box.
• Clean the unit carefully and keep it from moisture.
CAUTION: Before performing any maintenance or cleaning
procedures, ensure that engine is stopped, and that all engine parts
have fully cooled.
Stop button
Safety cover
• Install the safety cover on the shaft with the safety cover bracket
and the screws provided.
• Tighten the screws after setting the safety cover bracket at the
appropriate position.
Installing/Removing the blade
• When installing or removing a blade, lock cutter holder with lock
handle to tighten or to untighten (Fig.F).
• When installing a steel blade, fit the blade as show below (Fig.G).
NOTE: As the blade fixing bolt is left threaded, turn it
counter-clockwise.
WARNING: Always wear protection when performing this task.
Always ensure that engine is stopped completely before removing
the blade.
Fitting the cutting line and spool assembly:
• Ensure that the cutting lines are correctly threaded through the
holes in the spool cover.
• Push the spool and line assembly onto the spindle (Fig.H).
• Make sure that the hexagonal recess on the spool is fully
located on the hexagonal section on the spindle.
• Secure the spool and line assembly by screwing the bump knob
onto the end of the spindle (Fig.I).
• Tighten the bump knob using the spanner provided.
Replacement of the cutting line:
• Stop the engine
• Put the tool on the floor in a way that the cutting line and spool
assembly are facing up.
• Open the cutting line and spool assembly by using the spool
removal spanner, twisting the bump knob anti-clockwise.
• Pull the bump knob out of the spool head and remove the
remaining cutting line (Fig.J).
• Cut the new line, Ø2mm and 6 meters long on two equal
lengths. Make a loop folded at each end of the two nylon
threads (already cut) and insert into one of the slots provided in
the center of the spool and wrap the line firmly clockwise.
• Introduce each end of the line to the eyelets in the spool holder (Fig.K).
The line should stick out 150mm each side.
• Screw the bump knob back on the shaft firmly.
CAUTION: After changing the line spool, run the tool under no load
for at least a minute to make sure that the line and the tool are both
operating correctly.
WARNING! NEVER use steel threads and/or three teeth other
than that provided by the manufacturer. Always use tools in perfect
condition, free of damage.
Installation of throttle lever and stop switch
• The throttle lever and stop switch are temporarily assembled
together, so they should be dissembled first.
• As you dis-assemble the throttle lever assembly, familiarise
yourself with the arrangement of its components.
• Put the round head of the throttle cable and throttle cable
together into the handle channel.
• Locate round head of throttle cable in corresponding hole in
throttle trigger.
• Re-assemble throttle handle and stop switch, ensuring all screws
and parts are secure (Fig.L).
Start position
Idle
adjustment
Fig.F
Fig.G
Fig.H
Fig.I
Fig.J
Stop switch
Throttle
trigger Fig.L
Fig.M
Fig.N
Fig.O
Fig.P
Fig.K
Fig.E

TROUBLE SHOOTING GUIDE
PROBLEM POSSIBLE
CAUSE
REMEDY
Power loss or
sudden stopping
of the engine.
Is there fuel in the
tank?
Refill the fuel tank
Two-stroke mixture not
reaching the engine?
Clean fuel filter.
Is there water in the
fuel?
Drain and rinse the fuel
system.
Is the air filter dirty? Clean air filter.
Carbon deposits in the
cylinder exhaust pipe
or muffler
Clean the pipe and/or
change the muffler.
There is no spark from
the spark plug
Check and or replace
the spark plug
The spark plug gap
is wrong
Adjust the spark
plug gap
Bad quality cut. Overloaded cutting,
grass too high or too
thick for engine to cut.
Work on small areas.
Organic material
wrapped around the
cutting tool.
Clear the organic
material from the
cutting tool.
Table of contents
Other Silverline Brush Cutter manuals
Popular Brush Cutter manuals by other brands

GARDENJACK
GARDENJACK GBC26C Original instructions

Zenoah
Zenoah Zenoah BCZ3200DL owner's manual

Bosch
Bosch AHS 52 LI Original instructions

Billy Goat
Billy Goat BC2403 Series owner's manual

Portek
Portek Rufcut Operator's handbook

Hyundai power products
Hyundai power products HDBDN40V-A Original instructions

Lawn-King
Lawn-King LK PBT3043 AUTO Translation of the original instructions for use

TrimmerPlus
TrimmerPlus BC720 Operator's manual

Woody
Woody 5' lateral Brushcutter Operator and maintenance manual

Masport
Masport BCL330 owner's manual

Vari
Vari BDR-620D user guide

Briggs & Stratton
Briggs & Stratton NAX 700B manual