SimPal G4 User manual

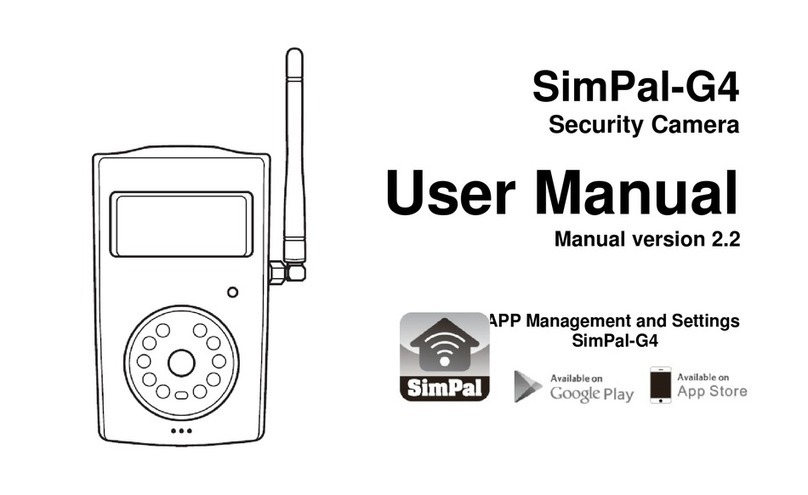
SimPal-G4
3G/WIFI Security Camera
User Manual
Manual version 1.5
PP Management and Settings
SimPal-G4

SimPal-G4 3G Security Camera User Manual
SimPal-G4 3G/WIFI security Camera
Thank you for purchasing the SimPal camera. This camera is a remote controlled
image-capturing de ice consisting of a microphone, LED lights and a high quality 5
megal-pixel camera lens. The SimPal camera can capture images according to a pre-
programmed remote command and then send it to your multimedia messaging (MMS)
or e-mail ia cellular network. You can control and change the camera settings ia
SMS command.
MMS images sent from the SimPal camera can be iewed on your mobile phone. You
also can check the e-mail images in your mobile phone e-mail App.
The built-in high-light LED allows the camera to capture clear images e en in dark
en ironment.
SimPal camera worked with encrypted 433MHz wireless sensors such as PIR-, door
magnet sensors. As soon as the wireless sensor triggers the camera alarm, you or
your families and/or your guards can thus recei e the alarm message ia SMS, MMS,
Email or standard calls, according to the pre-programmed. If you choose to purchase
the optional accessory -- an wireless siren, the SimPal camera can trigger the wireless
siren to emit loud oice when it alarms.
Howe er, the camera can perform its duty well without any wireless sensor too. The
Camera has an integrated infrared body detector. It will therefore detect any
unauthorized entry into your house and notify you ia SMS, MMS, standard calls or E-
mail.
All ser ices and functions need to be supported by the GSM / WCDMA network and a
SIM card. WIFI function only working after install SIM card and set up WIFI account by
SMS command.
This brochure suits for SimPal-G4 model.
Details of the functioning and ad anced operation of this camera are described in this
instruction manual.
2www.microdata.fi [email protected] 09 - 42474920

SimPal-G4 3G Security Camera User Manual
CONTENTS
For your safety..............................................................................................................................................5
Exception clause...........................................................................................................................................5
C apter 1 Structure instruction.............................................................................................................................6
1.1 Package contents.....................................................................................................................................6
1.2 Products instructions...............................................................................................................................6
1.4 Lig t indicator and Beeper.....................................................................................................................7
C apter 2 Installation............................................................................................................................................9
2.1 T e antenna, temp sensor, SIM card and power adapter........................................................................9
2.2 T e power adapter and battery.............................................................................................................10
2.3 Install mounting bracket.......................................................................................................................11
2.4 Mounting t e camera............................................................................................................................11
2.5 Power on/ off........................................................................................................................................12
C apter 3 Define t e user and basic settings......................................................................................................12
3.1 User aut orization level........................................................................................................................12
3.2 Setup master number............................................................................................................................13
3.2.1 Register camera.........................................................................................................................13
3.2.2 C ange Master number..............................................................................................................13
3.2.3 C ange password.......................................................................................................................13
3.3 Define User number..............................................................................................................................14
3.3.1 Add User number.......................................................................................................................14
3.3.2 Delete User number...................................................................................................................14
3.4 Network parameter settings..................................................................................................................14
3.4.1 MMS parameters setting...........................................................................................................14
3.4.2 Cellular data parameters setting................................................................................................15
3.4.3 Set-up WIFI network.................................................................................................................16
3.4.4 Set-up e-mail..............................................................................................................................16
3.4.5 Configure outbound e-mail.......................................................................................................16
3.4.6 Configure receiving email address ...........................................................................................17
C apter 4 Operations and settings......................................................................................................................17
4.1 Call t e camera to listen in...................................................................................................................17
4.2 Capture images.....................................................................................................................................17
4.2.1 Capture images to mobile p one...............................................................................................18
4.2.2 Capture images to user’s E-mail address..................................................................................18
4.2.3 Sc edule send images................................................................................................................18
4.3 Arming or disarming SimPal camera...................................................................................................19
4.3.1 Arming SimPal camera..............................................................................................................19
4.3.2 Camera alarm.............................................................................................................................19
4.3.3 Disarming SimPal camera.........................................................................................................19
4.3.4 Sc edule arming t e camera......................................................................................................20
4.5 Remote control .....................................................................................................................................20
4.5.1 Pair remote control....................................................................................................................20
4.5.2 Remote control instruction........................................................................................................20
4.5.3 Un-pair remote control..............................................................................................................21
4.6 PIR motion detection............................................................................................................................21
4.7 Wireless sensor accessories..................................................................................................................21
4.7.1 Pair wireless sensor...................................................................................................................21
4.7.2 C eck sensor status....................................................................................................................22
4.7.3 Removing sensor.......................................................................................................................22
4.7.4 Temperature sensor....................................................................................................................22
4.8 Image resolution...................................................................................................................................22
4.9 Image quantity......................................................................................................................................22
4.10 Beeper alert.........................................................................................................................................23
4.11 SMS alert............................................................................................................................................23
4.12 Images alert.........................................................................................................................................23
3www.microdata.fi [email protected] 09 - 42474920

SimPal-G4 3G Security Camera User Manual
4.13 Voice call alert....................................................................................................................................23
4.14 SMS alert to User...............................................................................................................................23
4.15 Images alert to Users..........................................................................................................................23
4.16 LED status indicator...........................................................................................................................24
4.17 Nig t vision LED lig ts......................................................................................................................24
4.18 Mains power failure alert....................................................................................................................24
4.19 Unknown SMS forward......................................................................................................................24
4.20 C eck status........................................................................................................................................24
4.21 Reboot t e camera..............................................................................................................................25
4.22 Reset to factory settings......................................................................................................................25
C apter 5 General troubles ooting.....................................................................................................................25
C apter 6 Main tec nical parameters.................................................................................................................26
Appendix: SMS commands list..........................................................................................................................27
4www.microdata.fi [email protected] 09 - 42474920

SimPal-G4 3G Security Camera User Manual
1. Purchase a 3G SIM card (mobile phone card) from network service
operator and install it in the camera. This SIM card number is referred
as SimPal camera number on this brochure.
2. The user needs to activate the MMS, Cellular data functions and Caller
ID Presentation function of SIM card, and deactivate PIN code of the
SIM. Contact with GSM network service for support.
3. Change the original password at the beginning use. Be sure to keep
the password and SIM card number secret. Do not disclose this
information to anyone other than the authorized users in order to
ensure your safety.
For your safety
This product is a wireless signal transmission de ice. Keep it away from
electronic equipment likely to interfere with the wireless signals, in order to
a oid signals interference.
Switch off your SimPal camera and mobile phone when entering areas marked
"Explosi e", "Might explode", "Closed wireless transcei er de ices" etc.
Do not cast this product in a fire, as this may cause the battery to explode.
This product should only be operated from power appro ed by the product
manufacturer. The use of any other types of power may damage the product.
Keep the product and its accessories out of the children reach.
Exception clause
We operate on a policy of continuous de elopment. We reser e the right to
make changes and impro ements to any of the products described in this
document without prior notice.
For the latest product information, please isit: http://www.simpal.cn. We don’t
guarantee for the document eracity, reliability or any content except regulate
in proper laws. Including no guarantee for product suitable market or suitable
area promise.
Use only this product according to the law. Respect one another’s pri acy.
Neither monitor another’s home nor pri ate. We hold no responsibility for the
illegal use of this product.
We hold no responsibility for any loss of data or income; or any special,
incidental, consequential or indirect damages howsoe er caused.
The contents of this document are pro ided “as is”. Except as required by
applicable law, no warranties of any kind, either expressed or implied,
including, but not limited to the accuracy, reliability or contents of this
document. We reser e the right to re ise this document or withdraw it at any
time without prior notice.
5www.microdata.fi [email protected] 09 - 42474920

SimPal-G4 3G Security Camera User Manual
Chapter 1 Structure instruction
1.1 Package contents
1. Remote camera 1 unit
2. Power adapter(12V/1A) 1 pcs
3. GSM antenna 1 pcs
4. Temperature sensor 1 pcs
5. User manual 1 pcs
6. Mounting bracket 1 set
7. Remote control and wireless sensor Optional
1.2 Products instructions
6www.microdata.fi [email protected] 09 - 42474920

SimPal-G4 3G Security Camera User Manual
Figure 1: SimPal camera instructions
Tip: Keep the camera lens clean to insure best imaging quality.
1.4 Light indicator and Beeper
Color ction Status
Red
Flash slowly Searching the network.
Flash quickly Sensor alarm, infrared body detector alarm.
Constant Light Not installed SIM card, or the remote camera
damaged.
Green Constant Light Armed status.
7www.microdata.fi [email protected] 09 - 42474920

SimPal-G4 3G Security Camera User Manual
Flash twice per
2 seconds Alarm-suspension status
Flash slowly Disarm status.
Flash quickly Processing SMS or sending images
Light 2 seconds Successfully reset factory setting
Red and
Green
Two color lights
alternately Loading sensor or Pairing remote control
Note: Slow flash 1 time per second, quick flash 2 times per second.
Beeper Status
Long beep (2
seconds) Register GSM network
Short beep
Enter sensor loading mode
Enter remote control pairing mode
Sensor pair success
Remote control pair success
Arm by remote control
Short beep
twice Disarm by remote control
Short beep
three times
Sensor already paired
Remote control already pared
Sensor reach max quantity 16pcs
Remote control reach max quantity 2pcs
Short beep last
1 minutes Camera alarm and turn on beep functions
8www.microdata.fi [email protected] 09 - 42474920

SimPal-G4 3G Security Camera User Manual
Chapter 2 Installation
2.1 The antenna, temp sensor, SIM card and power adapter
Installing the antenna
Mount the supplied antenna into the Antenna Connector on the camera.
Installing the SIM card
Remo e the Battery Compartment Co er from the rare of SimPal camera and a
SIM card holder will be found.
Open the SIM card holder.
Insert the SIM card carefully into the card holder. Make sure that the golden
connectors on the card are facing downwards.
9www.microdata.fi [email protected] 09 - 42474920

SimPal-G4 3G Security Camera User Manual
Close the SIM card holder.
Get back the Battery Compartment Co er of SimPal camera.
2.2 The power adapter and battery
Connecting to the power adapter
Connect the plug to the power interface of the SimPal camera and then connect
the adapter to an AC power.
The built-in rechargeable Lithium battery
The camera will notify the user when the power changes. For example, if the
power adapter is disconnected or failure of the AC power occurs, SimPal
camera will notify the user “External power cut. The de ice is operating on
battery.”
If SimPal camera is again connected to the external power, or the AC power is
10 www.microdata.fi [email protected] 09 - 42474920

SimPal-G4 3G Security Camera User Manual
a ailable again, the notification will be sent to the user, i.e.” The de ice is now
resuming the use of external power source.”
Low battery: The configure setting can not be sa ed when SimPal camera is
operating on low battery.
2.3 Install mounting bracket
The camera has a bottom bracket by which it can stand on the table.
2.4 Mounting the camera
SimPal camera can be mounted on a wall ( ertically with the screws) or put down on
any suitable horizontal surface.
How to choose the Installing place:
In order to capture better image quality, a oid any areas where bright light will
be irradiated directly into the lens of the camera on the camera.
In order to a oid backlighting photography, it is suggested that the camera is
located at the place where can look down the monitoring place with the
minimum angel 30°.
The GSM network’s signal strength may affect the image, li e oice quality
and images transmission speed. Therefore, upon installation, the user should
ensure that SimPal camera is located in an area with a strong network signal.
After installation, the user should perform a test-run by taking se eral images
and sending it to the user’s mobile phone. This allows the user to check the
image quality of the camera. The position of SimPal camera can then be
adjusted until a satisfactory image quality le el is reached.
11 www.microdata.fi [email protected] 09 - 42474920

SimPal-G4 3G Security Camera User Manual
2.5 Power on/ off
Power on:
Operation Indicator light Status
Turn the power
switch to “On”
position.
Red light on 1 seconds, then off
20 seconds..
Red light flashing slowly for
about 5 seconds.
A “Beep…” tone will be heard.
Green light flash slowly, or
green light be on constantly.
SimPal camera is
disarmed, or armed.
Power off:
Turn the power switch to downside “Off” position.
Chapter 3 Define the user and basic settings
3.1 User authorization level
There are two le els, each with a different authorization le el, namely Master,
Families.
Table 3.1 the difference in authority for Master, Families users:
User Type
Functions Master Families
Change authority, password YES NO
Alarm
Recei e SMS YES YES
Recei e MMS YES YES
Recei e alarm calling YES YES
Get images by E-mail YES YES
Recei e emergency calling YES YES
Call the camera to listen in li e oice YES YES
Get images by sending SMS command YES YES
Get images by E-mail YES YES
Set remote camera by SMS command YES NO
Add, modify or delete sensor YES NO
Note
Any MMS enabled mobile phone can recei e the images captured by SimPal
camera by sending SMS command with password.
12 www.microdata.fi [email protected] 09 - 42474920

SimPal-G4 3G Security Camera User Manual
Any SMS enabled mobile phone can control SimPal camera with the password
command.
All the settings of SimPal camera can be set or adjusted ia a SMS command.
bout the SMS Command:
9.1)SMS command format: #code#content#.
9.2)The password must be a four-digit number.
9.3)The original password is 1234.
9.4)The maximum digits that are allows for the phone number is sixteen.
9.5)SimPal camera will reply to the user after it recei es the SMS command.
Note
The “#” symbol must not be ignored when typing an SMS command.
No allow any space within the commands.
3.2 Setup master number
Master user has all the rights of changing camera settings and recei es alarm
messages from camera. In order to enable all the functions on the camera, the Master
user must store his/ her mobile number in the camera’s memory. Only one Master’s
mobile number (Master number) is allowed for a camera.
3.2.1 Register camera
SimPal camera is being used for the first time, or SimPal camera has been reset, the
master number need to be programmed into the camera, in order to ensure acti ation.
The following methods can be used:
Master send following SMS (text message) to camera from your mobile phone (the
phone number will be the Master number) to:
Setup master number: #00# (1)
If the camera reply master number already exists, please refer the Reset Factory
Setting parts to delete old master number.
3.2.2 Change Master number
Master user sends following SMS message in order to:
Change Master number: #14# NewMasterNumber # (2)
3.2.3 Change password
In order to ensure your pri acy and safety during the use of this camera, change the
password once start to use SimPal camera.
Master user sends following SMS message to:
Change the password: #18# oldpassword # newpassword # (3)
The password is a four digit number.
13 www.microdata.fi [email protected] 09 - 42474920

SimPal-G4 3G Security Camera User Manual
The original password is 1234.
3.3 Define User number
User number has the authority to listen in on the camera, capture images, and
recei e notification when the integrated infrared body detector be triggered. User’s
mobile number and emails are set by the Master number. The User should remember
and safeguard the camera’s SIM number.
3.3.1 dd User number
Master user sends following SMS message in order to:
dd User number: #07# User-mobile-number # (4)
Up to 4 user numbers can be stored on one camera.
dd User email address: #07# User-e-mail # (5)
Up to 4 user email email can be stored on one camera.
3.3.2 Delete User number
Master user sends following SMS message in order to:
Delete user number: #27# user-mobile-number # (6)
Delete user e-mail: #27# user- e-mail #
Delete all user numbers and Emails: #27# (7)
3.4 Network parameter settings
3.4.1 MMS parameters setting
Camera already preset most operator MMS settings on the firmware. Users needn’t to
setup the MMS parameters. But if the GSM operator changes the MMS parameters or
the local MMS settings do not preset on the firmware, users will recei e SMS when
they request MMS images: Sorry, the network is busy, MMS sending failed. Master
number can setup the MMS parameters manually by following two methods.
Method 1:
User sends following SMS to:
Auto select MMS setting from firmware: #54# (8)
Manual select MMS settings from firmware: #54#Network code# (9)
Network code is the MCC+MNC of this operator, such as 46001. If do not included
network code in this command, only send #54#, it will auto configure the setting
according SIM card MCC+MNC.
Method 2:
14 www.microdata.fi [email protected] 09 - 42474920

SimPal-G4 3G Security Camera User Manual
Six MMS parameters be requested on the camera. Master send following SMS
commands to camera.
Configure MMS parameter settings:
#25#MMSC# Proxy IP # ProxyPort #Proxy Port2 # APN # Username # Pssaword #type# (10)
The command included parameters:
MMSC means MMS center, for example: http://mmsc.
Proxy IP: The IP address for MMS, For example: 139.7.29.17
Proxy Port: for example:9201 or 80
Proxy Port2: for example: 80 or 8080
APN
User Name
Password
Type: name is this setting, normally the type is “mms”
If the User name and Password is empty, only lea e blank and separate with #.
Get the current operative network parameter settings: #25# (11)
3.4.2 Cellular data parameters setting
Camera already preset most operator cellular data settings in firmware, but if can not
connect the network, user can set up the GPRS parameters manually.
Method 1:
Manual select from another list of firmware, Master send following SMS to
Manual select Cellular data settings: #54# (8)
Method 2:
SMS command configure Cellular data (GPRS) parameter settings:
#24#APN#Username#Password#MCC#MNC# proxy#port#type# (12)
For example: #24#li e. odafone.com###505#03##80#default#
If the User name and Password is empty, only lea e blank and separate with #.
Normally the type is “default”.
Check cellular data settings #24# (13)
15 www.microdata.fi [email protected] 09 - 42474920

SimPal-G4 3G Security Camera User Manual
3.4.3 Set-up WIFI network
T e Camera support sending alarm images email via WIFI network, Camera will auto switc from WIFI and
Cellular data, It will priority use WIFI sending email, w en WIFI lost, will auto use Cellular data to send
images email.
Turn ON WIFI network: #38#1# (14)
After turn ON WIFI network, it need to wait 10-20 seconds before setting SSID and password. Camera will
searc ing nearby WIFI network.
Setting WIFI SSID and Password: #38#SSID#Password# (15)
T e SSID is name of WIFI network. Bot SSID and Password are case sensitivity, only input correct WIFI
name and password can success connect t e WIFI.
C eck WIFI status: #38# (16)
Camera will reply current WIFI status, WIFI – OFF means WIFI function turn OFF
WIFI – Disconnnect means WIFI function is ON, but do not connect to any WIFI success.
“Name” WIFI – CONNECTED means already success connected to WIFI “Name” network.
Turn OFF WIFI function: #38#0# (17)
3.4.4 Set-up e-mail
SimPal camera support SMTP protocol sending images e-mail, need to set-up
outbound email account and receipt email account. Images e-mail sender will be
outbound email; recei er will be receipt e-mail. Suggest to set both outbound and
receipt same e-mail address, it will lower chance of e-mail delay.
3.4.5 Configure outbound e-mail
#26#e-mail#password#SMTP#SMTP port#Type#tls# (18)
E-mail: The email address is use to sending e-mail,
Password: This is the password to log in email account, need to fill with letter or
number.
SMTP: Simple Mail Transfer Protocol. Request activate e-mail SMPT service by
log-in web and check e-mail settings.
SMTP port: the port for SMTP.
Type: setting email SMTP or SMTPS protocol. 0 means SMTP, 1 means SMTPS.
Tls: this is encryption of hotmail and outlook, only hotmail or outlook need to acti ated
this function. 0 means deacti ated TLS, 1 means acti ated TLS.
Some e-mail setting as following:
Gmail: the SMTP port is 465, and need to select SMTPS, deacti ated TLS.
#26#[email protected]# PASSWORD#smtp.gmail.com#465#1#0#
16 www.microdata.fi [email protected] 09 - 42474920

SimPal-G4 3G Security Camera User Manual
Outlook, Hotmail: the SMTP port is 587, and select SMTP, acti ated TLS.
#26#[email protected]#PASSWORD#smtp.li e.com#587#0#1#
Company email: It need to switch the SMTP ser er to IP address, and select SMTP,
deacti ated TLS.
#26#[email protected]#PASSWORD#218.85.138.181#25#0#0#
It will send one confirm email after configure the sending email successfully.
Two public testing e-mail accounts can be set for your camera, setting command as
following:
Testing e-mail 1:
#26#[email protected]#simpal509#smtp.qq.com#465#1#0#
Testing e-mail 2:
#26#[email protected]#509alarmcam#smtp.qq.com#465#1#0#
Check email SMTP parameters: #26# (19)
It will reply current email settings by sending this command.
3.4.6 Configure receiving email address
Master sending following SMS to set email address which use to recei e alarm from
camera. Only allow to set one email for master number.
Configure receiving email address: #09#email# (20)
Delete email address: #09# (21)
Chapter 4 Operations and settings
4.1 Call the camera to listen in
Master or Users calls SimPal camera number, it will answer calling automatically.
Then you can listen in the li e audio of the monitoring area. Only one line can be
connected to SimPal camera at a time.
4.2 Capture images
uthority:
Master/ User send SMS to the camera to get the image and send by MMS or email.
17 www.microdata.fi [email protected] 09 - 42474920

SimPal-G4 3G Security Camera User Manual
4.2.1 Capture images to mobile phone
Method :
The user sends following SMS message in order to:
Capture image and send to the user mobile by MMS:
For Master and Users: #03# (22)
Capture one image and send to other user number:
For Master: #03#Phone- Number # (23)
4.2.2 Capture images to user’s E-mail address
Need to configure email settings before using this function. The camera will sending
images email ia Cellular data. It will charge cellular data cost by network operator.
Capture image and send to user email: #05# (24)
Capture image and send to other email address #05#email# (25)
4.2.3 Schedule send images
Master sends following SMS message in order to:
Set schedule to auto-send images parameters:
#43#Mode# WorkDay # StartTime # EndTime # IntervelTime #. (26)
Mode: the parameter is 0 and 1, 0 means sending images to email, 1
means sending images by MMS.
WorkDay: one digit, the alues lie in the range of “0” to “9”.
The following table contains the descriptions of each alue:
Value Corresponding day
0 E eryday
1 Monday
2 Tuesday
3 Wednesday
4 Thursday
5 Friday
6 Saturday
7 Sunday
8 Monday to Friday
9 Weekend
StartTime and EndTime: Be consists of 4 digits (hh:mm) and works on a 24
hour clock. For example: 0000 means time 00:00(hh:mm), 2359 means time
23:59(hh:mm). the EndTime can be earlier than StartTime, it will set as end of
18 www.microdata.fi [email protected] 09 - 42474920

SimPal-G4 3G Security Camera User Manual
next day.
IntervalTime: This consists of 2 or 3 digits and has alues in the range of “5” to
“480” minutes.
For example: #43#0# 0 # 2100 #0800#10# The camera will reply SMS following:
Schedule capture images function: OFF
Recei e mode: Email
E eryday
Time: 21:00-08:00
Inter al: 10 minutes.
ctivate schedule send images: #06#1# (27)
Master sending this command to acti ate Schedule sending images functions.
Deactivate schedule send images: #06#0# (28)
4.3 rming or disarming SimPal camera
4.3.1 rming SimPal camera
When user arm the SimPal camera, the built-in infrared body detector (PIR) will
start working and detecting body heat. SimPal camera will automatically send
alarm message or making a phone call once it be triggered.
SimPal camera has 30 seconds alarm-suspension period after it be armed. The
user can lea e the camera place during this time to a oid misalarm.
Method 1:
The user sends following SMS message in order to:
rming SimPal camera manually: #01# (29)
Method 2:
Master or User number calling the camera number, hand up before it answer the
calling. By this method, camera will switch from Arm and Disarm mode.
4.3.2 Camera alarm
Once the camera be triggered, the LED will flash fast in green, then turn red and flash
fast. It will sending alarm SMS, MMS, Email or make oice calling according to the
setting. After it finish alarm process, camera will enter 30 seconds alarm-suspension
period and then it can alarm again.
4.3.3 Disarming SimPal camera
SimPal camera in disarm mode, all loaded Normal wireless sensor, built-in infrared
body detector will not working. 24 Hours sensor and remote control still working in
disarm mode.
Method 1:
The user sends following SMS message in order to:
Disarming SimPal camera manually: #02# (30)
19 www.microdata.fi [email protected] 09 - 42474920

SimPal-G4 3G Security Camera User Manual
Method 2:
Calling the camera, hand up before it answer the calling. It will send SMS to notify
camera Disarm.
4.3.4 Schedule arming the camera
Master sends following SMS message in order to:
Enable schedule arms the camera: #04#1# (31)
Set time period to arm the camera:
#41# WorkDay # StartTime #End Time # (32)
Disable schedule arm the camera: #04#0# (33)
WorkDay: The alue description is same with command 21.
StartTime and EndTime: Be consists of 4 digits (hh:mm) and works on a 24
hour clock. For example: 0000 means time 00:00(hh:mm), 2359 means time
23:59(hh:mm). the EndTime can be earlier than StartTime, it will set as end of
next day.
4.5 Remote control
4.5.1 Pair remote control
User can buy Remote control separately and use with SimPal camera, remote control
to arm, disarm or make emergency alarm by pressing remote control buttons, user
should pair remote control before use. A camera can pair up to 5 remote controls.
Camera indicator Operations Status
Green, flashing or
constantly light.
1. Press and hold the Reset
key for 2 seconds
Indicator light turns to orange
(Learning mode)
Orange, flashing
2. Press any button on the
remote control (with battery
inside) to send a signal to
SimPal.
SimPal will emit a “Beep” tone
and indicator will turn green for
2S. (Added successfully.)
Orange, flashing 3. Repeat step2 to load
another new remote control.
Orange, flashing
4. Press the Reset key to
exit the learning mode or
waiting for 15 seconds to
auto-exit.
Indicator light turns green,
flashing or constantly light. (Exit
learning mode)
4.5.2 Remote control instruction
There are three buttons on the remote control:
. rm SimPal camera :When is pressed, the indicator light on SimPal
camera will turn green. This indicates that SimPal camera is in armed mode.
B. Disarm SimPal camera :When is pressed, the indicator light on SimPal
camera will slowly flash green. This indicates that SimPal camera is in disarmed mode.
20 www.microdata.fi [email protected] 09 - 42474920
Other manuals for G4
3
Table of contents
Other SimPal Security Camera manuals
