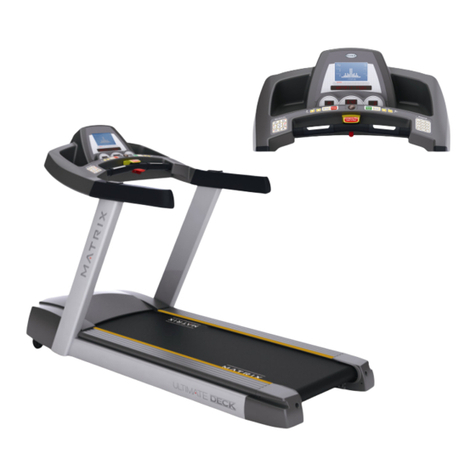
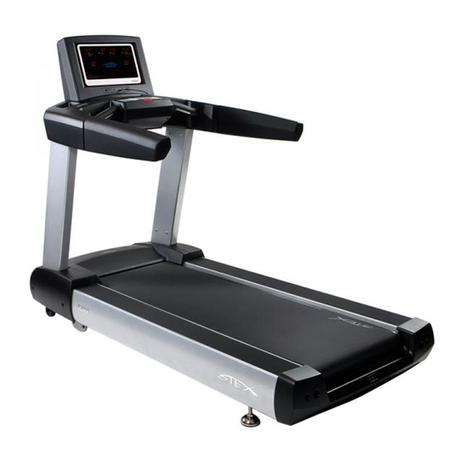
Simply Brands B Series User manual

1
B SERIES TREADMILL
USER MANUAL
Please read this manual carefully before using
the product and keep it.
Importer Name:
Simply Brands (Asia) Ltd.
Importer Address:
Unit 04-05, 16th Floor, The Broadway No. 54-62
Lockhart Road, Wanchai, Hong Kong.
www.simply-brands.com
Treadmill Manual_Updated.indd 1Treadmill Manual_Updated.indd 1 23/03/2021 09:1423/03/2021 09:14

2
Thanks for choosing this home electric treadmill, our products
will improve your health, the more familiar you are with your
treadmill, you will find it easy to use, so please read carefully
this user manual, before using the new treadmill.
All parts of the machine are made of high-quality materials
and have passed series inspection and testing to ensure
maximum product quality. Refer to this manual will guide
you assemble, use and maintain this treadmill.
Thank you for using!
1. Catalogue:
SECTIONS CONTENT
1 Catalogue
2 Safety Instructions
3 Package Specifications
4 Assembly Specifications
5 Electric Control Instructions
6 Maintenance Instructions
7 Failures & Trouble Shooting
8 Warranty Terms
9 Exercise Guidelines
10 Warm Exercise
Treadmill Manual_Updated.indd 2Treadmill Manual_Updated.indd 2 23/03/2021 09:1423/03/2021 09:14

3
We considered many safety problems when design and
manufacture this treadmill, to ensure your safety, please read
all contents of this manual carefully before use. We do not
bear the consequences of any abnormal operation.
RISK
Do not use the heart rate device together with other wireless
heart rate devices, or it can cause electrical interference.
WARNING
Please follow the instructions below to avoid any hurts to you or others.
1. Before using the treadmill, please make sure that the treadmill
is fully grounded to avoid accidents and dangers.
2. When running, please clamp the safety lock (red) clip in the
proper position of the clothes to facilitate the emergency to pull
off the safety lock and stop the machine to ensure safety.
3. a. Before the fitness exercise, please consult your health care doctor.
b. Please wear appropriate sportswear for exercise (do not wear soft-
soled shoes for running, otherwise the shoe scraps will be caught in
the motor and control system, causing the machine to malfunction.
c. Keep the room clean and tidy: avoid the dirty being absorbed into
the treadmill, which will cause operating malfunction.
d. The user’s weight should not exceed 100kg.
4. This product is for one person only when it is running. Do
not let children or pets play around to avoid accidents.
5. The minimum spacing required to be placed in the home
after the machine is unfolded (in the distance from the
wall and furniture), the front and the sides are not less
than 100CM, and the rear is not less than 200CM.
6. Do not use the unit if the power cord is damaged.
7. If the treadmill is damaged or broken, do not use the
unit and contact your local dealer for repair.
8. Do not touch any part of the movement with your hands.
Do not press or insert any objects into the unit.
2. Safety Instructions:
Treadmill Manual_Updated.indd 3Treadmill Manual_Updated.indd 3 23/03/2021 09:1423/03/2021 09:14

4
2. Safety Instructions:
3. Package Specifications:
9. This machine is suitable for indoor use and should
not be used outdoors or in the gym.
10. Place the treadmill on a clean, level surface and keep it
in good ventilation. Make sure there are no sharp objects
nearby. Do not use it near water and fire sources.
11. Please use the handrail when going on and getting off from the
machine, when the walking machine is not completely stopped,
do not get off the machine. If you need an emergency jump, you
must unplug the safety lock: the treadmill will stop immediately.
12. Do not operate the treadmill while you using oxygen
equipment or using the spray near it.
13. In order to maintain the normal operation of this unit,
do not install any accessories that are not provided
by the original manufacturer on this unit.
14. All parts of the machine must be kept firm.
15. Please turn off the power and unplug the
plug after using the treadmill.
NUMBER SPARE PARTS
1Frame
2 Manual
3 Screw Bag Illustrated on page 4
Treadmill Manual_Updated.indd 4Treadmill Manual_Updated.indd 4 23/03/2021 09:1423/03/2021 09:14

5
Step 1:
Pull up the electronic watch in the direction of the arrow, and fix
it on the column with E # M8 * 15 screws and D # M8 flat pads.
4. Assembly Specifications:
Screw Bag:
Treadmill Manual_Updated.indd 5Treadmill Manual_Updated.indd 5 23/03/2021 09:1423/03/2021 09:14

6
Step 2:
Pull up the column and fix it on the frame with
E # M8 * 15 screws and D # M8 flat pad;
If the treadmill you purchased is a multi-functional
treadmill, please continue the installation in the
following steps:
NUMBER SPARE PARTS
4 Message Helmet
5Screw
6 Gasket
Treadmill Manual_Updated.indd 6Treadmill Manual_Updated.indd 6 23/03/2021 09:1423/03/2021 09:14

7
1. Rotate the massage bracket in the direction of the arrow
shown in the X figure, and then fix the massage bracket on
the column with E # M8 * 15 screws and D # M8 flat pads.
2. Use its flat screws and spring padsto massage 4 #. The head is
fixed on the flat plate on the upper end of the massage stand.
Treadmill Manual_Updated.indd 7Treadmill Manual_Updated.indd 7 23/03/2021 09:1423/03/2021 09:14

8
Window display:
1. “SPEED” window: The current speed value is displayed in
the running state, and the speed display range is 0.8-10KM /
H. During the countdown, “3”, “2”, and “1” are displayed.
2. “TIME” window: Display exercise time, forward counting from
0: 00-99: 59, re-counting when counting to 99: 59; countdown
decreasing from the set time to zero, and when the countdown
reaches 0: 00, the treadmill stops slowly and stops. After
running, stop completely and enter standby mode.
3. “DIS.” Window: Display the movement distance. The forward count will
be from 0.0-99.9, and it will be re-counted after overflow. The reverse
count will be decremented from the set value to zero. When the
countdown reaches 0, the treadmill will stop running at a steady speed
and stop, and then enter the standby state after completely stopping.
4. “CAL.” Window: Display calorie consumption value, when
displaying calorie consumption value, count from 000-990 when
counting forward, and recount after overflow, count down from
set value to 0 when counting backward, when the treadmill
is down smoothly when counting down to 0. Quickly stop the
operation and enter the standby state after completely stopping.
5. “PULSE” heart rate window: A heart rate signal is detected, the heart-
shaped marker flashes, and the pulse value is displayed. When the
treadmill is powered on, there is a heart rate display within 5 seconds
of holding the heartbeat. The initial value is the actual measured hear.
5. Electric Control Instructions:
Treadmill Manual_Updated.indd 8Treadmill Manual_Updated.indd 8 23/03/2021 09:1423/03/2021 09:14

9
“PROG” is the program selection key: In standby mode, press
this key first to select the built-in programs “P01-P02 -...- P12”
in sequence-> Body fat test mode-> Manual mode->- .
“START” is the start key: When the power is on and the safety lock is
engaged, press this key at any time to start the running of the treadmill.
“STOP” is the stop button: during the exercise, you can use
this button to stop the running of the treadmill and reset it to
zero. After stopping, press and hold the stop button to enter
the sleep state. Press any button to wake up the meter.
“+” and “-” are speed plus and minus keys: standby state, used to
adjust the set value. It is used to adjust the speed after start up.
Its adjustment range is 0.1 km / time. Continue to press and hold
for more than 1 second to automatically increase or decrease.
“MODE” is the mode selection key: Press this key to cycle through
“15:00”, “1.0”, “50.0” (“15:00” is the time countdown mode, and “1.0”
is the distance countdown mode, “50.0” is the calorie countdown
mode.) When selecting various modes, you can use the setting
plus and minus keys to set the relevant countdown value after
completion, press the “START” key to start the treadmill.
“6” and “9” are speed keys: 6-9KM / H.
“Previous Song” and “Next Song” Bluetooth music fast switching III.
Quick start (manual mode):
1. Turn on the power switch and properly attach the magnetic
safety lock to the safety lock position under the panel.
2. Press the “START” key, the system enters a 3 second
countdown, the buzzer sounds, and the speed window displays
the countdown. At the end of the 3 second countdown,
the treadmill starts running at a speed of 0.8KM / H.
3. After starting, you can use the “+” and “-” keys to
adjust the speed of the treadmill as needed.
Key functions:
Treadmill Manual_Updated.indd 9Treadmill Manual_Updated.indd 9 23/03/2021 09:1423/03/2021 09:14

10
Operations during exercise:
1. Pressing “-” will decrease the running speed of the treadmill.
2. Pressing the “+” key will increase the running speed of the treadmill.
3. Press the “STOP” button to reduce the running speed to stop running.
Manual mode:
1. In the standby state, directly press the “START” key, the treadmill
starts running at a speed of 0.8KM / H; other windows start counting
from 0, and press the “+” and “-” keys to change the speed.
2. In the standby state, press the “MODE” key to enter the
time countdown mode. The “TIME” window displays
“15:00” and blinks. Press the “+” and “-” keys to set the
exercise time. The setting range is : 5: 00--99: 00.
3. In the time countdown mode, press the “MODE” key to enter
the distance countdown mode. The “DIS” window displays
“1.0” and blinks. Press the “+” and “-” keys to set the movement
distance and distance setting range. It is: 0.5-99.9.
4. In the distance countdown mode, press the “MODE” key to enter
the calorie countdown mode. The “CAL” window displays “50.0” and
blinks. Press the “+” and “-” keys to set the calories. : 10.0—990.
5. Select one of the three countdown modes and press the
“START” key after the setting is completed. The treadmill will
start running after a delay of 3 seconds. Press the “+” and “-”
keys to adjust the speed. The treadmill stops running.
Built-in programs:
1. This system has 12 built-in programs P01-P12. In the standby state,
press the “PROG” key. The program window displays “P01” to select
the program you like, and the “TIME” window flashes; the preset
time is 30: 00, press “+”, “-” Keys to set the required exercise time, and
then press the “START” key to start the built-in program,the built-in
program is divided into 10 segments, each segment of exercise time
= set time / 10. When entering, there are 3 “Bi-Bi- Bi-” prompts in the
system during one period. The speed of the system changes with the
change of the program segment.
Treadmill Manual_Updated.indd 10Treadmill Manual_Updated.indd 10 23/03/2021 09:1423/03/2021 09:14

11
FAT≤19: Underweight
FAT(20-25): Normal weight
FAT(25-29): Over weight
FAT≥30: Obesity
During this period, you can press the “+” and “-” keys to change
the speed, but it will resume when the program enters the next
segment. At this speed, after running a program, the system will
issue 3 beeps of “Bi-Bi- Bi”, the treadmill will stop running at a steady
speed, and it will enter the standby state after stopping completely.
2. Physical Fitness Test (FAT) In the standby state, continuously press the
“Program” key to enter the body mass index (F-1) test, and the window
displays “F-1”.
Press the “Mode” key to select the parameters to be set (F1--Sex, F2-
Age, F3-Height, F4-Weight), and press the “Speed+” and “Speed-1”
keys to set these parameters. After setting, press the “Mode” key to
display F5. Hold the pulse device and enter the physical fitness test to
see if your weight and height are commensurate.
Body mass index (FAT) is a measure of the relationship between a
person’s height and weight. It does not refer to the proportion of the
body. FAT is suitable for any male and female. Together with other
health indicators, it provides a basis for people to adjust weight. The
ideal FAT should be between 20-25, if it is below 19 it means too thin,
if it is between 25 and 29, it is overweight, and if it exceeds 30, it is
considered obese. The parameter ranges are as follows.
(This data is for reference only and cannot be regarded as medical
data.) When exiting the body fat test, press the “Program” key to exit.
Sex Male / Female
Age 10 - 99
Height 100 - 200
Weight 20 - 15
Treadmill Manual_Updated.indd 11Treadmill Manual_Updated.indd 11 23/03/2021 09:1423/03/2021 09:14

12
Energy saving mode:
In the standby mode, no operation machine enters the energy-
saving mode for 10 minutes. At this time, there is no display
on the display. Press any button to exit standby mode.
Program description:
Time set by time segment program / 10 = Run time of each
segment, each program divides exercise time into 10 equal
parts, and each time period has a corresponding speed.
Set time / 10 = run time of each time slot
1 2 3 4 5 6 7 8 9 10
P1 Speed 2 2 5 3 5 6 4 4 3 2
P2 Speed 1 3 5 4 6 6 5 7 6 4
P3 Speed 2 4 6 6 8 8 7 5 3 2
P4 Speed 3 3 5 6 7 7 8 4 3 2
P5 Speed 3 6 6 2 4 5 7 7 3 1
P6 Speed 2 6 5 4 6 8 8 9 5 2
P7 Speed 1 5 4 6 8 7 9 3 2 2
P8 Speed 2 3 6 4 5 9 8 7 5 3
P9 Speed 2 4 6 8 8 9 6 5 3 2
P10 Speed 2 5 3 5 4 6 7 7 4 3
P11 Speed 3 5 7 8 9 9 6 5 3 2
P12 Speed 2 3 5 6 5 6 4 6 5 3
Program
Time
slot
Treadmill Manual_Updated.indd 12Treadmill Manual_Updated.indd 12 23/03/2021 09:1423/03/2021 09:14

13
Display range of each value:
Safety lock function:
In any state, pull off the safety lock can be urgently stopped
treadmill operation, treadmill emergency stop, speed window
shows “E07”, at this time the treadmill in addition to shutdown can’t
do anything else, the safety lock will be re-installed correctly, the
treadmill back into standby state, waiting for input instructions.
Shut down:
The treadmill can be turned off at any time by turning off the
power switch so that it does not damage the treadmill.
Bluetooth Music: Enter the phone settings - Bluetooth -
turn on Bluetooth - search device - Appears EsAudioV2.3
Bluetooth device name click pairing, pairing successfully
returns to music APP to broadcast music.
Setting
Parameter Initial Initial Set The
Initial Value Set Range Show
Range
Time (Minutes:
Seconds) 0:00 15:00 5:00-99:00 0:00-99:59
Slope (Segment) - - - -
Speed (Km/H) 0.8 0.8 0.8-10 0.8-10
Distance (Km) 0.00 1.00 0.5-99.9 0.0-99.9
Heart Rate
(Time/Minute) - - - -
Calories (Kcal) 0.0 50.0 10.0-990 0.0-990
If you purchased a treadmill with Bluetooth music, please
follow the following method after powering on:
Treadmill Manual_Updated.indd 13Treadmill Manual_Updated.indd 13 23/03/2021 09:1423/03/2021 09:14

14
Proper maintenance keeps your treadmill in optimal condition forever,
and the wrong maintenance can hurt or shorten the life of the treadmill.
Warning: Always unplug the treadmill before
cleaning or maintaining the appliance!
1. Regularly remove dust to keep the parts clean,
2. After each use of the treadmill, wipe the meter and other areas of
sweating and debris with a clean towel or cloth, please note that do not
spill water on the electrical components and under the running belt.
3. Please put your treadmill in a clean, dry environment to make
sure the power is turned off and the plug has been unplugged.
4. In order to facilitate the movement, the treadmill set up the wheels,
before moving please confirm the power supply and fold the body.
5. Check and lock all parts of the treadmill frequently;
6. In order to better maintain and extend the life of the treadmill,
it is recommended that you continue to use for 30 minutes.
Then, rest the treadmill for 10 minutes before using it.
7. The running belt has been adjusted at the factory, but after use, the
running belt will be stretched, will deviate from the center of the
running belt friction edge and rear cover damage. It is normal for the
running belt to be forced to stretch during use, and if you are using
the treadmill after a period of time, you can adjust the tightness of the
running belt to improve it if you appear to have a slip or smoothness.
a. Running belt loose adjustment. If the running belt is too loose,
insert a random hex wrench the adjustment hole of the left guard
step of the treadmill, rotate clockwise 1/4 turn, and then rotate 1/4 lap
clockwise on the right foot, pay attention to the left and right must
be adjusted synchronously, so that the running belt can be tightened
and the running belt will not deviate from the center point.
6. Maintenance Instructions:
Treadmill Manual_Updated.indd 14Treadmill Manual_Updated.indd 14 23/03/2021 09:1423/03/2021 09:14

15
If the running belt is too tight, adjust the left and
right synchronization counter-clockwise.
Note: The running belt cannot be adjusted too tightly. This will pull the
running belt, increase the pressure of the front / rear drum, the drum
bearings and other damage, produce a different tone or other problems,
just adjust to the running belt does not slip for the most appropriate.
b. Running belt alignment. When you use a treadmill, the pressure
on the running belt is unbalanced because the force of both feet
is not the same when running, causing the running belt to deviate
from the center. This deviation is normal, and when no one is
running on a running belt, it automatically returns to the center.
If you can’t get back to the center, you’ll need to run the belt back
to center.Run the treadmill empty, speed to 6th gear, observe
the distance from the running to the left and right-side bars:
• If left, use a hex wrench to rotate the left screw clockwise 1/4 turn;
• If you are right, use a hex wrench to rotate
the right screw clockwise 1/4 turn;
• If the running belt is still not in the middle, repeat
the above action until adjusted to the middle.
After adjusting the run to the middle, adjust the speed to 6th gear,
and observe the deviation of the running belt and the smoothness
of the run, if there is a deviation, repeat the adjustment step.
Warning! Do not over tighten the drum! This will
result in permanent damage to the bearings!
8. Treadmills are oiled when they are shipped, but the lubricity of
the treadmills is often checked to help keep the treadmills at peak
use. The treadmill must be lubricated after one year of use or 100
hours of operation. After 30 hours or 30 days of use, in the treadmill
stationary state, pull the starting belt from the side to reach as far
as possible to touch the table surface, if you feel touch the lubricant,
do not need to add lubricant;(Use non-petroleum lubricants).
How to add lubricant, please press the figure
way to operate, open the side bar left front of the
refueling decorative cover, with scissors or art
knife to press the lubricant bottle to cut the size of
the figure, and then press the bottom illustration
to refuel, refueling, please pay attention to the
oil bottle front of the thin rod inserted into the
fuel pipe on the platform and then pour oil into.
Treadmill Manual_Updated.indd 15Treadmill Manual_Updated.indd 15 23/03/2021 09:1423/03/2021 09:14

16
The electronic table displays the error message code and excludes:
7. Failures & Trouble Shooting:
Fault
Code
Fault
Description
Fault
Handling
E1
Communication
anomalies: power-on
control and electronic
table communication
abnormal.
Possible causes: electronic control and electronic
table communication is blocked, check the
electronic table to the next section of the
control communication line of the connection,
to ensure that each core is fully inserted.
Check if the electronic table is connected to
the controller break, replace the cable.
E2 High voltage fault Possible causes: Check the motor line for
damage, odor, replace the motor.
E3 No motor detected
Possible causes: Check that the motor
line is connected and reconnect the
motor line. Check the motor line for
damage, odor, replace the motor.
E5
Overcurrent protection:
In the operational
state, the control
continuously detects
that the DC motor
current is greater
than the amount
of fixed current,
up to 3 seconds.
Possible reasons: more than the rated load
caused by excessive current, system self-
preservation, or a part of the treadmill is stuck
dead, resulting in the motor can not turn, the
load is too heavy, the current is too large, the
system self-insurance; There is also checking
the motor for overcurrent or burning
odor, replacing the motor, checking the
controller for burning air, replacing the
controller, or checking that the supply
voltage specifications are not or low, retest
using the correct voltage specifications.
E6
Explosion protection:
abnormal supply
voltage or motor
anomalies, etc.
lead to drive motor
circuitry Damage.
Possible cause: Check if the supply voltage is
below normal 50, retest with the correct voltage
specifications, check the controller for odor,
replace the controller, check that the motor line
is connected, and reconnect the motor line.
E7 Safety switch
not Put it on. Put the security lock in place;
Treadmill Manual_Updated.indd 16Treadmill Manual_Updated.indd 16 23/03/2021 09:1423/03/2021 09:14

17
2. Common problems and troubleshooting methods:
1. Some or all of the buttons are not working well.
1.1 Uncover the upper case of the electronic watch
and test whether the buttons are working;
1.2 Check or replace the electronic board;
1.3 Check the button can be worked after the power is turned back on.
2. The electronic watch has no display.
2.1 Check if the input voltage is within the
allowable range: AC 200-240V;
2.2 Check if the switch on the electric running machine is turned on;
2.3 Check if the fuse inside the power outlet is blown.
If it is blown, replace it with a spare fuse;
2.4 Check the controller, if LED is lit;
2.5 Check each cable;
2.6 Check or replace the electronic board;
2.7 Check or replace control board.
Other problems and troubleshooting
a. The treadmill cannot start - Check if the power plug is plugged in,
the power switch is turned on, and the safety switch is removed.
b. Treadmill slips - Adjust the running belt
tightly by referring to the instructions.
c. Running belt deviation - Refer to the instructions
to adjust the running belt to center.
d . Running abnormal sound - Check if the machine screws
are loose and the running belt needs to be lubricated.
1. Warranty coverage - In the case of proper use and maintenance,
the non-human damage caused by normal use, the warranty card
is limited to the original purchaser and may not be transferred.
2. Free warranty period - Free one year warranty from the date of
purchase. Consumables, normal wear and tear are not covered
by the warranty, such as running belts and other accessories.
8. Warranty Terms:
Treadmill Manual_Updated.indd 17Treadmill Manual_Updated.indd 17 23/03/2021 09:1423/03/2021 09:14

18
3. The following terms are not covered by the warranty:
a. Damage caused by abuse, negligent use,
accident or unauthorized modification;
b. Damage caused by improper adjustment of
the running belt and the driving belt;
c. Damage caused by improper maintenance;
d. Other violations and resulting damage.
4. Spare parts and services - Please contact the dealer
or us. The company is not responsible for the extended
services arranged by the merchants themselves.
5. The warranty commitment is only valid for private use of the
family, not for professional training in the gym. If you need to
purchase non-warranty accessories, please contact customer
service. Please provide the following information when ordering:
• Instruction
• Treadmill model
• Part number or picture
• Proof of purchase date
• Consult your doctor before starting a exercise or training program.
Please follow the doctor’s advice and instructions for training.
• Set your goals with your doctor before you can ensure that the
plan is realistic and start the training program with ease.
• You can add some aerobic exercise to your exercise plan, such as
walking, jogging, swimming, dancing or cycling. Always check the
pulse. If you do not have an electronic heartbeat monitor, ask your
doctor how to measure the pulse by hand or neck. In addition, you
must set the target heart rate based on age and physical well-being.
• Drink plenty of water during exercise. You must replenish moisture
lost from excessive exercise to prevent dehydration. Avoid drinking
plenty of ice water or beverages, and the temperature of your
drinking water or beverage is equal to room temperature.
9. Exercise Guidelines:
8. Warranty Terms:
Treadmill Manual_Updated.indd 18Treadmill Manual_Updated.indd 18 23/03/2021 09:1423/03/2021 09:14

19
Warm-up and soothing exercise:
A successful exercise program must include warm-up, aerobic and
soothing exercises. The number of exercises will be at least two or
three times a week, and one day after the exercise, you can increase
the number of exercises to four to five days after a few months.
Warm-up is an important part of your fitness. Warm up before
each exercise. Warm warm-up can prepare your body for more
intense exercise, because warm-up can help muscles warm
and stretch. Improves blood circulation, increases pulse, and
delivers more oxygen into the muscles. After the aerobic exercise,
repeated warm-up exercises can also reduce muscle soreness.
We recommend the following warm-up and soothing exercises:
10. Warm Exercise:
1. Stretch down:
The knees are slightly curved, the body
slowly bends forward, let the back and
shoulders relax, hands touch the toes as
much as possible. Hold for 10-15 seconds
and then relax. Repeat 3 times.
2. The tendon stretch:
Sit on a clean cushion, straighten one leg,
and then put the other leg inward so that it
fits snugly against the inside of the straight
leg and try to touch the toe with your hand.
Hold for 10-15 seconds and then relax.
Repeat 3 times for each leg.
3. The calf and heel are stretched:
Hold the wall with both hands or stand with
one foot behind, keep the hind legs upright,
and the heels touch the ground and tilt
toward the wall. Hold for 10-15 seconds and
then relax. Repeat 3 times for each leg.
Treadmill Manual_Updated.indd 19Treadmill Manual_Updated.indd 19 23/03/2021 09:1423/03/2021 09:14

20
www.simply-brands.com
Importer Name:
Simply Brands (Asia) Ltd.
Importer Address:
Unit 04-05, 16th Floor, The Broadway No. 54-62
Lockhart Road, Wanchai, Hong Kong.
Client SKU:
SBA-00081
Manufacturer Model:
B1
Please retain this information for future reference.
4. Quadriceps stretching:
Grasp the balance with your left hand or the
table, then extend your right hand back-
wards and grab the right heel and slowly
pull it toward your hips until you feel the
muscles in front of your thighs.
Hold for 10-15 seconds and then relax.
5. The sartorius muscle (muscle inside the
thigh) stretches:
The soles of the feet are opposite, the knees
are seated outwards, and both hands grasp
the feet and pull toward the groin. Hold for
10-15 seconds and then relax.
Repeat 3 times.
Technology Parameter:
Treadmill Manual_Updated.indd 20Treadmill Manual_Updated.indd 20 23/03/2021 09:1423/03/2021 09:14
Table of contents
Popular Treadmill manuals by other brands
Maxxus
Maxxus RunMAXX 9.1 Installation & operating manual
NordicTrack
NordicTrack A2550 NTL09107.0 user manual
ICON Health & Fitness
ICON Health & Fitness NordicTrack Club Reflex user manual
Life Span
Life Span PRIME owner's manual
Vision Fitness
Vision Fitness Platform Treadmill T9700 Runne owner's guide
Tunturi
Tunturi J3F owner's manual
Yowza
Yowza Delray Assembly instructions and owner's manual
Weslo
Weslo Cadence 1020 Treadmill user manual

Vision Fitness
Vision Fitness Treadmill TM357 owner's guide

Keys Fitness
Keys Fitness ALLIANCE 950HR-OB owner's manual
Spirit
Spirit XT185 owner's manual

Pro Fitness
Pro Fitness GF705766-DI Assembly & user manual


