Simply OTP01 User manual
12V Oil PumP
Part no:OTP01
Thank you for purchasing a Simply product. Manufactured to a high standard, this product will, if used according to
these instructions, and properly maintained, give you years of trouble free performance.
IMPORTANT: PLEASE READ THESE INSTRUCTIONS CAREFULLY. NOTE THE SAFE OPERATIONAL REQUIREMENTS, WARNINGS & CAUTIONS. USE
THE PRODUCT CORRECTLY AND WITH CARE FOR THE PURPOSE FOR WHICH IT IS INTENDED. FAILURE TO DO SO MAY CAUSE DAMAGE AND/OR
PERSONAL INJURY AND WILL INVALIDATE THE WARRANTY. KEEP THESE INSTRUCTIONS SAFE FOR FUTURE USE.
1. SAFETY
9Maintain the pump in good condition (use an authorised service agent).
9Replace or repair damaged parts. Use recommended parts only. Non authorised parts may be dangerous and will invalidate the
warranty.
9Keep the pump clean for best and safest performance.
9Familiarize yourself with the applications, limitations and potential hazards of the Transfer Pump.
9Ensure the power supply (vehicle battery) corresponds with the requirements of the pump.
9Ensure that there is more liquid in the delivery tank than will be needed.
9Ensure that the capacity of the receiving tank is sufficient to hold the dispensed fuel.
9Wear safety goggles and gloves, and protective clothing when working around fuel. A full range of personal safety equipment is
available from your local Sealey Stockist.
9Keep area clean and tidy and free from unrelated materials, and ensure there is adequate lighting.
9Maintain correct balance and footing. Ensure the floor is not slippery and wear non slip shoes.
9Use the pump in an appropriate working area for its function. Keep area clean and tidy and free from unrelated materials.
9Keep children and unauthorised persons away from the working area.
8DO NOT run the pump dry. This will damage the pump’s internal components and will invalidate your warranty.
8DO NOT operate the pump continuously for more than 30 minutes. The duty cycle of the unit is 30 minutes, after which the motor must
be left to cool down for 30 minutes.
8DO NOT run the unit for more than 2-3 minutes with the delivery nozzle closed.
8DO NOT start or stop the pump by connecting or disconnecting the battery clamps.
8DO NOT operate the pump with wet hands.
8DO NOT use the pump where explosive or flammable vapours may be present.
8DO NOT tamper with the pump connections.
8DO NOT pull or carry the unit by its cables and do not pull the negative and positive clamps from the battery terminals.
8WARNING! DO NOT use the unit to pump the following fluids: Petrol, flammable liquids with flash point <38°C, water, foodstuffs,
corrosive chemicals and solvents.
8DO NOT smoke or allow a spark, or ame in the vicinity of the battery or pump.
WARNING! DO NOT use the unit to pump the following fluids:
Petrol, flammable liquids with PM <55°C, water, alimentary liquids with viscosity >20 cSt., corrosive chemicals and solvents.
WARNING! The warnings, cautions and instructions referred to in this manual cannot cover all possible conditions and situations
that may occur. It must be understood that common sense and caution are factors which cannot be built into this product, but must
be applied by the operator.
2. INTRODUCTION
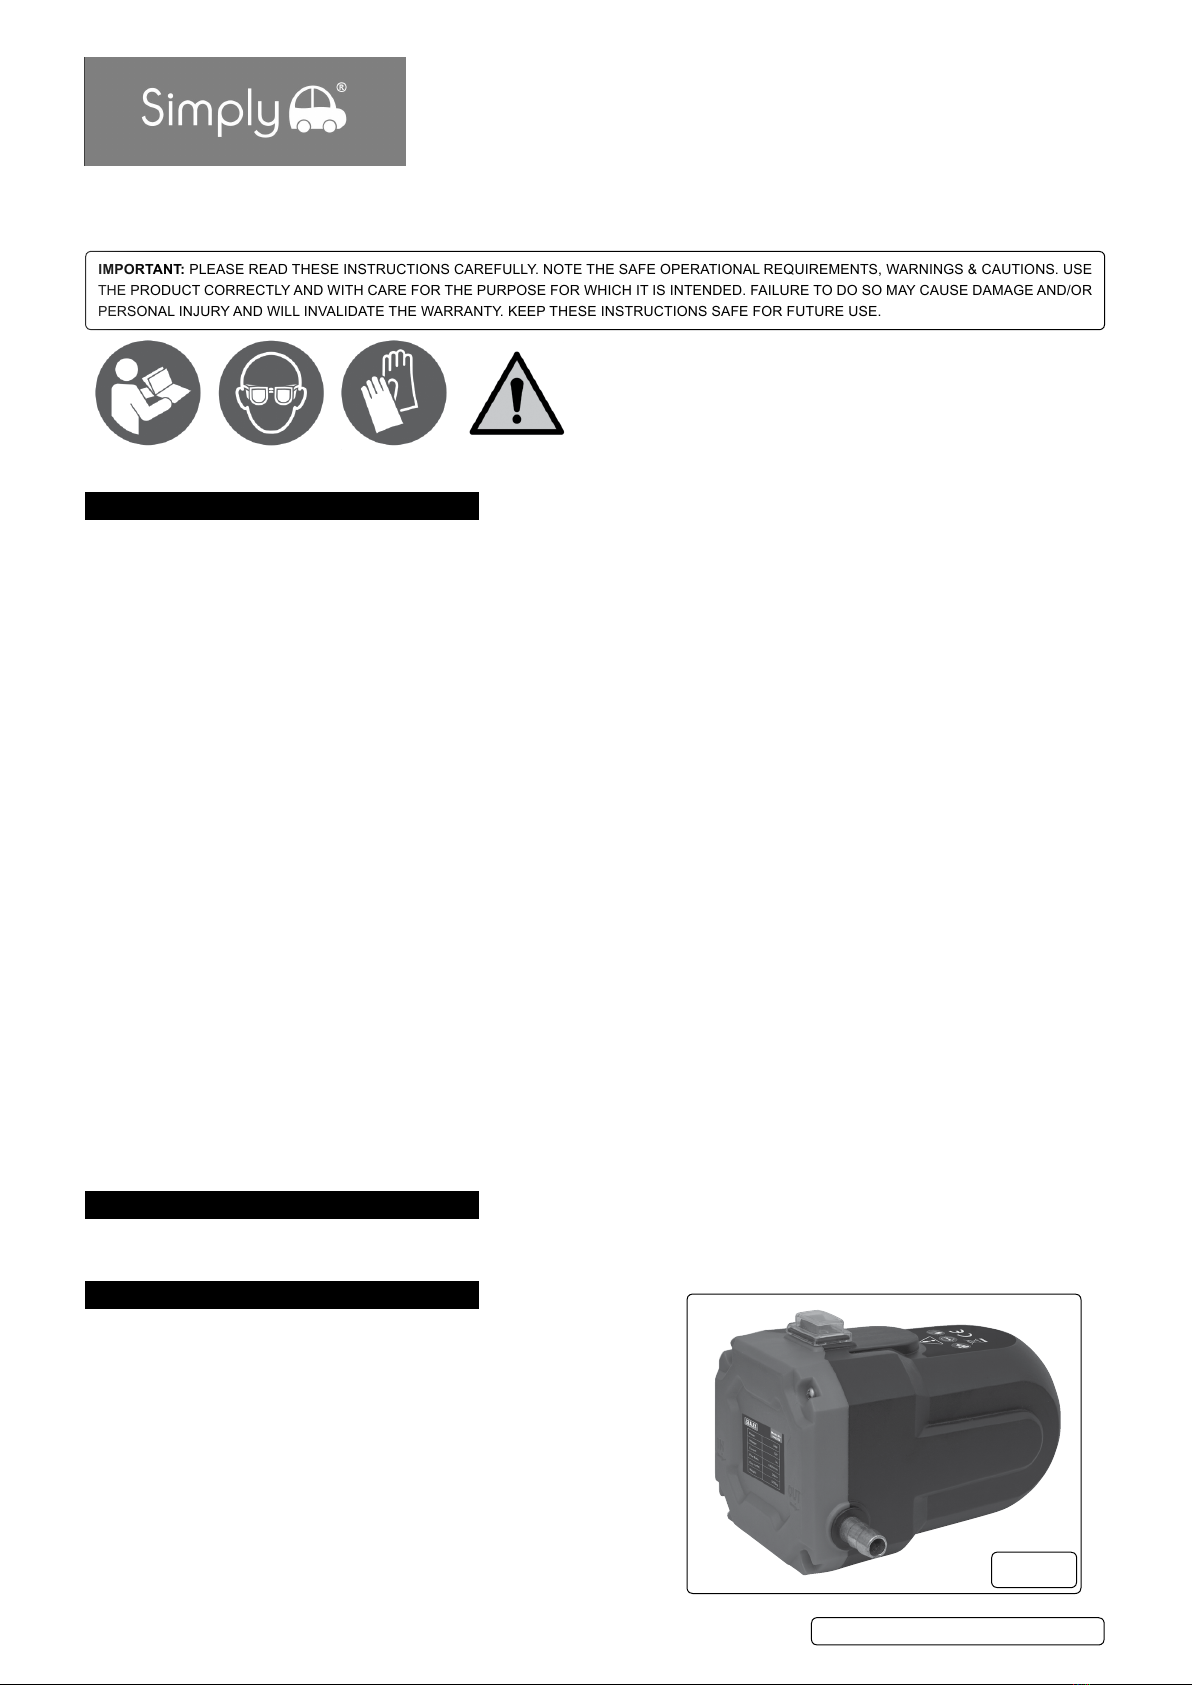
Robust and compact portable pump ideal for extracting engine oil or diesel. Powered from a 12V battery. Supplied with a 1.2mtr suction hose,
2mtr discharge hose and a 2mtr battery cable with clips. Not suitable for use with Petrol.
3. SPECIFICATION
Model No: .................................................................. OTP01
Current:..............................................................................7A
Duty Cycle: .................................................................. 30min
Flow Rate:........................................Diesel approx. 1.5ltr/min
or engine oil (maximum 60°C) approx. 0.2ltr/min
Nett Weight: ................................................................ 0.95kg
Power:.............................................................................84W
Voltage:............................................................................12V
OTP01 Issue 1 11/03/20
© JRP Distribution Ltd
Refer to
instructions
g.1
Wear eye
protection
Wear protective
gloves
Warning

4. GETTING STARTED
4.1. Attaching the hoses
4.1.1. Remove the protective caps before attaching hoses
(g. 2).
4.1.2. Straighten the suction hose 8 and the drain hose 10.
4.1.3. Install the suction hose (ø6mm) 8 onto the suction
hose connector 7 .
4.1.4. Install the drain hose (ø12mm) 10 onto the drain
hose connector 6 .
4.1.5. Secure both hoses 8, 10 with the supplied hose
clamps 9.
4.1.6. Pay attention to the pumping direction on the
appliance. Make sure that the hoses are
straightened to avoid damage
5. OPERATION
5.1. Start the vehicle and run it for 5-10 minutes to warm up the oil (60 °C is the maximum oil temperature). This reduces viscosity of the
oil and enables to pump it out more eciently.
WARNING! DO NOT pump the oil when the car engine is running.
5.2. Gently insert the suction hose (ø6mm) 8 into the bottom of the oil pan.
5.3. Insert the drain hose (ø12mm) 10 into a container (e.g. oil collecting tray).
5.4. Set the on/o switch 1 to “O” (o) position.
5.5. Connect the positive pole clamp (red) 4 to the positive pole (+) of the vehicle battery.
5.6. Connect the negative pole clamp (black) to the negative pole (‒) of the vehicle battery.
5.7. Turning on: Set the on/o switch 1 to “I” position. The pumping begins after a short suction period.
5.8. Turning o: Set the on/o switch 1 to “O”. Turn the appliance o as soon as oil extraction is over or after 30 minutes of continuous
operation.
5.9. After each use, pump through some fresh oil to clean the appliance.
5.10. Disconnect both clamps 4, 5 from the vehicle battery.
WARNING! To prevent damage let the appliance cool for at least 10 minutes after every 30 minutes of continuous operation.
6. MAINTENANCE
WARNING! During cleaning or operation DO NOT immerse the electrical parts of the appliance in water or other liquids. Never hold
the appliance under running water.
6.1. Cleaning
6.1.1. After each use, pump through some fresh oil to clean the appliance.
6.1.2. Clean both clamps 4, 5 with a dry cloth after each use. Make sure there is no adhering battery uid left on the appliance.
6.1.3. Keep the casing 2 and accessories clean. DO NOT use abrasive, aggressive or chemical cleaning agents to clean the surface of
the appliance.
6.1.4. In case of oil spillage, clean it with a soft cloth or a paper towel.
6.1.5. Before each use check the appliance and all its accessories for any visible damage. Apart from the occasional cleaning, the
appliance is maintenance-free.
6.1.6. When not in use, store the cleaned appliance in a dry, secure location away from children.
JRP Distribution, UNIT10-A, Chichester Business Park, City Fields Way, Tangmere, W Sussex, PO202FT
01903750355 01903752121 [email protected] www.jrpdistribution.co.uk
ENVIRONMENT PROTECTION
Recycle unwanted materials instead of disposing of them as waste. All tools, accessories and packaging should be sorted, taken to
a recycling centre and disposed of in a manner which is compatible with the environment. When the product becomes completely
unserviceable and requires disposal, drain any fluids (if applicable) into approved containers and dispose of the product and fluids
according to local regulations.
WEEE REGULATIONS
Dispose of this product at the end of its working life in compliance with the EU Directive on Waste Electrical and Electronic Equipment
(WEEE). When the product is no longer required, it must be disposed of in an environmentally protective way. Contact your local solid
waste authority for recycling information.
Note: It is our policy to continually improve products and as such we reserve the right to alter data, specifications and component parts without prior
notice.
Important: No Liability is accepted for incorrect use of this product.
Warranty: Guarantee is 12 months from purchase date, proof of which is required for any claim.
OTP01 Issue 1 11/03/20
© JRP Distribution Ltd
g.2
Table of contents
Popular Water Pump manuals by other brands

Balcrank
Balcrank Lynx Series Operation, installation, maintenance and repair guide

Marco
Marco UP9-P Instructions for use

T.I.P.
T.I.P. AJ 4 Plus 90/53 Translation of original operating instructions

Sealey
Sealey TP97 instructions

Gude
Gude GS 4003 P Translation of the original instructions

elem
elem EL34PC instruction manual


Pumpex
Pumpex K 101 Service instruction

Wilo
Wilo PH-041E owner's manual

ClimaCool
ClimaCool SHC onDEMAND 15 Installation, operation & maintenance manual

Wanner Engineering
Wanner Engineering Hydra-Cell G-10 Installation service

Wanner Engineering
Wanner Engineering Hydra-Cell G-25 Installation service

Greenlee
Greenlee Fairmont H4660B Specifications and parts list