13
www.climacoolcorp.com
The power for all modules is taken from a suitable circuit
breaker/fused disconnect power supply within the main
panel. The electrical service enters the individual modules
through the top into the module’s control panel enclosure.
Proper grounding of the module is mandatory. Before
carrying out any electrical work, conrm that the main
supply is isolated. A typical power wiring is located on page
48 – Power Distribution Drawing. Knockout drawings are
provided. Do not drill into cabinet; shavings can damage
electronic components. The power for all individual modules
shall be in compliance with all local and national codes.
CoolLogic Control System Wiring
A separate 115 volt power supply is required to power the
CoolLogic Master Control Panel. Communication between
the Master Control Panel and chiller modules requires a
simple two-conductor 22 AWG shielded cable rated at 60°C
minimum, daisy chain connection. Control wiring cannot be
installed in the same conduit as line voltage wiring or with
wires that switch highly inductive loads such as contactor
and relay coils.
See the ARC156 Specications on the next page. Refer to
the Power Distribution drawing on page 48 of this manual
for more information. All wiring shall be in compliance with
all local and national codes.
Electrical Phase Sequencing
Proper clockwise rotation for scroll compressor motors
is important to prevent damage to the compressors.
ClimaCool recommends the use of a phase sequence
indicating instrument following the manufactures
directions. An alternative is to “bump test” the compressors
one at a time with pressure gauges attached to the high and
low gauge ports of the compressors to check for proper
rotation. Energize the compressor for a few seconds to
If the discharge pressure does not increase, proper
rotation is reversed. Compressor rotation can be reversed
by opening the main electrical disconnect and switching
any two of the main power supply leads feeding that
compressor’s contactor.
Proper Voltage Balance
Occasionally, in three phase circuits, a voltage imbalance
occurs between phases. It is not recommended to operate
equipment when an imbalance greater that 2% occurs. This
their longevity. The following example describes how to
calculate the average voltage of the three phases to see if
the imbalance is greater than 2%.
Example: Line 1 = 226v Line 2 = 230v Line 3 = 228v
The average is: (226+230+228) / 3 = 228v
Next, [100(228-226)] / 228 = 0.9%
The voltage imbalance of the three phase circuit is 0.9%.
This is well under the 2% range.
Voltage/Phase Monitor
installation with the CoolLogic Master Control Panel. The
voltage/phase monitor helps guard the chiller bank against
conditions which could void your warranty. The voltage/
phase monitor has three wires that connect to the main
three phase power chiller bank input. Two low voltage
control wires are connected to the CoolLogic Master Control
Panel. Do not install control wiring in the same conduit
as line voltage wiring or with wires that switch highly
inductive loads such as contactor and relay coils. Note: It
is mandatory to install one (1) monitor per bank at main
power distribution panel to monitor voltage and phasing
of power to the modules. See Wiring Diagram on page 15.
Electrical Connections
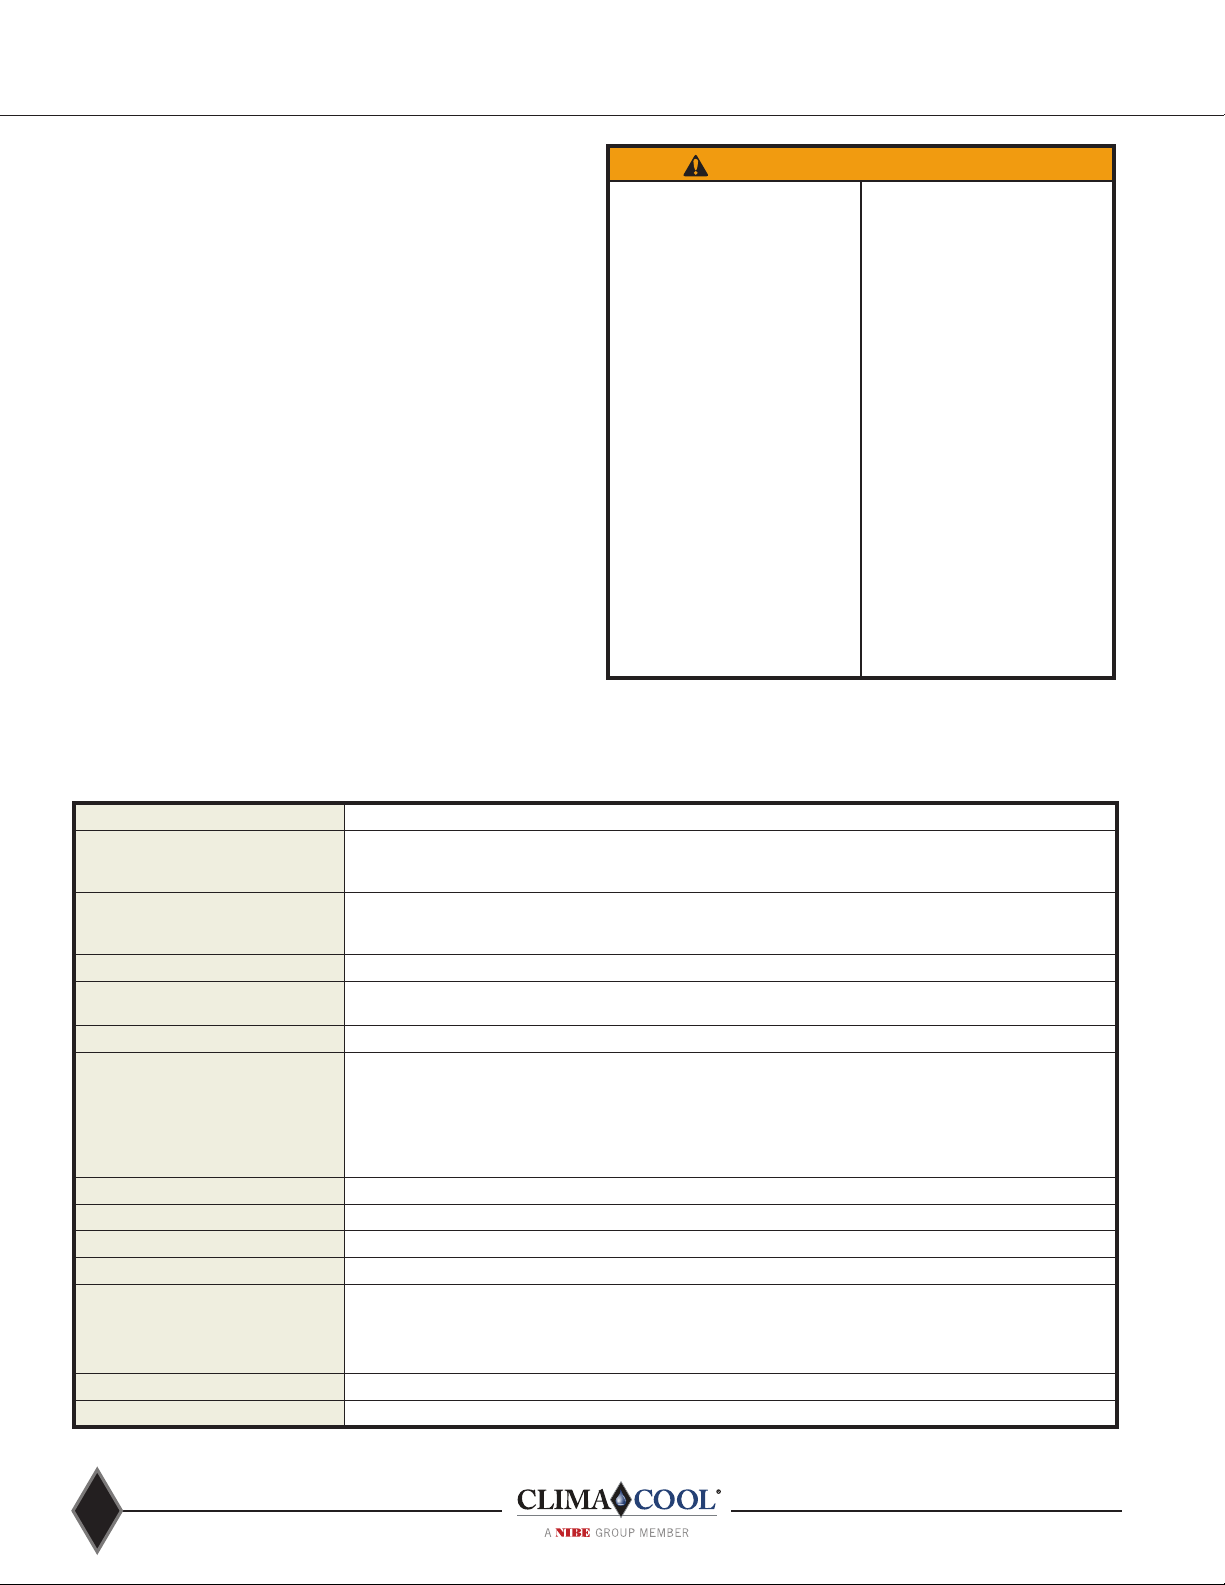
CAUTION/ATTENTION
installed wiring. Unit terminals are
not designed to accept other types of
conductors.
Utilisez uniquement des conducteurs en
cuivre pour le câblage. Bornes de l’unité
ne sont pas conçus pour accepter
d’autres types de conducteurs.
WARNING/ADVERTISSEMENT
Disconnect power supply(ies)
before servicing. Refer servicing
Electric shock hazard. May
result in injury or death!
Debrancher avant d’entreprendre
le dépannage de l’appareil.
pour le dépannage. Risque de
choc électrique. Résiltat de mai
dans dommages ou la mort!
CAUTION/ATTENTION
personnel only. Refrigerant
system under pressure. Relieve
pressure before using torch.
Recover refrigerant and store or
dispose of properly.
Conifer la maintenance à un
Décomprimer avant d’exposer
frigorigene et le stocker ou le
détrulre correctement.
CAUTION/ATTENTION
3 PHASE SCROLL
COMPRESSOR UNIT
UNITÉ COMPRESSEUR
SCROLL 3-PHASE
If this unit uses a 3 Phase Scroll
Compressor, the following instructions
MUST BE followed:
• Unit power supply MUST BE wired
in the proper sequence to avoid
damage to the 3 Phase Scroll
Compressor;
• Scroll Compressors with
INCORRECT rotation show the
following characteristics:
- High sound level;
- High suction pressure and low
discharge pressure;
- Low current draw.
• If any of the three above
characteristsics exist, swap
two fo the three supply wires
at the disconnect and recheck
compressor for incorrect rotation.
Si cet appareil utilise compresseur
scroll 3-Phase, les instructions
suivantes doivent être suivies:
• L’alimentation de l’appareil doit
être monté dans l’ordre correct
pour éviter endommager le
compresseur scroll 3-Phase;
• Compressuers scroll avec
rotation incorrecte montrent les
caractéristiques suivantes:
- Haut niveau de son;
- Pression d-aspiration élevée
et une faible pression de
décharge;
- Faible ampérage.
• Si l’un des trois éléments
mentionnés ci-dessus sont
remplies, échanger deux des trois
lignes électriques alimen tant la
la rotation du compresseur.