Sin Tech Sky Dancer User manual

- -
s u p p o r t @ u s b i d . c o . i l
Sky Dancer
3/3.5 CHANNEL METAL HELICOPTER
Instruction Manual
1. IR helicopter introduction
Thanks for purchasing our product. To help you operate the product more easily, we kindly recommend you to read the
INSTRUCTION carefully before operating.
Please keep this INSTRUCTION for future reference.
1. This product has high-stability.
2. Helicopter: 3.7V 100mAh/ 140mAh/ 180mAh Li-poly; remote: 6X1.5V “AA”batteries.
3. Helicopter could fly 6-8 minutes if fully-charged.
2. Safety Precaution
1. Read the instruction carefully before operating. Strictly follow the INSTRUCTION when operating.
2. Keep the small elements of the product away from the kids, in case of CHOKING accident.
3. Do not put the batteries in heat (fire, electronic heating devise, etc.)
4. Human being should be 1~2 meters away from the helicopter when it is flying. Make sure the helicopter doesn’t hurt
people’s face, head or body.
5. Do not modify the product without reference, or else it will probably be out of order
6. Keep your helicopter in your sight for easier control.
7. Parental guidance is highly recommended for the children’s safety.
3. The product include
4. Component elements
5. Install the remote batteries
1) Use a screw driver to open the cover
of the batteries. (Pic.1)
2) Place 6x1.5V “AA” size batteries into the
battery compartment. (Pic.2)
3) Tighten the screw. (Pic.3)
WARNING:
CHOKE HAZARD –Small Parts
Not for children under 14 Year
Don’t touch the running propeller!
Don’t play above someone’s head!
Adult supervision is required!

- -
s u p p o r t @ u s b i d . c o . i l
6. Charge the helicopter
1). Open the charge cover and remove the charging wire on the transmitter, and then turn the power switch
handle of the transmitter to the ON position. (Pic.4)
2). Turn the power switch handle of the helicopter to the OFF position. Insert the charging plug to the charging
slot on the helicopter. (Pic.5)
3). The green LED light will on while charging. (Pic.6) .After the battery is fully charged, the green LED light will
off. At this time pull out the charging plug away from the charging slot of the helicopter.
4). It can flight about 6-8 minutes after charge for 20-30 minutes.
Caution:
If the helicopter need to recharge.
please wait for 10-15 minutes to
let the battery cooling before
charge
7. Charge the plane directly (sold separately)
1. Charger the charging method
First will helicopter at the bottom of the first call to the power switch “OFF”(Pic.7), and then insert the charger power outlet
(Pic.8), this charger green power indicator light on (Pic.9), and then plug the charger connected to the helicopter base of
the charging jack (to connect to a clear understanding of the right direction), then the charge the charger indicator light red
(or green power indicator light turns red) that the charge began, about 20-30 minutes to complete the charge, the charge
on the charger the red indicator light turns off(or power indicator light turn green from red).
2. USB socket of the charging method
First will helicopter at the bottom of the first call to the power switch “OFF”(Pic.10), and then inserted into a computer USB
port USB interface (Pic.11), USB Plug the red indicator light (Pic.12), and then plug USB charger to connect to the
helicopter base of the charging jack (to connect to a clear understanding of the right direction), USB Plug the red indicator
goes out, about 20-30 minutes to complete the charge, the charge on the charger the red bright light.
Caution:
Please do not purchase non-factory charger and USB charging line to the helicopter charge, or
else they might damage the battery explosions.

- -
s u p p o r t @ u s b i d . c o . i l
8. Flying environment
1). Indoors with smooth air current. Pay attention to the air current from air condition.
2). Wide area. Recommended size: 3m x 5m x 2.5m
3). Place with few obstacles. A place with no electric fan, air condition, lamp or other dangerous objects is highly
recommended
4). Do not fly your helicopter in a place with direct sunshine or strong lighting, or else it would affect the remote-
control system.
9. Preparation
1. Set the frequency of the remote (A, B, C) as the same frequency of the helicopter.
2. Make sure the power switch of the transmitter is “off” before you turn on the helicopter.
3. The helicopter hit power switch to ON position, and then wait until the helicopter is no longer the front of
flashing lights, can begin to operate helicopter (3.5 channel use only).
4. Place the helicopter on the ground with the head faces forward.
5. Make sure the gear lever points downwards (at the minimum position) and then switch on the power.
10. Flying control
Up
Slowly pushing the gear lever up to
raise the helicopter up
Down
Slowly pushing the gear lever down
to fly it to a lower place
Left
Slowly turn the direction stick to the
left
Right
Slowly turn the direction stick to the
right
Forward
Slowly turn the direction stick
forward
Backward
Slowly turn the direction stick
backward

- -
s u p p o r t @ u s b i d . c o . i l
11. Extra tips for controlling
1.lf the direction stick was not touched but the helicopter keep spinning, try to adjust as the picture shows:
1)If the helicopter keep spinning
clockwise or keep turning towards
the tight, roll the “micro-adjust”
towards the left, till it could fly
straight forward.
2)If the helicopter keep spinning
anticlockwise or keep turning
towards the left, roll the “micro-
adjust” towards the right, till it could
fly straight forward.
2.The product configure fuselage
lighting switch control function for
the users to choose.
Warm reminder:
Open the lights: make the helicopter is in full
mode, attractive lights at night;
Close the lights: Make the helicopter is in
power saving mode to extend the flight time.
12. Attention
1.If the battery power of the remote goes low, the
control distance would be much shorter.
2.If the battery power of the helicopter goes low, the
helicopter could not fly to a high position or even fly.
3.The remote-control range is about 10 meters, if the
helicopter flies out of this range, it may lost control.
4.Repair immediately when the helicopter is damaged
or out of shape. (e.g. If the rotor is seriously broken,
do not fly the product, or else it may cause some
accident.)
13. Maintenance
1). Wipe the toy gently with clean damp cloth.
2). Do not insolation on sun and calefaction.
3). Do not submerge the toy into the water.
4). Turn of the power of the remote and the helicopter when not in use.
5). Remove battery from the remote when not used for a long time.
6). New and alkaline batteries are recommended for the remote to obtain best and maximum performance.
7). Check the toy regularly; makes sure the toy is in good shape.
14. Repair
SYMPTOM
CAUSE
SOLUTION
Propeller can’t move
1. ON/OFF switch is OFF
2. Run out of power
1. Turn the power on.
2. Recharge the helicopter or change the remote’s
batteries.
Suddenly stop and
drop down when
flying
Run out of power
Recharge the helicopter
Helicopter does not
react
1. Wrong frequency selection
2. Another infrared control device is working with the
same frequency
3. Affected by strong lighting.
4. Aircraft unopened gyroscope system
(3.5 channel use only).
1. Set to the correct frequency
2. Avoid this kind of situation if possible, or choose another
place to play.
3. Change to another place to avoid direct lighting.
4. Shut down after the restart switch and the aircraft placed
in a steady state (3.5 channel use only).
Table of contents
Popular Toy manuals by other brands
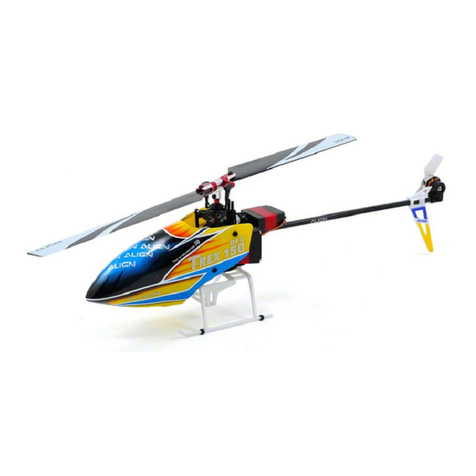
Align
Align Trex 150 SFC RH15E01XT instruction manual
REVELL
REVELL KIT 5320 Assembly manual
Legend Hobby
Legend Hobby 86'' A-1 SKYRAIDER 35-60cc WARBIRD Assembly manual
Jamara
Jamara Verkehrsschranke Grand Instruction
Mattel
Mattel Barbie BDF47 instructions

Fisher-Price
Fisher-Price T6351 Consumer information

Kid Dimension
Kid Dimension Barney's Fun Splash Sprinkler instructions

Canon
Canon Lunar Globe Assembly instructions
Amewi
Amewi D90X28 manual

Mattel
Mattel MAX STEEL BGT84 instructions

ROBBE
ROBBE K-RAT II Instruction and user's manual

HELI-CENTER BERLIN
HELI-CENTER BERLIN Hughes 500 - Logo 800 xxtreme manual
