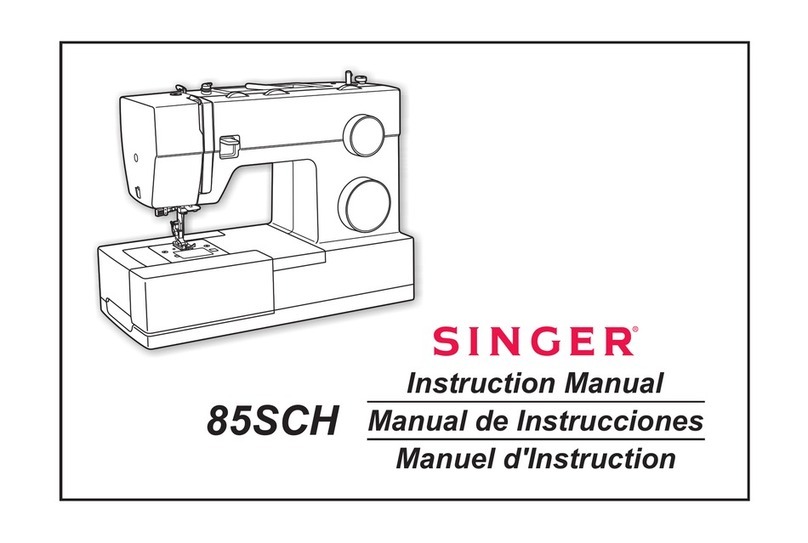
Singer 120U User manual

t •
} .
SINGER
SEWING
MACHINE
MODEL
120u
1 ^
I..
<?..
f
5
•u
.vV-
"i
\y
'«••
s
From the library of: Superior Sewing Machine & Supply LLC

CONTENTS
Introducing the New SINGER Sewing Machine Model 120U 1
Oiling the Machine 2
Needles
3
Thread
3
Inserting the Needle 4
Threading the Machine 5
Removing the Bobbin Case and Bobbin 6
Winding the Bobbin 7
Threading the Bobbin Case 8
Replacing the Bobbin Case 8
Preparing to Sew 9
Sewing 9
Setting
Thread
Tensions 10
Adjusting Presser
Foot
Pressure 11
Adjusting Stitch Length 11
Machine
Pin
Cushion
12
Hints for Perfect Operation 12
Copyright © 1972 THE SINGER COMPANY
Ail
Rights
Reserved
Throughout
the
World
From the library of: Superior Sewing Machine & Supply LLC

SINGER
Introducing
the
New
SINGER*
Sewing Machine Model
120U
!
The
most
dependable,
lightest
running
machine
of
its
kind.
This
machine
will
produce
top
quality
straight-line single-needle
lock
stitch
ing in fabrics as fine as ladies' lingerie or as heavy as men's overcoating.
This machine can reach speeds up
to
5000
revolutions
per
minute.
With an oil reservoir, a
pump
and
a
minimum
of
wicking, all
parts
requiring
oil
are
kept
constantly
lubricated.
Oil
flow
can
be
checked
easily
through
a
"window"
on
arm
top
cover.
Quiet and smooth in operation, the Model 120U was designed for
your
comfort,
making sewing
more
pleasant, quicker
and
more
profitable to
you.
- i -
From the library of: Superior Sewing Machine & Supply LLC

OILING
THE
MACHINE
Oil
your
machine!
For
best
results, use
SINGER*"TYPE
A"or
"TYPE
C"
Oil.
"TYPE
C"
Oil
is
used
when
an
oil
is
desired
which
will
produce
minimum
staining
of
fabrics even
after
along
period
of
storage.
Fig.
2
TIP
MACHINE
BACK
NEVER
ALLOW
OIL
TO
FALL
BELOW
LOW
MARK
FILL
TO
HIGH
MARK
Tip
machine back on its hinges and fill the oil reservoir as illustrated in
Fig. 2.
When
a
machine
is NEW
or
has
been
idle for several weeks,
it
is
advisable to remove the face plate and oil the needle bar and take-up
bearings.
CAUTION:
Correct
lubrication
is
indicated
by
a
continuous
stream
of
oil passing
the
oil flow
window
while
machine
is
running,
as
shown
in Fig. 3.
Fig. 3
SHOULD
SHOW
STEADY
OIL
FLOW
Should
this
oil
flow
become
erratic,
STOP
the
machine
and
check
the
reservoir
oil
level.
Fill
if
needed.
At
least
twice
each
month,
check
the
oil
level
in
the
reservoir.
Never
allow
the
oil
level
to
drop
below
LOW
mark,
shown
in Fig. 2.
-2-
From the library of: Superior Sewing Machine & Supply LLC

NEEDLES
The
needles
you
use
have
a
veiy
directeffect on the quality, strength
and appearance
of
the stitching produced by your machine. This is
why it is so important to use
SINGER
needles according to the
follow
ing
chart.
MACHINE
NEEDLES
CAT.
NO.
CLASS
and
VARIETY
SIZES
120U3
1361
88x9
8,
9,10,11,12,13,14,16,
17,
18,
19,
20,21
and
22
1315
88
X 1
I20U13
2254
16x231
16, 18, 19,
21,
22
and
23
2270
16x257
8,
9,10,
11,12,13,14,16,
17,
18, 19,
20,21,22,
23
and
24
A
bent
needle will cause
your
machine
to
skip stitches and drift away
from adesired sewing direction.
A
hook
or
burr
on the needle
point
will result in a blurred finish and
may
cut
the
material.
THREAD
In
the
Class
120U,
use
ONLY
left
twist
thread
in
the
needle.
Either
right
or
left
twist
thread
can
be
used
in
the
bobbin.
To
determine
the
thread
twist,
hold
the
thread
as
shown
below.
Then
roll
the
thread
held
by
the
right
hand
over
toward
you—if
the
strands
of
the
thread
wind
tighter,
the
thread
is
left
twist;
if
the
strands
unwind
or
separate,
the
thread
is
right
twist.
HOLD
THIS
END
Fig.
4
ROLL
OVER
TOWARD
YOU
-s-
From the library of: Superior Sewing Machine & Supply LLC

Fig, 5
MOVE
TO
HIGHEST
POINT
LOOSEN
SCREW
INSERT
NEEDLE
UP
AS
FAR
AS
POSSIBLE
LONG
GROOVE
120U3
MACHINE
—
Fig. 6
MOVE
TO
HIGHEST
POINT
LOOSEN
SCREW
INSERT
NEEDLE
UP
AS
FAR
AS
POSSIBLE
LONG
GROOVE
120U13
MACHINE
INSERTING
THE
NEEDLE
Turn
the
machine
pulley
over
toward
the
operator
until the
needle
bar
moves
to
its
highest
point.
After
loosening the needle clamp
ing screw, insert needle UP into
needle
bar
AS
FAR
AS
IT
WILL
GO, as instructed in Figs. 5 and
6.
The
long groove
of
the
needle
MUST
face
the
left
end
of
the
machine,
as
shown
in Figs. 5
and
6.
Securely
tighten
the
needle
clamp
ing
screw.
-4-
From the library of: Superior Sewing Machine & Supply LLC

THREADING
THE
MACHINE
First,
turn
machine
pulley
over
toward
you
until
needle is at its
highest
point,
then
pass
the
needle
thread
from
the
thread
stand
through
the
threading
points
in
the
order
shown
in
sketch
below.
Draw
about
two
inches
of
thread
through
the
eye
of
the
needle.
NOTE:
For
better
sewing results, use needle
bar
thread
guide A
(Fig.
9)
when
sewing
lightweight
fabrics
with
the
120U3
machine.
CAUTION:
When using
the
needle
bar
thread
guide,
DO
NOT
run
the
machine
with
presser
foot
up.
O
Fig. 8
120U3
MACHINE
Fig.9
120U3
MACHINE
Fig. 10
120U13
MACHINE
-5-
From the library of: Superior Sewing Machine & Supply LLC

LATCH
Fig. 11
Fig.
12
REMOVING
THE
BOBBIN
CASE
AND
BOBBIN
Turn
machine pulley over
toward
you until the thread take-up lever is
at
its
highest
point.
Open slide plate and reach under
the
bed
of
the
machine
with
left
hand
and
remove
the
bobbin
case
as
shown
in Fig.
11.
LATCH
BOBBIN
DROPS
OLIT
Releasing
the
latch
will allow
bobbin
removal
as
shown
in Fig.
12.
-6-
From the library of: Superior Sewing Machine & Supply LLC

WINDING
THE
BOBBIN
PRESS
DOWN
TO
PUSH
PULLEY
u--/
AGAINST
BELT
-/M
\/
Fig.
13
Place
bobbin
on
spindle
C
of
bobbin
winder
pushing
it
on
as far as
it
will
go
and
pass
thread
through
threading
points
as
shown
in Fig.
13.
Wind
end
of
thread
around
the
bobbin
a
few
times.
Press
down
on
thumb
latch
and
start
machine.
The
bobbin
winder
will
stop
automatically.
Fore
more
thread
on
the
bobbin,
turn
screw
Aclockwise;
for
less
thread
on
the
bobbin,
turn
screw
A
counterclockwise.
When
winding
a
bobbin
with
fine
thread,
alight
tension
should
be
used.
Adjust
the
knurled
nut
D,
Fig. 13,
to
regulate
the
tension.
If
thread
winds
unevenly
on
bobbin,
loosen
screw
B
and
move
tension
bracket
to
the
left
or
right, as
required.
Tighten
screw B.
Bobbins
can
be
wound
while
the
machine
is
stitching!
Oil
your
bobbin
winder
occasionally. Apply a few drops
of
oil to
the
oil well in
bobbin
winder
as
shown
in
Fig.
13.
From the library of: Superior Sewing Machine & Supply LLC

SLOT
NEAR
TOP
DRAW
THREAD
UPAND
INTO
DELIVERY
EYE
Fig.
14
PULL
THREAD
INTO
SLOT
QD
DRAW
THREAD
DOWN
AND
UNDER
SPRING
Fig.
15
REPLACE
BOBBIN
CASE
ON
STUD
PRESS
BOBBIN
CASE
FIRMLY
INTO
PLACE
Fig. 16
THREADING
THE
BOBBIN
CASE
Hold
the
bobbin
so
that
thread
will
unwind
in
the
direction
shown
in
Fig.14.
Hold
the
bobbin
case
as
shown
in
Fig. 14
and
place
the
bobbin
into
it
and
thread
as
shown
in Fig. 15.
REPLACING
THE
BOBBIN
CASE
After
threading,
take
bobbin
case
by
latch
in
left
hand
and
place
bobbin
case
on
center
stud
of
bobbin
case
holder,
as
shown
in
Fig. 16
and
release
latch.
Press
bobbin
case
firmly
into
place.
Allow
about
two
inches
of
thread
to
hang
free.
-8-
From the library of: Superior Sewing Machine & Supply LLC

PREPARING
TO
SEW
Hold
end
of
needle
thread
with
left
hand
very
lightly.
Then
turn
the
machine
pulley
over
toward
you
slowly
until
the
needle
moves
down
and
up.
Pull
on
the
needle
thread
and
the
bobbin
thread
will
come
up
through
the
hole
in
the
throat
plate
as
shown
in Fig. 17.
Place
both
threads
under
the
presser
foot
prior
to
sewing.
SEWING
Place
the
material
under
the
presser
foot
and
lower
the
presser
foot.
You
are
now
ready to sew—quickly,
smoothly
and
easily.
Stop
the
machine
when
the
needle
bar
has
just
started
to
come
down
for
best
material
removal.
Raise
the
presser
foot,
draw
the
work
behind
the
presser
foot
and
cut
the
threads
close
to
the
work.
- 9 -
Fig.
17
From the library of: Superior Sewing Machine & Supply LLC

PERFECT
STITCH
B
NEEDLE
THREAD
TENSION
TOO
TIGHT
NEEDLE
THREAD
TENSION
TOO
LOOSE
Fig.
18
i
w/.
/
Fig.
19
MORE
C1
TENSION
LESS
TENSION
Fig.
20
SETTING
THREAD
TENSIONS
Normally,
tension
on
the
needle
and
bobbin
threads
should
be
balanced
so
that
if
you
were
to
look
at
a
cross
section
of
a
line
of
stitching,
the
needle
and
bobbin
threads
would
be
locked
in
the
center
of
the
thickness
of
the
material
as
shown
in Fig. 18-A.
Incorrect
settings will
produce
the
conditions
as
shown
in Figs.
18-8
and
18-C.
Regulate
the
needle
thread
tension
as
shown
in Fig. 19. Be
sure
the
presser
foot
is
down
when
making
tension
adjustments.
Tension
on
the
needle
thread
should
be
just
enough
to
set
the
stitch
properly
in
the
material.
See
Fig. 18-A.
For
average sewing,
the
tension
on
the
bobbin
thread
should
be
very
light.
Should
regulation
of
the
tension
on
the
bobbin
thread
be
necessary,
remove
the
bobbin
case
and
adjust
as
shown
in Fig.
20.
-10-
From the library of: Superior Sewing Machine & Supply LLC

ADJUSTING
PRESSER
FOOT
PRESSURE
Correct
presser
foot
pressure
helps
feed
the
work
properly.
The
pressure
on
the
material
should
be
as
light
as
possible,
while
still
sufficient
to
insure
proper
feeding.
Adjust
the
pressure as
shown
in
Fig. 21 and tighten
nut
firmly.
ADJUSTING
STITCH
LENGTH
Depress
and
hold
feed reverse lever
A in center position and
turn
stitch
length regulating dial as shown in
Fig.
22.
The machine will produce a maxi
mum 6 stitches to the inch (4mm
stitch
length).
To
change
the
direction
of
feed
for
back
tacking,
depress
feed reverse
lever
quickly
to
lowest
position
until
back
tack
is
completed.
NOTE:
Numerals
on
stitch
length
regulating
dial
are
reference
points
and
do
not
denote
actual
number
of
stitches
per
inch.
-
//
-
MORE
Fig. 21
LONGER
SHORTER
Fig.
22
From the library of: Superior Sewing Machine & Supply LLC

Fig. 23
MACHINE
PIN
CUSHION
For
your
convenience, a
pin
cushion
has
been
provided as
shown
in Fig.
23.
It is easily
removed
and
replaced.
Remove
the
cushion
by
pulling
it
from
its
seat
and
replace
it
by
pressing
the
cushion
into
position.
HINTS
FOR
PERFECT
OPERATION
*Keep
the
oil level in
the
oil reservoir
at
the
HIGH
mark.
*
When
turning
the
machine
pulley,
always
turn
it
over
toward
you.
*Always
keep
the
bed
slide closed
when
the
machine
is in
operation.
*Clean
out
any
lint
or
other
waste
around
the
hook
and
between
the
feed
rows
on
the
underside
of
the
throat
plate.
*
Don't
try
to
"help"
the
machine
by pulling
the
fabric.
*
Don't
press
the
knee
lifter
while
the
machine
is running.
*
Don't
run
the
machine
when
threaded
unless
there
is
material
under
the
presser
foot.
-
12
-
From the library of: Superior Sewing Machine & Supply LLC

The
Same!
To get replacements that
are the same as parts in
new
machines
....
BUY
PARTS
AND
NEEDLES
MADE
BY
SINGER
TO
BE
DOUBLY
SURE
of new machine performance, make sure that
all replacement parts and
needles
are precisely
identical
to
those
in
new
SINGER
machines.
LOOK
FOR
THE
TRADEMARK
SINGER
1. on every package or container
2. on the needle or numbered part
Needles in containers marked
"For
Singer Machines" are
NOT made by SINGER
TO
ALL
WHOM
IT
MAY
CONCERN:
The improper placing or affixing
of
the Trademark "SINGER" or
any other of the trademarks of The Singer Company (all of which are
duly Registered Trademarks) on any machine that has been repaired,
rebuilt, reconditioned, or altered in any way whatsoever outside a
SINGER factory or an authorized SINGER agency is forbidden.
* A
Trademark
of
THE
SINGER
COMPANY
From the library of: Superior Sewing Machine & Supply LLC

Form
\) 229
"]
Printed in Jopon
UNITY
SEWING
SUPPLY
CO.
824
E.
8th
St.
Los Angelesi
CA
90081
From the library of: Superior Sewing Machine & Supply LLC
Other manuals for 120U
1
Table of contents
Other Singer Sewing Machine manuals

Singer
Singer 133W101 User manual

Singer
Singer 147-85 User manual

Singer
Singer 1375A1 User manual

Singer
Singer C240 User manual

Singer
Singer 18-22 User manual

Singer
Singer 111W112 Quick start guide

Singer
Singer 11-33 User manual

Singer
Singer 40751 User manual

Singer
Singer 6SS User manual

Singer
Singer 8280 User manual

Singer
Singer Quantum 9240 User manual

Singer
Singer 212U539A Setup guide

Singer
Singer 291U User manual

Singer
Singer 451K125 User manual

Singer
Singer 150W4 Quick start guide

Singer
Singer 150W3 Quick start guide

Singer
Singer 123-1 User manual

Singer
Singer 221-1 User manual

Singer
Singer Pixie User manual

Singer
Singer 160 User manual