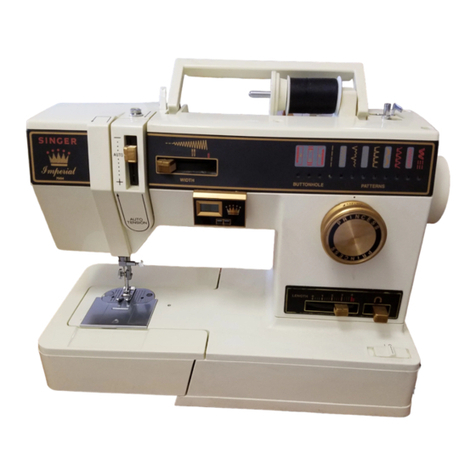
Singer 160 User manual

Service Manual
104 73 23-26
26 Sep 2011
160 model

Page 2/41
Original issue
Sept.2010
Service Manual
160
Model
INDEX
1. Disassembling of covers
2. Test mode
3. Adjustment of feed dog height
4. Needle bar height
5. Needle threader height
6. Presser foot height and direction
7. Needle position at zigzag stitching
8. Clearance between needle and shuttle
9. Needle timing to feed dog
10. Needle timing to shuttle hook
11. Adjustment of take-up lever timing to needle
12. Adjustment of meshing position of gears for thread take-up
lever
13. Adjustment of thread tension
14. Tension of timing belt
15. Motor belt tension
16. Retaining bracket for bobbin case
17. Origin point positioning of zigzag bight
18. Stitch length
19. Needle stop at highest position
20. Electronic component area
*ACPowerboard
*CPU board-1
*Switch board-1
21. Wiring diagram

Page 3/41
Original issue
Sept.2010
Service Manual
160
Model
1. Disassembling of covers
(1) Face cover side
Remove screw A.
Remove screw B.
A
B

Page 4/41
Original issue
Sept.2010
Service Manual
160
Model
1. Disassembling of covers –continued--
(2) Bottom side
Remove a screw on front cover.
Remove a screw inside of access
hole of front cover.
Don’t remove screws above and
below the access hole
Remove cap for fine adjustment on assembly.

Page 5/41
Original issue
Sept.2010
Service Manual
160
Model
1. Disassembling of covers –continued--
(3) Back cover side
Remove two self-tapping screws.
Remove two self-tapping screws
Remove self-tapping screw.

Page 6/41
Original issue
Sept.2010
Service Manual
160
Model
1. Disassembling of covers –continued--
Pre-tension unit is removed.
(4) Front cover side
Loosen screw A.
A
Remove screws (A & B) on pre-tension unit.
B A B

Page 7/41
Original issue
Sept.2010
Service Manual
160
Model
1. Disassembling of covers –continued--
Open back and front covers.
Push up front cover to open by inserting
small screw driver between front and
back covers.
Open mating portion of front and back
covers by pushing back cover with small
screw driver.
Open
front cover with
smallscrewdriver.
Remove front cover.

Page 8/41
Original issue
Sept.2010
Service Manual
160
Model
2. Test mode with warning function deactivated
This test mode is used to operate machine without threading, while sensors for
thread breakage, presser foot lever and bobbin thread are deactivated.
1. While pushing three switch buttons 1, 3 & 5 at control panel at the same time,
turn on sewing machine.
2.Release three switch buttons after beep sound is heard.
Machine runs with any desired button selected by using foot control.
1 3 5

Page 9/41
Original issue
Sept.2010
Service Manual
160
Model
2. Test mode -- continued --
1. Push bobbin winder to the right
2. Push and hold reverse switch
in place.
3. Turn on power switch.
4. Release bobbin winder while
pushing reverse switch, just after
power switch is turned on.
Note: See next page

Page 10/41
Original issue
Sept.2010
Service Manual
160
Model
2. Test mode -- continued --
Release bobbin winder by the time when LED is lit at extreme right line.
After entering test mode, the machine beeps and LED turns off.
Test mode
*Test mode 1 (Button ①)
Maximum zigzag width at 7 mm
No feed
*Test mode 2 (Button ②)
2.4 mm feed
Needle in the center position
*Test mode 3 (Button ③)
For aging (shaking down)
Zigzag width at 7 mm
2.4 mm feed forward and backward
Note: use foot controller for running
machine.

Page 11/41
Original issue
Sept.2010
Service Manual
160
Model
3. Adjustment of feed dog height
Checking:
1. Move feed dog to its highest position by turning hand wheel.
Check to see if feed dog height is as illustrated below.
Adjustment:
1. Remove needle plate. Loosen nut with wrench.
2. Adjust height by turning screw as illustrated. Tighten nut securely after adjustment.
0.9 – 1.1 mm

Page 12/41
Original issue
Sept.2010
Service Manual
160
Model
4. Needle bar height
Note: Make this checking before checking “Needle timing to shuttle” and
”Feed-dog timing (vertical motion)”. Use needle Singer 90/14.
Checking:
1. Select straight stitch at center needle position.
2. Remove presser foot and needle plate, and then remove bobbin case.
3. Replace needle with special needle gauge (L=28.5 mm).
4. Lower the needle gauge to its lowest position by turning hand wheel by hand.
Check to see if the bottom of the needle gauge aligns with shuttle race pushing
the needle lightly as shown by arrow mark.
Adjustment:
1. Remove face cover.
2. Loosen screw (A) of needle bar clamp using hex screw driver
and adjust the height of needle bar.
Highest position of
Needle
Needle position
at center
A
Needle gauge L = 29 mm
Shuttle race

Page 13/41
Original issue
Sept.2010
Service Manual
160
Model
4. Needle bar height –continued--
3. Tighten the screw (A) securely after adjustment. Replace needle gauge with
normal needle #90/14.
4. Check to see if needle threader operates correctly and there is not interference in
vertical movement of needle bar.

Page 14/41
Original issue
Sept.2010
Service Manual
160
Model
5. Needle threader height
1. Use needle Singer 90/14.
2. Select straight stitch at center needle position.
3. Raise needle to its highest position by turning hand wheel toward you.
4. Lowering needle threader lever, check and see if hook is inserted into needle hole.
Adjustment
1. Remove face cover.
2. Turning hand wheel by hand, raise needle bar to its highest position.
3. Loosen screw (B) of threader stopper.
4. Insert hook into the upper side of needle hole moving the needle bar (C).
5. While holding the above situation, tighten the screw (B) attaching the threader
stopper onto stopper pin (D).
6. The direction of threader stopper should be facing toward you so that it may
not hit the needle support bracket.
*Insert the hook into the upper side of needle hole at all times as the smaller
needle size, the shorter needle hole.
Insert the hook into the
upper side of needle hole.
90/14 80/11
70/9
Hook
B
D
B
C
Threader stopper

Page 15/41
Original issue
Sept.2010
Service Manual
160
Model
5. Needle threader height --continued--
7. If the direction of insert hook is deviated from correct position, adjust the hook
position with the small screw driver in the accessory.
8. If hook protrudes from needle hole too much or little, it may affect threading
condition.
Hook protrudes
too much.
Hook protrudes
correctly.
Hook protrudes
too little.
Needle
Hook
Hook holder
Needle hole
Hook
Hook

Page 16/41
Original issue
Sept.2010
Service Manual
160
Model
5. Needle threader height --continued--
Remove screw (K) and outer pipe (J). Pull down the threading lever to its
lowest position. Check and see if hook protrudes approx. 1.5mm from needle.
Loosen nut (F) under threader support shaft and turn hook portion (G) in either
way for adjustment. Tighten the nut (F) securely after adjustment.
Reassemble outer pipe (J) to correct position.
F
G F G
K
J
approx.1.5mm

Page 17/41
Original issue
Sept.2010
Service Manual
160
Model
5. Needle threader height -- continued --
9. If twin thread guide (H) is located much higher or lower than hook portion, needle
is not threaded.
After checking hook position, adjust position of outer pipe (J) so that there may be
a clearance 0.4 to 0.6 mm between screw (K) and bottom of long hole.
0.4 to 0.6mm
Position of twin thread guide and hook is shown below with threading lever lowered.
thread guide is locates too low.
It is located correctly.
K
J
It is located too high.
Guide (H)
Hook
Outer pipe (J)
0.4 to 0.6 mm

Page 18/41
Original issue
Sept.2010
Service Manual
160
Model
6. Presser foot height and direction
Checking
1. Lower the feed dog below the needle plate.
2. Raise the presser foot lever.
3. Check and see if clearance between needle plate and presser foot is about 5.6 mm.
Adjustment
1. Remove the face cover, and Raise the presser foot lever.
2. Loosen the screw (A) and adjust the presser foot height moving the presser bar.
3. Tighten the screw securely after checking the presser foot is parallel with the holes for
feed dog on the needle plate.
5.6 mm
A
A

Page 19/41
Original issue
Sept.2010
Service Manual
160
Model
7. Needle position at zigzag stitching
Checking:
1. Set test mode at 1.
2. Turn hand wheel by hand and see if needle leaves the same clearance at both right
and left end of needle plate hole.
Adjustment:
1. Loosen screw (A) and adjust needle position.
b
a
a=b
A

Page 20/41
Original issue
Sept.2010
Service Manual
160
Model
8. Clearance between needle and shuttle
Note: Set machine at test mode and select mode 1 for needle at L/C/R
positions. Make this checking before checking “Needle timing to shuttle”.
Checking:
1. Remove needle plate, bobbin case and face cover.
2. Shift shuttle hook at the rear of needle by turning hand wheel.
Check to see if needle clearance to shuttle is within 0.05 to 0.15 mm.
Adjustment:
1. Turn screw (A) to either direction as illustrated and adjust needle position by moving
support shaft back and forth.
To decrease clearance, turn screw to counter-clockwise.
Shuttle
0.05~0.15mm 0.05~0.15mm
At left position At right position
0.05~0.15mm
At left position At right position
A
A
Other manuals for 160
2
Table of contents
Other Singer Sewing Machine manuals

Singer
Singer 400W31 User manual

Singer
Singer 758E User manual

Singer
Singer 51W19 Quick start guide

Singer
Singer 6408 User manual

Singer
Singer 4411 User manual

Singer
Singer 246-20 User manual

Singer
Singer 71-53 User manual

Singer
Singer 410W10 User manual

Singer
Singer 320K2 Installation and operation manual

Singer
Singer 5062 User manual

Singer
Singer 176-21 User manual

Singer
Singer 10 PATTERN SEWING MACHINES User manual

Singer
Singer MA75T User manual

Singer
Singer 695B012 Troubleshooting guide

Singer
Singer 14U594 User manual

Singer
Singer 1408 User manual

Singer
Singer 3323 User manual

Singer
Singer 15-1 User manual

Singer
Singer 144W204 Quick start guide

Singer
Singer 251C User manual