manuals.online logo
Brands
  1. Home
  2. •
  3. Brands
  4. •
  5. Singer
  6. •
  7. Sewing Machine
  8. •
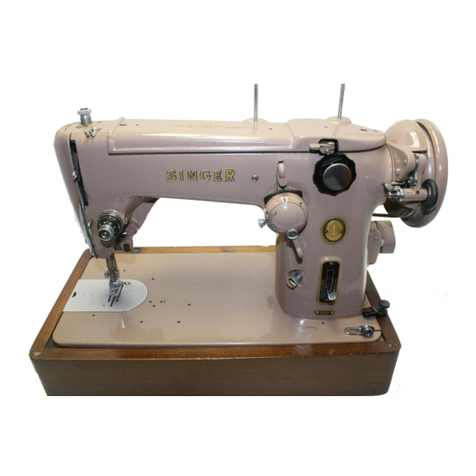
  9. Singer 327 User manual

Singer 327 User manual

Other manuals for 327

1

This manual suits for next models

1

Other Singer Sewing Machine manuals

Singer 62-25 User manual

Singer

Singer 62-25 User manual

Singer 20U51 User manual

Singer

Singer 20U51 User manual

Singer 1200-1 User manual

Singer

Singer 1200-1 User manual

Singer HD-110 User manual

Singer

Singer HD-110 User manual

Singer 95-40 User manual

Singer

Singer 95-40 User manual

Singer 86-1 User manual

Singer

Singer 86-1 User manual

Singer 147-114 Quick start guide

Singer

Singer 147-114 Quick start guide

Singer C240 User manual

Singer

Singer C240 User manual

Singer 188K User manual

Singer

Singer 188K User manual

Singer 24-56 User manual

Singer

Singer 24-56 User manual

Singer 17U130 Manual

Singer

Singer 17U130 Manual

Singer 212U539A Setup guide

Singer

Singer 212U539A Setup guide

Singer 270 Series User guide

Singer

Singer 270 Series User guide

Singer 71-3 User manual

Singer

Singer 71-3 User manual

Singer 657 User manual

Singer

Singer 657 User manual

Singer 127-1 User manual

Singer

Singer 127-1 User manual

Singer FEATHERWEIGHT FW-75 User manual

Singer

Singer FEATHERWEIGHT FW-75 User manual

Singer 3321 matri User manual

Singer

Singer 3321 matri User manual

Singer HD 6700C User manual

Singer

Singer HD 6700C User manual

Singer Athena 2009 Dimensions

Singer

Singer Athena 2009 Dimensions

Singer Fashion Mate 7256 Owner's manual

Singer

Singer Fashion Mate 7256 Owner's manual

Singer 86K60 Quick start guide

Singer

Singer 86K60 Quick start guide

Singer 118W4 Installation and operation manual

Singer

Singer 118W4 Installation and operation manual

Singer 6267 Manual

Singer

Singer 6267 Manual

Popular Sewing Machine manuals by other brands

Brother PE-180D Service manual

Brother

Brother PE-180D Service manual

ELNA 2002 instruction manual

ELNA

ELNA 2002 instruction manual

Siruba DL7200D-NM1 Instruction book

Siruba

Siruba DL7200D-NM1 Instruction book

Silver Viscount 9500e instruction manual

Silver

Silver Viscount 9500e instruction manual

Pfaff 3588-05/020 instruction manual

Pfaff

Pfaff 3588-05/020 instruction manual

JUKI DDL-9000A instruction manual

JUKI

JUKI DDL-9000A instruction manual

Pfaff 284 Instruction book

Pfaff

Pfaff 284 Instruction book

Reliable MSK-335B Specification sheet

Reliable

Reliable MSK-335B Specification sheet

Kenmore 385. 19000 owner's manual

Kenmore

Kenmore 385. 19000 owner's manual

Brother FD4-B271 instruction manual

Brother

Brother FD4-B271 instruction manual

Brother Computerized Embroidery Machine Operation manual

Brother

Brother Computerized Embroidery Machine Operation manual

Husqvarna Viking Designer SE user guide

Husqvarna Viking

Husqvarna Viking Designer SE user guide

Riccar RL634DE user manual

Riccar

Riccar RL634DE user manual

ZOJE ZJ9800 Operation manual

ZOJE

ZOJE ZJ9800 Operation manual

Siruba C007JP Instruction book

Siruba

Siruba C007JP Instruction book

IKEA SY user guide

IKEA

IKEA SY user guide

Pfaff 571 instruction manual

Pfaff

Pfaff 571 instruction manual

Brother BB370 Quick setup guide

Brother

Brother BB370 Quick setup guide

manuals.online logo
manuals.online logoBrands
  • About & Mission
  • Contact us
  • Privacy Policy
  • Terms and Conditions

Copyright 2025 Manuals.Online. All Rights Reserved.

~
~
~
- -
INSTRUCTION
BOOK
Memo-MatiC
Punchcard knitter
with
5JNGER
'Magic Point'
motif
making by ·
Downloaded from ManualsNet.com search engine
We
thank you for purchasing our
Knitting Machine Model 327
Before
sta
rting
to
kn
it
on
this
machine, we recom-
mend
you
ca
refully
re
ading this Instru
ction
Book. By
using
th
ese
"Ea
sy-
to-F
o
ll
ow"
directions,
yo
u will
be
able
to
take full advantage
of
the excell
en
t
perfor-
mance
of
this
machine.
For
the
Model
329
Knitter,
th
e
Knit
Contour,
Pattern
Paper and
Stitch
Scale
Se
t are
not
included.
Downloaded from ManualsNet.com search engine
Names
and
function
of
component parts.
Accessories
Carr
iag
e
Main body
of
machine
1.
Assembli
ng
procedure. . . . . . . 1
2.
Preparation
for
knitting
. . . . . .
..
.
..
4
* R
ow
co
unter.
. 5
* Latch needle
positioning.
. . . . . . 6
* The
la
tch
need
le and names
of
its parts. 6
3.
Casting on and stockinet
knitting.
. 7
* The
re
lation between the Stitch Dial
a
nd
ya
rn. . . . . . . . . .
.11
4. H
ow
to
use
the
Knit
Contour
12
* Names
of
component parts and
their
operation . .
...
...
...
. 12
* Pattern
Paper
. . . . . . . . . . . . . . . . . . 12
* G
au
ge
Scale . . . . . . . . . . . . . . . . . . . 12
* Stitch
Sca
le. . . . . . . . . . . . . . . . . . . . 12
*
Ce
ntre Scale . .
..
..
. . . 12
* H
ow
to
measure a swatch
with
a
Gauge
Scale . . . . . . . . . . . . . . . . . . . 12
* H
ow
to
set
the Stitch Scale. . . . . . . . . 15
*
How
to
set
the Row Number Dial
....
*
How
to
set
the Pattern Paper
..
* P
re
paratory Steps
for
Knitting
.
5.
Basic
techniques
for
knitting.
(1)
Wa
ste
Knitting
* Methods
of
Increasing. .
..
. .
(2) Increasing one stitch at the
edge
(3) Incr
easing
two
or more stitches at
15
16
18
19
19
19
19
the edge. 20
* Metho
ds
of
decreasing 20
(4) Decreasing one stitch at the
edge
....
20
(5) Decreasing
two
or more stitches
at
the
edge
..........
. .
..
...
.
* Method
of
Partial
Knitting
...
..
..
.
(6) Parti
al
knitting
by
decreasing stitches.
(7) Partial
knitting
by increasing stitches .
* Finishing
(8)
How
to
remove the garment
from
21
21
22
23
machine . . . . . . . 24
(9
) Binding
off
K1
P1
Ribbing.
.
.....
25
(10)
Se
aming on machine
or
Bin,ding
off
..
25
(11
)
Kitc
hener stitch or weaving ......
..
26
(
12
)
Seam
ing the side
edges
. . 26
(13)
Sl
ip stitches
......
...
...
....
..
27
(14)
How
to
make
buttonho
l
es.
. . 27
(1
5)
Hemming a garment . . . . . . . . . 28
(16) Bound
off
Cast-On (Closed
edge
Cast
-o
n) . . . . . . . . . . 28
(17) Mock
Ribbing.
. . . . . . . . . . 29
6.
Let's
Knit.
. . . . . . 30
Lady's pullover
...
. .
...
. .
...
....
30
Man's Cardigan . . . . . . . . . . . 35
7.
Pattern
Knitting.
. . . . 38
*
How
to
read the Punch Card. . 38
*
How
to
use
the marking
A,
B,
C, Don
the card . . . . . . . . .
..........
38
* The Relation between the Pattern Marks
on the Needle
Bed
and Patterns. 39
*
How
to
use
the
Vinyl
Tape. . 39
* Installing the Card Guide
........
40
*
How
to
set
the
Pun
ch Card. . . . . . . 40
* First Setting Position . .
*
How
to
Read
the Operation Table .
*
Prepa
ra
tions
for
Knitting
Pattern
Stitches
.....
Tuck stitch pattern
40
41
42
43
48
Tuck stitch pattern
in
colours .
Slip
st
itch pattern
....
Slip stitch pattern in col
ours.
....
..
51
54
Knit-in (Fair
is
l
e)
. . .
..
.
..
. 57
Mag
ic
point
(Motif)
......
.
..
.....
61
Weaving . . . . . . . . . . . . . . . . . 65
Punch
lace
70
Pattern
knitting
using the every-other
row feeding mechanism. . 73
Platting .
76
Lace
knitting
78
How
to
use
the New Magic
Cams
.
...
.
80
* In
case
of
Magic Point
Knitt
i
ng
...
.
..
81
* In
case
of
Knit
-i
n and Weaving
...
. . .
81
Pattern stitches
without
using punch
card . . . . . . . . . . . . .
82
1.
K1.
P1.
Ribbi
ng
. 82
2.
Garter
stitc
h . . . . . . . . . . 82
3.
Open
work
. . . . . .
..
. . , . . . . . 83
4. Cable stitch. . . . 84
5.
Solid pattern
of
knit and purl stitch. 84
6.
Cord
knitting
85
8.
Hel
pful
hints.
86
*
If
the Carriage
has
jammed
while
knitting
86
*
How
to
repair incorrect
knitting
. .
86
* When the Carriage
is
Accidentally Pulled
Off
the Rail in the Middle
of
Pattern
Knitting
. . 88
* Relation between Touch Levers and
patterns in
each
form
of
Knitti
ng.
* If the yarn gets loose or entangled at
the
edge
of
fabric
...
*
How
to
Correct a Dropped Stitch
While
Knitt
ing
......
.
89
89
90
* If the yarn
is
entangled in the
"Memory
Bank"
..
. . .
91
*
If
the Carriage
will
not
move
smoothly.
91
* Replacing damaged needles .
92
9.
Maintenance instruction .
(
1)
Lubrication.
(2)
After
us
i
ng
the machine
..
10.
How
to
repack the machine.
Knitting
symbols . .
.....
93
93
93
94
95
Downloaded from ManualsNet.com search engine

*
NAMES
AND
FUNCTION
OF
COMPONENT
PARTS*
*ACCESSORIES*
,
____
j_
ao
___
_ _
J._
l
@ ®
~
~
.
CD
1i;., ..;;;;
Q..
·
:.;
®
"'--
..:;;p
®
- l
-
.:3
@
I 'I
r~
-
l·
"~
r
__
t.-
--
@
@
I
~
-
-
-
. .
..
@
([; ®
6 @
®
Qj)
@
Used
for
Magic
Point
knitting.
CD
New
Magic Cam
~
Point
Cam M Placed
on
the
needle bed
behind
the
needle
butt
to
cover
the
range
of
the
Magic
Point
.
®
Point
CamE
Placed
on
the
needle bed
behind
the
needle
butts
for
Knit-in
and Weaving.
®
Separator
.
..
........................ Used
to
separate
two
different
yarns.
® Accessory
box
.....
..
............
Contains
the
accessories.
® Spare needles ..................
..
For
replacement
of
damaged needles.
(J)
Tapestry
needle................. Used
to
finish
the
stitches
or
to
seam
the
garments.
®
Name
paper........................ Used
for
identific
a
tion
of
the
possessor
of
the
ma-
chine.
® Ravel
cord
.......................
..
Used
for
east-on and separa
ting
the
waste
knitting
from
main
knitt
in
g.
®
Brush
............
..
................... Used
to
clean
the
machine.
@
Oil
container
.....................
Contains
oil
for
lubricating
of
the
knitting
amchine
.
@ Weaving
arm
..
......
..
............ Used
for
weaving
patterns.
@ Ex
tra
r
ound
brush ............ Used
for
tuck
knitting.
@ Card snaps ..................
..
.... Used
to
join
both
ends
of
the
punch
card.
~'-...
! 1
·~~-r~
·
-
-
- -
-
-
-
-
-
~
-
-
----
.-=.::::.;
Ll..-
-~--
J•
l=;
"
'F
"
.---
I /
\:,/
®
F e " u
-C
?.
. n
@
001
~~
@
@
--
__;_-:;,~=!
,_
'
@
®
@
~

@
@
I
•
® @
@
Stitch
scale ....................... Used
for
counting
s
titches
on
Knit-Contour.
@ Gauge
sca
le ...........
..
.......... Used
for
counting
a swatch.
@
Auto-tension
rod
........
..
.....
Holds
the
auto-ten
sion and
the
auto
-
tension
guide.
@
Auto
-
tension
....
.................
Adjusts
the
tension of yarn
autom
a
ti
cally.
@ Weights...........
..
....
..
...
..
...... Used
on
the
garment
while
pattern
knitting.
®
Transfer
tools
....
................ Used
to
transfer
stitches
for
increasing and decreas-
(1
x
2,1x3,2x3)
ing.
@
Tappet
..
...................
..
........ Used
to
change
plain
stitch
to
purl
stitch
for
r
ibbing
and
other
patterns
.
@
Clamps
.............
..
............... Used
to
se
cure
the
machine
to
the
table
.
@I
Carriage fastener
..
..
....
....
..
. Used
to
fasten
the
carriage
to
the
needle bed.
@ Card
guide
..........
..
............
Holds
the
punch
card in
position
.
@ Needle pusher
..
....
....
..........
Two
sided
plastic
plate,
one
edge
smooth
and
the
other
1x 1. Used
to
select
the
needles.
@ Punch card
@
Pattern
paper
Perforated
vinyl
sheets used
for
pattern
knitting.
A set
of
20
sheets
come
with
the
machine.
Used
on
Knit-Contour,
18
sheets
come
w
ith
the
ma-
chine.
R l ' - " j
• ' ' - 9
.•
t ' ____, I ;;} ,,..- f \
i ·I ,
_.t
~
ll
Ill
J!t I
k~
,/
)>
t
't
j
,.
,
,.
w.
i8
Q•
Vv7!M
()
1 ·•
'I
I
,,
1
-:
l
'
IJ
Downloaded from ManualsNet.com search engine
*CARRIAGE*
Memory
Bank
-
----------------
-~
The memory bank
is
installed inside
the Carri
age
Cov
er.
Side
Lever
--
--
-
--
------
- -
----.
The Side Levers
have
tw
o positions.
• For moving the Carriage
without
knitting.
A.
For Stockinet and pattern knitting.
Arm
Nut
--
-
--
-
------
-
--
----
Fabric
P
r
E!SSe,r
-
----------------
~
This pr
eve
nts the
knitting
from
coming up or floating
*MAIN
BODY
OF
KNITTING
MACHINE*
Knit-Contour
Punch
Card
Insertion Slit
Ravel
Cord Holder Pattern position marks Needle Number
Mark
Th
is
clip
holds
the Ravel
Cord
for
casting
on.
At every
twenty
fou
rth
needle
there
are
marks X and 0
to
make
it
easier
to
find
the
posit
io
n
of
a
pattern
whic
h
is
repeated
at every
twenty-fourt
h needle.
Yarn
Gate
(
E
I=
t
I.
~~
-
~
~~--
---
C
v
Separate the yarn
in
Yarn
Feed
er
1 from that in Yarn
Fee
Open the Yarn Gate towards you to thread the yarn
int
·
Feeder 1.
Read
the
row
number
appearing here.
Feed
Stop
Knob
• ........... The Punch Card
is
e
..
........
.The feeding
of
the
(The arrangement
the pattern on the
L Knob
S ...........Punch Card
is
fr
stroke
of
the
Ca
L ...........Punch Card
is
fE
other
stroke
of
Row Counter
'fJ
·-
I _ _ _
\ \ _.:==[_
--
'
~
. .-
~
. -..-
--
_.,
...
-.
. . . . -
L Indicator
The
Blue
co
l
our
appears
VI
positioned
at
S.
Blue
an
d Red
colours
E
when
the
L
Knob
is
posit
i
Downloaded from ManualsNet.com search engine
Ro
w Counter Lever
~
"
"'
foe
c=
ih'
R~
Coool"
Stitch Dial
This di
al
is
used
for
adjusting to the weig
ht
of yarn
fo
r
th
e si
ze
of
the s
tit
ches.
By adjusting this d
ial
a wide variety of yarns from
very fine yarn
to
bulky
yarns
can
be
knitted
.
Handle
Yarn Gate
The
ha
nd
le
is
foldable and ready
for
use
when raised.
It
is
ve
ry
eas
y
to
pa
ck away.
Cam Lever
By setti
ng
this l
ev
er to a
des
ired position on the Carri
ag
e,
th
e
pattern
stit
ches
c
an
be wor
ke
d simply by moving the
Ca
rr
iage
back and forth.
Russel
Lever
1..
..
.... .With the Ru
ssel
Lever in this position the needl
es
pl
aced
in
Band
C pos
ition
knit
while those pla
ced
in D position
do n
ot
knit.
II
. .
..
.This position
is
used
when
knitt
ing the needles placed in
D position.
-1---
---d.'\-frr-
--
-Carriage
Arm
When t
he
Carri
age
jams remove
th
e
Ca
rriage
Arm
and
the
fr
ont
of
the
Ca
rr
iag
e
ca
n
be
lift
ed
to
be mov
ed
freely.
Yarn Holder
In weavi
ng
, the yarn to
be
woven
is
hooked h
ere.
3,:oarate the yarn in Yarn Feeder 1 from that in Yarn Feeder 2 .
::;[en the Yarn Gate
towar
ds you
to
th
read
the yarn into the
==e
er
1
=iea
d
the
row
num
ber
3op
earing here.
Touch Le
ver
Feed
Stop Knob
• ...
..
...... The Punch Card is a
utomatic
al
ly fed.
e .
..
.....
..
.The feeding
of
the Punch Card
is
stop
ped.
Carri
age
Covers, I
ndicator
s, and Brand Marks
are cover
ed
wi
th
pl
as
ti
c films
to
prot
ec
t
the
machine f
rom
s
ca
rs in
pa
cka
gi
ng and in trans
it
.
Yo
u may peel o
ff
th
e fi
lm
s w
ith
your
fin
ge
r
nails
before
using
th
e machine.
(The arrangement of
th
e Touch Lever indicates
th
e p
attern
on the
Pu
nch Card.)
L Knob
S.. . .
..
.Punch
Ca
rd
is
fed w
ith
every
st
roke
of
the
Car
riag
e.
L ... .
..
..
.
..
Punch Card is fed
wi
th
every
other s
troke
of
th
e
Ca
rr
iage.
L Indicator
The Blue co
lo
ur appears
wh
en
the
L Knob
is
p
ositio
ned
at
S.
Blue and Red
colo
ur
s
appear
al
terna
t
ely
wh
en
the
L K
no
b
is
po
s1t
ioned
at
L.
Accessory
Tray
Downloaded from ManualsNet.com search engine
\
~
\
---.'$
Accessory Box
I \
Auto-Tension
.-
~
~
~
..
~
%
~
~·~
\
fr,:;;.
~-
;Wi;~~
--------------
(
1)
Place the machine on a table
with
the handle on
your
op-
posite side and unfasten the
latc
hes.
(2)
Lift
the upper
case
slightly
and
pull the cover towards
you
to
free
it
from
the machine. (The
Arm,
Auto-Tension Rod and
Auto-Tension are housed in the
Top
Cover.)
(3) Remove the
protective
packing
from
the Accessory Box and
Carriage.
(4) Take from the Accessory Box
the
two
clamps and insert them
into
the slots,
which
are situat-
ed
between the
Foot
Rubber
and the Casement, on the un-
derside
of
the machine, and
secure them
to
the tabl
e.
Rubber feet are provided un-
derneath the
ma
chine
so
it
wi
II
not
slide on the table when the
clamps are
not
used.
Downloaded from ManualsNet.com search engine

(5) Loosen the
right
Arm
Nut
and remove the Car-
riage Fastener.
(Be
very careful
not
to
lose the
Carriage Fastener,
as
this
is
used
for
securing the
Carriage
to
the Needle Bed when the machine
is
stored
or
handled.)
(6)
Release
the
wire
spring
whic
h secures, inside
the
top
cover, the Auto-Tension Rod,
Auto
-Ten-
sion and Carriage
Arm
and remove the latter
from
the cover.
Auto-Tension Spring
Wire
(7) Loosen the Carriage
Arm
Nuts and slide
the
Carriage
Arm
under the nuts
as
far
as
it
goes
and
firmly
tighten the nuts.
(8)
Raise
the Carriage Handle
until
it
stands in a
locked position.
(9) Keep small accessories, such
as
Transfer Tools
and Tappet, etc., in the Accessory
Tray,
on the
right
side
of
the machine.
Be
careful
that
the
accessories do
not
prot
rude
from
the tray
to-
wards the needle bed, especially in the
case
of
the Ravel Cord. This
is
a precaution against
the cord becoming entangled in the memory
bank
of
the carriage.
(10)
For
Model 329, install the cover
of
the Accesso-
ry Box
onto
the screw at the
right
end
of
the
machine
so
that
it
may serve
as
an
Accessory
Tray.
- 2 -
Downloaded from ManualsNet.com search engine
cr/
(11) Install the
Auto-
Tension in the order indicated
in
the
diagram opposite.
- 3 -
* The Tension Spring must
be
turned
until
it
comes
to
a stop, making a cl icking sound.
Tension Spring
The
Auto-Tension
Rod
can
be
installed on
either side
of
the c
ase
handle.
By
using
an
additional
Auto-Tension
Complete (sold
sepa-
rately)
you
can
knit
four
different
coloured
yarns
wi
thout
having the bathersome task
of
changing the yarns
each
time
you
wish
to
knit
in
a
different
colour.
The photograph on the
left
shows the machine
ready
for
knitting.
Downloaded from ManualsNet.com search engine
The Auto-Tension takes up the slack on
the
yarn and
feeds the yarn
to
the Yarn Feeder at
an
even tension.
In order
to
knit
even
stitches, the yarn must
be
threaded
correctly
through the Auto-Tension. As the
Auto-Tension
can
hold
two
yarns at a
time,
first
thread one yarn through one side
of
the tension and
rest
it
in the yarn clip and then
you
ca
n proceed w
ith
threading the second yarn.
(
1)
The yarn must
be
unwound
in
an
orderly
pile
in a basket
or
wound
into
a ball using a Yarn
Ball Winder
wit
h the yarn pulling
from
the
centre
of
the
ba
II.
After
wind
ing the yarn
into
a ball,
pull
the yarn
from
the centre before removing
it
from
the
winder
.
Afterwards
check
to
see
if
the yarn
pulls
smoothly
(if
not
rewind).
Note
: The yarn
must
be
placed well behind the
machine
so
that
it
wi
II
not
come in contact
with
the carriage.
If
the yarn hangs loosely
over the machine,
it
may become entangled
with
the
memory
bank. Care should
be
taken
to
prevent this.
*
For
practi
ce
it
is
recommended
to
use
a medium
si
ze,
4
ply
yarn in
light
colour.
(2) Threading yarn through the
Auto-Tension:
- 4 -
Downloaded from ManualsNet.com search engine