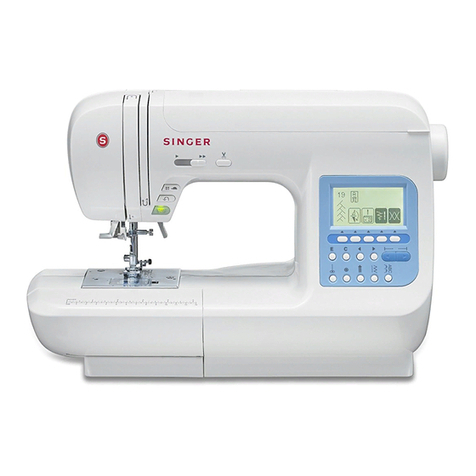
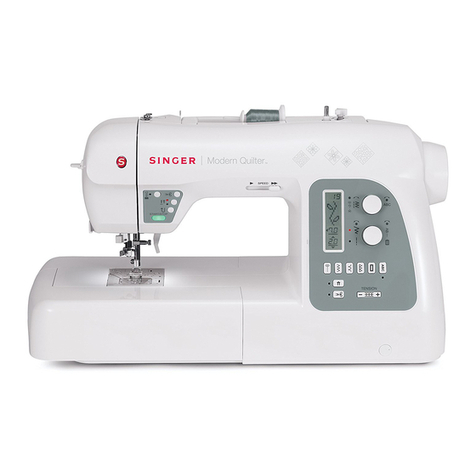
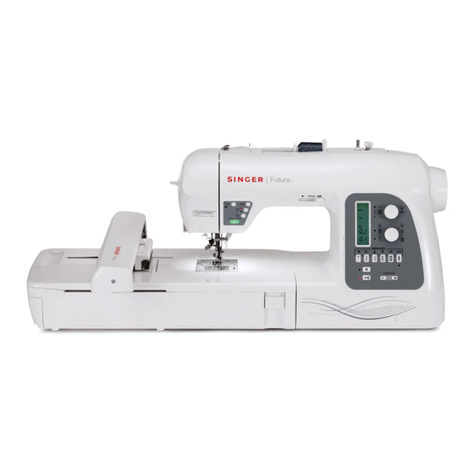
Singer QUANTUM STYLIST 9960 User manual

Service Manual
104 73 05-26
05 March 2010
Quantum Stylist TM
9960

2Singer Quantum Stylist TM 9960
INDEX
ESD..............................................................................................................................................................3
Service tools.................................................................................................................................................4
1. Timing of the upper and lower shaft .........................................................................................................5
2. Needle bar height ....................................................................................................................................6
3. Needle threader height ............................................................................................................................7
4. Presser foot height and parallelism to the needle plate ...........................................................................8
5. Feed-dog height ......................................................................................................................................9
6. Adjustment of needle at center position..................................................................................................10
7. Tension of timing belt..............................................................................................................................11
8. Needle timing to Hook............................................................................................................................12
9. The play of the hook gear.......................................................................................................................13
10. The gap between the needle and the hook..........................................................................................14
11. Bobbin case thread tension .................................................................................................................15
12. Upper thread tension unit....................................................................................................................16
13. Basic positioning of feeding step motor ...............................................................................................17
14. Stitch Balance.......................................................................................................................................18
15. Position of buttonhole sensor lever ......................................................................................................19
16. Tension of motor and pulley belt...........................................................................................................20
17. Height of bobbin thread pullout arm .....................................................................................................21
17. Bobbin winder.......................................................................................................................................22
Service Program ........................................................................................................................................23
Service program - Sensor menu.................................................................................................................23
Service Program - Step motor....................................................................................................................26
Service Program - Message check.............................................................................................................27
Service Program - Without Front cover......................................................................................................28
Removing the covers..................................................................................................................................29
Electrical Parts Connection ........................................................................................................................33

Singer Quantum Stylist TM 9960 3
ESD
ATTENTION!
It is of the utmost importance that precautions are being taken in order to avoid damage of the electronics
by electro static discharges ESD (=Electro Static Discharge). To avoid that these errors arise it is important
to handle loose circuit boards in a controlled way.
Electrostatic charges are caused by:
• When a person is walking (influence) over synthetic tilled or carpeted floor
• When its friction between and separation of two insulating materials.
If this static electricity discharges through electronic components, these may be partially or irreparably
damaged. Electrostatically charged persons represent the greatest danger for components. This can be dis-
sipated by controlled electrostatic discharge.
Always use wrist band when servicing.
Please note that on disposal, this product must be
safely recycled in accordance with relevant
National legislation relating to
electrical/electronic products. If in doubt please
contact your retailer for guidance.
Veuillez noter qu’en cas de destruction, ce produit doit
bénéficier d’un recyclage sécurisé, conforme à la
législation nationale applicable aux produits
électriques/électroniques. En cas de doute, veuillez
contacter votre distributeur agréé.
Bitte beachten Sie, dass hinsichtlich der Entsor-
gung dieses Produkts, vorschriftsmäßig entspre-
chend der gültigen nationalen Gesetzgebung für
elektrische/elektronische Produkte, recycelt
werden muss.Bei Zweifel setzen Sie sich bitte mit
Ihrem Fachhändler in Verbindung.
• All casted parts within our products are marked with name of
material if allowed by size.
• All molded plastic parts within our products are marked with name
of material if allowed by size.
• Innerhalb unserer Produktion werden alle gegossenen Teile mit dem
Materialnamen bezeichnet, wenn es deren Größe erlaubt.
• Innerhalb unserer Produktion werden alle geformten Teile mit dem
Materialnamen bezeichnet, wenn es deren Größe erlaubt.
• Toutes les pièces moulées (en métal) de nos produits sont marquées
du nom du matériau utilisé, quand la taille de la pièce le permet.
• Toutes les pièces moulées (en plastique) de nos produits sont
marquées du nom du matériau utilisé, quand la taille de la pièce le
permet.
4Singer Quantum Stylist TM 9960
Service tools
A reasonable requirement in a domestic sewing machine is that it should able to sew all types of fabrics
used in the home. The settings made when assembling and sewing-in the machines are those most suited to
give the best results in the majority of fabrics and fabric combinations. In doing so, consideration has been
given to the requirements of different markets. This does, however, mean that when sewing extreme fabrics,
better results may be obtained in certain cases by altering the settings. It must be pointed out that these
altered settings can cause poorer results on more normal fabrics. How the different standard ratings are
set can be seen from the description under each setting instruction. The following list of setting gauges and
service tools is intended as an instruction about the special service tools needed to servicing this machine.
1. On several different occasions the needle is used as a setting gauge.
The setting ratings are adapted to needle 90. Make sure to use an undamaged needle.
2. Screwdriver Philips 2PH
3. Screwdriver Philips 1PH
4.Gauge for the feed dog lift.
5. Gauge for the needle height - 28.50 mm
6. Distance gauge 0.05-1,00 mm
7. Allen Key (hex driver) : 2 mm
8. Allen Key (hex driver) : 2.5 mm
9. Allen Key (hex driver) : 1.5 mm
10. Spacer, Ref. No: 63-102600-18/000
11. Feeler gauge 2.5, Ref. No: 61-111600-02/000
12. Needle clamp Ref. No: 413 10 22-01

Singer Quantum Stylist TM 9960 5
1. Timing of the upper and lower shaft
Check
1. Remove the Front cover.
2. Turn the hand wheel to set the needle bar to its lowest position.
3. At this time, the mark (A) - very small molded line on edge, on the lower shaft timing pulley
must be facing straight towards the front.
Adjustment
1. Remove the Front Cover.
2. Loosen the screw (B) of the timing belt tension pulley bracket.
3. Slip out the timing belt from lower shaft timing pulley.
4. Set the needle bar to its lowest position.
5. Turn the lower shaft timing pulley so that the mark (A) faces toward you.
6. Hook the timing belt on the pulley.
7. Push the tension pulley bracket so that the edge of bracket should be 0-1 mm lower than the casting.
NOTE! After adjustment , be sure to check and/or adjust “Hook timing”
A
B
0-1 mm
B

6Singer Quantum Stylist TM 9960
2. Needle bar height
Check
Note: ALWAYS check ”the Timing of the upper and lower shaft” before checking Needle bar height
Check
1. Remove needle plate and bobbin case.
2. Select straight stitch (center needle position).
3. Replace needle with the special needle gauge.
4. Bring the needle bar into its lower turning position.
6. The distance between the upper end of the needle and the surface
(B) of the hook ring should be 28.50 (+/- 0.05 mm).
5. Check this by push on the tip (B) of the Special needle gauge, and it
should just touch the upper part of hook ring(C).
The check is executed with a gauge which is 28.50 mm
long.
Adjustment
The setting is executed with a gauge which is 28.50
mm long.
1. Remove face cover
2. Bring the needle bar to its highest position, from the
front , loosen set screw (A) and retighten it lightly.
2. Bring the needle bar to its lower turning position.
3. Move the needle bar until the correct distance is obtained, the tip of
needle must be flush with hook ring.
4. Tighten set screw (A).
5. Check by means of a twin needle that the needle bar is not twisted, it may cause jump stitches when
sewing with a twin needle.
6. Check to see if needle threader operates correctly
NOTE! This setting affects:
2. Needle threader height
12. Needle timing to shuttle
28.50 mm
A
B
A

Singer Quantum Stylist TM 9960 7
3. Needle threader height
Check.
1. Insert a new # 70 needle.
2. Set the machine to straight stitching (center needle position).
3. Bring the needlebar to its highest turning position.
4. Go down with the threader hook into the needle eye, the threader hook shall go smoothly into the
needle eye.
Adjustment of threader hook highways
1. Insert a new # 70 needle.
2. Remove the face cover.
3. Turning the hand wheel by hand to so the needle bar comes to its highest position.
4. Loosen screw (A) of the threader stopper.
5. Go down with the threader hook into the needle eye.
6. Move the threader holder so that the threader hook is on the upper side of the needle eye.
see Fig 1.
7. Tighten the screw (A) . Make sure to attaching the threader stopper onto stopper pin (D).
NOTE! If the direction of threader stopper isn’t correct, the machine will make and/or threader will not
work smoothly.
Adjustment of threader hook sideways
1. If the sideways position of the hook isn’t correct, adjust the hook position with a small screw driver.
2. Recheck that the needle threader works correctly.
#90 #80 #70
Fig 1
A

8Singer Quantum Stylist TM 9960
4. Presser foot height and parallelism to the needle plate
Check
1. Lower the feed dog, with the feed dog drop mechanism, so it is below the needle plate.
2. Raise the presser foot to its highest position.
3. The clearance between the needle plate and the presser foot should be 6.5 mm.
4. Lower the presser foot , it should be parallel to the needle plate slot (B).
Adjustment
1. Remove the face cover,
2. Lower the feed dog, with the feed dog drop mechanism, so it is below the needle plate.
3. Raise the presser foot to its highest position.
4. Loosen the set screw (A) and adjust the presser foot height by moving the presser bar up or down.
5. Tighten the set screw (A) securely
6. Lower the presser foot and check so the presser foot is parallel with the needle plate slot (B).
if not
a. Lift up the presser foot
b. Loosen up set screw (A) and adjust the parallelism of the presser foot, by turn the Presser bar to the
left or to the right.
7. Tighten the set screw (A) securely.
8. Re-check height and parallelism of the presser foot.
A
6.5 mm

Singer Quantum Stylist TM 9960 9
5. Feed-dog height
Check
Check
1. Turn on the machine and set it at straight stitch , lengths; 5.0
2. Bring the feed dog to its highest position by turning hand wheel.
3. The top of the feed dog should now be 0.9 to 1.1 mm above the needle plate.
Adjustment
1. Bring the feed dog to its highest position.
2. Remove the needle plate.
3. Adjust by turning the Allen key screw (A) until a correct feed dog height (0.9-1.1 mm) is obtained.
Turn clockwise: It will be higher
Turn counter clockwise: It will be lower
This Adjustment can be done, without removing the covers, through the hole (B) on the front cover.
4. Re-check the feed dog height.
0.9-1.1 mm
A

10 Singer Quantum Stylist TM 9960
6. Adjustment of needle at center position
Check
1. Set the machine on straight stitching, center position.
2. Insert a new # 90 needle.
3. The needle position should now be aligned with the centre mark (A) of presser foot ”A”.
Adjustment
1. Remove face cover.
2. Set the machine on straight stitching, center position
3. Turn eccentric screw (B) on needle bar until the needle is aligned with the centre mark (A) of presser foot
”A”.
A
A

Singer Quantum Stylist TM 9960 11
7. Tension of timing belt
Check
1. Remove the covers
2. Push on the belt; it should not be to hard or to loose.
- Too weak tension may result in slippage between hook gear and lower shaft gear due to thread
jamming, bunching and fabric snagging.
- Too strong tension may result in incorrect operation due to increased machine torque.
3. The tension pulley bracket should be 0 -1 mm lower than the casting.
Adjustment
1. Loosen the screw (B).
2. Push the tension pulley bracket so that the edge of bracket should be 0-1 mm lower than the casting.
3. Tighten the screw (B).
B
0-1 mm
B

12 Singer Quantum Stylist TM 9960
8. Needle timing to Hook
Check
1. Always check “Timing of the upper and lower shaft ”and “Needle height” before ”Needle timing to
hook” is checked.
2. Insert a new #90 needle in the machine.
3. Remove the needle plate, bobbin case holder and the bobbin
case.
4. Set machine at straight stitch.
5. Set the needle in its lowest turning position.
6. Turn the hand wheel in the sewing direction and as the needle
is moving upwards, the tip of the hook should pass behind the
centre of the needle, when the needle is 2.5 mm above its lower turning position.
Check with setting gauge, Ref. No: 63-102600-18/000 Spacer, Ref. No: 61-111600-
02/000 Feeler gauge 2.5, Ref. No: 413 10 22-01
Needle clamp
1. Set the machine at straight stitch so the needle is in its cen-
tre position against the presser foot ”A”.
2. Turn the hand wheel until the needle is at its lower turning
position.
3. Put the spacer onto the needle bar and push it upwards
against the needle bar frame (C).
4. Take then the timing clamp and put it on the needle bar
and tighten its screw lightly.
5. Take the 2.5 mm feeler gauge and put its cutout on the
needle bar, above the clamp.
6. Loosen the clamp a little and push both feeler gauge and
clamp upwards against the spacer.
7. Tighten the screw on the timing clamp.
8. Remove the 2.5 mm feeler gauge.
9. Turn the hand wheel, in the sewing direction, until the timing clamp stops against the spacer.
10. The tip of the hook should now be behind the centre line of the needle.
Adjustment
1. Loosen the 2 screws (D) in the hook wheel of the lower shaft.
2. Make sure that the feed dog is in its down stroke position.
3. Repeat checking points 1 to 9 with the setting gauges.
4. Hold the turn the hook gear until its tip arrives behind the centre line of the needle.
5. Hold the hook in position with the left hand and tighten one of the screws (D).
6. Check.
7. Tighten all the
screws (D). A A
C
D
2.5 mm

Singer Quantum Stylist TM 9960 13
9. The play of the hook gear
It is impossible to obtain an equally large play in one rotation of the cog wheel, but it should be as small
as possible at the tightest spot during the revolution.
Check
1. Rotate the hook back and forth and check the play.
2. Do this check on at least 3 different spots during the revolution of the cog wheel.
(Move the cog wheel with the hand wheel).
3. Free play at the tip of hook may be 0.1-0.3 mm.
Adjustment
1. Remove the covers
2. Loosen, screw (A) in the bearing clamp.
3. The play can now be adjusted by turning the eccentric bearing (C).
Use a flat screw driver to move the eccentric bearing.
- up the play will increase
- down the play will decrease
4. Tighten the screw (A).
5. Re check.
NOTE! The slot in the bearing, for setting the play ,shall be to the front.
0.1-0.3 mm
A
C

14 Singer Quantum Stylist TM 9960
10. The gap between the needle and the hook
Check
2. Remove needle plate and bobbin case.
3. Turn the hand wheel and check so the needle clearance to shuttle at both left and right side of needle posi-
tions are within 0.05 to 0.15 mm.
Adjustment
1. Remove needle plate, bobbin case and face cover.
2. Set machine
3. Turn the screw (A) on the back of the machine.
4. When turning screw (A) until the correct needle clearance is obtained.
- To decrease clearance, move the needle bar unit (B) to the front (D - direction).
- To increase clearance , move the needle bar unit to the back (C - direction) .
5. Re-check to see so the needle clearance to shuttle is within 0.05 to 0.15 mm.
A
A
C
D

Singer Quantum Stylist TM 9960 15
11. Bobbin case thread tension
Check
1. Insert a full bobbin into the bobbin case, use normal polyester thread.
2. The thread tension spring of the bobbin case shall give a resistance of 10-12 g when pulling the thread
slowly, using normal polyester thread.
Adjustment
1. Insert a full bobbin into the bobbin case, use normal polyester thread.
2. Pull the thread slowly and turn screw (A) until the correct thread tension is obtained.
NOTE! Remove any loose pieces of thread or fluff from the thread tension discs before any adjustment is
done.
A

16 Singer Quantum Stylist TM 9960
12. Upper thread tension unit
Check
1. Always check so the bobbin thread tension is correct before the upper thread tension is checked.
2. When sewing straight stitching and zigzag, using normal cotton fabrics and polyester thread, a correct
take-up should be obtained.
Adjustment
1. Always check so the bobbin thread tension is correct before the upper thread tension is adjusted.
2. Thread up the machine.
3. Remove the thread tension cover from the top.
4. Sew the machine and turn dial knob (C) until a correct take-up is obtained
NOTE! Before any adjustment is done remove any loose pieces of thread or fluff from the thread tension
discs
a
b

Singer Quantum Stylist TM 9960 17
13. Basic positioning of feeding step motor
This adjustment should normally only be carried out if the step motor has been replaced.
Check - basic position
1. Place the step motors cog wheel (A) against the pin stoppers left side (B).
2. The mark (C) should now line up against the most right cog (D) of the cog segment of guide block.
Adjustment - basic position
1. Loosen up the set screw on the Step motor cog wheel (A).
2. Set the step motors cog wheel (A) against the pin stoppers left side (B).
3. Move the cog segment of guide block so its most right cog (D) is lining up against the mark (C) on the
step motor cogwheel.
Check - fine adjustment
NOTE! In the following procedural it’s required that the Feed unit is removed from the machine.
1. Connect the step motor to the main PC board.
2. Loosen up the set screw on the Step motor cog wheel (A).
3. Pressing the two indicated keys (E) and (F) in the illustration simultaneously while switching on the
machine.
4. Turn the cog wheel around so the left side of the step motors cog wheel (A) is against the stop pin (B).
5. Press the key (F) key, to set the step motor to its set/starting point.
6. Tighten the set screw on the Step motor cog wheel (A).
A
B
C
D
+
㨎㨒㧿㨀㨟㨃㨣㧻㨅 㧷㧲㧩 㧿㧩
㧝㧝㧜㧝㧜㧜㧝㧝㧝 㧜 㧞㧡㧡 㧞㧟㧞
㨇㨆㨉㨇㧲㨉㨇㧸㧱㧰㨉 㨇㨅㨉㨇㨥㨉
F
E

18 Singer Quantum Stylist TM 9960
14. Stitch Balance
Check of stitch balance
1. Enter the stitch lengths balance menu by pressing the
two indicated keys in the illustration simultaneously while
switching on the machine.
2. Put a piece of paper under the presser foot
3. Start the machine and when the holes (a) and (b) meet they should come in the same position.
Adjustment of stitch balance
1. Tilt the machine backward. Use the balance screw (c) in the hole of the base plate.
2. Put a piece of paper under the presser foot and run the machine.
3. The forward-reverse stitch length is adjusted by turning the screw (c).
• If the reverse stitch (b) comes lower than the (a) stitch, turn the screw counter clockwise (-)
• If the reverse stitch (b) above than the (a) stitch, turn the screw clockwise (+).
4. Repeat the process until desired Stitch lengths balance is obtained
+
Feed Adjust
a, b
a
b
b
a

Singer Quantum Stylist TM 9960 19
15. Position of buttonhole sensor lever
Check 1
When sewing a one-step buttonhole with the buttonhole foot, it should sew it with out any interuption.
Check 2
NOTE! If the machine dose not sew even with the buttonhole lever all the way down, it means that the
buttonhole lever is not positioned properly. Also, if the buttonhole lever is not positioned properly, the
machine will sew buttonhole as shown or incorrectly.
Adjustment
1. Remove the face cover.
2. Go into the Service program - Sensor menu by pressing
the buttons (A) and (C) as shown in illustration and turn on
the power switch
3. Attach the buttonhole foot.
4. Lower the presser foot and the buttonhole lever.
5. Lift the presser foot lever slightly and push the presser
foot frame to the back about 1cm.
Sensor menu (b) should now change from “0” from “1”.
6. Then slowly move the frame frontward.
7. When sensor menu (b) changes from “1” to “0” , lower the
presser foot.
8. The presser foot frame should be about 1mm to the back from
the extreme end (D).
8. If it is not in correct position, adjust as follows:
Push the presser foot frame to the back so it is 1mm from the
extreme end, and lower the presser foot.
9. Turn the eccentric pin (E) left or right so that the sensor menu
(b) just changes to “0” from “1” .
10.Re-check the buttonhole lever position when adjustments
have been completed.
+
㨎㨒㧿㨀㨟㨃㨣㧻㨅 㧷㧲㧩 㧿㧩
㧝㧝㧜㧝㧜㧜㧝㧝㧝 㧜 㧞㧡㧡 㧞㧟㧞
㨇㨆㨉㨇㧲㨉㨇㧸㧱㧰㨉 㨇㨅㨉㨇㨥㨉
b
A
C
1mm D
E

20 Singer Quantum Stylist TM 9960
16. Tension of motor and pulley belt
Check
1. Remove the covers.
2 Check tension of pulley belt by pushing it lightly (about 300 g) with your finger and then it should flex
about 5-6 mm.
Adjustment
1. Remove the covers.
2. Loosen lightly the two set screws (a) and (b).
3. Move motor up or down until the correct belt tension is obtained.
4. Tighten the two set screws (a) and (b).
a
b
Other manuals for QUANTUM STYLIST 9960
4
Table of contents
Other Singer Sewing Machine manuals

Singer
Singer 14U46B Manual

Singer
Singer 106-10 User manual

Singer
Singer S900 User manual

Singer
Singer 14 U444B Manual

Singer
Singer SE300 User manual

Singer
Singer Sewing Machine User manual

Singer
Singer 110W117 User manual

Singer
Singer 513 User manual

Singer
Singer 52-60 User manual

Singer
Singer 327K User manual

Singer
Singer 5560 User manual

Singer
Singer Zig Zag K-100 User manual

Singer
Singer CONFIDENCE 7470 User manual

Singer
Singer 21W162 User manual

Singer
Singer 143G2 User manual

Singer
Singer 8280 User manual

Singer
Singer 136W105 User manual

Singer
Singer Centurion 121D User manual

Singer
Singer 114-27 User manual

Singer
Singer 1669U User manual