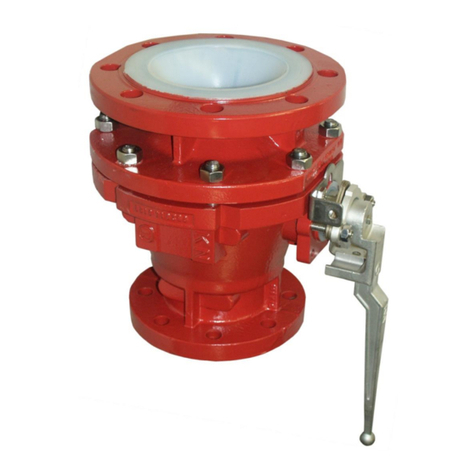
SISTAG WEY TK01 User manual

WEY CHECK VALVES TK/RSK
Instruction manual
weyvalve.ch | 6_30_10_en | Version 12.04

WEY CHECK VALVES TK/RSK | Instruction manual
1General
1.1 Safety
2Transportation, Storage
2.1 Transportation
2.2 Storage
3Installation
3.1 Preparation before installation
3.2 Installation site
3.3 Installation position
3.4 Mounting
4Commissioning
4.1 General measures
4.2 Safety measures
4.3 TK, RSK
4.4 TK – Reservoir version
5Maintenance
5.1 Operation cycles
5.2 Checks / Lubrication
6Trouble shooting
7Final remarks

WEY CHECK VALVES TK/RSK | Instruction manual
1General
1.1 Safety
Prior to any work or start-up and in order to ensure a proper functioning of our products, the instruction manual
for installation and operation must be observed. Alterations on the products need our written approval. For
consequential damages due to neglect of this direction, any liability will be rejected.
This symbol marks safety and risk advice. Follow all such advice in order to prevent any damages to human life
and objects.
The installation must be carried out according to established procedures and only by qualified personnel.
Project related data of valves, e.g. dimensions, materials and service range are found in the respective
documentation.
2Transportation, Storage
2.1 Transportation
Transportation of the valves to their final destination (building site) shall take place in solid crates adapted to the
valves’ size. The valves shall be protected against exterior damage and atmospheric exposure. Depending on the
duration of transportation or storage and in view of the conditions, preservation shall take place by welding
valves into PE-film or adding sufficient drying agent or equal.
2.2 Storage
Until final installation the Wey Check Valves shall be stored in a dry, shaded and vented area. All function
relevant parts shall be suitably covered against humidity, dust or other contamination.
The valve disc shall be in open position for relief of the rubber seat. Factory applied preservatives shall be
checked for possible transport damages and appropriately repaired according supplier’s instructions, if
necessary.
For accessories mounted to the valves, such as electric actuators, limit switches, solenoids, etc., the respective
storage instructions of the manufacturer shall be observed with priority.
3Installation
3.1 Preparation before installation
Not correctly aligned pipelines must, by all means, be corrected before installation in order to avoid tensions or
even cracking of the valve body.
Before final installation of the valves, all parts and in particular the bore passage and the disc seal shall be free
of dust and dirt.
3.2 Installation site
The Installation site shall be chosen so that the Wey Check Valves are well accessible for functional checks or
maintenance work.

WEY CHECK VALVES TK/RSK | Instruction manual
For outdoor installations, the valves shall be protected at site with shields or covers against severe weather
conditions like snow and ice.
3.3 Installation position
The check Wey Check Valves can be installed either horizontally or vertically.
Therefore the respective lever positions acc. Fig. 1, 2 and 3 are to be observed.
Horizontal line
Lever position
1.1 Right in flow direction
1.2 Left in flow direction
1.3 On both sides*
Fig. 1
Vertical line: flow from bottom to top
Lever position
2.1 Right in flow direction
2.2 Left in flow direction
2.3 On both sides*
Fig. 2

WEY CHECK VALVES TK/RSK | Instruction manual
Vertical line: flow from top to bottom
Lever position
3.1 Right in flow direction
3.2 Left in flow direction
3.3 On both sides*
Fig. 3
* If arrangement with two levers, no adjustable stop can be mounted.
3.4 Mounting
Before mounting, Wey Check Valves to be checked for possible transportation or storage damages.
The valves shall be protected against construction work at site.
If lifting devices are used, valve shall be hooked at the flange holes and not at the counterweight lever.
The flange pattern consists of through holes. Apply flange bolts acc. Fig. 4.
Fig. 4
The thread dimensions and the number of bolts are found in the dimension sheets.
Attention: Tighten bolts cross-wise with caution, so that tensions in the body do not cause any cracking or
breaking. No tilting, steady tightening.

WEY CHECK VALVES TK/RSK | Instruction manual
4Commissioning
4.1 General measures
Before taking the valves into service, clean body and actuator thoroughly.
Check valve coatings for possible mounting damages and repair acc. to supplier’s instructions, if necessary .
4.2 Safety measures
For automated valves installed in an area where valve movement could be dangerous for people (or
animals/objects), it must be ensured by the user on-site that all moving parts are enced with a suitable cover or
protection shield.
Such covers are optionally available from manufacturer.
4.3 TK, RSK
Check ease of operation by lifting and let go of the lever with counterweight. Wey Check Valves must shut
pressureless.
The slidable counterweight has to be set for the respective pressure situations.
4.4 TK – Reservoir version
For little pressure differentials, the attachment of our adjustable stop is recommended.
This stop shall be set with the existing spring load regarding the respective pressure situation in order that the
valve disc will open from the seat in a pressureless stage.
5Maintenance
5.1 Operation cycles
During one service year, at least four (4) operating cycles shall take place, whereby all components shall be
checked. Under severe service conditions, such functional checks shall take place more frequently.
5.2 Checks / Lubrication
Periodic maintenance or lubrication of the valve is under normal service conditions not necessary.
Attention: To avoid any damage due to longer stand-still periods, the valve disc has to be set into a slightly open
(10°) position. When recommissioning, follow the steps under commissioning (para 4).

WEY CHECK VALVES TK/RSK | Instruction manual
6Trouble shooting
Trouble
Possible Cause
Elimination
Leakage in bore passage of valve
Valve disc not comp- letey closed;
jammed particles between disc and
body internals
TK01
–Open valve slightly and repeat closing action
–Remove jammed particles
RSK
–Remove valve cover, clean disc
Disc seal damaged
TK01
–Remove valve, replace seal
RSK
–Remove valve cover, replace disc
Valve disc heavily movable
Valve clogged, calcified
TK01
–Remove valve, clean, decalcify
RSK
–Remove valve cover, clean, decalcify
Leakage through shaft bearing
Seals damaged
TK01
–Remove valve, replace seals
RSK
–Remove valve cover, replace seals
Leakage between valve flange and
pipe flange
Valve and pipe flange not parallel
–Correct pipe flange alignment
Flange bolts not tightened
–Tighten bolts firmly
7Final remarks
All details given above are to our current up-to-date knowledge and shall provide, together with our technical
documentation, information about our products and their range of applications.
They are not thought to assure particular features of the products nor their suitability for a specific application.
Faultless quality is assured within our General Sales Conditions.
For any further information, please call any time on our Customer Service Department.
Alterations reserved
This manual suits for next models
1
Table of contents
Popular Control Unit manuals by other brands
Watts
Watts LF70A Series instructions
Ross
Ross AVFR-7564 manual
Grundfos
Grundfos UP-ZV Installation and operating instructions
Bristan
Bristan OP TS1503 EL C Installation instructions and user guide
WAREMA
WAREMA WMS Splitter UP Operating and installation instructions
Bosch
Bosch DS7400 operating instructions
