Skycat XS User manual

www.skycat.pro
All Rights Reserved
1
SKYCAT XS PARACHUTE LAUNCHER
USER MANUAL v1.2 - 6/2016
Thank you for choosing Skycat!
We want to offer uncompromised customer service to all of our old and new
customers. Our team members have years of experience in various fields of the
UAV industry and based on this experience and feedback from our clients, we
recognize the importance of customer oriented approach. Our first goal is to
stand out from the crowd, in a positive way.
Please read and follow the instructions carefully. This manual is updated
regularly. In case you have any questions, ideas or feedback, please don’t
hesitate to contact us at www.skycat.pro/contact
Fly safe!
Skycat team

www.skycat.pro
All Rights Reserved
2
HOW DOES SKYCAT XS PARACHUTE SYSTEM WORK?
Parachute is folded into a compact package and loaded into the Skycat XS
launcher. Patent pending servo release mechanism holds the catapult in
standby, minimizing stress to the servo.
Servo can be controlled by an RC receiver, autopilot or other device. When
launch is requested, servo releases the cover and the spring loaded catapult
ejects the parachute away from the propellers.
IMPORTANT KNOWLEDGE AND SAFETY
Latest manuals and videos available at:
http://www.skycat.pro/downloads-1
Please read and follow these instructions carefully to ensure successful
operation and to stay within warranty limits.
Careful installation, parachute folding, parachute arming and radio setup is
essential in order to achieve best possible performance. We recommend loading
and launching Skycat a few times as exercise, before mounting it to your aircraft.
In case of any uncertainty, please don’t hesitate to contact us for assistance.

www.skycat.pro
All Rights Reserved
3
General safety
-Only launch Skycat towards free airspace. Never point or launch towards
people or animals.
-Do not expose Skycat system to rain or use near flammable materials.
-Don’t try to repair damaged components. Contact Skycat for repair and
spare part services.
-Do not use in high G-force applications.
-Use reliable, digital RC control systems to reduce risk of unwanted eject.
-Use of excessive force should not be required at any point of arming,
loading or installation.
Skycat XS Launcher
-Only use Skycat launcher to eject a parachute and not other items.
-Only use original Skycat cloth for parachute folding.
-If launcher stays loaded over two months without launching, it is
recommended to open and refold the parachute. This can decrease
opening distance in an emergency.
Operating specifications
Operating temperature range: 0°C to 40°C (32°F to 104°F)

www.skycat.pro
All Rights Reserved
4
ASSEMBLY
Attach the spring with zip ties as indicated in the picture (locks on the inside).
Attach hooks to the base with supplied bolts, washers and nuts.

www.skycat.pro
All Rights Reserved
5
POWER SUPPLY AND SPECS
Servo
Servo is powered through the three pin PWM wire. Operating voltage range of
the servo is 4,8 – 6,0 V.
Power supply
If needed, use a regulator to convert power supply voltage to 4,9 – 6,1 volts.
A dedicated battery is required, if XS launcher operates separated from aircraft
electronics (as required with Phantom 3). Any small Li-Po battery may be used,
for example 2s 300mAh.
XS can also be powered through aircraft’s receiver or other controlling device.

www.skycat.pro
All Rights Reserved
6
ELECTRICAL INSTALLATION
Use zip ties and velcro straps to fasten components to the back plate.
Following components are required to operate XS separated from the aircraft
electronics (as required with Phantom 3):
- Radio transmitter (one free channel).
- Small and light receiver.
- 4,8 – 6,0 V voltage regulator.
- Power supply.

www.skycat.pro
All Rights Reserved
7
RADIO SETUP
For detailed instructions, please refer to the manuals of your transmitter and
autopilot. We have made instructions for some transmitters, you can find them at
our download page: www.skycat.pro/downloads-1
DJI Phantom 3
1) Decide which transmitter switch or button and channel you want to use to
launch the parachute.
2) Connect Skycat XS servo lead to your receiver.
3) Configure your transmitter so that when you flip the switch, parachute is
released.
Motors need to be stopped from DJI radio. Please refer to the manual of the
DJI Phantom for further instructions.
Other models
1) Decide which transmitter switch or button and channel you want to use to
launch the parachute.
2) Connect Skycat XS servo lead to your receiver.
3) Configure your transmitter so that when you flip the switch:
- Servo moves to release position.
- Motors are stopped in all flight modes.
Remove propellers and test functionality:
1) Apply 10-30% throttle.
2) Flip the parachute switch. Motors should stop and servo should move to
release position.
3) Repeat in all flight modes (manual, ATTI, GPS etc.)

www.skycat.pro
All Rights Reserved
8
Servo travel
Set servo travel range as wide as possible to minimize stress to the servo arm
and to guarantee reliable ejection in an emergency situation. Servo travel range
and loop position is OK when servo does not bind (emit high pitch noise).
Binding will reduce battery life and may damage the servo over time.
Standby position.
Release position.

www.skycat.pro
All Rights Reserved
9
FAIL-SAFE SETUP
DJI Phantom 3
Decide what you want to happen if dedicated transmitter’s signal is lost. Setup
your transmitter’s failsafe accordingly. Recommended setting is “no action”.
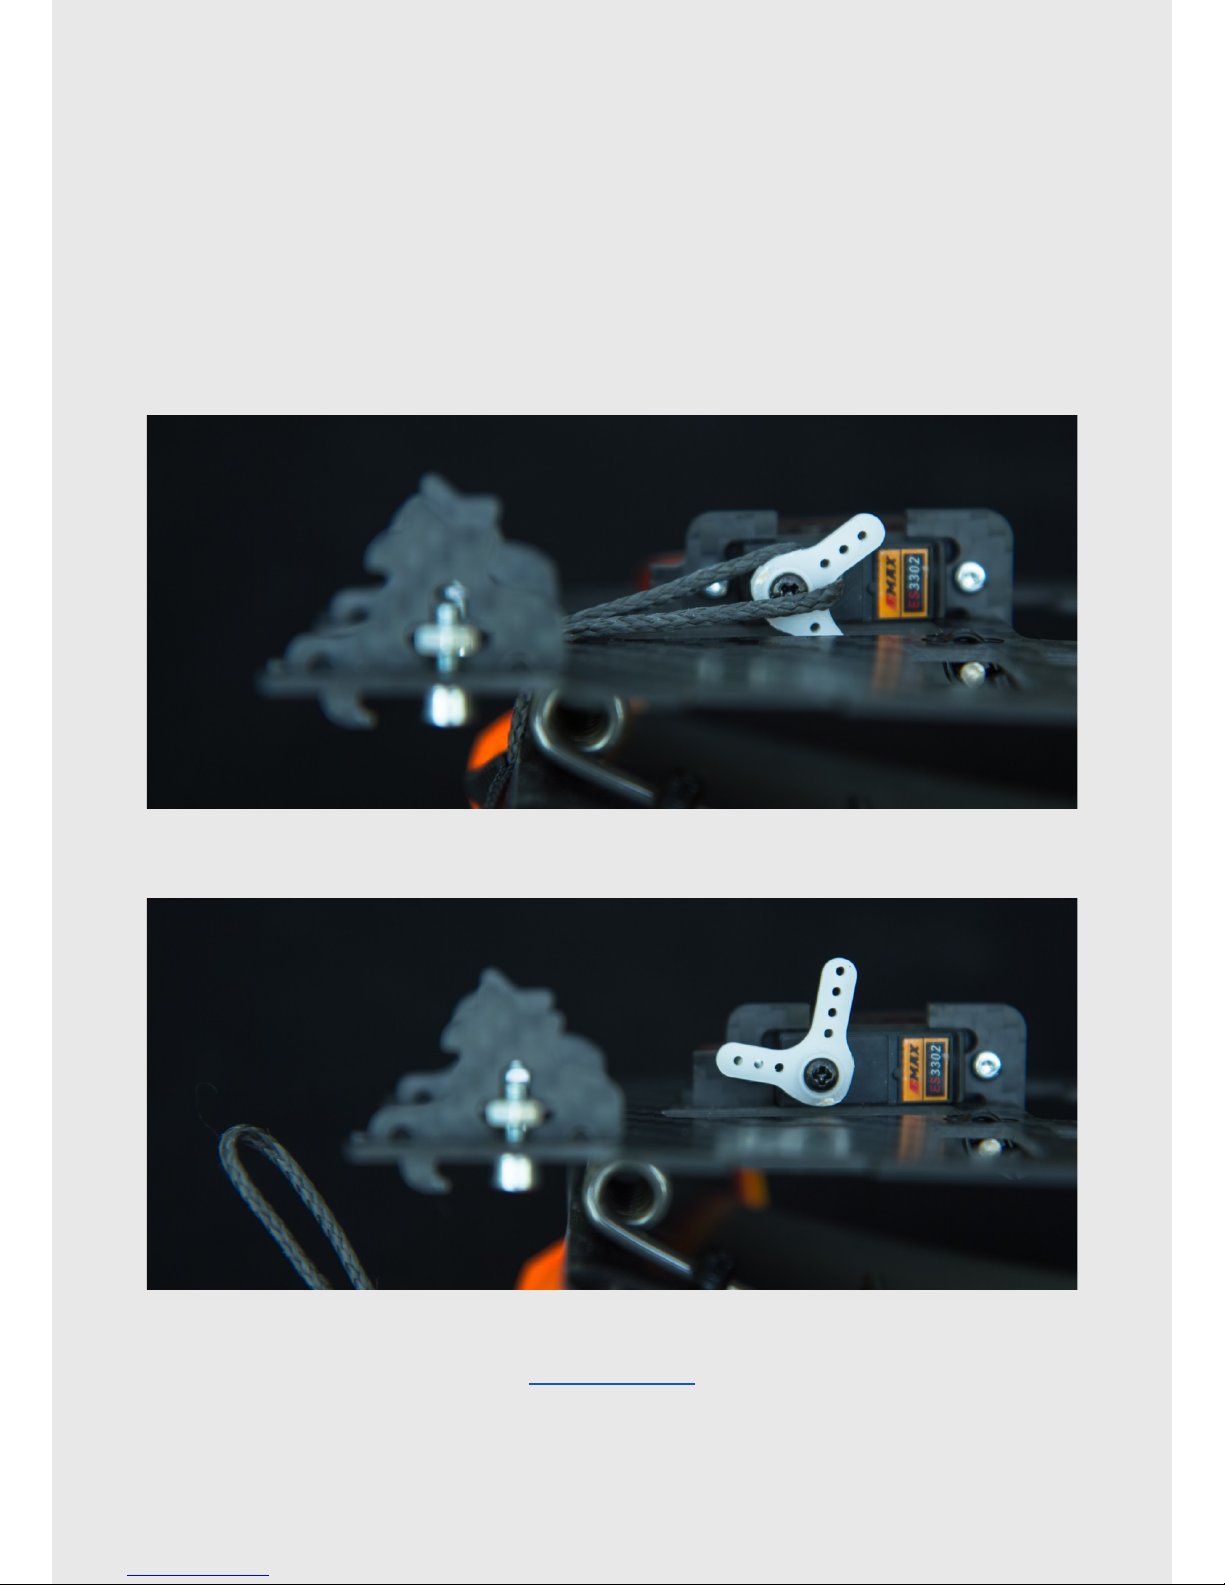
a. No action. Setup failsafe so that servo stays in standby position.
b. Parachute launch. Setup failsafe so that servo moves to release position.
This action is not recommended for normal flying.
To test failsafe:
1) Turn on your dedicated transmitter and power up the XS launcher.
2) Turn off your transmitter. Launcher should enter chosen fail-safe mode.
Other models
This applies, if XS is connected to your aircraft’s receiver. Please refer to
Phantom 3 instructions above, if a dedicated transmitter is used. Decide what
you want to happen if transmitter signal is lost. In most cases, recommended
setting is “autopilot failsafe”.
a. Autopilot failsafe. Setup failsafe so that autopilot enters failsafe mode (for
example “return to home” and servo stays in standby position.
b. Parachute launch. Setup failsafe so that servo moves to release position
and motors are stopped in all flight modes. This action is not
recommended for normal flying.
Remove propellers and test failsafe:
1) Apply 10-30% throttle.
2) Turn off your transmitter.Aircraft should enter chosen fail-safe mode.

www.skycat.pro
All Rights Reserved
10
SHOCK CORD
A shock cord is recommended for normal flying. It has many advantages:
- Protects parachute lines and reduces the risk of entanglement.
- Reduces oscillations and swinging, especially in windy conditions.
Instructions
80 cm (31.5 in) shock cord is recommended for Skycat XS launcher. To achieve
this, cut 100 cm (39.4 in) portion of parachute line.
1. Fold 8cm (3.1 in) segment of parachute line.

www.skycat.pro
All Rights Reserved
11
2. Make a figure-of-eight knot according to the image below.
3. Make a figure-of-eight knot to the other end. Shock cord is completed.
Shock cord is connected to the parachute by joining the loops together.

www.skycat.pro
All Rights Reserved
12
PARACHUTE FOLDING AND LOADING
- Always pack and load on a clean and dry surface!
- Connect shock cord before folding.
- Opale parachutes come with a red bag attached. The bag is not needed with
Skycat XS and should be removed.
- If launcher stays loaded over two months without launching, it is recommended
to open and refold the parachute. This can decrease opening distance in an
emergency.
Demonstration videos:
Opale 1.0 m2 parachute: http://tinyurl.com/skycat-xs-opale-1m2
Fruity Chutes IFC 36 parachute: http://tinyurl.com/skycat-xs-fruity-36SL

www.skycat.pro
All Rights Reserved
13
HARNESS LINES - DJI PHANTOM 3
Measure and cut 117cm (46 in) portion of supplied parachute line.
Fold 13cm (5 in).

www.skycat.pro
All Rights Reserved
14
Make a knot but don’t tighten yet.
Route the line around the front left boom. Slide the free end of the line through
the knot and tighten lightly.

www.skycat.pro
All Rights Reserved
15
Length it OK, when the loop reaches the the center of the frame while the knot is
at the side.
Route the free end of the line under the gimbal wires. Be careful.

www.skycat.pro
All Rights Reserved
16
Make a basic knot in the middle of the frame. Do not tighten yet.
Fold 18cm (7 in) portion of the line and make a knot.

www.skycat.pro
All Rights Reserved
17
Route the line around the rear right boom and through the open knot and
tighten lightly.
Slide the second loop through the first loop.

www.skycat.pro
All Rights Reserved
18
Add the small quick lock as shown in the picture. Make sure all lines go through
the quick lock.
Snap the parachute in place and close the quick lock. Use tape to secure the
harness in place. Make sure that harness lines cannot get to the propellers.

www.skycat.pro
All Rights Reserved
19
Finished installation.
When flying without the XS, route the base line though the quick lock as shown
in the picture. Make sure lines are tight and cannot get to the propellers.

www.skycat.pro
All Rights Reserved
20
HARNESS LINES – OTHER MODELS
Harness lines distribute the force of the parachute to the airframe. Choose the
strongest points of your airframe such as the arms. Depending on your airframe,
3 or 4 harness lines can be used.
Instructions
Decide the optimal length of the harness lines for your model.
20 cm (8 in) of extra line needs to be added to target harness line length. For
example, cut 60 cm segments for 40 cm target length.
1. Fold a 8cm (3.1 in) segment at the end of the line.
2. Make a figure-of-eight knot according to the image above and pull it tight.
Table of contents