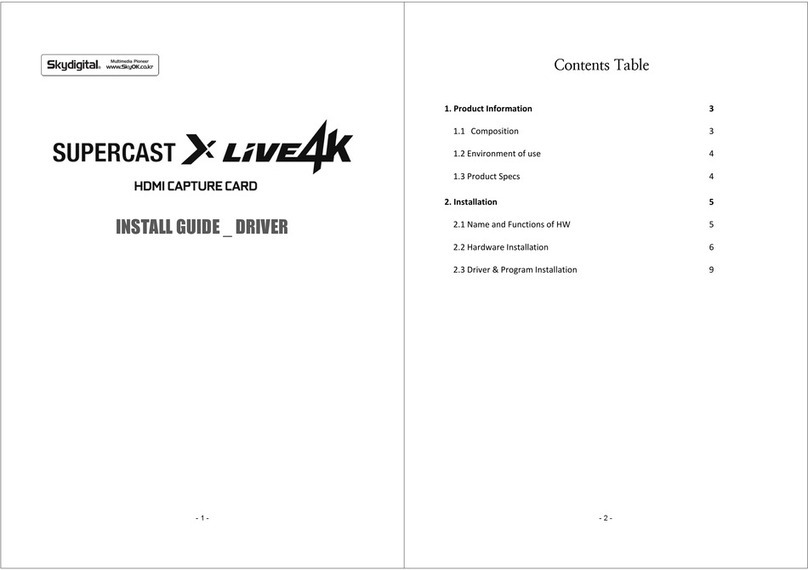
Skydigital SKYCAPTURE SUPERCAST X6 HDMI Troubleshooting guide

- 1 -
SKYCAPTURE
PROGRAM MANUAL _ V3.0
- 2 -
Table of Contents
1 How to use Program 4
1.1
Program Menu
4
1.2 Control bar & Status bar 5
1.3 Popup Menu 6
1.4 Popup Menu Setting 7
2
Program En ironment Setting
9
2.1 Dri er 9
2.2 External De ice 12
2.3 Program 13
2.4 Record Setting 14
2.5 Encoder 16
2.5.1 MP4 Record 17
2.5.2 MKV Record 18
2.5.3 Video Encoder Detailed Setting 19
2.5.4 External Encoder Setting 21
2.6 Decoder Setting 22
2.7 Renderer Setting 23
3 Still Image Storage & Video Recording 24
3.1 Sa e Still Image (Frame capture) 24
3.2 Sa ing Video (Record) 24
4 Reser ation Setting 25
5 File Playback Mode 27
5.1 Pre iew of File Playback 27
5.2 Change Playback Speed 28
5.3 Files to Playback 28

- 3 -
6 Use Screen function 29
6.1 Screen Function Quick Guide 30
6.2 Screen Input Window 33
6.3 How to input Screen Function 34
6.4 How to input Audio 34
- 4 -
1. How to use Program
Getting Started
Welcome to SkyCapture!
SkyCapture Program is an operational program of SuperCast capture card series by Skydigital Inc. In order to
skillfully operate the program, you should get used to and familiarize yourself with two menu systems. You
will ha e to go through with them before you mo e ahead.
1.1 Program Menu
There are two menus mostly used during the session with SKY Capture Program. One is Program Screen
Menu and the other is Pop-up menu. You can use them at your con enience. Program Screen Menu is more
likely a monitor, recorder and player. And it consists of 4 portions
① Title Bar : Minimize, maximize and close the screen menu
② Screen : Displays the contents.
③ Control Bar : You may click on the icons to bring up function
④ Status Bar : Displays current alues for the input, resolution, progress, screen size and so on.
These title bars, control bars,
and status bars are always isible
(fixed), or if necessary,
adjustments such as (OnMouse)
that appear when you mouse
o er them are possible.
You can check the contents
in the 2.3 Program menu.
①
②
③ ④

- 5 -
1.2 Control Bar & Status Bar functions
Menu
Icon
Function/Feature
Control
Bar
Volume On/Off Volume On/Off(Mute)
Volume Control Adjust Volume
Input Mode Select input mode according to the cable, Video, S-Video, Component or HDMI
File Open Opens up ideo file folder for playback.
Reser ation,
Scheduling Bring up the record scheduling window to record at a preset time.
Deinterlace
ON/Off
Turn on or off the afterimage remo al function. The afterimage remo al is used
to remo e the afterimages that appear on the screen in interlace mode such as
480i or 1080i. In progressi e mode such as 480p / 720p, it does not affect e en
if it is On. This works for only analog ideo, ex. HDMI, Component, etc..
Screen Ratio
Adjustment
Adjusts screen ratio. Clicking on it will switch to each ratio. As you click on the
button, it changes to 16: 9 / 16:10 / 3: 2/4: 3 / Free.
Configuration Configuration window pops up.
Frame Capture Captures the frame into an image
Recording
Start/Stop
Start or stop manually recording contents in the current screen.
If you place cursor o er the red dot, not clicking on it, the balloon will pop up
showing the current file format.
Recording time
Use to specify the recording time. Press the "R" button during recording to set
the time and the menu will appear. At this time, if you set the time in minutes
and press the "Ok" button, the recording will end automatically after the
specified time elapses from the present time.
Status
Bar
Video Input Displays selected ideo input mode from “Input Mode”, Component, HDMI or
File (HDMI / SCRN)
Input
Resolution/Frame
Display current, real-time ideo resolution and frame rate (per Sec.) calculated
by the system. When there’s no incoming frame, the rate would be ‘0”.
Audio Input The current audio input mode. Line-In/SPDIF/HDMI
Audio Type
/Sampling rate
Similar to Input Resolution, this is sampling-measured alues for incoming
audio stream. The alue goes to ‘0’ when there’s no sampling data.
Progress Status Shows the current status. 'Run()'/’Pause()’/’Stop()’ or any other critical string.
Screen Size/Ratio
Size of the current screen and ratio (16:9/16:10/ 3:2/4:3/ Free/Customized ratio)
- 6 -
1.3 Po -U Menu
Pop-up menu is a sort of shortcut to functions and, the most frequently used menu that is ital in the
program operation. The pop-up menu appears when you right-click on the screen window.
Menu Description
Config (Configuration) Show en ironment setting window
Schedule Reser ed action control.
Ch manager This function is used for TV reception card, in case the card is
installed.
KBD command A menu to set up a shortcut key using the keyboard.
Open file Playback mode that can play recorded file is executed.
A/V source
Select the input ideo / audio mode. Video mode selection can
also be performed from the program's control bar.
Audio input can be selected from Line-In / SPDIF / HDMI audio.
Supported audio inputs aries to product.
Capture X HDMI products support Line-In / SPDIF / HDMI audio,
meanwhile Capture U 3.0 and SuperCast products support Line-In
/ HDMI audio. All other support only Line-In audio input.
Deinterace Afterimage remo al.
Timeshift This function is for TV reception card.
Closed Caption This function is for TV reception card.
Subtitle
Selects subtitle when playing a file. If you ha e a subtitle file (smi),
you can load the subtitle file and display it.
You can also select internal subtitles (language, etc.) for the
subtitles included in the mo ie.
Language This function is for TV reception card
Sleep Turn off the PC automatically after a certain time. You can select
from 10 minutes to 180 minutes.
Screen ratio
4: 3/3: 2/16: 9/16: 10/16: 9 / User ratio. Used to adjust the aspect
ratio of the screen.
The user ratio is a method for using the current screen window
size ratio as the user ratio. This setting will be fixed at the
pre iously set percentage when selecting the user's percentage in
the Aspect Ratio menu.
Screen size
Changing the screen size. You can maximize the screen window at
a fixed ratio, or maximize without certain ratio, minimize, and
restore to the pre ious screen size.
You can also adjust from the current screen size to ½ small size /
current size / double large screen, or you can set it to a specific
resolution ratio or a user-specified size.
Always on top Set the window to Always on top.
Play speed Slow down or speed up the playback speed.
Record (S)
Record: Start recording. Stealth mode. Recording is performed
without connecting the decoder and the renderer. No screen and
sound output.
Stop record Ends the recording that is in progress.
Frame Capture Sa e the image displayed on the screen window as a still image in
BMP(RGB 24bit) and JPG(Lossless) format.
Program Information Shows the ersion of the Capture program.
Close Exits the Capture program.

- 7 -
1.4 Po -U Menu Setting
■ Screen Ratio
Use it to adjust the aspect ratio of the screen among these options - 4:3/3:2/16:9/16:10/16:9/user-ratio.
The user ratio is a method for using the current screen window size ratio as the user ratio. This setting will be
fixed at the pre iously set ratio when selecting the user's ratio in the Aspect Ratio menu.
■ Screen Size
Change the screen size. You can maximize the screen window at a fixed ratio, or maximize without certain
ratio, minimize, and restore to the pre ious screen size.
You can also adjust from the current screen size to ½ small size / current size / double large screen, or you
can set it to a specific resolution ratio or a user-specified size.
■ Magnifier
Magnify the screen to read small text or images in 4K high-resolution.
● How to use
①
Run Magnifier
②
Point the first point with Mouse
③
Shift + mo e
After Magnified window is fixed, position the
selected range to magnify.
④
Enter Shift-Key twice to show or hide the
magnified window in toggle
- 8 -
⑤
Close Maginfier
Select Close() and close the magnifier
■ H/W device status / monitoring
● Bus Type
SUPERCAST X6 HDMI equipped slot type
● Bus Speed
Display Frequency, Max Resolution and Frame where SUPERCAST X6 HDMI installed PCI Express
slot can be supported. To support FHD resolution 5Gbps shall be supported.
● Recei er
- INPUT : Display the Color-format, Resolution and Frame-rate of Video source
- HW status : Display EDID communication status
● Splitter
(SUPERCAST X LIVE 4K only)
- INPUT : Color format, resolution and frame display of the ideo source input through the HDMI
IN terminal
- To Outside : Display color format, resolution, and frame output through HDMI-OUT
- To Inside : Display color format, resolution and frame of ideo source transmitted to HDMI
Recei er
- HW status : Display EDID communication status
Color format /
Resolution / Frame

- 9 -
2. Program environment setting
To set up the Capture program, click the en ironment setting icon ( ) on the control bar or right-click on
the screen to display a pop-up menu, then select “En ironment Settings” to bring up the setting window.
2.1 Driver
The dri er menu consists of the part controlled by the dri er side of the capture board as a menu, and you
can set ideo and audio input settings and color settings.
■ Video standard
In external input mode, this menu is used to
select the ideo standard to match the ideo
standard of the country. For Korea and North
American regions, NTSC format is used. The
PAL method is used in Europe and the SECAM
method in some regions such as France.
■ Video resolution
In the ideo resolution menu, you can select
the input mode and the input resolution/frame
rate that can be set in each input mode.
- Auto Detect
The Auto Detect function is a function that
automatically detects the input resolution and
automatically sets the screen to fit the size. If
you set Auto Detect in the ideo resolution
menu, it automatically recognizes and sets the
frame rate that matches the resolution as well
as the input resolution.
If you select a resolution other than the Auto
Detect option, you may not be able to get the
correct resolution. Please select Auto Detect if
you do not know the exact resolution and
frame rate because the program does not
support upscaling or downscaling.
■ Color
Select the color format of the ideo image being input.
The default recommended setting is 16bit (YUY2). 24bit (RGB) may not be supported or the screen may not
be displayed normally depending on the system en ironment or arious complex situations.
■ Video Color Adjustment
This menu is a menu that allows you to adjust the color (brightness, contrast, hue, saturation) of the input
image. Since it is set in the input state, the color alues set during playback and recording are applied.
Adjustment can be adjusted by dragging with the mouse.
- 10 -
■ Audio Sampling Rate
You can select the audio sampling rate. The audio sampling rate output from most ideo equipment is
48KHz. Howe er, if the connected de ice outputs at 44.1KHz, it can be input at 44.1KHz in the Capture
Program. In general use, it is recommended to select “Auto Detect”.
2.2 External device
In this menu, it is an option to play or record using an external audio input rather than using HDMI input
audio (when playing or recording). For external audio, you can use the line-in or microphone-in terminal of
the sound card (chipset), or you can use the audio de ice of the webcam. Also, in Screen mode, which
requires the use of a stereo mix de ice, you must set up a stereo mix through an external de ice for normal
audio playback and recording.
■ Ext Audio Device
- Use external audio
External audio input will be used
instead of using audio input ia HDMI.
-Speaker output
If you check the speaker output, you
can hear the sound input from the
external audio e en during playback,
and the sound input from the external
audio is recorded e en during recording.
Howe er if speaker output is not
selected, external audio is not played
but sound input from external audio is
recorded only when recording.
- De ice
Set the external audio de ice you
want to use. Depending on the de ice
type, you can select the sound card
name or webcam, but there are cases
where you can select an integrated
audio mixer de ice depending on the
sound dri er or settings.
- Input
If you select a sound chipset or de ice,
set the de ice you want to input (line in or
microphone in, etc.).
■ Screen Audio
- De ice
Select the audio de ice of the screen mode function as a stereo mixer.

- 11 -
2.3 Program
This is a menu for the basic settings of the program, and it is configured to set the bar option for the control
/ status / screen title and audio amplification.
■ Bar options
You can adjust the display status of the
title bar / control bar / status bar.
Since each bar can be set to be isible or
in isible, bars that are frequently used can
be set to appear, and bars that are not
used frequently can be displayed with the
mouse.
▶ Fixed:
The bar is unconditionally displayed in
the program.
▶ OnMouse: When the mouse cursor is
mo ed to the bar position, the bar
automatically appears, and when the
mouse cursor is mo ed to another place,
the bar disappears.
▶ None : Doesn't show that bar.
- Arrangement of control buttons
This menu is used to adjust the positions
of the buttons displayed on the control bar.
▶ Auto: The menu buttons on the
control bar are automatically arranged
according to the program size.
▶ Left: Arrange the control bar menu
buttons by positioning them to the left
side of the program.
▶ Right: Arrange the control bar menu
buttons by positioning them to the right
side of the program.
-Bar size
Adjust the bar size in 3 steps of 25/33/40.
■ PCM audio amplification
When the olume of the input audio is ery low, this function amplifies the olume with the software and
applies to both playback and recording. Amplification is possible only for PCM audio, and digital audio such
as AC3 or DTS cannot be amplified. Mo ing the scroll bar to the right boosts the olume le el of the input
audio.
◆
Note
◆
DTV subtitles / number of pre ious TV channels / mouse wheel option are supported only on TV
recei ing cards.
- 12 -
2.4 Recording Setting
It consists of a menu for recording options, time shift settings, and frame capture (still image sa ing) for
recording settings.
■ Recording options
- Recorded file size display
This menu shows the recorded capacity in
real time during recording.
If you select this menu, you can check the file
size and recording format (MP4, MKV) sa ed
in real time.
- Start recording without Stop/Run
In the case of normal recording, when
recording starts, a filter is configured so that
recording can be performed, and a stop-run
process is performed.
There is a delay of about 1 to 2 seconds
during this process, so it is incon enient if
you need to record immediately.
The ad antage of selecting this option is that
you can start recording from the point you
want.
Howe er, it is recommended to turn off the
option in general recording situations as
recording may not be possible depending on
the characteristics of the encoder.
- Input to the encoder after applying
deinterlace in ad ance
Normally, most of the encoders used for
compressed recording ha e a built-in
afterimage remo al (deinterlace) function, so
that the afterimages are remo ed from the
recorded recording. Howe er, depending on
the encoder, some encoders do not support
de-interlacing. In this case, after applying de-
interlacing in the Capture program, you can compress and sa e through the encoder.
This function is used at this time, but it is not recommended for general recording because it differs
according to the characteristics or types of encoders.
The resolution required for deinterlacing (image remo al) is an interlaced resolution such as 480i or 1080i,
and in the case of progressi e images such as 720P / 480P that do not require afterimage remo al, the
function will not be executed e en if this function is turned on.
-Progressi e 50/60 frames recorded in 1/2 (half)
This function cuts the progressi e 50 (PAL) or 60 (NTSC) frames such as 480p or 720p in half to record at 25
or 30 frames. In other words, the recorded ideo retains the progressi e method, but because it stores only
half of the frames, it has the ad antage of reducing the capacity in half without losing quality.
Howe er, since the number of frames is 1/2, the smoothness during playback may be slightly less than for
60 (or 50 frames) frames in mo ing images with fast camera mo ement.

- 13 -
◆ Note ◆
When recording at 1/2 frame, you need to cut the bit rate of the set encoder in half to cut the capacity in
half. If you set the bit rate to the original bit rate with the progressi e 50/60 frame 1/2 recording function
set, the recording capacity will not decrease.
-Automatic creation of year/month folder
Select the hard disk dri e and folder you want to sa e. Howe er, after the folder set for collecti e
management, a folder in which the year and month are recorded is additionally created, and the recordings
are recorded in the folder. In other words, for recordings made in May 2020, a folder named “2020_05” is
created under the folder set in the storage folder, and the recordings are recorded under that folder.
■ Time shift
This function is only supported by DVT recei ing card, and is not supported by capture card.
■ Frame Capture
- Format
When sa ing as a still image, specify the format.
BMP method and JPG method are supported, and JPG method is a compressed format, so it can be sa ed
with less capacity than BMP method.
- Frames per click
This is the menu to set how many screens are sa ed when the still image sa e button [] is pressed.
If the frame per click is set to 1, one screen is sa ed each time the still image button is pressed, and if it is
set to 5, fi e screens are sa ed each time the button is pressed.
-Frame spacing
When capturing multiple frames per click, this feature is an option to set how many seconds to capture each
frame.
- 14 -
2.5 Encoder
It is a menu where you can set the file format and compression codec (encoder) during recording, and you
can record in MP4, MKV, etc. methods.
◆ Note ◆
The file format setting of the digital (DTV) option is a function not used in the capture board.
■ Analog (ATV, external input)
- Select the recording file format
This is a menu to select the recording format when
sa ing the input ideo as a ideo. For 4K high
resolution recording, the performance of the
hardware encoder built into the graphics card is
important. Until now, only GTX 1050 or higher
graphics cards among nVIDIA series graphics cards
are supported normally. Intel and AMD series are not
supported. The file format must be selected from
two types, MP4 and MKV.
- Recording muxer, ideo encoder, audio encoder
settings
This is a menu where you can specify ideo encoder,
audio encoder, and mux for each recording format
for compressed storage when sa ing ideos.
Among them, in the case of MP4 and MKV, which
basically pro ide encoders, the user can of course set
a separate encoder or muxer, but the encoder and
muxer are basically set to suit the recording format.
It is recommended to use the default setting after
selecting the file format. The quality can be set by
pressing the setting button on the ideo encoder.
◆ Note ◆
In the compression codec (encoder) separately installed by the user, the ideo and audio may be out of sync
or the image quality may be degraded depending on the performance and settings of the codec (bit rate,
etc.), and recording may not be possible.

- 15 -
2.5.1 MP4 Recording
In MP4 recording, both ideo and audio are compressed and sa ed.
When recording in MP4 format in the SKY Capture program, the encoder and muxer pro ided by default
▶ Video Encoder : SKY Smart H.264 Encoder
SKY Smart H.265 Encoder (Recommended)
▶ Audio Encoder : SKY Smart AAC Encoder
● Video and Audio processing flow chart for MP4 recording
- 16 -
2.5.2 MP4 Recording
In MKV recording, both ideo and audio are compressed and sa ed.
When recording in the MKV method in the SKY Capture program, the basic encoder and muxer pro ided by
default
▶ Video Encoder : 1. SKY Smart H.264 Encoder
2. SKY Smart H.265 Encoder (recommended)
▶ Audio Encoder : 1. SKY Smart MP3 Encoder
2. LAME Audio Encoder

- 17 -
2.5.3 Video encoder detailed settings
This setting is for recording by compressing the input ideo effecti ely.
It is used to set the codec type, bit rate (quality) mode, setting alue, and key frame inter al.
If you click the “Settings” button on the right of “SKY Smart H264 Encoder” or “SKY Smart H265 Encoder” set
in the ideo encoder category, the following setting screen appears.
■ H.264 / H.265 Video Encoder
In order to encode 4K resolution, MFT using hardware acceleration of the graphics chipset must be set, and
only nVIDIA graphics chipset MFT is supported normally (refer to recommended specifications).
■ Bit rate control method
In Mode setting, you can select Quality / VBR_Constrained / VBR_Unconstrained / CBR method.
● Quality – This is an encoding method in which a ariable bit rate is applied automatically according to the
optimal image quality according to the quality le el. (Default recommended option)
● VBR_Constrained - Limited ariable bit rate setting method.
This is a method of changing the quality of the image to be recorded according to the motion and size of
the input image. This is a method of recording with limited maximum and minimum alues of the image size.
● VBR_Unconstrained – Unconstrained ariable bit rate setting method This is a method of changing the
quality of the image to be recorded according to the motion and size of the input image. It is a method that
allows unlimited recording without setting the maximum/minimum alue of the ideo size.
● CBR - Constance bit rate setting method
This is a recording method to compress the input ideo into a uniform capacity regardless of the motion
and size.
- 18 -
■ Bitrate / Max rate
It is a unit representing the data size of an image that needs to be processed per second. (Bit Per Second)
The higher the bit rate is set, the larger the ideo data, the better the quality and the larger the file size.
If the bit rate is set smaller, the image data size decreases, so the file size decreases, but the quality
deteriorates.
Max rate can be selected only when the bit rate control method is ‘VBR_Constrained’.
It corresponds to the maximum bit rate alue that can be processed when compressing the input ideo.
Please refer to the settings below for the recommended bit rate by resolution.
In ut Video
Resolution Max rate (kb/s) Bit-rate (kb/s)
480i 4000 2500
480p 6000 4000
720p 10000 8000
1080i 15000 12000
1080p 20000 18000
2160p 30000 25000
■ Keyframe spacing (for ad anced setters)
The key frame inter al option is the same concept as GOP (Group Of Picture), and is an option to set how far
the key frames are to be arranged between frames of consecuti ely input images.
It can be specified in units of ms (1/1000 sec), and the default is 1000ms (for ad anced setters).
■ B frame (for ad anced setters)
B frame setting is a menu to set the order in which each frame is arranged.
Depending on this setting, the capacity and quality will differ, and the Seek can be affected when playing
back recorded recordings.
● None - This is the default setting for recording at the lowest capacity by configuring only B frames.
● IBP - This refers to the method of processing (encoding) the frame arrangement in the GOP in the order of
I Frame / B Frame / P Frame.
In this way, when compressed recording is performed and then played, it has the ad antage of being able to
quickly mo e to the designated location during Seek, but it has the disad antage of taking up more space.
● IBBP-This refers to the method of processing (encoding) the frame arrangement in the GOP in the order of
I Frame / B Frame / B Frame / P Frame.
It is the intermediate setting of NONE and IBP and a frame arrangement method that does not significantly
change the capacity while mo ing the position effecti ely during playback.
◆ Note ◆
When B frame is set to IBP or IBBP, it is difficult to process Full Frame when using Intel QuickSync MFT in EVR renderer.
Unless there is a special case, it is recommended to use "None" in the H.264 / H.265 encoder setting.

- 19 -
■ What is I/B/P frame?
● I Frame (Intra Frame)– refers to the frame that is the reference when determining the key frame inter al
and refers to an independent image frame that does not refer to the pre ious or subsequent frames.
The more I Frames are inserted, the more ad antageous it is to mo e the Seek to a specific point when
playing the result, but the file size increases as there are more complete image frames irrespecti e of the
pre ious/post mo ement.
● P Frame (Prediction Frame) – This refers to a frame that contains data in the forward direction, that is, the
part where the change of the frame to come in the future occurs. Compared to I frame, the capacity is
smaller and the compression rate is better.
● B Frame (Bi Directionally Frame)
It refers to a frame that contains only the data of the part where the pre ious/after frame change occurred.
This frame has the smallest capacity and good compression rate, but its image quality is relati ely
deteriorated, and it is a frame that puts a little more burden on decoders or seeks when playing back
recordings.
2.5.4 External Encoder Setting
The SKY Capture program pro ides basic encoders and muxers for compressed recording.
If you want to set an encoder other than the encoder pro ided by our company, please proceed as follows.
External encoders can be additionally specified only
when the standard DirectShow-based codec is
installed on Windows. We do not pro ide encoders
that can be further configured other than the
default encoder.
① Select the recording format (MP4, MKV) you
want to record in "File Format".
② As shown in the picture on the right, you can
select the item you want to set in Muxer / Video
Encoder / Audio Encoder.
Click the [ ] button and select "User_Define".
③ In the Filter Dialog window, select the codec
(encoder, muxer etc.) you want to set and click the
OK button.
- 20 -
④ When the codec setting is completed, you can proceed with compression recording using the selected
codec.
◆ Note ◆
External encoders must use a codec consisting of a ideo encoder, audio encoder, and muxaga set.
If you set up each encoder and muxer, there may be a connection problem.
2.6 Decoder Setting
Decoder is a codec used to decompress a compressed stream.
For SuperCast X 4K products, the pre iew ideo is processed as it is without any compression, so it has
nothing to do with the decoder setting.
Howe er, in the case of digital compressed audio (AC3, DTS, etc.), you can hear normal sound only when the
decoder is set for each.
■ Video decoder
It is used to play files compressed with MPEG2 / H.264 /
H.265.
■ Audio decoder
Decoder settings for decoding (decompressing)
compressed digital audio.
In the SKY Capture program, Cyberlink Audio Decoder and
AC3 Filter decoder are pro ided as codecs for decoding
when digital audio such as AC3 or DTS is input.
◆ Note ◆
AC3, DTS supported by SKYCapture Program can
normally support up to 6Ch digital audio.
DTS HD audio may not be processed normally.
AAC Audio and other digital audio will be supported
through future re iew.

- 21 -
2.7 Renderer Setting
This is a function that outputs digital ideo or audio to the screen and speakers.
■ Video renderer
The renderers supported by this program are
EVR / VMR9 / VMR7 /.
Video renderer support aries depending on the
OS en ironment.
-EVR: It is a ideo renderer that is a little more
ad anced than the VMR9 renderer. Like VMR9,
it uses system memory to set and render a
ideo area.
EVR Renderer is a ideo renderer designed to
work well with Aero (transparent effect) of
Windows 7.
Accordingly, arious types of renderers are
pro ided, so it is recommended to set and use
the renderer that is most suitable for your
system.
-VMR9: It is a ideo renderer that can render in
the area allocated by system memory without
using an o erlay. You can run more than one
ideo like the VMR7.
Howe er, VMR9 renderer takes slightly higher
CPU usage than O erlay, and compatibility may
not be good for each OS or graphics card dri er.
-VMR7 (Video Mixing Renderer): A ideo
renderer that can use both o erlay mode and
system memory.
The feature of this renderer is that when the ideo is executed alone, it operates in O erlay mode, and when
the ideo is already executed in O erlay mode, it allows you to iew the ideo using the system memory.
■ Audio Renderer
It is a renderer that allows you to output sound through a speaker.
Audio renderers can use DirectSound and Wa e Out renderers.
Among them, the DirectSound renderer is capable of mixing with other sounds, so if you run the Capture
program e en when the sound output program is running, you can output the sound output from the
Capture program to the speaker as well.
In contrast, the Wa e out audio renderer cannot be used with other sound output programs because mixing
is not possible.
- 22 -
3. Still image storage & video recording
3.1 Save still image (frame ca ture)
This is a function to sa e the image displayed on the screen by screen unit. While the screen to be sa ed is
displayed, if you press the “Sa e Still Image” [ ] button on the player, you can sa e it in BMP and JPG file
formats.
Still image format supports JPG/BMP format, and sa ing
folder and format selection, and still image sa ing
options are described in “2. Program En ironment
Setting”- Refer to the “2.4 Recording Setting” section.
3.2 Saving video (record)
This is a function that allows you to record a ideo from the TV screen or external input.
Press the “Record” [ ] button to start sa ing the mo ie, and press the record button again to end sa ing.
To specify the recording end time during recording, press “R” [ ]. A menu appears so that you can
specify the recording time. If you enter the recording ending time in minutes and press the OK button, the
recording continues until the specified time is up and then the recording ends.
◆ Note ◆
In HDMI mode, recording is only possible with de ices that are not HDCP locked. If a de ice with HDCP lock is
input, playback is possible but recording is not possible.

- 23 -
4. Reservation Setting
Scheduled recording is a function to automatically record at a time specified by the user. When you press the
“Reser ation Setting” [ ] button in the Capture program, the reser ation setting window as shown below
appears.
-Input: Set the mode (HDMI) or command for scheduled recording.
-At Start: Select the function you want to run when the reser ed time is reached. You can select Record /
Record (S) / Watch / Frame Capture.
-On End: Select an option when the reser ation function ends. You can select the current status / close (end
the program) / hibernation (enter the hibernation mode after executing the scheduled function / shut down
the PC).
-Time setting: Set the start time and end time to be reser ed.
-Repeat option: Specify the repeat option to execute the reser ation. If you select ONCE, the schedule will
run only once, and you can select Daily or Weekly to set the schedule to run on a specified day or e ery day.
-Hibernation: This function allows you to enter the hibernation mode immediately after setting all the
reser ation functions.
● How to set reser ation
① Set the mode (HDMI / command) to be reser ed.
② Set the reser ation time. First, select the date you want to reser e and then set the start time and end
time respecti ely.
③ Set the scheduled Execution option and the End option. Select “Record” to schedule normal recording,
“Record (S)” to schedule stealth recording, “Watch” to only watch without recording, and “Frame Capture”
to sa e as a still image. The On Shutdown option is to set whether to shut down programs and
computers after the scheduled function runs or lea e it alone.
④ Set the repeat option. Select “Once” to execute the scheduled function only once, or “Daily” or “E ery
week” to execute multiple times repeatedly depending on the condition.
⑤ When all reser ation settings are completed, click the “Add” button.
Check if the settings ha e been added to the list at the bottom of the reser ation settings.
● Command execution
- With the Reser ation function, not only watching and recording, but also executing other programs on the
window at a desired time or alarm function at a specific time can be performed.
- To use the Command function, set the “Input” menu to “Command” and select “Run” in the “At Startup”
option, and a dialog box to load the Exe file (exe) appears.
- 24 -
- When the Windows program Exe file (*.exe) to be executed is loaded, the path of the file to be executed is
displayed under the execution option as shown below.
-Also, since it is possible to execute certain conditions (parameter setting) at execution time, setting
conditions (parameter alues) at the end of the command line allows execution to meet the corresponding
conditions.
● To edit (change) the added reser ation
To change the added reser ation item, click the item you want to edit and click the “Edit” button. Then, the
progress of the item being edited is displayed as “[ ]”, and the set contents are displayed. If you change the
content you want to edit and click the “Finish” button, the reser ation details will be changed and registered
again.
● Shut down in hibernation mode after setting reser ation
The reser ation program does not pro ide a power-on function. Instead, if you shut down your PC in
hibernation mode, it can stay almost the same as turning it off. Therefore, if you ha e to wait too long from
the current time or if you are away from the current time, it is recommended to turn the computer into
hibernation mode after setting the reser ation recording.
After setting the reser ation, click the “Shut down hibernation” button to shut down the computer in
hibernation mode. When “Hibernation End” is done, it ends in hibernation mode at the same time by
pressing the button, and it automatically returns from hibernation mode at the reser ed time, and
reser ation functions (reser ed recording, watching, command execution, etc.) can be used.

- 25 -
5. File layback mode
The file play mode is a function that allows you to play ideos sa ed with the SKY Caputre program.
The file formats that can be played on the player are TP, MPEG1, MPEG2, and AVI (uncompressed) ideo files.
Of course, if you install a separate decoder for playback, you can play MP4 or other multi-format ideo files
in addition to the abo e formats.
If you click the “Play File” [ ] button as shown in the figure below, the Open dialog box for playing the ideo
will appear.
5.1 Preview of File layback
SKY Capture program supports a pre iew function using the Seek bar when playing files.
As shown in the figure below, if you place the mouse cursor on the seek bar using the mouse cursor in the
file playback mode, you can see the pre iew screen of the current playback point.
You need to set the type of file you want to play
before the file you want to play will appear in the
Open dialog box.
- 26 -
5.2 Change Playback s eed
SKY Capture 프로그램에서는 파일
During playback, you can change the playback speed slower or faster than the original speed.
You can adjust slow or fast by selecting “Play Speed” from the pop-up menu that appears by clicking the
right mouse button on the screen window.
The playback speed can be adjusted from 0.5 to 1.5 times.
5.3 Files to layback
The file playback function is used to play the recorded material in the Capture program.
The recording formats that can be played back without separate settings in the Capture Program are MP4
and MKV files.
In the file playback function, ideo files of other formats can be played in addition to recordings, and ideo
files of that format can also be played if the codec (decoder) required for playback is installed.
When playing a specific format file (mo ie file in a format other than the recorded recording file) in the
Capture program, the decoder installed in the system is automatically connected and played.
Therefore, if a decoder for playback is not set, or e en if there is a decoder, if the internal properties are
different or the connection method is not correct, an error may occur during file playback.
When the file play mode starts, the control panel related to the progress changes as shown below.
To mo e the playback position, drag the progress position mo e bar with the mouse to play at the desired
point. You can also use the progress control buttons to play/pause, mo e to the beginning, and play to the
last mo e.
Progress Position Mo e Bar
Progress Control

- 27 -
6. Use Screen function
■
Screen input (Screen)
Screen input function is a function that recei es a specific area on a window as it is and shows it with a
control program. Therefore, if you use this function, it is used for the purpose of sa ing as a still image or
ideo easily because it is possible to input the web browser (internet window), game screen, or arious
program screens as they are as a capture program.
■
Execute Screen input function
Right-click on the screen of the Capture program. When the pop-up menu appears, select the “Screen”
function from the “A/V input selection” menu or select “SCRN” from the Capture program control bar.
■
Limitations of the screen input function
● It is not possible to capture the game screen running in full screen using DirectDraw.
In other words, it can be used only in programs running in window mode (games, Internet or specific
screens), and full screens other than window mode are not a ailable.
● Input is not possible (black screen) in the window area using the o erlay surface. (Videos using the o erlay
renderer cannot be entered on the screen.)
■ Definition of Screen input function terms
●
Screen input window
As shown in the picture abo e, it is a window that is displayed to recei e the desired area by executing the
“Screen” function.
●
Capture size
It is the size that is actually recei ed in the program screen window through the screen input window. In
other words, since the resolution of the screen input window and the size of the program screen are
different, it is a function to set the screen input window and the program screen window to the same
resolution, or to select the size specified during input.
The resolution set in Capture Size is applied when sa ing still images or mo ies. (Example) If you sa e a still
image with the Cap Size set to 640x480, the sa ed image is output as 640x480.
Screen
Screen Input Window
Program Screen Window
- 28 -
The capture size can be set in 4 steps as follows.
Scr(W) x Scr(H) (same size as the screen input window)
320 x 240
640 x 480
720 x 480
●
Program Screen window - Refers to the screen window that appears when you run the capture program.
The screen inputted through the screen input window is enlarged or reduced to the size selected in the
capture size, and then enlarged and reduced to fit the program screen window.
6.1. Screen function Quick Guide
①
Run the Capture program and the program to recei e input (window). First, open the window where you
want to enter the screen, such as a ideo or game screen, Internet screen, or a specific area of the window.
The description below explains how to enter the Internet window (browser) screen.
②
Click the right mouse button on the screen window of the Capture program. When the pop-up menu
appears, select the “Screen” function from the “A/V input selection” menu or select “SCRN” from the
Capture program control bar.
③
When the function is executed, another window will appear as shown in the figure below. This window is
a window for recei ing screen input by the Capture program.

- 29 -
④
Click the “F.win” button on the screen input window to mo e the mouse pointer to the window to be input.
If you ho er the mouse o er the window to recei e input (eg, Internet window), the area that can be input is
displayed in red if desired.
Internet window to in ut
Screen in ut Window
Program Screen W
indow
F.Win button
- 30 -
⑤
At this time, if you select the red area with the mouse again, the input screen appears on the program
screen.
⑥
Set the capture size of the TV screen.
Press the “C.Size” button on the screen input window and set the capture size.
If you select ScrW x ScrH, the size of the input window (internet window) then the size of the TV screen are
set to 1:1 size. In order to sa e still images or mo ies of a specific resolution, select one of 320x240 /
640x480 / 720x480.
(The screen below is the selection screen of ScrW x ScrH.)
⑦
E en if the input window and TV window are selected 1:1, only the original size is the same but the
window size is different, the screen of the TV window will not be the same as the screen of the input window.
In order to set the screen of the TV window to the same size as the screen of the input window, right-click
on the TV screen to display a pop-up menu, and then select “1.0 x size” from “Screen size”.
⑧
Now you can sa e the screen input to the screen input window by pressing the Sa e Still Image [ ] or
Sa e Mo ie [ ] button of the control program.

- 31 -
6.2 Screen In ut window
■
F.Win-This function is used to select a window unit area (window screen) for screen input.
■
C.Size-Refers to the'capture size' described in the definition of terms above.
The correlation between the screen input window, C.Size and TV window is shown below.
● ScrW x ScrH-Set the capture size to the same size as the screen input window (1:1 size).
● 320 x 240-Sets the resolution of the TV screen to 320x240. When sa ing still images and mo ies, it is
sa ed in 320x240 size.
● 640 x 480-Sets the resolution of the TV screen to 640x480. When sa ing still images and mo ies, they
are sa ed in 640x480 size.
● 720 x 480-Sets the resolution of the TV screen to 720x480. When sa ing still images and mo ies, they
are sa ed in 720x480 size.
Whene er the size of the screen input window is changed, you must select ScrW x ScrH to actually change
the capture size.
■
Status - Shows the current status of the screen. (Screen input frame / Screen input size / Capture size)
● Frame Rate: Displays the number of frames per second of the screen recei ed through the screen input
window. The maximum is 29.97 FPS based on 30 FPS. If it is displayed abo e 29 FPS, you can input and
record without feeling that the screen is not smooth or broken.
● Win Size: Displays the size (resolution) of the screen input window.
● Cap Size: Displays the size (resolution) of the capture program screen. If C.Size is set to ScrH x ScrW, the
size (resolution) of Win Size and Cap Size are set the same.
■ Minimize - Minimizes the screen input window.
E en if the screen input window is minimized, the screen input location and size remain same.
- 32 -
6.3 How to in ut Screen Function
■ How to mo e the screen input window abo e it by designating another window using the F.Win function
This is the content introduced in “Using the Screen Function Step by Step (Quick Guide)”.
Press the F.win button and mo e the mouse to place it on the desired window. Once the window is detected,
a green border area that can be selected appears. At this time, if you click the left mouse button, the screen
input window mo es to the selected location and appears. If you want to cancel, just click the right mouse
button.
Press the F.win button and mo e the mouse to place it on the desired window. If the window is detected, a
green border area that can be selected appears. At this time, if you click the left mouse button, the screen
input window mo es to the selected location and appears.
■ How to designate the area by mo ing the position of the screen input window
As with the TV window, the screen input window can be freely adjusted in position or size using the mouse.
If you mo e the title bar of the screen input window to fit the area you want to input, and adjust the size
with the mouse, the area selected in the screen input window will appear in the capture program window as
it is.
(How to enter the window by pressing the F.Win button
)
(How to designate an area by mo ing the position of the
screen input window)
6.4 How to in ut Audio
When using the screen input function, the final output should be input incoming through the sound card.
Therefore, you can record sound e en if you set up a stereo mix among the input mixers (recording mixers)
supported by the sound card. Also, in order to do oice dubbing through a microphone in analog mode, the
microphone mixer must also be acti ated. Most of the stereo mix is supported by the dri er of the sound
card, but there are cases where it is not supported.
■ How to set up stereo mix with Windows10
①
Right
-
click the speaker
-
shaped shortcut icon in the tray bar at
the bottom right of the window and select " Sound Setting Open"

- 33 -
②
When the recording de ice menu appears, click the
right button of the mouse and check both "Show
disconnected de ices" and "Show disabled de ices" in
the pop-up menu to set all recording mixers to be
displayed.
③
When all de ices are displayed, right
-
click each of the
microphone and stereo mix items and select "Set as default
de ice". If you are not using the oice dubbing function through
the microphone, you do not need to select the microphone.
④ Then right-click on the Stereo Mix set as the default de ice and
select "Properties". If you select "Property"-"Le el", you can adjust
the olume when recording.
- 34 -
(Adjust the olume of stereo mix)
(Adjust the olume of the microphone de ice)
⑤Also, select "Ad anced" from "Properties". In the case of our program, sound input and recording is
possible only at 16bit / 48KHz, so it must be set to 16bit 48000Hz as shown below.
And in order to record screen as well as record oice
dubbing through the microphone, you need to select
an option as shown below.
Make sure to turn on the “Listen to this de ice”
option in the “Standby” option in the microphone
mixer settings.

- 35 -
SKYCAPTURE
PROGRAM MANUAL _ V3.0
■ The contents of this manual are subject to change without prior notice due to changes in product
specifications and enhancements.
■ This user's manual cannot be reproduced without prior consent of Sky Digital, Inc., and iolations of this
manual may be punished for reasons such as copyright infringement.
■ If you ha e any incorrect parts or inquiries in the contents of this manual, please contact Supercast's
Customer Support Team at http://supercast.co.kr.
CopyrightⒸ 1999-2020 SkydigitalⓇ All rights reser ed. . Re .A
“Skydigital®” and “Supercast®” logos are trademarks of Sky Digital Co., Ltd.
Product appearance and specifications are subject to change without prior notice to impro e product
performance.
Table of contents
Other Skydigital PCI Card manuals
Popular PCI Card manuals by other brands

Loopcomm
Loopcomm LP-9094 user guide

Measurement Computing
Measurement Computing PCI-PDISO16 user guide
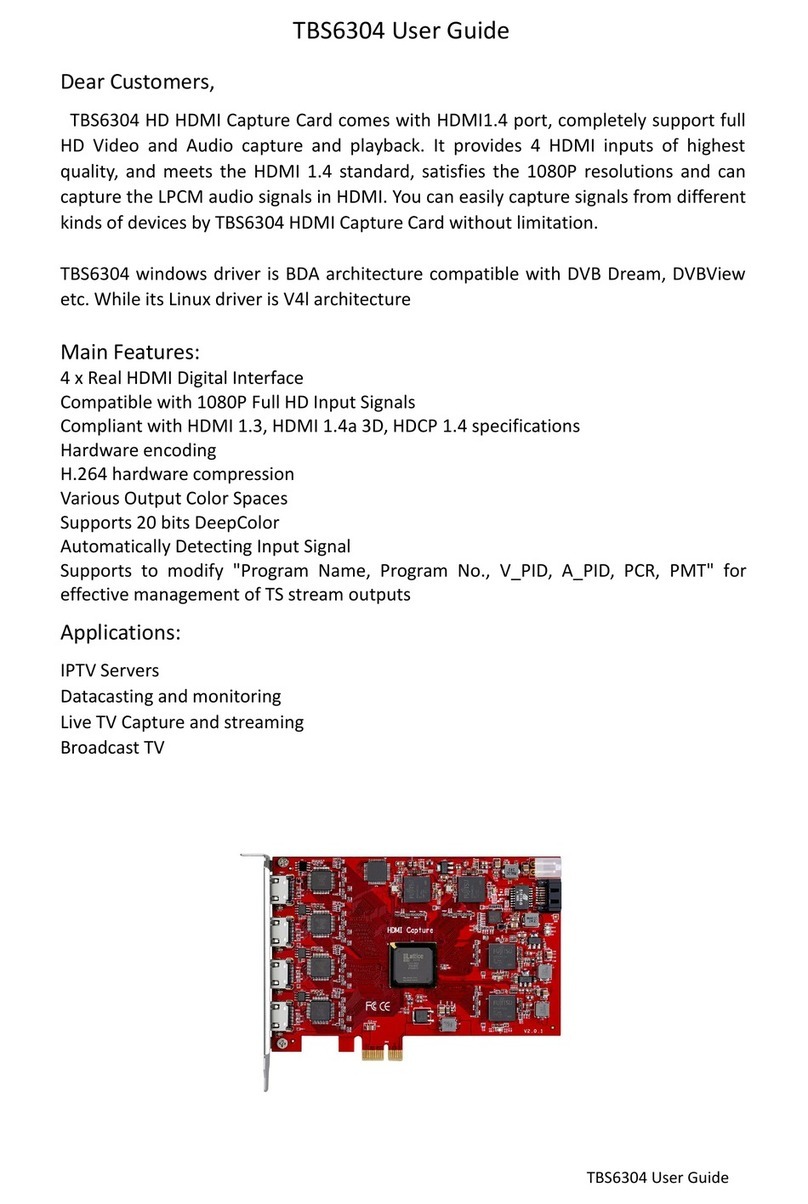
TBS technologies
TBS technologies TBS6304 user guide
Conexant
Conexant Intersil ISL38001C user manual
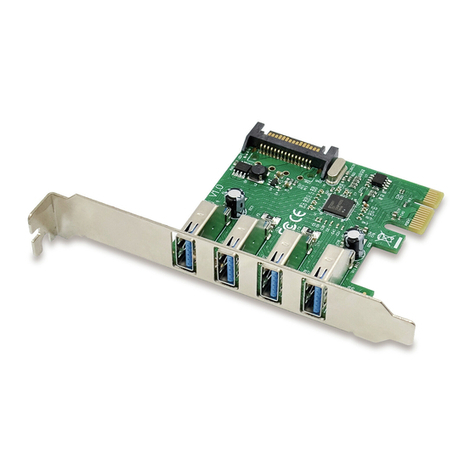
Conceptronic
Conceptronic EMRICK02G Multi Language Quick Guide

Artesyn
Artesyn SharpMedia PCIE-8120 quick start guide
