SM Pro JuiceRack User manual

JuiceRack
& JuiceBlock
500 series Power Supplies
!
Operating Manual
V 1.1
!

SM Pro Audio Page 2 of 11 Juicerack / Juiceblock manual
!
Contents
1 Safety instructions......................................................................................................... 3
2 Foreword......................................................................................................................... 4
2.1 Important Notes: ...................................................................................................... 4
3 Introduction .................................................................................................................... 5
3.1 Setup......................................................................................................................... 5
3.2 Mains Voltage........................................................................................................... 5
4 Module Installation ........................................................................................................ 5
5 Power up ......................................................................................................................... 6
6 Juicerack 1 ..................................................................................................................... 6
7 Juicerack 3 & Juiceblock3 ............................................................................................ 6
7.1 Audio Routing:......................................................................................................... 6
8 Juicerack 8 ..................................................................................................................... 7
8.1 Audio Routing:......................................................................................................... 7
9 Removal of Modules ...................................................................................................... 9
10 Warranty........................................................................................................................ 9
10.1 Warranty Registration ........................................................................................... 9
10.2 Warranty ................................................................................................................. 9
10.3 Return Authorization Number .............................................................................. 9
10.4 Warranty Regulations............................................................................................ 9
10.5 Claim for Damages .............................................................................................. 10
10.6 Other Warranty Rights ........................................................................................ 10
11 FCC and CE Regulation............................................................................................. 11
12 Correspondence ........................................................................................................ 11

SM Pro Audio Page 3 of 11 Juicerack / Juiceblock Manual
!
!
1Safety instructions
!
CAUTION: Please ensure power to your Juicerack/Juiceblock is OFF before installing or removing
your 500 series modules. Hot Swapping, (exchanging of 500 series modules with the power on) is
NOT recommended. If the Juicerack/Juiceblock power is on whilst exchanging modules, the pins on
the modules edge connector may short and burn the regulator. For this reason, hot swapping of
modules is not covered under the SM Pro Audio warranty.
DETAILED SAFETY INSTRUCTIONS:
All safety and operation instructions of this manual should be read and adhered to before operation.
Please retain all safety and operating instructions for future reference.
Follow instructions:
All operation and user instructions should be followed.
Water, liquid and Moisture:
The appliance should not be used near water, rain or other liquids. Make sure that no liquid can
leak, spill or otherwise seep into the appliance.
Ventilation:
Please place the appliance so no obstacles interfere or impede the flow of air through the ventilation
openings.
Heat:
The appliance should be situated away from other heat sources such as heaters, radiators, ovens,
or other appliances that produce heat.
Power Source:
Make sure your appliance is set to the correct voltage for the country in which it will
be use before switching the device ON.
Grounding and Polarization:
Precautions should be taken so that the grounding or polarization means of an appliance is not
defeated.
Power-Cord Protection:
Power supply cords should be routed so that they are not likely to be walked on, pinched, damaged,
worn, or rubbed by any other device or obstacle.
Cleaning:
The appliance should be cleaned only with a light soft cloth. Do not use any damaging
or corrosive products on the unit.
Periods of inactivity:
The power cord of the appliance should be unplugged from the outlet when left unused
for a long period of time or in case a lightning storm occurs.
Damage Requiring Service:
The appliance should be serviced by qualified service personnel when:
• The power supply cord or the plug has been damaged; or
• Objects have fallen, or liquid has been spilled into the appliance; or
• The appliance has been exposed to rain; or
• The appliance does not appear to operate normally or exhibits a marked change in
performance; or
• The appliance has been dropped, or the enclosure damaged.
Servicing:
The user should not attempt to service the appliance beyond that is described in the Operating
Instructions.
All other servicing should be referred to qualified service personnel.! !

SM Pro Audio Page 4 of 11 Juicerack / Juiceblock manual
!
!
2Foreword
!
Dear Customer,
Thank you very much for expressing your confidence in SM ProAudio products by purchasing this
unit. Our 500 series power supplies have been designed for use as a standard tool for home/pro
studios, P.A. rental companies, Schools and in many other situations where audio products would
be used.
With much experience in the audio industry over a long period of time, and along with valuable
suggestions from our customers, our engineers have developed a product we know you will be
satisfied with. We guarantee you uncompromising quality as well as excellent technical and audio
properties at an extremely affordable price.
We hope you enjoy making music with SM Pro Audio!!
!
2.1 Important Notes:
!
Every effort has been made to ensure all information provided in this manual is accurate at the time
of writing.
SM Pro Audio is not liable for any incorrect information contained in this manual and extends no
liabilities in regard to this manual other than those required by local law.
SM Pro Audio may update the contents of this manual at any time without prior notice. The latest
version of this manual is available from the SM Pro Audio website at all times.
http://www.smproaudio.com!
!
! !
08!
Fall$

SM Pro Audio Page 5 of 11 Juicerack / Juiceblock Manual
!
!
3Introduction
!
Our Juicerack and JuiceBlock power supplies produce more current than any other 500 series
power unit on the market today. So you can be confident that any brand of 500 series module will be
powered correctly in your SM Pro Audio Juicerack / Juiceblock.
The power output (in milliamps) for each SM Pro Audio model is as follows:
Juicerack 1 = 600mA
Juicerack 3 & Juiceblock 3 = 320mA per module slot.
Juicerack 8 = 350mA per module slot.
The original API™ spec calls for an average of 130mA for each slot, but there are 500 series
modules from many manufacturers that require more power than that average. SM Pro Audio
ensures that you can easily power any 500 series module available today with our Juicerack and
Juiceblock power supplies.
!
3.1 Setup
!
SMPRO Audio JuiceRack and JuiceBlock power supplies feature all-metal construction and full
compatibility with the 500-series format. Unscrew and remove the face plate cover on your Juice
power supply with the provided allen key.
3.2 Mains Voltage
!
Juicerack 8 can be used with voltages ranging from 100V AC to 250V AC. Please make sure that
you have selected the correct voltage on the rear voltage switch before switching the unit ON. Any
damage occurring as a result of incorrect voltage selection may not be granted a warranty repair.
!
4Module Installation!
1.!!Please ensure there is no power connected to your Juicerack / Juiceblock.
2. Insert your 500 series module into your Juice power supply slot and push in until you
feel a click. The front panel of your module should be flush with the front panel of the
Juicerack 1.
3. Screw your 500 series module into the Juice power supply slot with the supplied screws.
4. Plug your source signal into the Juice power supply rear input. Use Input 1 for an XLR
balanced input or Input 2 for a 1/4“ balanced TRS input.
5. Connect the audio output of the Juice power supply into your audio mixer or amplifier
etc. The Juicerack 1 XLR output is a balanced output and the 1/4“ output is an
unbalanced output.
!

SM Pro Audio Page 6 of 11 Juicerack / Juiceblock manual
!
5Power up
!
1.!!Insert the external power supply into your Juicerack/block (or IEC cable for Juicerack8).
2. Push the power button on your Juice power supply.
3. If you are using a microphone pre-amp and a condensor microphone, push the phantom
power button.
6Juicerack 1
!
JuiceRack1 is a single-slot power source for operating one 500-series module. It is a half-rack
format, and includes a connector that allows two Juicerack 1’s to be mounted into a 1 ru 19” rack.
The external AC power supply design, keeps the power transformer separated from your 500
module’s sensitive electronics, and ensures reduced hum and signal interference.
7Juicerack 3 & Juiceblock3
Juicerack 3 and Juiceblock3 are 3 slot power supplies for your 500 series modules. The rear panel
includes balanced XLR inputs and outputs along with balanced TRS 1/4” inputs and unbalanced
outputs. A 48V phantom power switch is located on the rear. These 3 slot models include front
panel buttons allowing audio routing between modules without the need for manual cable patching.
7.1 Audio Routing:
• FEED - Sends the audio output of one module into the next module
• LINK1 - Split a single balanced input and sends it to multiple modules simultaneously
• LINK2 - Split a single unbalanced input and sends it to multiple modules simultaneously
Onboard LEDs indicate which modules are using the FEED / LINK features, with each slot’s status
independently configurable.
!
!
!
!
!
!
!
!
!

SM Pro Audio Page 7 of 11 Juicerack / Juiceblock Manual
!
!
8Juicerack 8
!
JuiceRack 8 is a 19” rack-mount power source designed to house up to eight 500-series single slot
modules in a vertical configuration. The rear panel sports eight slots of balanced XLR inputs and
outputs along with eight slots of unbalanced 1/4” inputs and outputs.
A 48V phantom power switch is located on the front of the rack. When the +48V button is pushed,
the master phantom power is enabled, and each module may now enable its own phantom power.
8.1 Audio Routing:
• FEED - Sends the audio output of one module to the input of the next module
1. Press the select button until the feed LED is on
2. Press the status select button until 1-2 flashes twice
3. Press the ON/OFF button
4. The solid blue light shows output 1 is being fed into input 2.
5. Repeat the above process for feeding the other inputs.
6. NB: Inputs are fed in series.
Below is an example of how the feed button routes the audio
• LINK1 - Split a single balanced input and sends it to multiple modules simultaneously
1. Press the select button until Link1 LED is on
2. Press the status select button until the channel you wish to link is lit
3. Press the ON/OFF button
4. Repeat the above process to link further channels
Below is an example of how the LINK 1 button routes the audio
Input 1 is linked to inputs 2 & 3, whilst a separate input in module 6 is linked to inputs 7 & 8

SM Pro Audio Page 8 of 11 Juicerack / Juiceblock manual
!
•LINK2 - Split a single unbalanced input and sends it to multiple modules simultaneously
1. Press the select button until Link2 LED is on
2. Press the status select button until the channel you wish to link is lit
3. Press the ON/OFF button
4. Repeat the above process to link further channels
---------------------------------------------
Below is an example of more complex routing using FEED & LINK simultaneously.
Input of module 1 gets processed then outputs to (FEEDS) module 2, which again gets processed.
The signal then flows (LINKS) through to module 6 (with NO processing from inputs 3, 4 & 5) then
gets processed in module 6 and outputs to (FEEDS) module 7. (got that?)
!
!
!

SM Pro Audio Page 9 of 11 Juicerack / Juiceblock Manual
!
!
9Removal of Modules
!
The Juicerack 1 and Juicerack 3 have small slots in the top of the chassis that allows the removal of
modules. After unscrewing the module, this is done using a small straight head screwdriver, which
can be inserted into the top slot and pushed forward to release the module.
In the Juicerack 8 the lid of the chassis can be unscrewed & completely removed for easy removal
of modules.
!
10 Warranty
!
10.1 Warranty Registration
!
To be protected by this warranty, please register your purchase using our online
registration form at http://www.smproaudio.com/index.php/en/service/register
10.2 Warranty
10.2.1 SM ProAudio warrants the mechanical and electronic components of this product to be
free of defects in material and workmanship for a period of three (3) years from the
original date of purchase, in accordance with the warranty regulations described below. If
any defects occur within the specified warranty period that are not caused by normal
wear or inappropriate use, SM Pro Audio shall, at its sole discretion, either repair or
replace the product through its local distributor.
10.2.2 Warranty claims other than those indicated above are expressly excluded.
!
10.3 Return Authorization Number
!
10.3.1 To obtain warranty service, the buyer must: a. return the product to its place of purchase,
or b. contact your local distributor, or c. email service@smproaudio.com BEFORE
returning the product. All warranty requests must be accompanied by a description of the
problem and an original purchase receipt. If you have previously registered your
purchase (via the SM Pro Audio web site), you will then be issued with a return
authorization number. If you have not previously registered your purchase, then you
must forward a proof of purchase document (retail dealers invoice) before a return
authorisation can be provided.
10.3.2 The product must then be returned in its original shipping carton, together with the return
authorization number.
10.4 Warranty Regulations
!
10.4.1 Any product deemed eligible for repair or replacement by SM Pro Audio under the terms
of this warranty will be repaired or replaced in the best possible manner.
10.4.2 If the product needs to be modified or adapted in order to comply with applicable
technical or safety standards on a national or local level, in any country which is not the

SM Pro Audio Page 10 of 11 Juicerack / Juiceblock manual
!
country for which the product was originally developed and manufactured, this
modification/adaptation shall not be considered a defect in materials or workmanship.
The warranty does not cover any such modification/adaptation, irrespective of whether it
was carried out properly or not. Under the terms of this warranty, SM Pro Audio shall not
be held responsible for any cost resulting from such a modification/adaptation.
10.4.3 Free inspections, maintenance/repair work and replacement of parts are expressly
excluded from this warranty, in particular if caused by inappropriate use. Likewise, the
warranty does not cover defects of expendable parts caused by normal wear of the
product. Expendable parts are typically pots, potentiometers, switches and similar
components.
10.4.4 Damages/defects caused by the following conditions are not covered by this warranty:
Misuse, neglect or failure to operate the unit in compliance with the instructions given in
the user or service manuals.
Connection or operation of the unit in any way that does not comply with the technical or
safety regulations applicable in the country where the product is used.
Damages/defects that are caused by any other condition beyond the control of SM Pro
Audio.
10.4.5 Any repair carried out by unauthorized personnel will void the warranty.
Products which do not meet the terms of this warranty will be repaired exclusively at the
buyer‘s expense. SM Pro Audio will inform the buyer of any such circumstance. If the
buyer fails to submit a written repair order within 4 weeks after notification, SM Pro Audio
will return the unit C.O.D. with a separate invoice for freight and packing. Such cost will
also be invoiced separately when the buyer has sent in a written repair order.
10.5 Claim for Damages
!
Failure of SM Pro Audio to provide proper warranty service shall not entitle the buyer to
claim (consequential) damages. In no event shall the liability of SM Pro Audio exceed the
invoiced value of the product.
10.6 Other Warranty Rights
!
This warranty does not exclude or limit the buyer‘s statutory rights provided by national
law, in particular, any such rights against the seller that arise from a legally effective
purchase contract.
!

SM Pro Audio Page 11 of 11 Juicerack / Juiceblock Manual
!
11 FCC and CE Regulation
This device complies with Part 15 of the FCC Rules. Operation is subject to the following two
conditions: (1) this device may not cause harmful interference, and (2) this device must accept any
interference received, including interference that may cause undesired operation.
Caution: Any changes or modifications in construction of this device with are not expressly approved
by the party responsible for compliance, could void the user's authority to operate equipment.
Note: This equipment has been tested and found to comply with the limits for a Class A digital
device, pursuant to Part 15 of the FCC Rules. These limits are designed to provide reasonable
protection against harmful interference when the equipment is operated in a commercial
environment. This equipment generates, uses, and can radiate radio frequency energy and, if not
installed and used in accordance with the instruction manual, may cause harmful interference to
radio communications. Operation of this equipment in a residential area is likely to cause harmful
interference in which case the user will be required to correct the interference at his/her own
expense. If necessary, consult an experienced radio/television technician for additional suggestions.
12 Correspondence
For technical support, warranty claims, and all other enquiries, please contact your local SM Pro
Audio distributor.
Contact details of all SM Pro Audio distributors list can be found online at
http://www.smproaudio.com/index.php/en/dealers9distributors!
The information contained in this manual is subject to change without notice. No part of this manual
may be reproduced or transmitted in any form or by any means, electronic or mechanical, including
photocopying and recording of any kind, for any purpose, without the express written permission of
SM Pro Audio.
!
ALL RIGHTS RESERVED © 2013 SM Pro Audio
!
This manual suits for next models
1
Table of contents
Popular Power Supply manuals by other brands

Pulsar
Pulsar Green Power HPSB 3512C manual
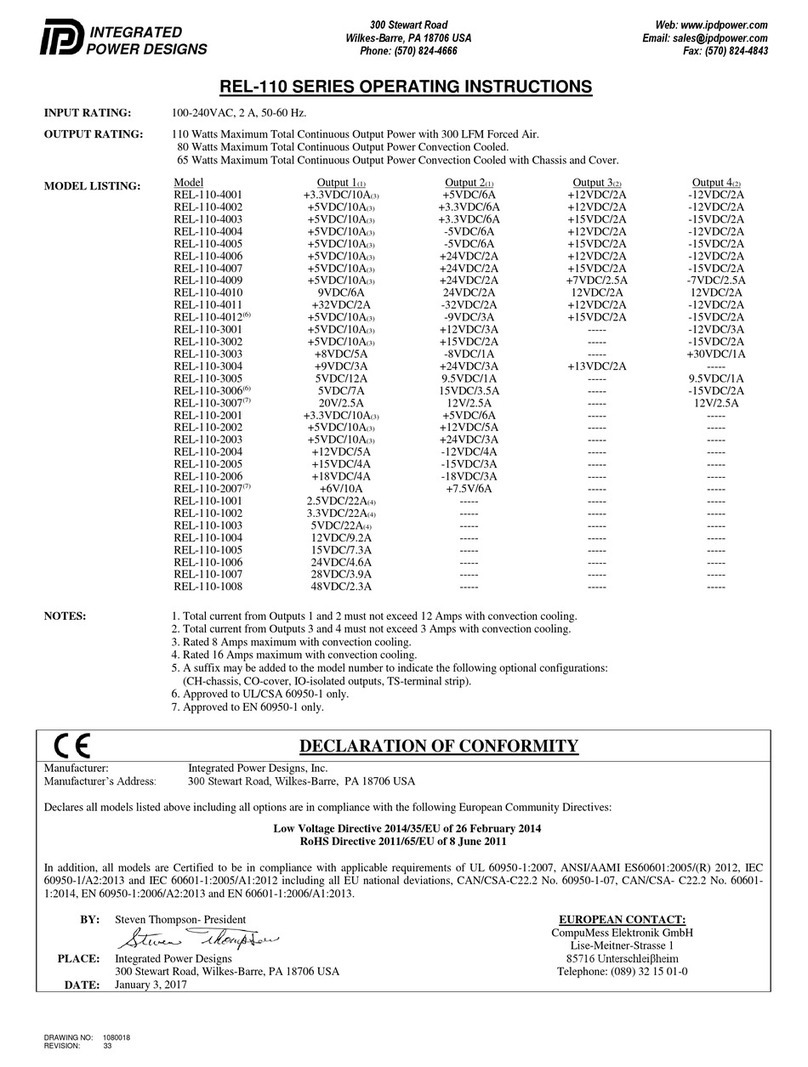
Integrated Power Designs
Integrated Power Designs REL-110 SERIES operating instructions
Pulsar
Pulsar RUPS1612RT quick start guide

EXAIR
EXAIR 7901 Installation & maintenance
Satel
Satel APS-724 manual

Manson Engineering Industrial
Manson Engineering Industrial KPS-6000 Series user manual
