Smart Electronic MX63 User manual

Terrestrial HDTV Receiver
User Manual
Version: 10.09.2012
ENGLISH
MX63

Introduction
2 smart MX63
Introduction
Dear customer,
Thank you for buying a smart terrestrial HDTV receiver.
This user manual provides information on
•placement
•installation,
•adjustment
•operation,
•cleaning and disposal of the receiver.
Please carefully read the user manual before operating the receiver.
We hope you enjoy your smart MX63.
Your
smart electronic GmbH
Industriestraße 29
78112 St. Georgen
Germany
Service hotline: +49 (0) 7724 94783-54
Fax: +49 (0) 7724 94783-33
E-mail: service@smart-electronic.de
Internet: www.smart-electronic.de
© smart electronic GmbH 2012
All rights, technical changes, errors as well as printing mistakes reserved. Any reproducing or copy-
ing of the contents requires prior written permission from smart.

Table of Contents
smart MX63 3
Table of Contents
1User Information ........................................................................................ 7
1.1 Use of this Manual ........................................................................................7
1.2 Signs, Symbols, Layout................................................................................7
2Product Description ................................................................................... 8
2.1 Scope of Delivery ..........................................................................................8
2.2 Receiver............................................................................................................9
2.2.1 Front Panel ......................................................................................................9
2.2.2 Rear Panel......................................................................................................10
2.3Remote Control ...........................................................................................11
2.4 Save Energy...................................................................................................13
2.5 Guarantee......................................................................................................13
3General Safety Instructions .....................................................................13
3.1 Intended Use ................................................................................................13
3.2 Risks in Case of Intended Use..................................................................14
3.3 Location..........................................................................................................14
3.4 Handling of Batteries .................................................................................15
3.5 Notes on Product Liability........................................................................15
4Installation of the smart MX63................................................................16
4.1 Connection Scheme...................................................................................16
4.2Connect DVB-T Antenna...........................................................................16
4.3 Connect TV Set.............................................................................................16
4.4 Connect Home Cinema System (Optional) ........................................17
4.5 Connect Data Storage (Optional) ..........................................................18
4.6 Insert Batteries of Remote Control........................................................18
5Start ...........................................................................................................19
5.1 Switch on Receiver .....................................................................................19
5.2 Initial Start-Up ..............................................................................................19
5.3 Select Operation Mode .............................................................................19

Table of Contents
4 smart MX63
5.4 Main Menu.................................................................................................... 20
5.5 Menu Navigation........................................................................................ 20
6Direct Operation ...................................................................................... 21
6.1 Number.......................................................................................................... 21
6.2 Up/Down (Channel Change) .................................................................. 21
6.3 Left/Right (V+/V-) ....................................................................................... 21
6.4 Mute................................................................................................................ 21
6.5 Pause...............................................................................................................21
6.6 Teletext .......................................................................................................... 21
6.7 OK .................................................................................................................... 22
6.8 Audio .............................................................................................................. 22
6.9 Recall...............................................................................................................22
6.10 Info .................................................................................................................. 22
6.11 Favorite Groups........................................................................................... 22
6.12 EPG .................................................................................................................. 23
6.12.1.1 Single EPG..................................................................................................... 23
6.12.1.2 Multi EPG....................................................................................................... 24
6.13 Subtitles......................................................................................................... 24
7Menu Edit channel ................................................................................... 25
7.1 TV Channel List / Radio Channel List.................................................... 25
7.1.1 Add Channel to Favorite Groups........................................................... 26
7.1.2 Provide Channels with Password Protection (Lock Against
Unauthorized Access) ............................................................................... 26
7.1.3 Skip Channels when Switching from Channel to Channel
(Zapping)....................................................................................................... 27
7.1.4 Move Channels to Another Channel Position................................... 27
7.1.5 Sort Channel List......................................................................................... 27
7.1.6 Rename Channels....................................................................................... 28
7.1.7 Delete Individual Channels from Channel List ................................. 30
7.2 Delete All ....................................................................................................... 30

Table of Contents
smart MX63 5
8Menu Installation .....................................................................................30
8.1 Auto Scan.......................................................................................................31
8.2 Channel Scan................................................................................................31
8.3 Aerial Adjustment .......................................................................................32
8.4 LCN...................................................................................................................32
9Menu System Setup..................................................................................33
9.1 Language.......................................................................................................33
9.1.1 OSD Language .............................................................................................33
9.1.2 Language of the First Audio Channel...................................................33
9.1.3 Language of the Second Audio Channel ............................................33
9.1.4 Subtitle Language.......................................................................................34
9.1.5 Teletext Language ......................................................................................34
9.2 TV System ......................................................................................................34
9.2.1 Video Resolution at the HDMI socket...................................................34
9.2.2 Aspect Mode.................................................................................................35
9.2.3 Video Out.......................................................................................................36
9.2.4 Color Encoding System.............................................................................36
9.2.5 RF Channel.....................................................................................................36
9.2.6 Format of the Digital Audio Signal........................................................36
9.3 Display Setting.............................................................................................36
9.4 Local Time Setting ......................................................................................37
9.5 Timer Setting ................................................................................................38
9.6 Parental Lock ................................................................................................39
9.7 OSD Setting...................................................................................................39
9.7.1 Subtitle Display............................................................................................39
9.7.2 OSD Timeout ................................................................................................40
9.7.3 OSD Transparency ......................................................................................40
9.8 Rename Favorite Lists................................................................................40
9.9 Automatic Standby Function..................................................................41
10 Menu Tools................................................................................................41
10.1 Information ...................................................................................................42

Table of Contents
6 smart MX63
10.2 Load Factory Setting ................................................................................. 42
10.3 Upgrade by USB.......................................................................................... 43
11 Menu USB.................................................................................................. 44
11.1 Media Player................................................................................................. 44
11.1.1 Music............................................................................................................... 45
11.1.1.1 Playback......................................................................................................... 45
11.1.1.2 Playlist ............................................................................................................45
11.1.1.3 Edit Audio Files............................................................................................ 46
11.1.1.4 Sort Audio Files ........................................................................................... 46
11.1.1.5 Playback Mode ............................................................................................ 46
11.1.2 Images............................................................................................................ 47
11.1.2.1 Configure a Slide Show ............................................................................ 47
11.1.2.2 Showing all Images in the Current Directory.................................... 47
11.1.3 Video...............................................................................................................48
11.1.3.1 Playback Video ............................................................................................ 48
11.1.3.2 Edit Video Files ............................................................................................ 48
11.1.3.3 Sorting Videos ............................................................................................. 48
11.2 Remove USB Device safely ...................................................................... 48
12 Cleaning.................................................................................................... 49
13 Transport and Decommissioning ........................................................... 49
14 Troubleshooting ...................................................................................... 50
15 Disposal .................................................................................................... 52
16 Technical Data.......................................................................................... 53
16.1 General Information .................................................................................. 53
16.2 Remote Control........................................................................................... 53
16.3 Mains Adapter ............................................................................................. 53
16.4 Connections ................................................................................................. 53
16.5 Temperature ................................................................................................ 54
16.6 Dimensions and Weight........................................................................... 54
17 Declaration of Conformity ...................................................................... 55
User Information
smart MX63 7
1User Information
1.1 Use of this Manual
•This manual is intended for the terrestrial HDTV receiver smart MX63.
•Please carefully read this user manual before operating the device for the
first time.
•Please note all warnings and notes included in this user manual.
•Consider this user manual to be an integral part of the product, and store it
at a well accessible location.
•This user manual should also be enclosed when handing over the device to a
third party.
•In case of loss, the current version of the user manual can be downloaded at
the support center on our website www.smart-electronic.de.
•The software is still being further developed even after your purchase of the
device. Thus, it may be possible that certain operation steps do not fully cor-
respond to the user manual.
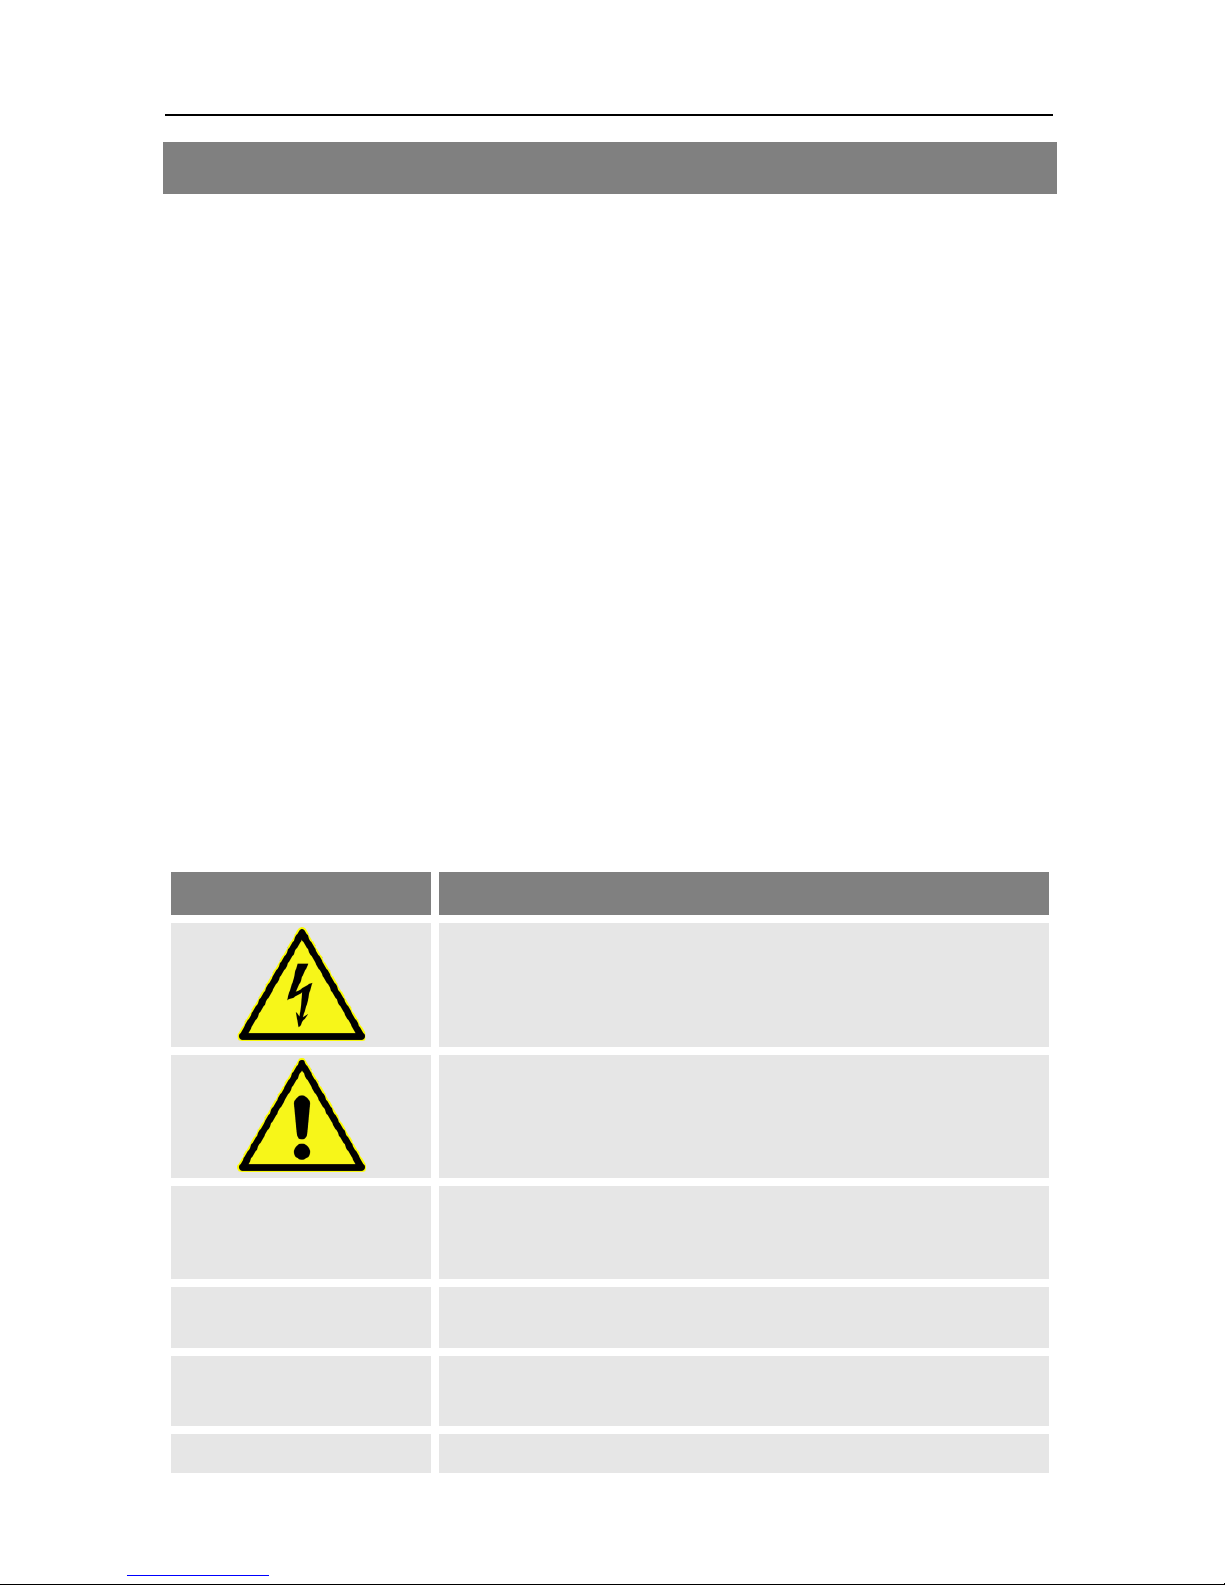
1.2 Signs, Symbols, Layout
Symbol/layout
Meaning
WARNING
Danger due to electric shock with possible severe bodily
injury
CAUTION
Warning of possible physical damage
NOTE
Useful information and hints
You are requested to perform an action.
1.
2. Perform these steps in the stated order.
List

Product Description
8 smart MX63
Symbol/layout
Meaning
Italics
The various possibilities of settings as well as image captions
are stated in Italics.
bold
The designations of keys are printed in bold letters.
bold italic
Menu windows and menu items (that often include further
hidden menu items or direct settings) are printed in bold
italic letters.
2Product Description
The Digital Terrestrial Receiver smart MX63 will take you to the new and exciting
world of Digital Television. A world of crystal clear widescreen pictures, digital
sound, more information and new services. All this and more on "Free to Air"
Digital Television.
To make full use of your new receiver please take the time to familiarize yourself
with the extensive features of the unit detailed in this User's Guide.
lf you need help in setting up please call your dealer or a customer service ad-
viser.
2.1 Scope of Delivery
•Terrestrial HDTV receiver smart MX63.
•remote control
•2 batteries (AAA) for remote control
•user manual
Product Description
smart MX63 9
2.2 Receiver
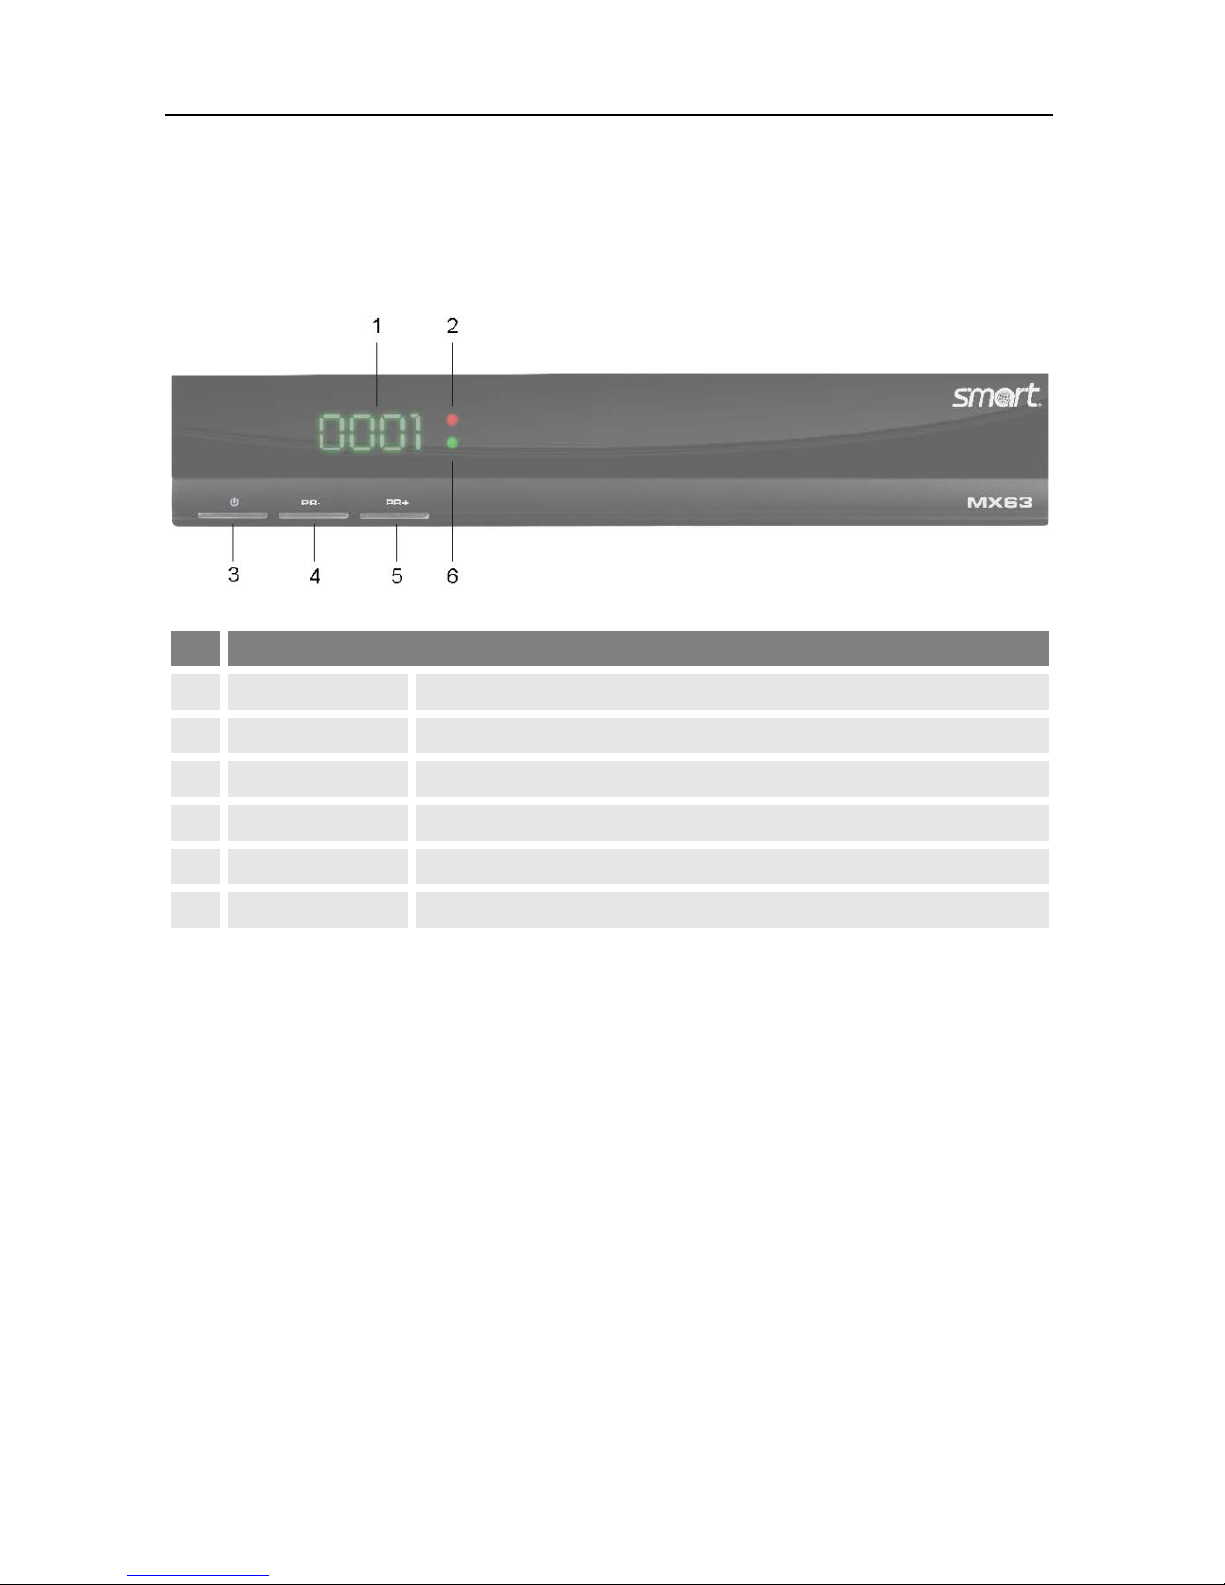
2.2.1 Front Panel
No.
Description
1
Display
4-digit display
2
LED red
Standby LED, lights if the receiver is in Standby mode.
3
STANDBY
Switch between standby / normal operation
4
PR-
Channel down / down-navigation in menu
5
PR+
Channel up / up-navigation in menu
6
LED green
Signal-LED, lights after if a video signal is routed to the TV set.
Product Description
10 smart MX63
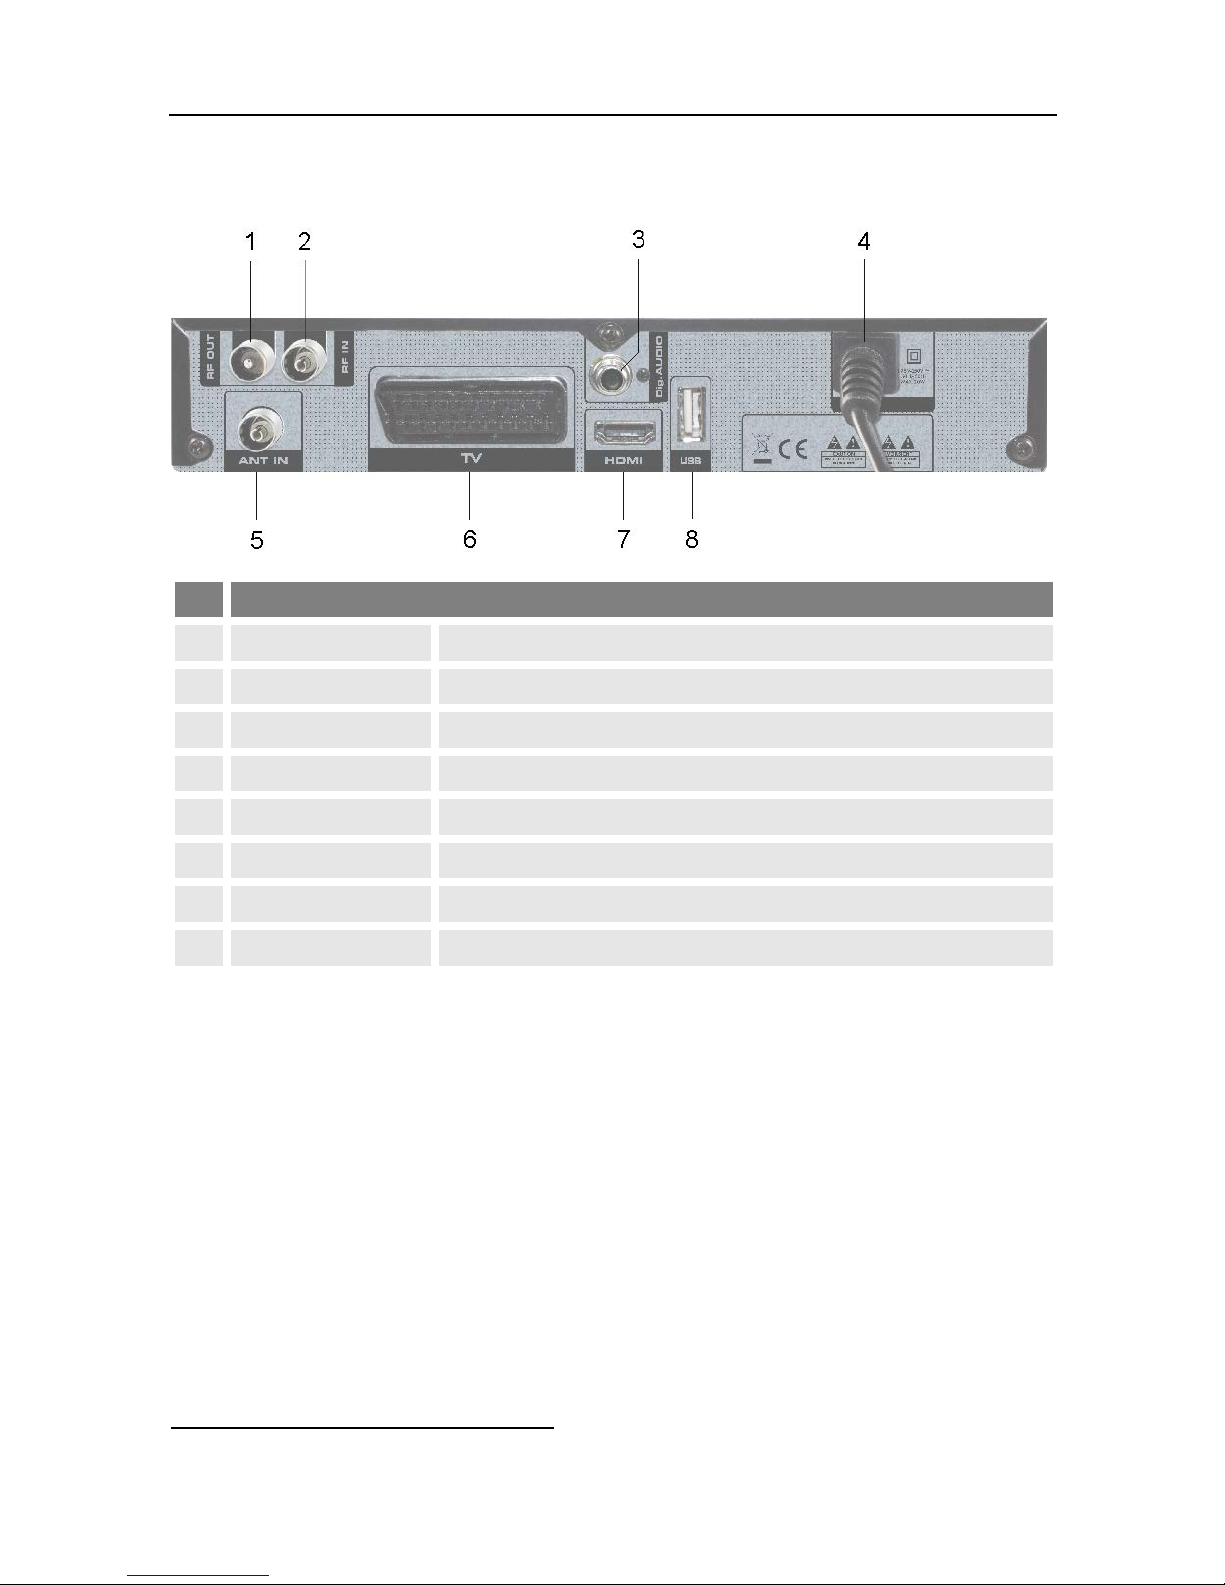
2.2.2 Rear Panel
No.
Description
1
RF OUT
Modulator out (to TV set antenna input)
2
RF IN
Modulator in (e.g. from cable – looped through to RF OUT)
3
DIGITAL AUDIO
Digital RCA audio out (SPDIF)
4
POWER
Power supply cord
5
ANT IN
Connection to antenna
6
TV
SCART connection for TV device (analogue)
7
HDMI1
Digital audio and video out
8
USB
Connection for external USB data storage
1High Definition Multimedia Interface; interface for fully digital transmission of audio and video
data.

Product Description
smart MX63 11
2.3 Remote Control
No.
Key
Description
1
Switch between operational and standby mode.
2
1 - 9
Direct channel selection
3
TV/RADIO
Switch between TV and radio mode
4
EPG
Call of EPG2
5
PR+
Channel + or up-navigation in menu
2EPG = Electronic Program Guide = electronic TV guide

Product Description
12 smart MX63
No.
Key
Description
PR-
Channel - or down-navigation in menu
Volume + or menu navigation to the right
Volume -or menu navigation to the left
OK
Display channel list / confirm menu item
6
INFO
Display information on current channel
7
10 entries up in menu / channel list
8
Red function key / display the Find window
9
10 entries down in menu / channel list
10
Green function key / switch to teletext mode
11
FAV
Call list of favorites
12
SLEEP
Enter into the sleep in mode
13
Not used
14
Play (media player)
15
Fast backward
16
Fast forward
17
Mute
18
0
Select playback format of media player
19
PR
Switch of previously selected channels
20
MENU
Call main menu
21
EXIT
Exit menu or menu item
22
Yellow function key / switch to subtitle mode
23
Blue function key / display the Audio window
24 PAUSE
Press once to pause the screen picture, press once again to go to
the normal mode
25
V-MODE
Display / switch the video resolution
26
SHIFT
Not used
27
TV/AV
Not used

General Safety Instructions
smart MX63 13
No.
Key
Description
28
Stop playback
29
Slow forwarding – slow motion
30
Slow rewinding
2.4 Save Energy
The receiver smart MX63 is equipped with particularly energy-saving electric
and electronic components. Furthermore, a sophisticated energy management
helps to save energy:
Thus, energy consumption during Save Energy Standby Mode is reduced to less
than 1 Watt!
2.5 Guarantee
The warranty of the terrestrial HDTV receiver smart MX63 of smart electronic
GmbH corresponds to the legal regulations at the time of purchase.
3General Safety Instructions
3.1 Intended Use
The terrestrial HDTV receiver smart MX63 is intended for private receiving of
unencrypted terrestrial digital television. It is exclusively intended for such pur-
pose and must be used exclusively for such purpose.
Any other use is deemed to be unintended use.
General Safety Instructions
14 smart MX63
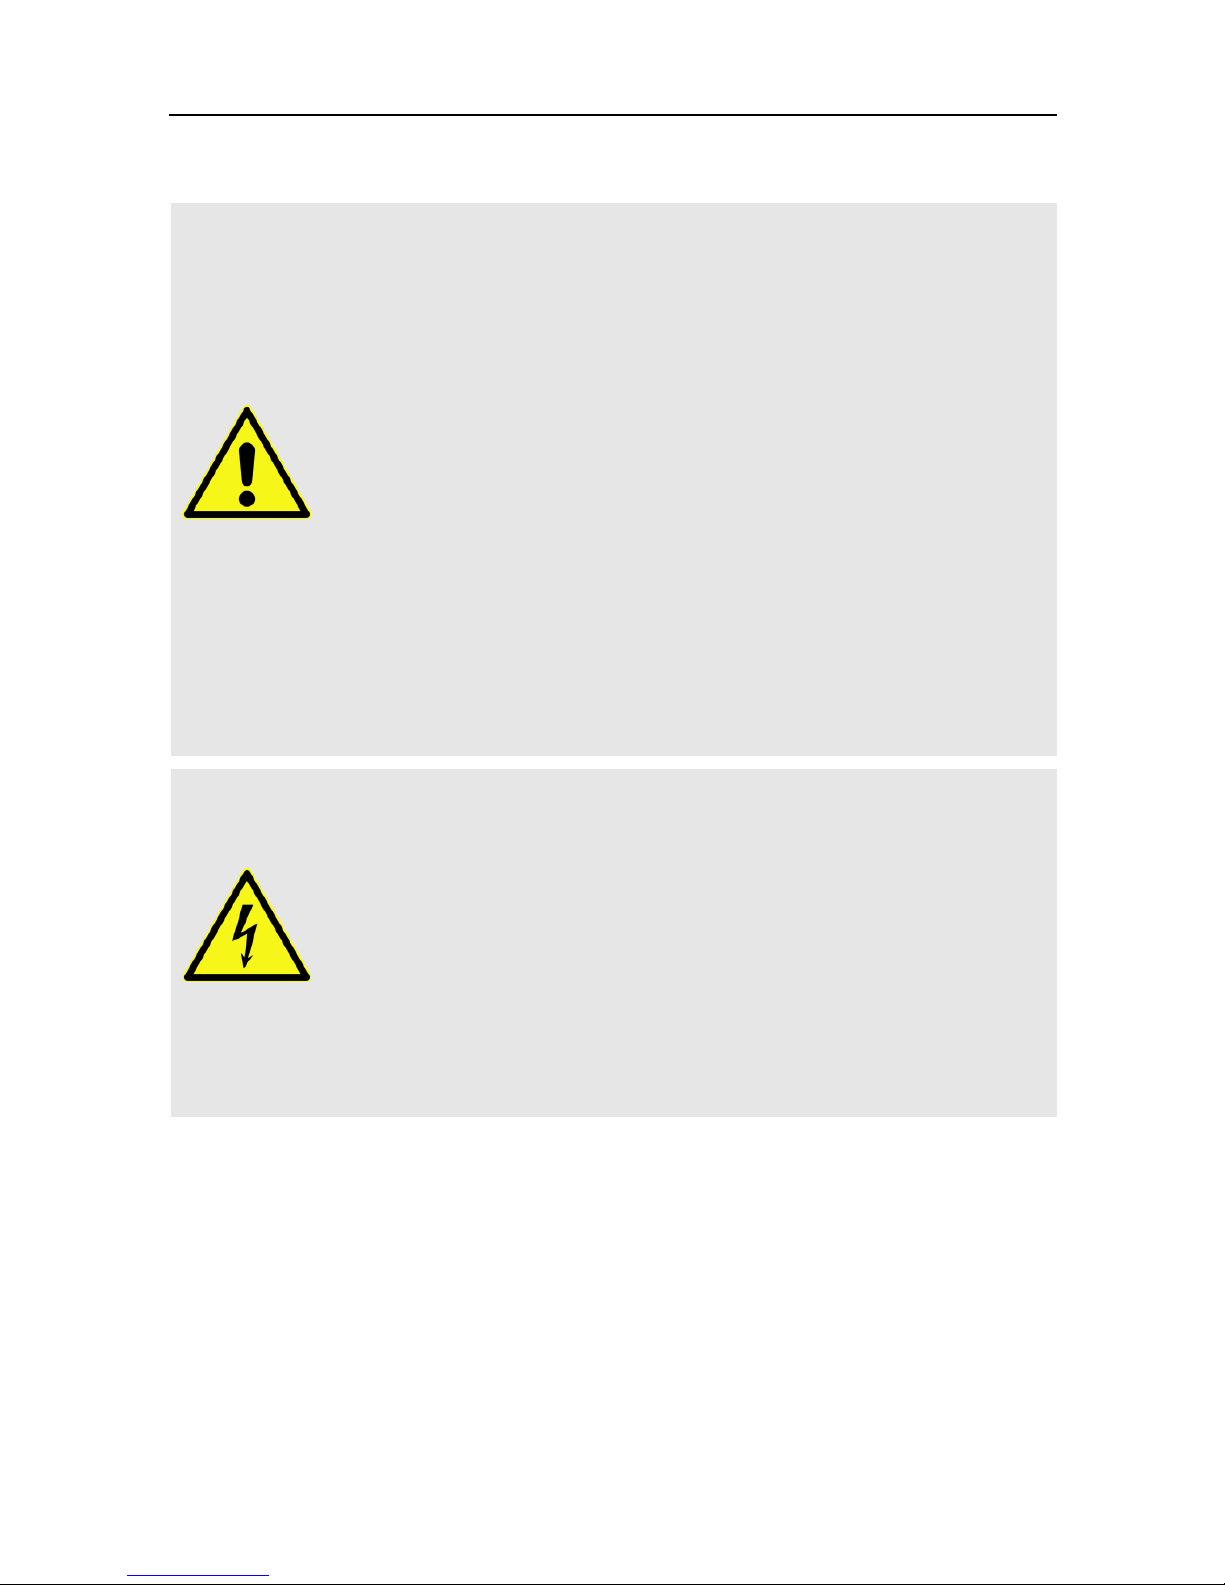
3.2 Risks in Case of Intended Use
CAUTION!
Humidity, wrong mains voltage and/or wrong
mains frequency, lightning stroke or mechanical
overload may cause malfunction of or damage to
the device.
Ensure that the receiver (in particular the mains plug) and
the remote control are not exposed to any humidity. Exam-
ple: Do not place filled flower vases or similar onto the re-
ceiver.
Only connect the receiver to 175…250 V ~, 50/60 Hz.
Disconnect mains plug in case of thunderstorms or malfunc-
tion.
Do not place heavy items onto the receiver.
Do not bend or squeeze the cable.
WARNING!
Risk of electric shock when contacting mains volt-
age.
Damage to housing, mains cable or improper repair may re-
sult in contact to mains voltage.
Do not place heavy items onto the receiver.
Do not bend or squeeze the cable.
Repairs of plug, cable or receiver should only be performed
by qualified specialists.
3.3 Location
Place the receiver onto a solid and level surface.
Protect the receiver from humidity, heat, dust and dirt.
Do not place items filled with liquid, e.g. flower vases, onto the receiver.
Protect the receiver from dripping and splash water.
Do not place burning items, e.g. burning candles, onto the receiver.

General Safety Instructions
smart MX63 15
Ensure sufficient ventilation (ventilation slots must not be blocked): the
receiver should have a distance of at least five centimeters to its surrounding
elements on all sides.
Ensure that the ventilation openings are not covered by objects such as
newspapers, table cloths, curtains etc.
Only operate the receiver in moderate climate (not in tropical climate).
Place the receiver so that the mains plug can be disconnected at any time,
correspondingly disconnecting the device from the mains.
If the device is transported from cold to hot environment,
then condensing humidity may build up in the device.
Do not connect the device, but leave it switched-off for
some hours.
3.4 Handling of Batteries
•Batteries should always be out of children's reach.
•Leaking batteries cause damage to the environment and the remote control.
•Batteries should not be exposed to extreme heat, e.g. sunlight, fire etc.
Dispose of the batteries in accordance with the applicable legal regulations
(see chapter Disposal, page 52).
3.5 Notes on Product Liability
In the following cases, the intended protection of the device may be limited.
Then, liability regarding function of the device correspondingly passes over to
the operator:
•The device is not used in accordance with the user manual.
•The device is used out of the field of application as described above.
•The operator performs unauthorized changes of the device.

Installation of the smart MX63
16 smart MX63
4Installation of the smart MX63
CAUTION!
First connect the receiver to the antenna
and any other
devices.
Please also note the user manuals of the other devices.
4.1 Connection Scheme
default connection
optional connection
4.2 Connect DVB-T Antenna
Connect the DVB-T antenna to the receiver connection ANT IN.
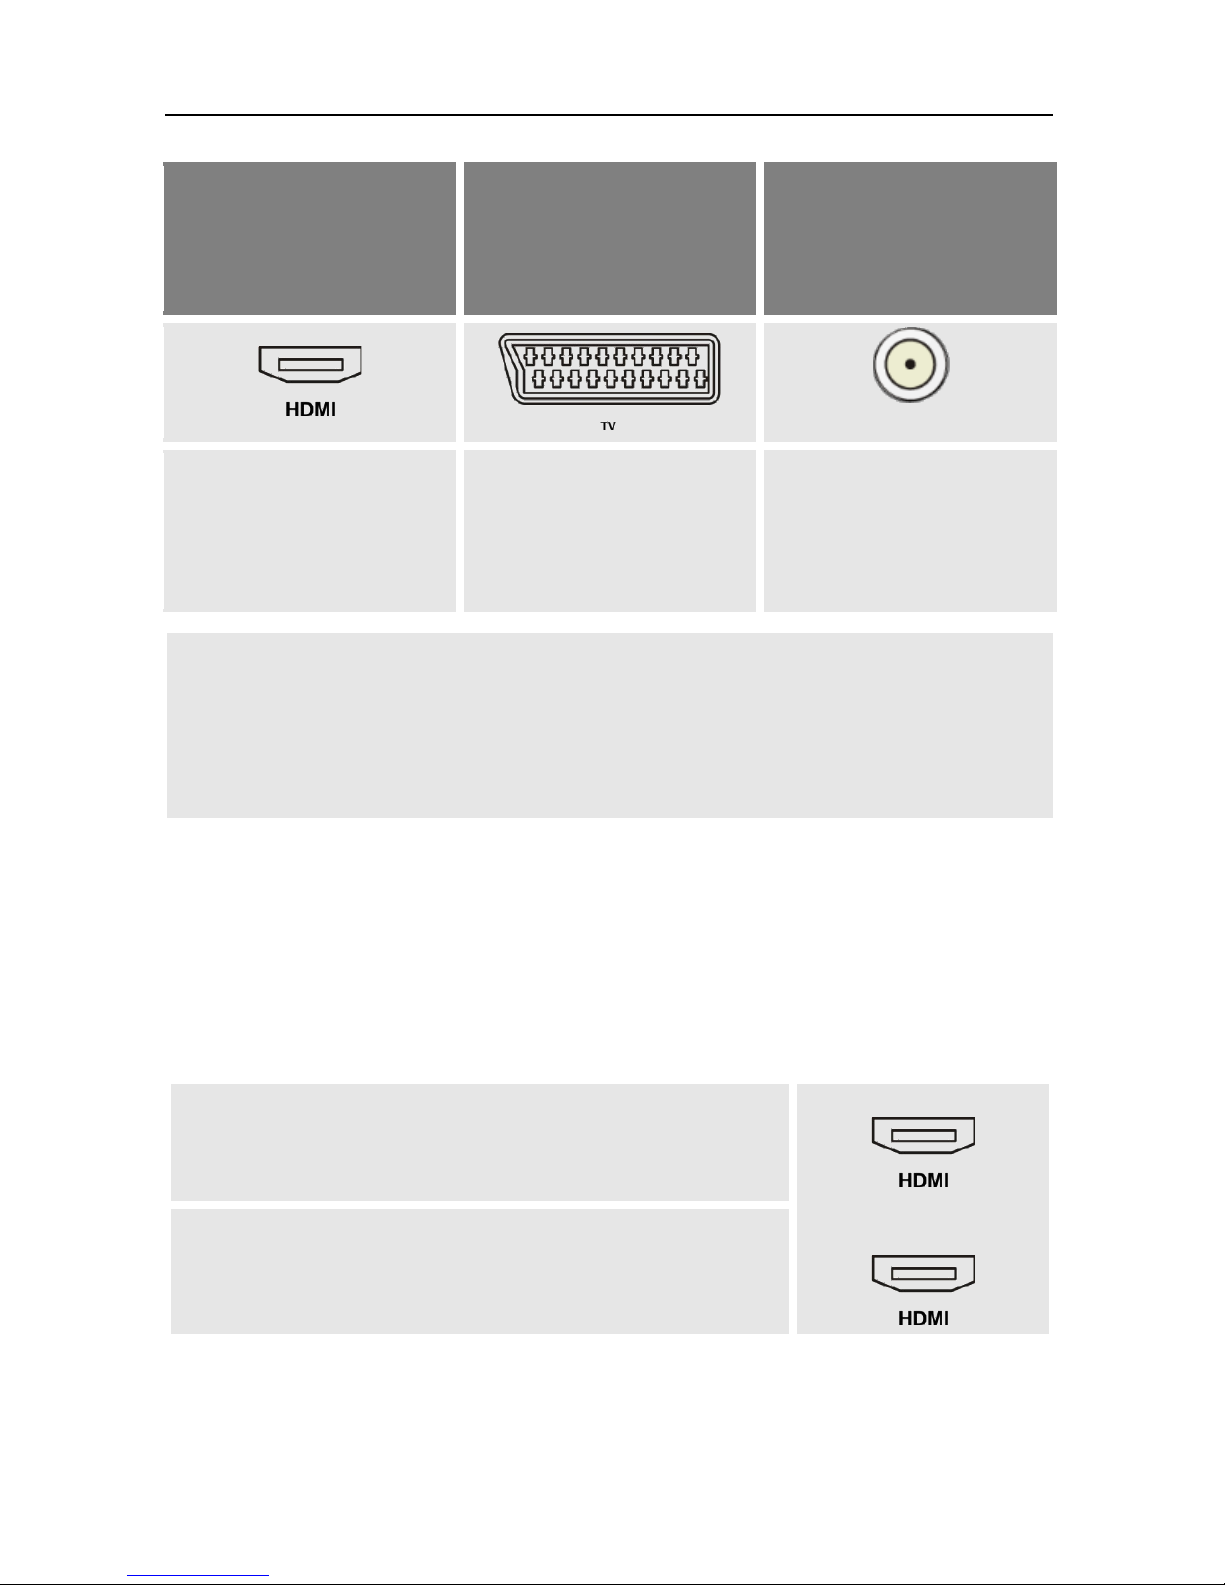
4.3 Connect TV Set
As stated in the connection scheme, the smart MX63 offers various possibilities
to connect TV set and receiver. The possibilities applicable to you depend on
the connection possibilities of your TV set.
Installation of the smart MX63
smart MX63 17
The TV set provides of
an HDMI socket:
The TV set does not
provide of an HDMI
socket:
The TV set does neither
provide of an HDMI
socket nor a SCART
socket:
RF OUT
Connect TV set and
receiver by using an
HDMI cable.
Connect TV set and
receiver by using a
SCART cable.
Connect TV set (ANT
IN) and receiver (RF
OUT) by using an an-
tenna cable
If your TV set offers all three possibilities then always
choose connection via HDMI cable.
This ensures best possible audio and video quality with
digital signals.
4.4 Connect Home Cinema System (Optional)
To improve audio playback, you can connect to the smart MX63 - additionally to
the TV set - also a multichannel home cinema system or a hi-fi system. There are
various possibilities for connection. Your type of connection depends on the
connection possibilities of your home cinema system.
a.
Your home cinema system is able to loop through
an HDMI signal, i.e. HDMI connection for receiver
and HDMI connection for TV set.
Receiver
TV set
Connect the home cinema system and the receiver
by using an HDMI cable as well as home cinema
system and TV set by using an HDMI cable.

Installation of the smart MX63
18 smart MX63
b.
Your home cinema system can process digital au-
dio data – connection for digital data is present.
DIGITAL AUDIO
Connect home cinema system and receiver by
using an RCA cable.
4.5 Connect Data Storage (Optional)
Connect a data storage (USB stick or hard drive with USB connection) at the
USB connector to be able to access MPEG, MP3, JPG or other media data
files. You can connect respectively one data storage to each of the two con-
nectors.
4.6 Insert Batteries of Remote Control
This describes the steps for inserting new batteries of the remote control
or for replacing empty batteries:
1. Open the battery compartment on the bottom side of the remote control.
Remove the cover of the battery compartment.
2. Place the two batteries 1.5 V (type: AAA).
Ensure correct polarity!
3. Close the battery compartment
Replace the batteries if certain remote control functions
are not performed any more or are performed incorrect-
ly.
When replacing batteries, always ensure that all batteries
are replaced.
Start
smart MX63 19
5Start
5.1 Switch on Receiver
1. Switch on all connected devices.
2. Ensure that the correct AV input is selected at the TV set (i.e. that the signals
from the receiver are displayed).
3. Ensure that the correct audio input is selected at the connected home cine-
ma or hi-fi system.
4. Connect the mains plug to the power outlet, to switch on the receiver.
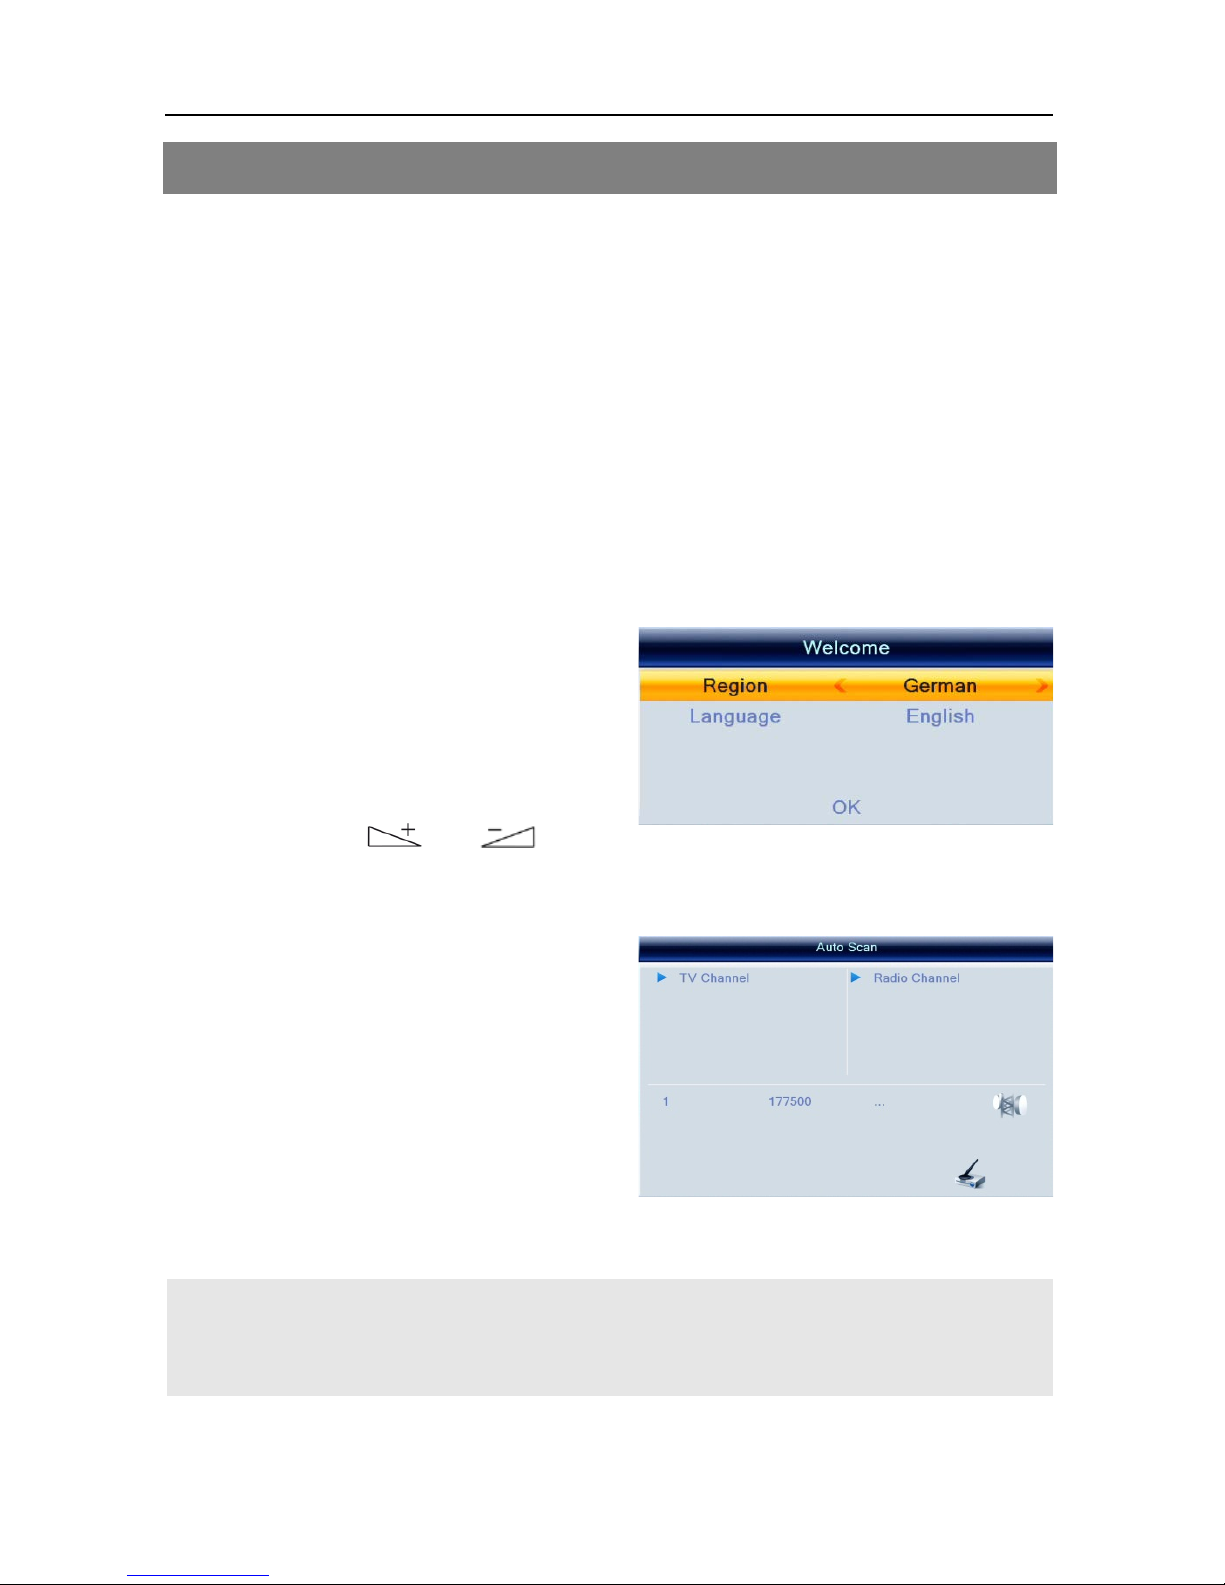
5.2 Initial Start-Up
After
first switching-on or after reset-
ting the receivers, various windows will
open:
Press the keys PR+/PR- to move
highlight to select language and
Region and.
Press the keys and to
move the cursor to choose your
choice.
Move highlight to OK option and
press the OK key to enter “ Auto
Scan” menu.
After the search is completed press
you’ll get a corresponding message.
Press the OK key to exit this menu.
5.3 Select Operation Mode
TV is the operation mode after first switching-on of the re-
ceiver (or after restoration of factory settings).
Start
20 smart MX63
You can select between the operation modes TV (TV channels) and RADIO
(radio channels) as follows:
Press the key TV/RADIO on the remote control.
Press again the key TV/RADIO to return to the previous operation mode.
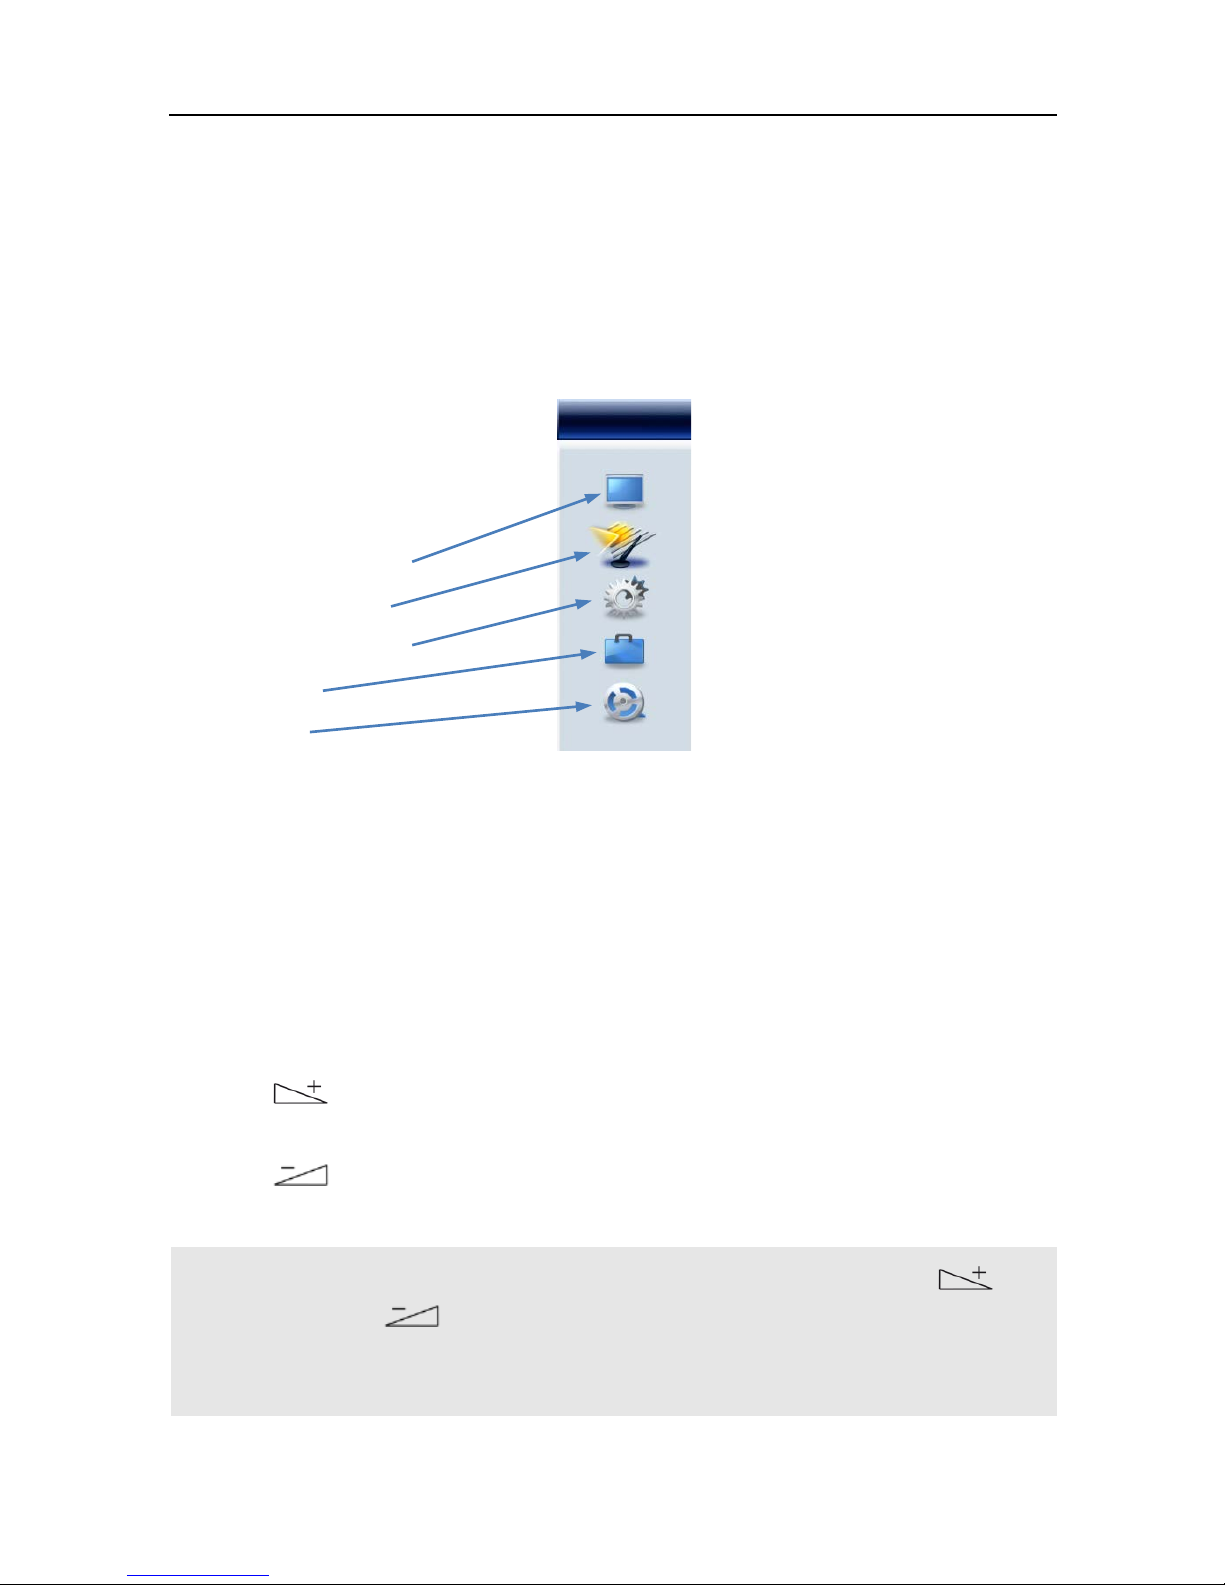
5.4 Main Menu
Press the key MENU to
enter the Main Menu.
This menu consists of
5 sub-menus as below:
−Edit Channel
−Installation
−System Setup
−Tools
−USB
The sub
-
menus are
accessible on the left side
of the screen.
Press the keys
PR+/PR- to select
them.
5.5 Menu Navigation
The menu items with the settings for TV and radio can be respectively accessed
in the two operation modes TV and Radio.
For menu navigation, you can use both the keys at the receiver as well as the
remote control:
Press PR+ to select the menu item above.
Press PR- to select the menu item below.
Press to change resp. increase the selected value or go to the right side
of the screen (sub-menus).
Press to change resp. decrease the selected value or go to the left side
of the screen (main menu).
Instead of changing a value by using the keys
and
, with many menu items you can also press the OK key,
select a new value from the l
ist, and confirm such value by
again pressing the OK key.
Active menu items are color-marked.
Table of contents


