Smead 64855 User manual

Assembly Instructions for Hanging Folder Frames 64855
Package contains components for two complete frames
A. Tie Rods (4)
B. Metal Side Rails (4)
C. U Frames (4)
D. Black Plastic Corner Pieces (8) (4 D1 / 4 D2)
E. Black Plastic Side Inserts (8)
Tools needed: tape measure, hammer and pliers.
Tools needed: tape measure, hammer and pliers
1. Measure the inside of the file drawer from front to back. This will determine the
length of the Metal Side Rails.
2. Measure two Metal Side Rails (B).
3. Measure the inside of the file drawer from front to back. This will determine the
length of the Metal Side Rails.
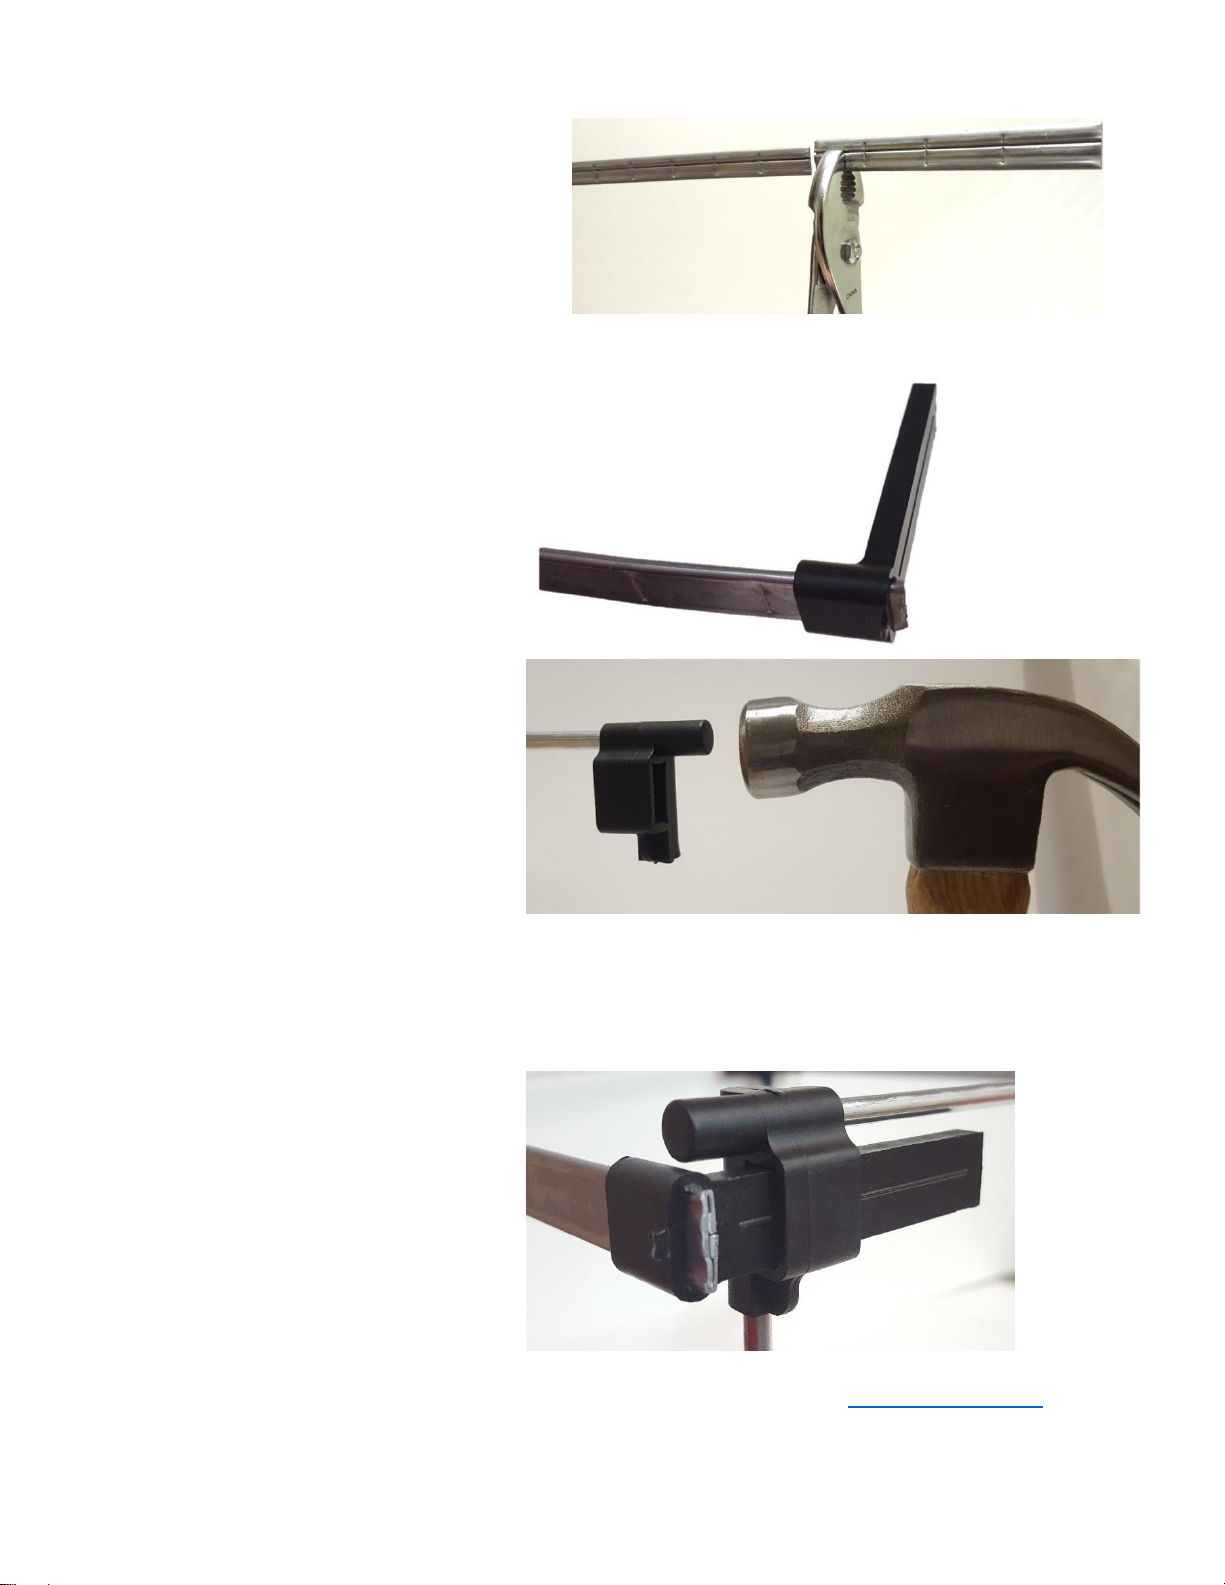
4. If necessary, place pliers next to indentation closest to the length you need, bend
back and forth until rail breaks. Use file to soften edges, if needed.
1. Measure the inside of the file drawer
from front to back. This will determine
the length of the Metal Side Rails.
2. Measure two Metal Side Rails (B).
3. If necessary to shorten Metal Side
Rails, place pliers next to indentation
closest to the length you need, bend
back and forth until rail breaks. Use
file to soften edges, if needed.
4. Place each end of a Metal Side Rail
(B) into a Black Plastic Slide Insert
(E), leaving a small portion of the Side
Rail extending beyond the Plastic side
piece, as shown. Set aside
5. Remove Black Plastic Corner Pieces
(D) from tree and place Corner Piece
D1 (D) on one end of a Tie Rod (A),
and Corner Piece D2 (D) on the other
end.
6. Lightly tap Corner Pieces (D) onto Tie
Rod (A) until it will go no further.
7. Place one end of U frame(C) into Corner Piece (D1) and one end into Corner Piece (D2).
8. Lightly tap Corner Pieces (D) onto U frame(C) until it will go no further.
9. Repeat Steps 5 through 8
You will now have the end components of the Hanging Folder Frame.
10. Place the Black Plastic Slide Inserts
(E) on Metal Side Rails into the
openings of the Black Plastic Corner
Pieces DI & D2.
11. Slide Black Plastic Slide Inserts (E) in
or out of Corner Pieces (D) to adjust
for letter, legal or A4 hanging folders.
For valuable organization tips and information, visit www.smead.com
The Smead Manufacturing Company Hastings, Minnesota USA
D2
D1
Table of contents


