Instructions for Use
23
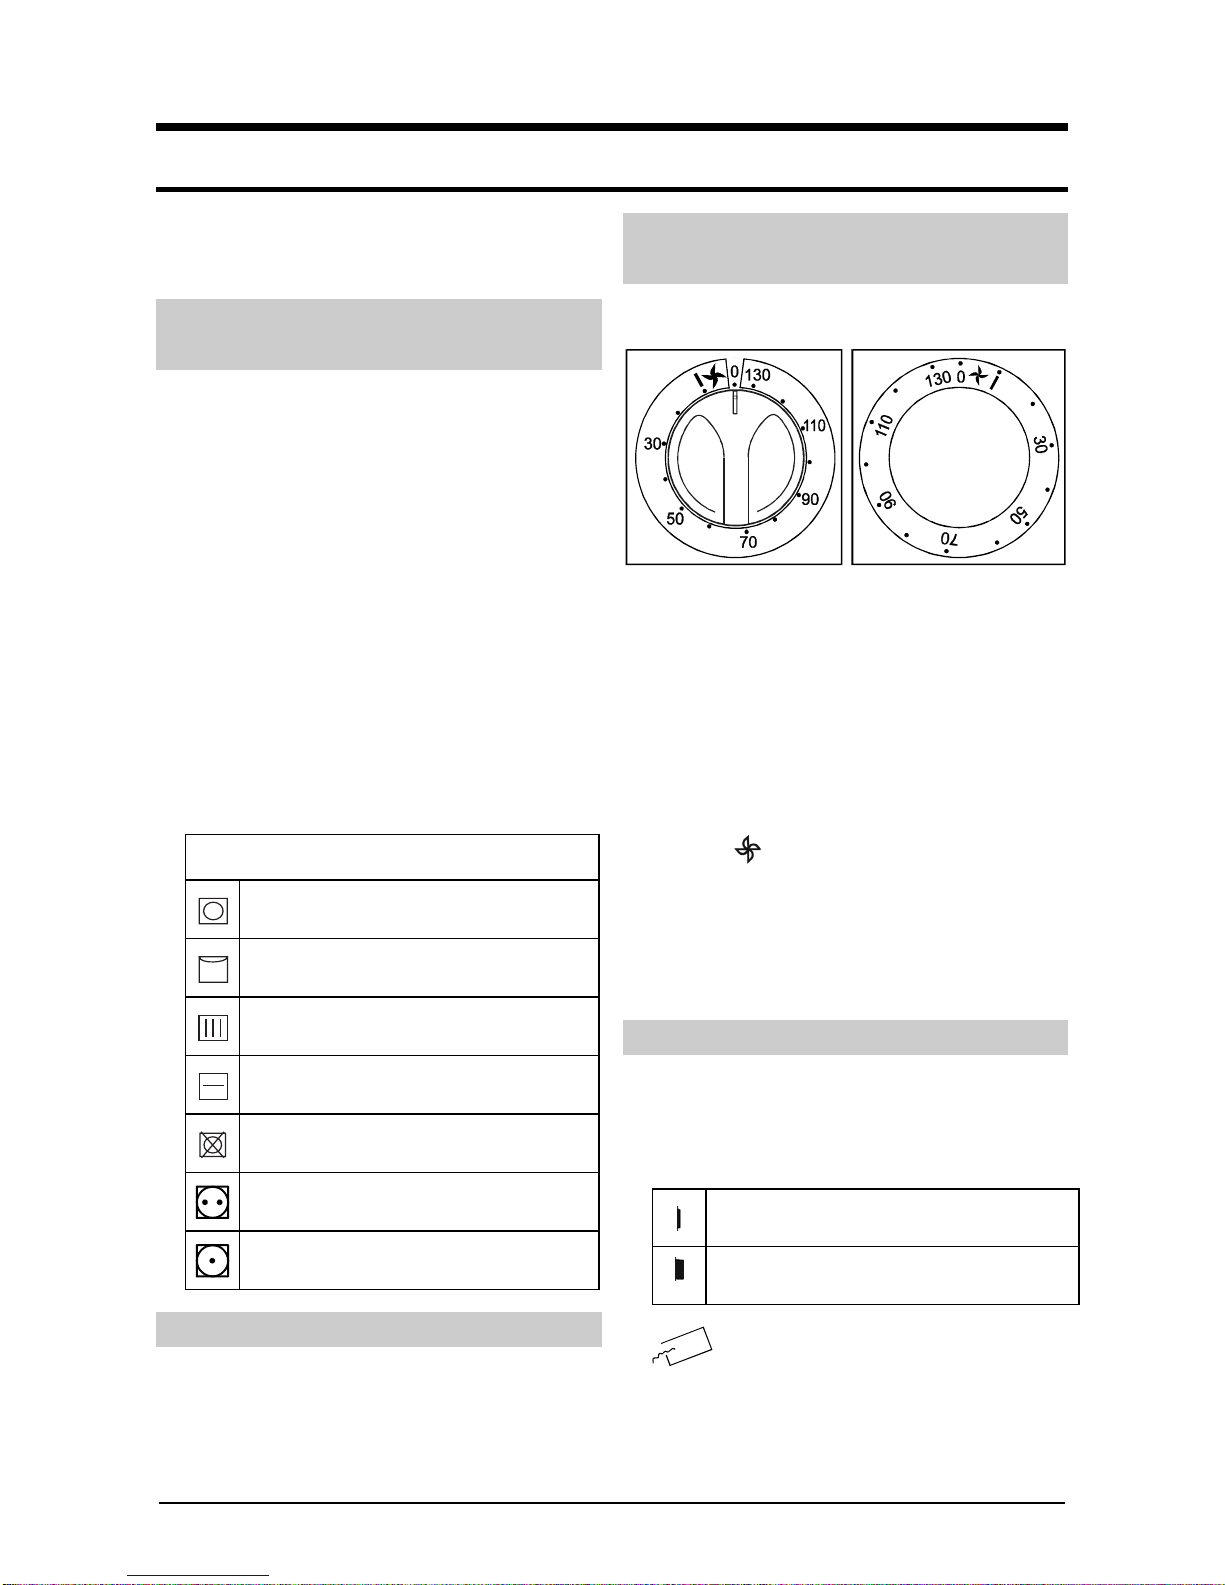
Drying Time
Drying time depends on the number of
revolutions when spinning the laundry in the
washing machine, on quantity and type of fabric
to be dried and on the requested degree of
drying.
For easier selection of drying time, refer to the
table on the front panel of the dryer.
Symbols:
Kg Quantity of dry laundry
Number of washing machine spin
revolutions
Type of laundry
Non-delicates (cotton, linen,..)
Delicates (synthetics, different kinds of
fabric)
Drying degree
Cupboard dry
Iron dry
Drying Procedure
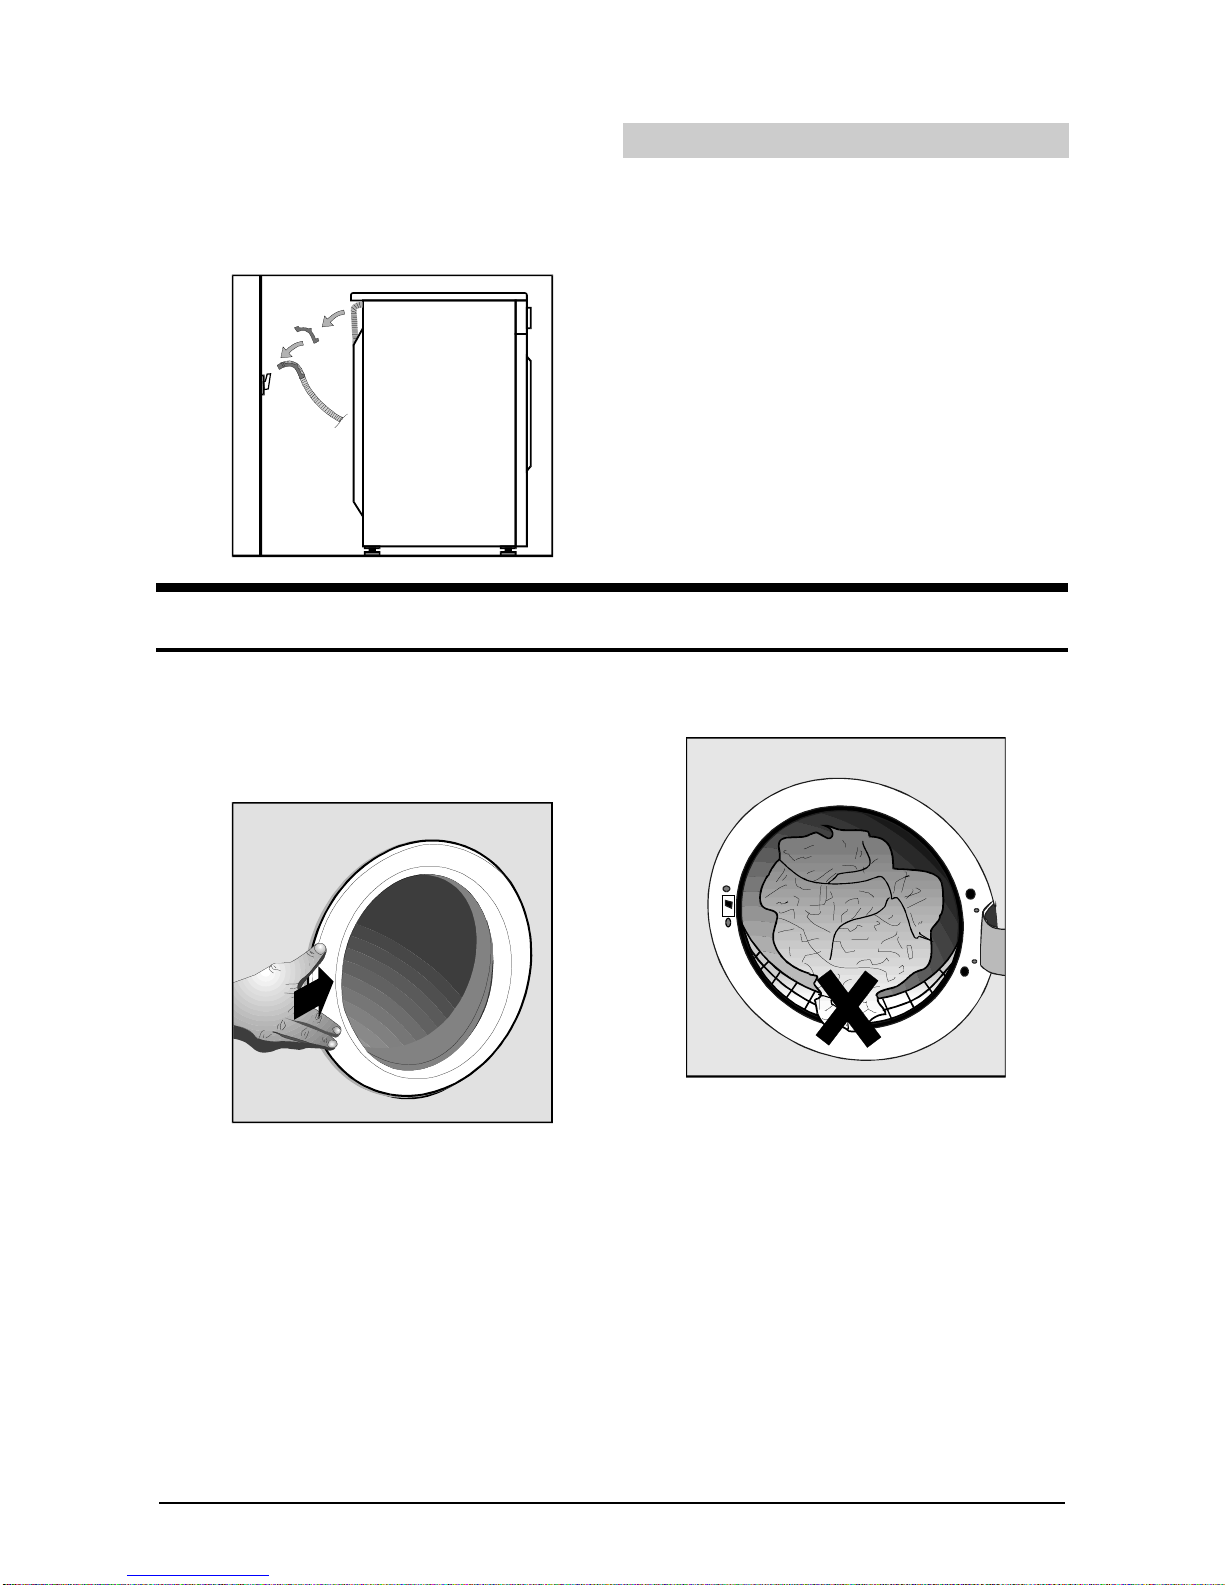
•Fill the drum with laundry.
•Close the door and connect the appliance to
power supply.
•Choose the correct drying temperature.
•Select the drying time. The drier is switched on
and starts operating.
Economic use of the dryer
•Time and energy will be saved with your dryer,
if the following is considered:
•spin the laundry as much as possible – the
higher the number of spin revolutions the
shorter will be drying time and the energy
consumption lower;
•by setting the adequate drying temperature,
over-drying of laundry can be avoided and
consequently difficult ironing;
•always load the dryer maximally as this is the
most economical. At the same time you can dry
the laundry for “dry, ready to be stored” and “
dry for ironing” by taking the latter out when it is
still adequately moist for ironing;
•by regular cleaning of the filter an optimum
drying time with minimum energy consumption
can be ensured.
•room in which your dryer is situated should be
adequately vented with no higher temperature
than 25oC (should be considered with
condenser-type dryer only);
•Venting fissures and the opening on the front or
on the rear side of the dryer must be free . After
cleaning, close the door of the dryer so that the
drum light will turn off. ( models with illuminated
drum).
•dryer consumption when used at a lower
electric power rate can additional save the
energy.
For your convenience the chart below indicates
approximate values for 5 kg of test laundry at
different washing machine spin stages. (program
– dry for closet)
extent of
moisture drying time
in min energy consumption
in kWh
RPM/
min l % extractor
dryer condensa-
tion dryer extractor
dryer condensa
-tion dryer
800 3,5 70 110 100 3,35 3,65
1000 3,1 62 98 90 3,0 3,2
1200 2,8 55 88 80 2,7 2,9
1400 2,5 50 80 72 2,4 2,6
1600 2,4 47 75 70 2,3 2,5
Measured quantities may differ from the indicated
because of differences in the type and quantity of
laundry, spinning, voltage supply oscillation, as
well as the temperature and humidity of the room.
After drying - condensation type
dryer
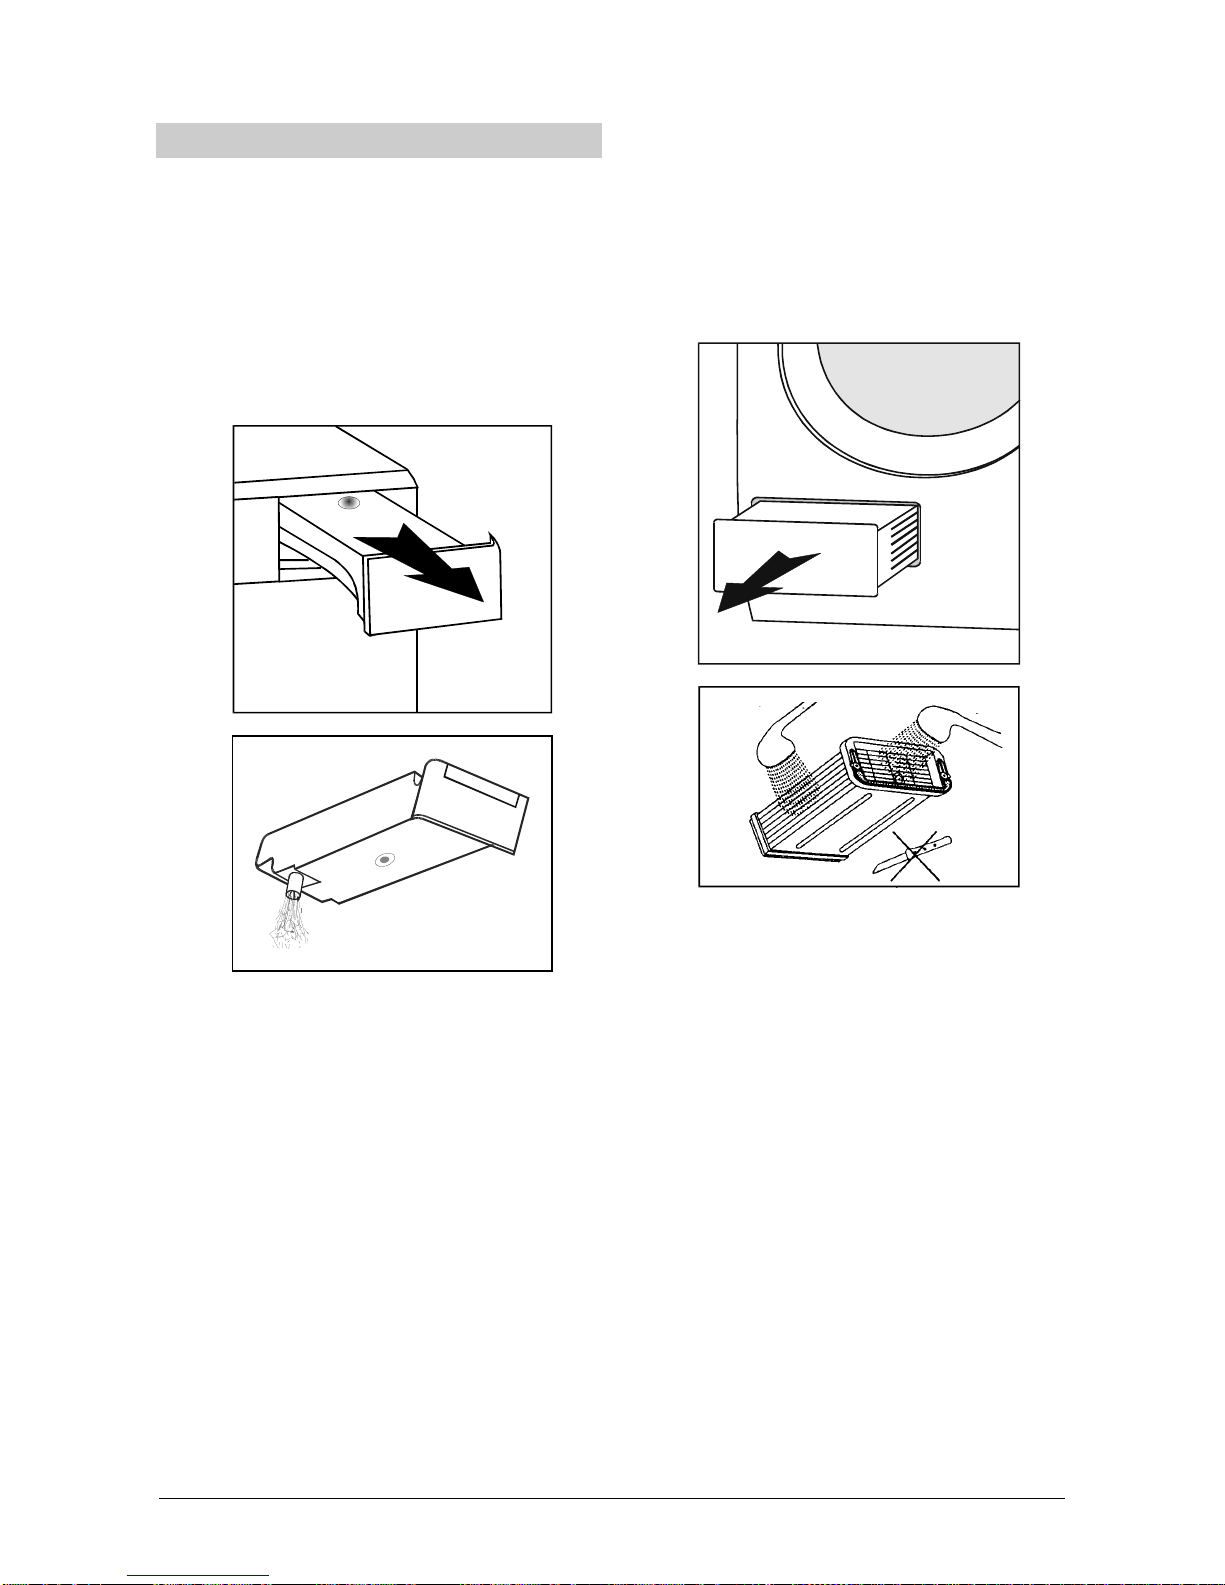
•Open the dryer door.
•Clean the filter. If the filter is not cleaned
regularly, the air circulation is obstructed, the
drying time is longer, and it may also cause
overheating failure of the appliance.
•Reinsert the filter.
•Extract the laundry.
•Close the door.
•Empty the condensation receptacle.
•Occasionally clean the air cooler.
•Disconnect the mains supply.
After drying - extractor dryer
•Open the dryer door.
•Clean the filter. If the filter is not cleaned
regularly, the air circulation is obstructed, the
drying time is longer, and it may also cause
overheating failure of the appliance.
•Reinsert the filter.
•Remove laundry from the drum.
•Close the door.
•Disconnect the mains supply.