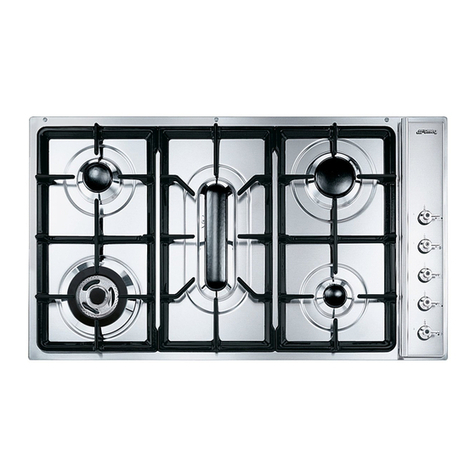
Smeg S232CX Technical manual

Dear User,
we are sincerely grateful to you for purchasing one of our products.
We are sure that the appliance modern, functional and easy to use, built with the finest materials
and components will satisfy all your needs.
We would ask that you read the instructions within this booklet very carefully so as to enable you
to obtain quality results from the outsets.
The appliance must be installed only by a qualified electrician in compliance with the
instructions provided. The manufacturer declines all responsability for improper installation.
USE, INSTALLATION AND MAINTENANCE
INSTRUCTIONS FOR ELECTRICAL
BUILT-IN HOT PLATES
The manufacturer is not responsible for any transcription errors or misprints contained in this handbook and,
furthermore, reserves the right to make any modification on the products, which might be deemed
necessary or usefull, this being in the user’s interest, without altering their basic operating or safety
features.This cook top was designed to be used exclusively as a cooking appliance: any other use
(such as heating rooms) is to be considered improper and dangerous.
COD. 120116SMN1SM020 (120116ENG) - 22.05.2014
SMEG S.p.A.
Via Leonardo da Vinci, 4
42016 GUASTALLA - ITALIA
TYPE: PFVZ 02
MOD.: S232CX - S232TCX

WARNING: the appliance and its accessible parts become hot during
use.
Care should be taken to avoid touching heating elements. Children
less than 8 years of age shall be kept away unless continuously
supervised.
This appliance can be used by children aged from 8 years and above
and persons with reduced physical, sensory or mental capabilities or
lack of experience and knowledge if they have been given
supervision or instruction concerning use of the appliance in a safe
way and understand the hazards involved.
Children shall not play with the appliance.
Cleaning and user maintenance shall not be made by children without
supervision.
WARNING: unattended cooking on a hob with fat or oil can be
dangerous and may result in fire. NEVER try to extinguish a fire with
water, but switch off the appliance and then cover flame e.g. with a lid
or a fire blanket.
WARNING: danger of fire: do not store items on the cooking
surfaces.
WARNING: if the surface is cracked, switch of the appliance to
avoid the possibility of electric shock.
The instructions regarding the stove, hobs and ovens must
indicate that you should not use an appliance for steam cleaning.
The instructions for hobs shall state that the appliance is not
intended to be operated by means of an external timer or separate
remote-control system.

15
DESCRIPTION OF THE HOT PLATES
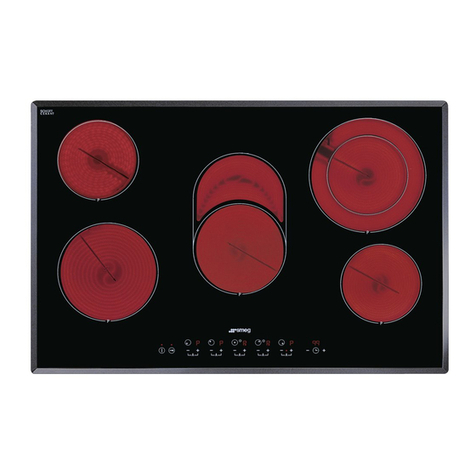
1 “Hi-light” electric heating element Ø 140 mm 1200 W
2 “Hi-light” electric heating element Ø 180 mm 1800 W
3 Switch for electric element n. 1
4 Timer control knob
5 Switch for electric element n. 2
6 Electric plate ignition warning light
TYPE: PFVZ 02
S232TCX S232CX

16
USE
1) ELECTRIC HOB
The hot plates are equipped with “hi-light” heating
elements with different powers and diameters.
Cooking zones are aesily identifiables thanks to the
circles (see illustration in description) on the top;
relative powers are listed in the scheme n. 1.
On the frontal panel, close to each knob, has been
silk-screened a scheme where is indicated to which
cooking zone the knob refers (fig. 1).
In some particular models the scheme annexes a
light indicator that turns on when the cooking zone
temperature is above 60 °C (fig. 1).
The indicator will turn off only when the temperature
of the cooking zone will be below the value: this is
the reason why we call it residual heat indicator.
Some other models they have only one indicator
(see description paragraph).
Connection of electric heating elements
Heating elements are controlled by energy
regulators with 12 positions (see fig. 1) that permit
to obtain a big range of different temperatures for a
specified time adjustable by the knob of timer
(fig. 2).
In scheme 1, by way of information, we give
instructions to obtain different cooking levels.
The connection of heating elements comes after the
activation of the timer (fig. 2) turning clockwise the
relative knob.
The heating element can be connected turning
clockwise or anticlockwise the relative knob on
desired position (fig. 1).
Timer
Timer allows to heating elements to turn off
automatically by acoustic warning.
It can be used also as timer (without turning off) and
can be set for a period of max. 60 minutes.
How to use cooking zones
Heating takes place only in the inside part of the
circles drawn on the special glass.The circles have
to be wholly covered by the pots.
Attention: use the hob only
under sorveillance!
FIG. 1 FIG. 2

17
USE
SCHEME 1
1 145 “hi-light” 1200 1
2 180 “hi-light” 1800 1 - 4
8 - 10
4 - 8
Zone Diameter Heating Power Energy
n° in mm element W regulators
12
10 - 12
To heat foods,
thaw deep-frozen
foods, to cook
fruits and pulses.
To melt butter,
chocolate and
else.
To fry with oil and
to heat big
quantities of water.
To cook roast of
meat, fish; to cook
steaks and eggs.
To cook meat, fish,
pulses with sauce.
To heat small
quantities of liquid
and to keep dishes
warm.
Power and dimensions
of the cooking zones
Position for
regulation of the
knobs
Possible
cookings
CAUT ON:
n case of hotplate glass breakage:
●shut immediately off all burners and any electrical
heating element and isolate the appliance from
the power supply;
●do not touch the appliance surface;
●do not use the appliance.

18
USE
FIG. 3
WARN NGS:
for a correct use, please look at fig. 3 and
remind:
- switch on the electricity only after having
placed the pot on the cooking zone.
- Use pots and pans with flat solid bottoms.
- Use pots with the same diameter of the
cooking zones.
- Dry the bottom of the pot before put in on the
cooking zones.
- Do not scrape the pot against the glass so to
not damage it.
- During the use of the cooking zones, please,
keep the children away from the hot plates.
Make sure that the handles of the pots are
placed in the right way towards the interior.
Be aware that overheated fats and oils may
become inflamed.
- Cooking zones after using remain warm;
don’t leave objects, don’t lean your hands so
to avoid burns, till the indicator light is off.
- f the glass cracks, please, disconnect the
appliance.
- Don’t use plastic pots or alluminium sheets.
- Don’t use hob as a supplementary surface.
- The appliance must not be operated with an
external timer or a separate remote-control
system.
- Do not attempt to change the technical
characteristics of the product because it can
be dangerous.
- f you should not to use this appliance any
more (or replace an old model), before
disposing of it, make it inoperative in
conformity with current law on the protection
of health and the prevention of environmental
pollution by making its dangerous parts
harmless, especially for children who might
play on an abandoned appliance.
WARN NGS AND ADV CE FOR THE USER:
- do not touch the appliance with wet or damp
hands or feet.
- Do not use the appliance barefoot.
- The manufacturer will not be liable for any
damage resulting from improper, incorrect or
unreasonable use.
- During, and immediately after operation,
some parts of the cook top are very hot:
avoid touching them.
- After using the cook top, make sure that the
knob is in the closed position.

19
CLEANING
Before any cleaning operation, disconnect the
appliance from the electric circuit.
2) ELECTRIC HOB
If you want to preserve the surface clean and bright,
we recommend you to use a silicone conditioner.
The use of this conditioners, prior to jam-making,
helps to protect the surface of the hob.
It is very important to clean the surface soon after
every use, when the glass is still tepid.
Do not use metallic sponges, powder abrasives or
corrosive sprays.
Depending on the dirty level we recommend:
- slights stains: it is enought the use of a moist clean
rag.
- Burnt or soiling may be removed with a special
razor scraper (fig. 4); be aware that the razor
can cause wounds.
- Marks of liquid, overflowed from the pot, can be
removed using vinegar or lemon.
-Pay attention to not let fall sugar or element with
sugar. n this case turn the switch off and clean
the surface with hot water and the razor blade
scraper.
- After a period of time may appear metal reflex and
scratches (fig. 5) due to the wrong cleaning and
the wrong use of the pots. The scratches are
difficultly removable, but they do not compromise
the good working of the hob.
- Don’t use steam jets for the equipment cleaning.
FIG. 4 FIG. 5

20
INSTALLATION
COMPLY W TH THE D MENS ONS
(mm)
A B C D E
EL. HOB 30 282 482 59 59 100
min.
FIG. 6 FIG. 7
TECHN CAL NFORMAT ON
FOR THE NSTALLER
nstallation, transformations and maintenances
below listed, may only be carried out by a
competent technician.
The appliance must be correctly installed in
conformity with current law and the
manufacturer's instructions.
ncorrect installation may cause damage to
persons, animals or property for which the
Manufacturer shall not be considered
responsible.
During the life of the system, the automatic
safety or regulating devices on the appliance
may only be modified by the manufacturer or
by his duly authorized dealer.
3) INSERTING
Check that the appliance is in a good condition
after having removed the outer packaging and
internal wrappings from around the various loose
parts. In case of doubt, do not use the appliance
and contact qualified personnel.
Never leave the packaging materials
(cardboard, bags, polystyrene foam, nails, etc.)
within children’s reach since they could
become potential sources of danger.
The measurements of the opening made in the top
of the modular cabinet and into which the hot plate
will be installed are indicated in either fig. 6.
Always comply with the measurements given for
the hole into which the appliance will be recessed
(see fig. 6 and 7).

21
INSTALLATION
4) FIXING
A special sealing strip underneath the hob for
damage. Make sure it is correctly positioned with no
gaps; it avoids any water infiltration. To fix in the right
way the strip, please, respect the following
instructions:
- fix the hooks in the relative accomodations of the
body (see fig. 8).
- Overturn the hob, take the seal strips off from their
support, having care that the transparent protection
remains attached to the seal. Correctly place the
seal "E" (fig. 8) under the hob edge, so that the
external side of the seal fits together with the
external perimentrical edge of the hob. The ends of
the strip must fit together without overlapping.
- Stick the seal to the hotplate uniformly, pressing it
with fingers.
- Take the protective paper strip of the seal off, place
the hotplate in the opening made in the table top,
and lock it with the special screws "F" (fig. 9).
- Since the casing of the hob may overheat due to a
prolonged use, it is necessary to insert a
separation plane wood, blocked by screws, which
must be installed under the cooktop at a minimum
distance of 70 mm from the top, as shown in fig.6.
WARN NGS:
be aware that the glue that join the laminated
plastic to the furniture, has to resist to
temperature not below 150 °C, to avoid the
unstuck of the panelling.
The rear wall, adjacent and surrounding surfaces
must therefore be able to withstand an
temperature of 90 °C.
FIG. 8 FIG. 9

22
INSTALLATION
FIG. 10 FIG. 11
5) ELECTRICAL CONNECTION
The electrical connection has to be done in
accordance with all electrical and installation
requirements of the regulation.
Before proceeding with the connection, please,
verify that:
- the voltage matches the value shown on the
specification plate and the section of the wires of
the electrical system can support the load, which
is also indicated on the specification plate.
- the power of the electrical system and the power
of the outlets is adequate to the maximum power
of the appliance (see the identification label in the
lower part of the body).
- The outelets and all the electrical system has an
efficient connection to the "earth" according with
the Regulation. We disclaim all responsabilities
for not observing such points.
- If the appliance is not equipped with an input
cable, connect to the clump with an adequate
section cable (see scheme paragraph 7) keeping
the "earth" conductor longer than "live" ones,
following the scheme of fig. 10.
When the connection to the input system has
been done through a outlet:
- apply to the input cable "C", if unprovided, a
normalized plug adequate to the load indicated in
the identification label. Connect the cables
according to the scheme of fig. 10, making sure
to respect the undermentioned respondences:
Letter L (Live) = cable brown colour;
Letter N (Neutral) = cable blue colour;
Symbol (Earth) = cable green - yellow
colour.
- The input cable has to be located so that never
reach the temperature of 90 °C.
- Please do not use in the connection any
reduction, adaptation that may provoke a false
contact with following dangerous overheatings.
- The outlet must be accessible after the built-in.
When the connection has been done directly to
the input system:
- interpose between the appliance and the system
an onnipolar switch, adequate to the load of the
appliance, with a minimum nose between the
contacts of 3 mm.
- eep in mind that the "earth" cable does not have
to be interrupted by the switch.
- The electrical connection can also be protected
by a differential switch with high sensitivity.
We recommend to fix the earth coloured cable to
an appropriate earth installation.
Before performing any service on the electrical
part of the appliance, it must absolutely be
disconnected from the electrical network.
WARN NGS:
all our products are projected and built
according with the European Norms EN 60 335-1
and EN 60 335-2-6 and relative amendments.
The appliance has been produced according
with the European Directives:
- CEE 2004/108/CE concerning the compatibility
electromagnetic.
- CEE 2006/95 concerning the electrical
security.
MPORTANT!
The appliance must be installed following
the manufacturer's instructions. The
manufacturer will not be liable for injury to
persons or animals or property damage
caused by an incorrect installation.
f the installation requires modifications to
the home's electrical system or if the
socket is incompatible with the appliance's
plug, have changes or replacements
performed by professionally-qualified
person. n particular, this person must also
make sure that the section of the wires of
the socket is suitable for the power
absorbed by the appliance.
23
MAINTENANCE
Before doing any action, disconnect the
appliance from the input power.
6) COMPONENTS SUBSTITUTION
To replace the components lodged in the internal
part, is necessary to take the appliance up from
the furniture, overturn it, loosen the screws and
take away the bottom.
After these actions is possible to work on the
plates, commutators, clamps and input cable.
n case of substitution of the input cable, the
installer must keep the "earth" conductor
longer than "live" ones, and must respect the
cautions in paragraph "ELECTR CAL
CONNECT ON".
To reassemble the appliance repeat the inverse
process.
7) TECHNICAL CHARACTERISTICS OF
THE ELECTRICAL COMPONENTS
To facilitate the job of the installer we present a
scheme with the characteristics of the
components.
Denominations W
“Hi-light” electric heating element Ø 145 mm 1200
“Hi-light” electric heating element Ø 180 mm 1800
POWER OF ELECTRICAL COMPONENTS
TYPE AND SECTION OF THE POWER CABLES (for 2 or 1 HEATING ELEMENTS)
3 X 1.5 mm2
Cable type Single phase power
230 - 240 V ~
Rubber
H05 RR-F
WARN NG: MA NTENANCE MUST ONLY BE
PERFORMED BY AUTHOR SED PERSONS.

This appliance, before leaving the factory, has been carefully tested and regulated by expert and
specialized personnel in order to guarantee the best performances.
Any repairs or adjustments which may be subsequently required may only be carried out by qualified
personnel with the utmost care and attention.
For this reason, always contact your Dealer or your nearest After Sales Centre whenever repairs or
adjustments are required, specifying the type of fault and the model of appliance in your possession.
Please also note that genuine spare parts are only available from our After Sales Service Centres and
authorized retail outlets.
The above data are printed on the data label put on the inferior part of the appliance and on the packing
label.
The above informations give to the technical assistant the possibility to get fit spare parts and a heaven-
sent intervention. We suggest to fill the table below.
MARK: ................................................
MODEL: .............................................
SER ES: .............................................
This appliance is marked according to the European directive 2002/96/EC on
Waste Electrical and Electronic Equipment (WEEE).
This guideline is the frame of a European-wide validity of return and recycling on
Waste Electrical and Electronic Equipment.
TECHNICAL ASSISTANCE AND SPARE PARTS
24
TECHNICAL DATA
MODEL
2 HEATING ELEMENTS
(2 “HI-LIGHT”)
Voltage 230 – 240 V ~
Frequency 50/60 Hz
Tot. Rating 3000 W

Cher Client,
vous venez d’acheter un de nos produits et nous vous en remercions vivement.
Nous sommes certains que ce nouvel appareil, moderne, fonctionnel et pratique, réalisé avec des
matériaux de toute première qualité, saura vous donner entière satisfaction. L’utilisation est très
simple; nous vous conseillons cependant de lire attentivement cette notice avant de l’utiliser pour
obtenir les meilleurs résultats possibles.
Le fabricant décline toute responsabilité en cas de dommages aux personnes et aux choses
dus à une installation incorrecte ou à une mauvaise utilisation de l’appareil.
INSTRUCTIONS ET CONSEILS POUR
L’EMPLOI, L’INSTALLATION ET
L’ENTRETIEN DES TABLES DE CUISSON
ENCASTRABLES ÉLECTRI UES
EN VITROCÉRAMI UE
Le fabricant ne répond pas des inexactitudes de cette notice imputables à des erreurs d’impression ou
de transcription. De même, l’esthétique des figures représentées dans cette notice n’a qu’une valeur
indicative. Toujours soucieux d’améliorer nos produits, nous nous réservons le droit d’apporter toute
modification utile ou nécessaire dans l’intérêt de l’utilisateur, sans compromettre les caractéristiques
essentielles de fonctionnement et de sécurité.
Chaque plaque de cuisson a été conçue pour être utilisée uniquement comme appareil
decuisson: tout autre emploi (tel que le chauffage des pièces) doit être considéré inadapté et
dangereux.
COD. 120116SMN1SM020 (120116FR) - 22.05.2014
SMEG S.p.A.
Via Leonardo da Vinci, 4
42016 GUASTALLA - ITALIA
TYPE: PFVZ 02
MOD.: S232CX - S232TCX

AVERTISSEMENT: l’appareil et ses éléments accessibles deviennent
chauds durant l’utilisation.
Prenez soin d’éviter tout contact avec les éléments chauffants. Les
enfants de moins de 8 ans ne doivent jamais s’approcher de
l’appareil sans être constamment supervisés.
L’appareil peut être utilisé par des enfants de plus de 8 ans et par des
personnes ayant des capacités physiques, sensorielles ou mentales
réduites ou des personnes dépourvues d’expérience et de
connaissances spécifiques à condition qu’il soient supervisés ou
qu’ils aient reçu des directives pour l’utilisation de l’appareil dans des
conditions de sécurité et compris les dangers.
Les enfants ne doivent pas jouer avec l’appareil.
Les enfants ne doivent pas effectuer sans supervision les opérations
de nettoyage et d’entretien par l’utilisateur.
AVERTISSEMENT: il est dangereux de laisser des produits gras ou
de l’huile cuire sur la table de cuisson sans surveillance, cela pourrait
déclencher un incendie. En cas d’incendie, n’essayez JAMAIS de
l’éteindre avec de l’eau: mettez l’appareil hors tension et étouffez la
flamme, par exemple avec un couvercle de casserole ou une
couverture anti-incendie.
AVERTISSEMENT: risque d’incendie: ne laissez jamais aucun objet
sur les surfaces chauffantes.
AVERTISSEMENT: si la surface est fissurée, passer de l'appareil
pour éviter tout risque de choc électrique.
AVERTISSEMENT: si la surface est fêlée, mettez l’appareil hors
tension pour éviter tout risque d’électrocution.
Les modes d’emploi des cuisinières, plaques de cuisson et fours
doivent indiquer que l’appareil ne doit pas être utilisé pour le
nettoyage à la vapeur.
Les modes d’emploi pour les plaques de cuisson doivent indiquer que
l’appareil n’a pas été conçu pour être commandé par l’intermédiaire
d’une minuterie externe ou un système de commande à distance
indépendant.

27
1 Foyer électrique “hi-light” Ø 140 de 1200 W
2 Foyer électrique “hi-light” Ø 180 de 1800 W
3 Manette de commande du foyer avant n° 1
4 Bouton timer
5 Manette de commande du foyer avant n° 2
6 Voyant d'indication chaleur résiduelle
DESCRIPTION DES TABLES DE CUISSON
TYPE: PFVZ 02
S232TCX S232CX

28
1 ) TA B L E D E C U I S S O N E N
V I T R O C É R A M I U E
Les tables sont équipées de deux foyers électriques
“hi-light” de diamètres différents et fonctionnant à des
puissances différentes.
Les zones de cuisson sont indiquées clairement sur
la table par des cercles (voir figure, paragraphe de la
description) et leur puissance sont indiquées dans le
tableau 1.
Sur le bandeau, vous trouverez gravé, à côté de
chaque manette, un schéma qui indique la zone de
cuisson à laquelle la manette se réfère (fig. 1).
Sur certains modèles, le schéma comprend un
voyant lumineux qui s’allume lorsque la température
de la zone de cuisson dépasse 60 °C (voir fig. 1). Le
voyant s’éteindra uniquement lorsque la température
de la zone de cuisson sera descendue au-dessous
de cette valeur, ce qui lui vaut le nom de voyant de
chaleur résiduelle. Les autres modèles ne possèdent
qu’un seul de ces voyants, indiqué entre autre sur
une autre position (voir paragraphe de description).
Activation des éléments électriques chauffants
Les éléments chauffants sont commandés par des
régulateurs d'énergie à 12 positions (voir fig. 1) qui
permettent de couvrir une vaste plage de
températures, pendant une durée déterminée
réglable au moyen du bouton timer (fig. 2). A titre
purement indicatif, nous fournissons dans le tableau
1 des indications pour obtenir des cuissons
déterminées.
L’activation des éléments chauffants a lieu après
l'activation du timer (fig. 2), en tournant le bouton
dans le sens des aiguilles d'une montre.
L’élément chauffant se met en marche lorsque l'on
tourne dans le sens des aiguilles d'une montre ou
dans le sens contraire des aiguilles d'une montre le
bouton dans la position souhaitée (fig. 1).
Timer
Le timer permet l'extinction automatique des
éléments chauffants avec avertissement sonore.
Il fait également office de compteur de minutes et
peut être réglé pour une durée maximale de 60'.
Comment utiliser les zones de cuisson
Le chauffage n'a lieu qu'à l'intérieur des cercles
tracés sur le verre qui doivent donc être totalement
couverts par le fond des casseroles.
EMPLOI
FIG. 1 FIG. 2
Attention: toujours utiliser l'appareil sous
surveillance!

29
12
8 - 10
Zone Diamètre Foyer Puissance Régulateurs
n° en mm. W d’énergie
EMPLOI
TABLEAU 1
1 145 “hi-light” 1200 1
2 180 “hi-light” 1800 1 - 4
4 - 8
10 - 12
Pour chauffer des
plats consistants,
décongeler les
aliments surgelés
et faire cuire fruits
et légumes.
Pour faire fondre le
beurre,le chocolat et
autre.
Frire à l’huile et
chauffer de
grandes quantités
d’eau.
Rôtis de viande,
poissons, bifteck
et oeufs.
Cuisson de la
viande, du poisson,
de légumes en
sauce et de
préparations liquides.
Pour chauffer de
petites quantités
de liquide et pour
maintenir les plats
au chaud.
Puissance et dimensions Positions de règlage Types de cuisson
des zones de cuisson des manettes de commande possibles
ATTENT ON!
En cas de rupture du verre du plan de cuisson:
●éteindre immédiatement tous les feux et les
éléments chauffants électriques, puis mettre
l’appareil hors tension;
●ne pas toucher la surface de l’appareil;
●ne pas utiliser l’appareil.

30
AVERT SSEMENTS:
pour utiliser correctement votre table de cuisson,
observez la figure 3 et rappelez-vous de:
- mettre l’appareil sous tension uniquement après
avoir posé la casserole sur la zone de cuisson.
- Utiliser des casseroles à fond plat et é pais.
- Ne pas utiliser de casseroles plus petites que le
foyer.
- Essuyer le fond de la casserole avant de la
poser sur le foyer.
- Ne pas traîner les casseroles sur le plan en
verre pour ne pas le rayer.
- Ne pas s’éloigner de l’appareil pendant la
cuisson et faire attention que les enfants ne s’en
approchent pas. Assurez-vous que les manches
des casseroles sont tournés vers l’intérieur et
surveillez la cuisson lorsque vous utilisez de
l’huile et des graisses qui sont facilement
inflammables.
- Après l’utilisation, les foyers restent chauds
longtemps; ne posez pas les mains ou tout
autre objet tant que le voyant de chaleur
résiduelle ne s’est pas éteint pour éviter de vous
brûler.
- Débrancher l’appareil dès que vous remarquez
des fêlures sur la surface du verre.
- Ne poser ni aluminium ni récipients en plastique
sur la surface chaude.
- Ne pas utiliser la table de cuisson comme plan
d’appui.
- L’appareil ne doit pas être mis en marche à l’aide
d’une minuterie extérieure ou d’un système de
télécommande séparé.
- Ne jamais tenter de modifier les caractéristiques
techniques du produit: cela pourrait s’avérer
dangereux.
- Si vous décidez de ne plus utiliser l’appareil (ou
de remplacer un ancien modèle) avant de le
porter à la démolition, il est recommandé de le
rendre inutilisable comme le prévoient les
réglementations en vigueur en matière de
protection de la santé et de pollution de
l'environnement.
AVERT SSEMENTS ET CONSE LS
D’UT L SAT ON:
- ne pas toucher l’appareil avec les mains ou les
pieds mouillés ou humides.
- Ne pas utiliser l’appareil avec les pieds nus.
- Le fabricant ne peut être tenu pour responsable
d’éventuels dommages imputables à des
emplois incorrects, erronés ou irraisonnables.
- Pendant le fonctionnement, ou immédiatement
après, certaines parties de la plaque de cuisson
atteignent des températures très élevées: ne
pas y toucher.
- Après avoir utilisé la plaque de cuisson,
s'assurer que l’index des boutons soit en
position de fermeture et fermer le robinet
principal du conduit de gaz ou le robinet de la
bouteille.
EMPLOI
FIG. 3

31
NETTOYAGE
Débranchez l’appareil du réseau d’alimentation
électrique avant toute opération de nettoyage.
2 ) TA B L E D E C U I S S O N E N
V I T R O C É R A M I U E
Pour conserver la surface de cuisson propre et
brillante, passez un produit à base de silicone sur la
surface vitrée avant d’utiliser l’appareil pour le
protéger contre l’eau et la saleté. Ce film de
protection ne dure qu’un certain temps; nous vous
conseillons donc d’appliquer fréquemment le
produit.
Nettoyez la table chaque fois que vous l’avez
utilisée et lorsque le verre est encore tiède.
N’utilisez pas d’éponges métalliques, de poudres
abrasives ou de spray corrosifs.
Nettoyez la table en fonction du degré de saleté:
- pour les taches légères, utilisez une éponge
imbibée d’eau.
- Pour la saleté résistante et les incrustations,
utilisez un grattoir (fig. 4). Tenez-le avec le plus
grand soin pour ne pas risquer de vous
blesser.
- Les traces des liquides qui auraient débordé des
marmites s’éliminent avec du vinaigre ou du citron.
- Attention: ne laissez pas tomber de sucre ni
d’aliments sucrés sur la table pendant la
cuisson. Si cela devait vous arriver, éteignez la
plaque et nettoyez immédiatement à l’eau
chaude en utilisant un grattoir sur les taches
encore chaudes.
- À la longue, la table risque de prendre des
colorations ou des reflets métalliques ou présenter
des rayures (fig. 5) si vous ne la nettoyez pas
correctement ou si vous déplacez les récipients
trop brutalement. Il est très difficile d’éliminer ces
rayures mais sachez qu’elles ne compromettent
nullement l’efficacité de votre table de cuisson.
- N'utilisez pas les gicleurs de vapeur pour le
nettoyage d'équipement.
FIG. 4 FIG. 5

ABCD E
2 ELEM. 282 482 59 59 100
min.
INSTALLATION
NFORMAT ONS TECHN QUES
RÉSERVÉES AUX NSTALLATEURS
L’installation, tous les réglages, les
transformations et les entretiens mentionnés
dans ce chapitre doivent être effectués
exclusivement par du personnel qualifié.
L’appareil doit être convenablement installé,
selon les normes en vigueur et les instructions
du fabricant.
Une mauvaise installation peut provoquer des
accidents de personnes et d’animaux ainsi que
des dégâts matériels qui ne sont pas imputables
au constructeur.
Les dispositifs de sécurité ou de réglage
automatique des appareils pour la durée de vie
de l’installation pourront être modifiés
uniquement par le constructeur ou par le
fournisseur dûment autorisé.
3) MISE EN PLACE
Après avoir retiré l’emballage extérieur et les
protections intérieures enveloppant les différentes
parties mobiles, assurez-vous que l’appareil est en
bon état. En cas de doute, n’utilisez pas l’appareil et
adressez-vous à un technicien qualifié.
Ne laissez pas les éléments de l’emballage
(carton, sachets, polystyrène expansé, clous,
etc...) à la portée des enfants car ils
représentent un danger potentiel.
Effectuez une ouverture d’encastrement sur le
meuble en respectant les dimensions de la fig. 6 et
en vous assurant d’avoir respecté les dimensions
critiques de l’espace dans lequel l’appareil doit être
installé (voir fig. 7).
MESURES DE RESPECTER
(mm)
32
FIG. 6 FIG. 7
This manual suits for next models
4
Table of contents
Languages:
Other Smeg Hob manuals