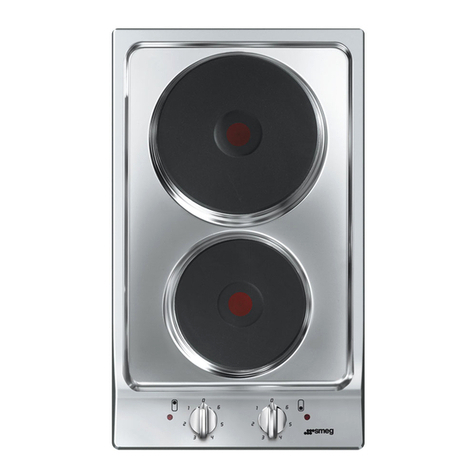
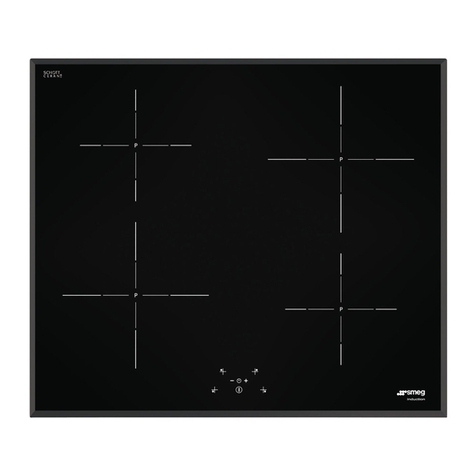
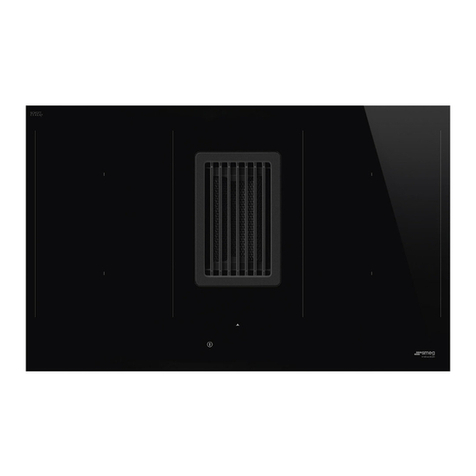
Smeg SE631CX User manual

ENCIMERAS DE COCCIÓN VITROCERÁMICAS
VITROCERAMIC COOKING HOBS
PIANI DI COTTURA IN VETROCERAMICA
TABLES DE CUISSON VITROCÉRAMIQUES
GLASKERAMIK-KOCHFELDER
KERAMISCHE KOOKPLATEN
ES
GB
IT
FR-BE
DE-BE
NL-BE

2
ES Página 3-9
GB Page 10-16
IT Pagina 17-23
FR-BE Page 24-30
DE-BE Seite 31-37
NL-BE Bladzijde 38-44

10
Model SE 640 (see fig. 1)
1 Heating element of 1.200 W.
2 Heating element of 1.800 W.
3 Heating element of 1.800 W.
4 Heating element of 1.200 W.
5 Residual heat indicators.
•Maximum electric power: 6.000 W.
Model SE 631 (see fig. 2)
1 Heating element of 1.200 W.
2 Heating element of 1.800 W.
3 Halogen heating element of 1.800 W.
4 Heating element of 1.200 W.
5 Residual heat indicators.
•Maximum electric power: 6.000 W.
13
5
2 4
Fig. 1 Fig. 2
31
2 45
Description
Introduction
GB

11
THE INSTALLATION AND FITTING WORK MUST BE
CARRIED OUT BY AN AUTHORISED INSTALLATION
TECHNICIAN ACCORDING TO APPLICABLE REGU-
LATIONS.
To install these hobs, a hole with the dimen-
sions specified in the figure, must be cut out
of the top of the work surface furniture.
The fixing system for these hobs is designed
for work surfaces of 20, 30 and 40 mm thick.
The underside of any furniture located verti-
cally above the hob must be at a minimum dis-
tance of 60 mm.
Once the hob location has been measured,
the sealing strip must be fixed to the undersi-
de of the hob.
Attach the fixing clamps as shown in the figu-
re, screwing them to the holes in the undersi-
de of the hob with the self-tapping screws pro-
vided (ø 4.2 mm).
If the furniture thickness is 30 mm or less, use the
M5 self-tapping screws supplied to hold the hob in
place, inserting them through the holes in the
clamps. The screws will form a thread in these
holes as they are screwed into them. These thre-
ads should be formed before the clamp is atta-
ched to the hob.
The clamps and the sealing strip are included
in the delivery contents.
Before connecting the hob to the electrical
supply, check that the voltage and frequency
of the supply correspond to those shown on
the rating plate on the base of the hob.
The electrical connection should be carried out
using a single-pole switch or a plug, provided this
is accessible, of a rating suitable for the power of
the hob and with a separation of at least 3mm
between contacts, to ensure that the hob can be
disconnected from the mains in case of emer-
gency or for cleaning.
The supply must include a suitable earth con-
nection, in compliance with applicable regula-
tions.
If it should be necessary to replace the flexi-
ble hob mains cable, the new cable should be
Note
Selecting a location
for the hob (see fig. 3)
Installation
GB
Fig. 3
575 maximum
Anchoring of the hob
(see fig. 4)
Self-tapping screw for
for mounting surfaces
20 and 30 mm thick
20/30 mm
40 mm
Fig. 4
Electrical connections

12
GB
replaced by the manufacturer since special
tools are required.
Avoid the mains cable resting against the hob
or oven casing oven if installed in the same
piece of furniture.
Note:
• The adhesives used in the manufacture of the
furniture or for applying decorative laminas or
the surface layer of the work top must be able
to withstand temperatures of up to 1000C.
• When handling the hob prior to installation,
take care to avoid cuts caused by sharp edges
or corners.
• When kitchen furniture or equipment is
being installed above the hob, cover it with a
suitable protective sheet, to protect it against
breakage due to blows or excessive pressure.
• Remember that the glass is not coverd by
the guarantee ir it is knocked or mishand-
led.
• Should the glass surface be broken, discon-
nect the hob from the electrical supply imme-
diately to avoid the risk of electric shock.
• The manufacturer does not accept res-
ponsibility for faults or damage due to inco-
rrect installation.
Technical Data
COMMON CHARACTERISTICS OF ALL
MODELS
The supply voltage and frequency are as indica-
ted on the rating plate.
The protection against risk in case of fire is class
"Y", so these hobs may be installed next to a
wall, as shown in figure 5.
Note: While the hobs are in use, and for
some time after they have been switched
off, there will be hot areas that can cause
burns. Keep children away from the hob.
Important:
Keep the guarantee beside this user
manual since it contains important techni-
cal information.
Technical data
50
50
Fig. 5

13
GB
Each of the vitroceramic hob's heating ele-
ments is connected to an energy compensator
which controls the operating and stopping
time for each one (more or less heat). (See
fig. 6).
The hob is switched off when at "0", at "1"
the operating time is short and the stopping
time long. At the subsequent positions on the
control the operating time increases and the
stopping time decreases until reaching posi-
tion "12" at which operation is continuous
only being switched off when the hotplate ther-
mostat is activated which cuts the power
supply when reaching the maximum permitted
temperature.
The control corresponding to each of the hea-
ting elements (hob) should be taken into
account before switching on. To do so, each
control has an indicator for the corresponding
heating element.
The operation of one or more heating zones is
shown by the on-off indicator.
Residual heat indicators
When a heating zone reaches a temperature
exceeding 60±15°C the corresponding resi-
dual heat indicator illuminates, remaining swit-
ched on until the temperature decreases,
even if the control is at "0". Nevertheless,
special attention should always be paid to the
temperature in the cooking zone given that
the, fortunately remote, possibility exists that
the indicator could break and not show the
temperature of the aforementioned zone.
To obtain the best results from this hob,
observe the following recommendations: use
pots with perfectly flat bases, since the grea-
ter the contact surface between the glass sur-
face and the pot, the greater the heat trans-
mission. To avoid dents in the bases we
recommend the use of pots with thick bases.
Figure 7 illustrates how pots with dented or
concave bases have reduced contact surfa-
ces.
Good Bad
•It is not recommended to use pots with a
smaller diameter than that of the circle
marked on the glass.
•Place the cooking pots properly centred on
Use and Maintenance
Using vitroceramic hotplates
Fig. 6
Suggestions and recommendations
A B B
A B Fig. 7

14
GB
the hotplate outlines marked on the glass.
•Dry the bases of pots before placing them
on the vitroceramic hob top.
•Never leave plastic objects or utensils, or
aluminium foil on the vitroceramic hob.
•Take care not to scrape the surface of the
hob with pots with sharp edges or corners.
•Do not switch on the hob if there is no pot
on the zone to be used.
•Do not heat plastic recipients on the hob.
•Cooking pots must be made of materials
that will not melt onto the glass of the hob.
•The glass will withstand a certain level of
impact from large recipients with no sharp
edges. Care should be taken to avoid impacts
with small, pointed utensils.
When the halogen heating elements are in
use it is recommended to avoid making eye
contact with them to prevent any injury
being caused.
Take care to prevent sugar or products that
contain sugar from spilling onto the glass
since when hot they could react with the
glass and damage its surface.
To keep the vitroceramic hob in prime condi-
tion only use suitable products and utensils
for cleaning. Vitroceramic hobs should be clea-
ned after every use, when they are warm or
cold. This makes cleaning easier, avoiding
accumulated stains from several uses.
Never use aggressive or abrasive cleaning pro-
ducts that could scratch the surface (see the
table on the next page of common cleaning
products to be used) nor cleaning equipment
using steam as a cleaning agent.
CARE OF THE GLASS SURFACE
When cleaning the hob the degree of staining
must be taken into account, using appropriate
products and utensils in each case.
Light stains
Light stains that have not hardened or stuck to
the surface can be removed with a damp cloth
and a gentle detergent or warm soapy water.
Hardened stains
Stubborn stains and grease can be removed
using special cleaning products for vitrocera-
mic hobs following the manufacturer’s instruc-
tions.
Baked-on stains can be removed using a
scraper with a sharp edge.
Coloured iridescent stains: These are cau-
sed by recipients that have dry grease stains
on the base or by the presence of grease bet-
ween the glass and the pot during cooking.
They can be removed using nickel cleaning
pads and water or a special cleaning product
for vitroceramic surfaces.
Plastic utensils and sugar or sugar-contai-
ning foods that have melted onto the surface
can be removed immediately using a scraper
while still hot.
Cleaning and maintenance

15
GB
RECOMMENDED CLEANING PRODUCTS
Product Can be used for cleaning...
... the glass? ... the frame?
Gentle liquid detergents YES YES
Powder or aggressive detergents NO NO
Special vitroceramic YES YES
cleaners
Grease removal sprays (ovens, etc.) NO NO
Soft cleaning cloths YES YES
Kitchen roll YES YES
Dish cloths YES YES
Nickel cleaning pads (never dry) YES NO
Steel cleaning pads NO NO
Hard (green) synthetic cleaning pads NO NO
Soft (blue) synthetic cleaning pads YES YES
Scrapers for glass YES NO
Liquid polish for domestic equipment YES YES
and / or glass
Please note:
• Handle cleaning scrapers with care as they
have sharp edges that can cause cuts!
• Only use the edge of the scraper to clean
the glass. Avoid touching the glass with the
body of the scraper as this could scratch the
surface.
• Use blades which are in perfect condition
and immediately replace them at the first sign
of wear.
• After using the scraper retract the blade and
lock it in the retracted position (see figure 8).
Changes in the colour of the glass
Colour changes do not affect the operation or
reliability of the hob. They are normally caused
by inadequate cleaning or defective recipients.
Metallic reflections are caused by metallic
recipients sliding across the glass surface.
They can be removed by thorough cleaning
using a special product for cleaning vitrocera-
mic hobs although it may be necessary to
repeat the cleaning process several times.
Fig. 8
Scraper in "safe"
position
Scraper with blade
exposed

16
GB
Deterioration of surface markings is caused
by using abrasive cleaning products or reci-
pients with irregular bases that scrape off the
silk-screened markings.
Pots may stick to the surface due to a subs-
tance melting between them. Never try to pull
the pot away when cold! This could break the
glass.
Never stand on the glass nor rest your weight
on it as this could break it and lead to cuts.
Do not store objects on top of the glass surfa-
ce.
FRAME MAINTENANCE
Use a damp cloth or lukewarm soapy water for
cleaning. If the stains are hard to remove use
a special vitroceramic cleaning product or
liquid polish for electrical household applian-
ces. Apply and spread, rubbing the undiluted
product, leave it to take effect and remove it
with a dry cloth. Do not use metallic or synthe-
tic cleaning pads.
Should the hob lose its shine use a polish for
electrical household appliances to help it
regain its original appearance
Troubleshooting
Fault Possible cause Solution
Neither the hotplates
nor the indicators work
The mains cable is Connect the mains cable.
not connected.
The recipient sticks to the
glass
Some meltded substance is Turn the heating zone to
between the recipient and full power and try to remove.
the glass.
Recipients with Check the bases of the
aggressive bases recipients and do not slide
then along the glass surface.
This manual suits for next models
6
Table of contents
Other Smeg Hob manuals