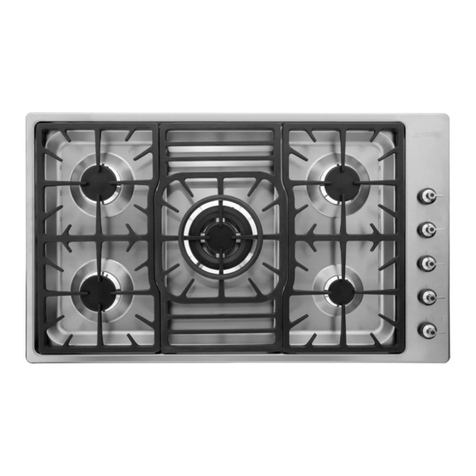
Smeg SE264TD1 User manual


Presentación / Apresentação / Presentation / Präsentation
/Présentation / Wprowadzenie/ Provedení / Predstavenie
/Prezentare / Presentasjon /Presentazione / Presentatie

4
600 510 560 490
Distancias mínimas / Distâncias mínimas / Minimum distances / Mindestabstände / Distances minimales /Minimum mesafeler /
Minimalne odlegoci / Minimlní vzdlenosti / Minimlne vzdialenosti / Distane minime/ Distanze minime /Minimumafstanden
Instalación / Instalação / Installation / Montage / Installation / Kurulum / Monta /
Instalace / Intalcia / Instalare /Installazione / Installatie
Unidades en mm / Unidades em mm / Units in mm / Einheiten in mm / Unités en mm / mm cinsiden birimler / Wymiary w mm / /
ednotky v mm /ednotky v mm / Uniti n mm / / Unit in mm / Eenheden in mm

5
STANDARD INSTALLATION SYSTEM FAST-CLICK SYSTEM
Distancias mínimas / Distâncias mínimas / Minimum distances / Mindestabstände / Distances minimales /Minimum mesafeler /
Minimalne odlegoci / Minimlní vzdlenosti / Minimlne vzdialenosti / Distane minime/ Distanze minime /Minimumafstanden
Horno SMEG / Forno SMEG / SMEG Oven /SMEG-Herd /
Four SMEG / SMEG /Piekarnik SMEG / SMEG st / Trouba SMEG / Rra
na eenie SMEG / SMEG Cutor /SMEG Ugn / SMEG Ovn / SMEG-ovn
/ SMEG-uuni /Forno SMEG / SMEG Oven /
Horno SMEG / Forno SMEG / SMEG Oven /SMEG-Herd /
Four SMEG / SMEG /Piekarnik SMEG / SMEG st / Trouba SMEG / Rra
na eenie SMEG / SMEG Cutor /SMEG Ugn / SMEG Ovn / SMEG-ovn
/ SMEG-uuni /Forno SMEG / SMEG Oven /
Unidades en mm / Unidades em mm / Units in mm / Einheiten in mm / Unités en mm / mm cinsiden birimler / Wymiary w mm / /
ednotky v mm /ednotky v mm / Uniti n mm / / Unit in mm / Eenheden in mm
Instalación / Instalação / Installation / Montage / Installation / Kurulum / Monta /
Instalace / Intalcia / Instalare /Installazione / Installatie

2
INSTRUCCIONES PARA LA INSTALACIÓN Y RECOMENDACIONES DE USO Y MANTENIMIENTO
ENCIMERAS VITROCERÁMICAS TOUCH CONTROL.....................................................................................6
INSTRUÇÕES DE INSTALAÇÃO E RECOMENDAÇÕES PARA A UTILIZAÇÃO E MANUTENÇÃO
PLACAS DE COZINHA VITROCERÂMICAS TOUCH CONTROL..................................................................12
INSTALLATION INSTRUCTIONS AND RECOMMENDATIONS FOR USING AND MAINTAINING
CERAMIC HOT PLATES TOUCH CONTROL..................................................................................................18
MONTAGEANLEITUNG UND EMPFEHLUNGEN ZUR VERWENDUNG UND WARTUNG
GLASKERAMIK-KOCHFELDER MIT TOUCH CONTROL.....................................................................................23
INSTRUCTIONS POUR L'INSTALLATION ET CONSEILS D'UTILISATION ET D'ENTRETIEN
PLAQUES DE CUISSON VITROCÉRAMQIUE TOUCH CONTROL.......................................................................29
KULLANMA VE MUHAFAZA ÇN KURULUM TALMATLARI VE TAVSYELER
SERAMK ISITMA PLAKALARI DOKUNMATK KONTROL..................................................................................35
INSTRUKCJA OBSUGI MONTAU ORAZ WSKAZÓWKI DOTYCZCE PIELGNACJI
CERAMICZNYCH PYT KUCHENNYCH TOUCH CONTROL...............................................................................40
NVOD K INSTALACI A DOPORUEN K PROVOZU A DRB
SKLOKERAMICKÉ VARNÉ DESKY TOUCH CONTROL.......................................................................................45
NVOD NA INTALCIU A ODPORANIA PRE POUVANIE A DRBU
KERAMICKÝCH VARNÝCH PLATNÍ DOTYKOVÉ OVLÁDANIE...........................................................................50
INSTRUCIUNI DE INSTALARE I RECOMANDRI DE UTILIZARE I NTREINERE
PLITE DE GTIT INCORPORAILE VITROCERAMICE TOUCH CONTROL......................................................55
ISTRUZIONI PER L'INSTALLAZIONE E CONSIGLI PER L'USO E LA MANUTENZIONE
PIANI DI COTTURA IN VETROCERAMICA TOUCH CONTROL...........................................................................61
AANWIJZINGEN VOOR DE INSTALLATIE EN RAADGEVINGEN VOOR GEBRUIK EN ONDERHOUD
KERAMISCHE KOOKPLATEN TOUCH CONTROL................................................................................................67
ES
DE
EN
PL
RO
NL
PT
FR
TR
CS
SK
IT

EN
18
Safety warnings:
If the ceramic glass
breaks or cracks,
immediately unplug
the hob to avoid
electric shocks.
This appliance is
not designed to work
with an external timer
(not built into the
appliance) or a
separate remote
control system.
Do not steam clean
this device.
The device and its
accessible parts may
heat up during
operation. Avoid
touching the heating
elements. Children
younger than years
old must stay away
from the hob unless
they are permanently
supervised.
This device may
solely be used by
children years old or
older, people with
impaired physical,
sensory or mental
abilities, or those who
are lack of experience
and knowledge, ONLY
when supervised or if
they have been given
adequate instruction
on the use of the
device and
understand the
dangers its use
involves. User
cleaning and
maintenance may not
be done by
unsupervised
children.
Children must not
play with the device.
Precaution. It is
dangerous to cook
with fat or oil without
being present, as
these may catch re.
Never try to extinguish
a re with water! in
this event disconnect
the device and cover
the ames with a lid,
a plate or a blanket.
Do not put any
object on the cooking
areas of the hob.
Prevent a possible
re hazard.
“If the mains cord
is damaged, should
be replaced by the
manufacturer or its
after sales service”
CAUTION: Use
only cooktop
protectors
appropriately
designed by the
household
manufacturer or the
protectors already
used in this appliance.
The use of
inappropriate
protectors could
cause accidents.
Installation
Emplacement with cutlery drawer
If you wis to ount furniture or a
drawer under te ob a searation
board ust be fitted between te
two Accidental contact wit te ot
surface of te devices ousing is tus
revented
Te board ust be tted 20 under
te botto cover of te ob
Electrical connection
Before you connect te ob to te
green-yellow
blue
brown
grey
black
green-yellow
blue
brown
grey
black
green-yellow
blue
brown
grey
black
green-yellow
blue
brown
grey
black
green-yellow
blue
brown
grey
black
g 1
DO NOT USE L3
green-yellow
blue
brown

EN
19
ains ceck if te voltage and
freuency atc tose secied on
te ob label wic is laced under
te ob or on te Guarantee card or if
alicable on te tecnical data seet
wic you ust kee togeter wit
tis anual trougout te roducts
service life
Te electrical connection will be via
an all-ole circuit breaker or lug
wenever accessible in accordance
wit te current and wit a iniu
3 distance between contacts Tis
ensures disconnection in eergencies
and allows ob cleaning
Only te SMEG official tecnical
service can andle or reair te
aliance including relaceent of
te ower cable
Ensure tat te inlet cable does not
coe into contact wit te ob ousing
or te oven ousing if it is installed in
te sae unit
Warning:
The electrical connection
must be properly grounded,
following current regulations,
otherwise the hob may malfunction.
Unusual high power surges
can damage the control system
(like with any electrical appliance).
Keep the Guarantee
Certificate or the technical data
sheet together with the instructions
manual throughout the product’s
service life. These contain important
technical information.
Use and
Maintenance
User instructions of the
Touch Control
HANDLING ELEMENTS g 2
On/o touc key
2 Hot late selection touc keys
Power and/or residual eat
dislays
Decrease ower touc key
Increase ower touc key
Double burner selection touc key
double ot late
Locking touc key for te rest of
touc keys
Hot late double one indicatior
only net to double burner ot
lates
Lock icon
Tier touc key
Tier dislay
Te tied cooking surface
indicator
Deending on odel
Only visible wile running
Te anoeuvres are done by eans
of te touc keys You do not need
to eert force on te desired touc
key you only need to touc it wit
your ngerti to activate te reuired
function
Eac action is notied by a bee
SWITCHING ON THE DEVICE
Wen te ob is connected for te rst
tie it will be locked and te related
ilot ligt 9 will be on To unlock it rst
touc locking touc key 7 until te
ilot ligt 9 switces o
1 Touc te switcing on touc key
1 for at least one second
Te Touc Control is activated and a 0
aears wit 50 brigtness on all
te ower dislays 3
If any one as residual eat indication
before switc on te dislay continue
s sowing ''H'' instead of 0
If you do not take any action in te net
10 seconds te touc control will
switc o autoatically
SWITCHING ON A HOT PLATE
Once te Touc Control as been
activated by eans of te touc key
1 te ower indicators of te ot
lates will dislay a 0 3
1 Press te touc key for te selected
ot late 2 Te related ower
indicator 3 will be activated
and brigtness of indicator will
increase
2 Using te touc key or 4/5
coose te desired ower level
Te and touc keys are
reetitive so if you kee te ressed
tey increase or decrease wit a 05
second interval
Only one ot late can be selected at
te sae tie
Warning:
To operate a hot plate, it must
be selected rst. When you want to
use a hot plate,check the brightness
of the power indicator.After
choosing hot plate, brightness of
power indicator should increase.
Quick switch-on at maximum
power: Once you ave selected te
ot late ress te touc key 4
once Te ot late will be activated at
full ower

EN
20
SWITCHING OFF THE HOT PLATE
1 Te ot late ust reviously be
selected
2 Using te touc key 4 lower te
ower level to 0
Quick switch-o alternatives :
i If user kee nger on te selection
sensor for 2 seconds te related one
will be switced o
ii Wen you ress touc keys and
4/5 siultaneously te ot late
will switc o uickly
RESIDUAL HEAT INDICATOR
Te ower indicator of te ot late will
dislay an H wen te glass surface
reaces a teerature tat could
cause burning
Wen tis risk disaears
i te dislay switces o if te device
is in stand by
ii or dislays 0 if te aliance is still
running
Warning:
In a rst run, H indication may appear
in a short time on the power display.
This showing is related with setup
operation and it does not mean the
cooking zone is hot.
Warning:
H indication is used for the safety
purposes in any case. Even if the
power is cut o for a long time, after
power on, H indication appears.
SWITCHING OFF THE DEVICE
Te device can be switced o at any
tie by ressing te general on/off
touc key 1 In standby ode an
H will aear in te ones tat are ot
Te rest of te dislays will not ligt u
Double burner hot plate
If your cooker as tis otion te double
burner ot late oers te ossibility of
using te inside ring or also in addition
te outside one deending on te sie
of te ot or an
SWITCHING ON THE DOULE HOT
PLATE
1 Te related ot late ust be
selected
2 Select te desired ower fro 1 to 9
using te touc key or 4/5
3 Press te double ot late touc
key 6 to activate te double
burner Wen te double one will
be activated double one indicator
8 ligt on
SWITCHING OFF THE DOULE
HOT PLATE
1 Te key by wic its double burner
ot late was switced on reviously
is selected
2 Press te double ot late touc
key 6 to deactivate te double
burner Te double burner indicator
8 will ligt o and te outer ring will
be deactivated
Locking of the touch keys
of the cooking hob
To revent undesired aniulation you
can lock te entire unit ecet for te
on/o touc key using te locking touc
key 7 Tis function is useful for
cild safety Wen te lock is activated
te lock indicator ligt 9 coes on
However reeber wen te touc
control is on te on/o touc key
1allows you to switc it o even if
te lock is activated te lock indicator
ligt 9 on
On te oter and if te touc control
is switced off te locking function
does not allow te on/o touc key
1 to be used
To deactivate te locking function ress
te locking touc key 7 once again
Lock indicator 9 ligt o and touc
control will be ready for use
CHILD LOCK
Te cild lock is dierent and ore
colicated tan key lock User can
activate key lock via one sensor But
cild lock need a sensor seuence
Te Cild Lock is being used to revent
cildren fro turning on te ob
Activating Child Lock :
1. Te ob is switced on via 1 On/
O touc key
2. Any one sould not be selected
Wen any one is not selected
5 Increase ower touc key
and 4 decrease ower touc
key and inus sensors is old for 3
seconds at sae tie At te end of
tis eriod a sort buer sound is
eard
3. After buer signal te 7 locking
touc key is touced tere is no
need to kee ress for a long tie
and a long buer sound is eard
and te Cild Lock will be activated
and all ower dislay sows L
During Cild Lock if user touc any
sensor Main sensor included L will
as on dislay
Warning : Cild lock status is not being
stored If te energy of te ob is butted
cild lock status could not be reserved
Deactivating Child Lock :
To be able to deactivate Cild Lock te
Cild Lock sould be activated before
and all ower dislay sow L
1. 5 Increase ower touc key
and 4 decrease ower touc
key and inus sensors is old for 3
seconds at sae tie At te end of
te tis eriod a sort buer sound
is eard
2. After buer signal is touced to
te 7 locking touc key tere
is no need to kee ress for a long
tie and a long buer sound is
eard and te Cild Lock will be
de activated and Indication will be
ligt o
EN
21
Flash Cooking
(Automatic cook start)
Tis function facilitates cooking as
you do not need to be resent wile it
is being done Te touc control re-
rograes te cosen ot late at
te aiu ower and subseuently
lowers it to te desired ower level
wic you ave selected after an
aroiate aount of tie see
table 1
Table 1
-
0
1
2
3
4
5
6
7
8
0
60
180
288
390
510
150
210
270
9
Selected
power
Automatic Cook Start
Function
SWITCHING THE AUTOMATIC
COOK START FUNCTION ON
1 Te ot late ust be selected
2 Select ower 9 and ten ress
ower touc key 5After using
te touc key you ust lower te
continuous cooking ower to te
desired level for eale 6 Wen
te autoatic cook function starts
A indication ases wit desired
ower level on te dislay
SWITCHING THE AUTOMATIC
COOK START FUNCTION OFF
After at least 10 seconds ave elased
since te beginning of te autoatic
cook start function:
1 Te ot late ust be selected
2 Press touc key 5 till te
indicator reaces level 9 and te
autoatic cook start function will be
deactivated
Timer Function
Tis function akes it easier to cook
as you do not need to be resent
trougout te rocess: te tied ot
lates will switc off autoatically
after te set tie as lased Tere is a
searate tier for eac ot late wic
allows all of te ot lates to be tied
siultaneously
Wit tese odels you can use te
clock as a tier for te otlates for
ties ranging fro 1 to 99 inutes All
te cooking areas can be rograed
individually and in a siultaneous
anner
TIMING ONE HOTPLATE
1 Te cooking one to be tied ust
be selected
2 Select a ower level for te otlate
fro 1 to 9 using te touc keys
or 5/4
3 Press clock touc key 10
Tier indicator 11 will dislay 00
Deending on te odel te tied
cooking surface indicator 12 will
as
On te ower indicator 3 will as
during te tie set
4 Iediately afterwards enter a
cooking tie between 1 and 99
inutes by using te touc keys or
5/4
Wen te ower indicator 3 stos
asing it will start to count down te
tie autoatically Te resective
tied otlate disolay 11 will continue
asing
Or wen te countdown starts te
relevant ower level and will as
alternately on te ower indicator 3
of te relevant eater area
Wen te clock reaces 01 it will
switc fro counting down inutes
to seconds
Once te selected cooking tie as
elased te eating one being tied
is turned o and te clock eits a series
of bees for several seconds Te
tier indicator will dislay a asing
00 beside te otlate tat as been
disconnected
If you wis to tie anoter otlate at
te sae tie reeat stes 3 and 4
If te eating one turned o is ot its
indicator dislays an H or oterwise an
0 To turn o te audible signal touc
any sensor
CHANGING THE PROGRAMMED
TIME
To cange te rogred tie you
ust ress te touc key of te tied
otlate 2 to select it and ten te
clock 10 You ay ten
read and
cange te tie
DISCONNECTION OF THE TIMER
If you want to sto te tier before te
rograed tie is u
1 First select te otlate and ten
ress clock touc key 10
2 Use te touc key 4 to recude
te tie to 00 Te clock is cancelled
Alternative etod :
After one selection if tier touc key
is ressed for two seconds te related
tier will be cancelled
Safety switch o function
If due to an error one or several ot
lates do not switc o te aliance
will be autoatically disconnected after
a set aount of tie see table 2
1
2
3
4
5
6
7
8
9
10
Table 2
5
5
4
3
2
2
2
1
Selected
power
level
MAXIMUM OPERATION
TIME
(in hours)

EN
22
Wen te safety switc o function
as been triggered a 0 is dislayed if
te glass surface teerature is not
dangerous for te user or an H if tere
is a burn risk
To reconnect te aliance switc it
o by ressing te on/o key 1 and
ten switc it on again
Keep the control panel of the
heating areas clean and dry at all times.
In case of operating problems
or incidents not mentioned in this
manual, disconnect the appliance
and contact the SMEG technical
service.
Recommendation for the
good use of vitroceramic
hobs
Use ots or ans wit tick
coletely at bottos
Pans wit a saller diaeter tan
te sown eating area are not
recoended
Do not slide ots and ans over te
glass as tey ay scratc it
Altoug te glass can witstand
knocks fro large ots and ans
witout sar edges try not to
knock it
To revent daage to te ceraic
glass induction surface try not
to slide te ots and ans over
te glass and kee te bottos
of te vessels clean and in good
condition
Try not to spill sugar or
products containing sugar on the
glass while the surface is hot as
these could damage it.
Cleaning and maintenance
To kee te aliance in good
condition clean it using suitable
roducts and ileents once it as
cooled down Tis will ake te ob
easier and avoid te build-u of dirt
Never use ars cleaning roducts or
tools tat could scratc te surface or
stea-oerated euient
A pot or pan may become
stuck to the glass due to a product
having melted between them. Do
not try to lift the pot while the hot
plate is cold! This could cause the
glass break.
Do not step on the glass or
lean on it as it could break and
cause injury. Do not use the glass
as a surface for putting objects.
SMEG reserves te rigt to ake
canges to its anuals tat it dees
necessary or useful witout aecting
te roducts essential features
Environmental
considerations
The symbol on the product
or its packaging means that this
product cannot be treated like
ordinary household waste.This
product must be taken to a recycling
collection point for electrical and
electronic appliances. y ensuring
that this product is disposed of
correctly, you will avoid harming
the environment and public health,
which could happen if this product
is not handled properly. For more
detailed information about recycling
this product, please contact your
local authority, household waste
service or the store where you
purchased the product.
The packaging materials used are
environmentally-friendly and can
be recycled completely. Plastic
components are marked PE, LD,
EPS, etc. Dispose packaging
materials, like household waste, in
your local container.
If something does not work
Before calling te tecnical service
erfor te verifications secified
below
The appliance does not work:
Ensure tat te ower cable is lugged
in
The pot sticks to the glass:
If tere is olten aterial between
te ot and te glass set te ot
late to aiu ower and try to
searate te
Single Sensor Error :
If any of te sensors is active ore
tan 10 seconds tis error situation
occurs and error codeF1 is sowed
Tis error can be related wit dierent
roots One of te is tat tere ay
be an obect fork knife on te any
of te sensor
Make sure tat tere is no any obect
on te control unit ob glass is wied
wit a dry clot If error situation
continue after tis solution lease
take out lug or switc o fuse switc
for 10 second
Plural Sensor Error:
If ore tan 2 sensors are sensed at
sae tie tis error situation occurs
and error codeF2 is dislayed
Potential root reasons of the
problem :
Tere ay be an obectot or
water accuulationoverow liuid
fro ot tat cover ore tan 2
sensors
Touc control location ay
eosure ore eat or stea
fro oven botto of te ob
Please be sure tat tere is no any
obect on te sensors and switced o
all stea and eat sources Tenob
glass is wied wit a dry clot If error
situation continue after tis solution
lease take out lug or switc o fuse
switc for 10 second
FC Error:
Fc essage on te control and te
ot lates switc off: Overeating
in te electronics Let testove cool
for a wile
Other manuals for SE264TD1
1
This manual suits for next models
1
Table of contents
Other Smeg Hob manuals
Popular Hob manuals by other brands

Viking
Viking Professional VERT530-4B Specifications

Pelgrim
Pelgrim PKI154RVS manual

Electrolux
Electrolux EGC3313 user manual

montpellier
montpellier MON-INT251 Installation and operating instructions

Hotpoint Ariston
Hotpoint Ariston KIO 744 DD Z operating instructions

Ariston
Ariston PH 750 RT GH AUS operating instructions