Smyths Toys G75 User manual
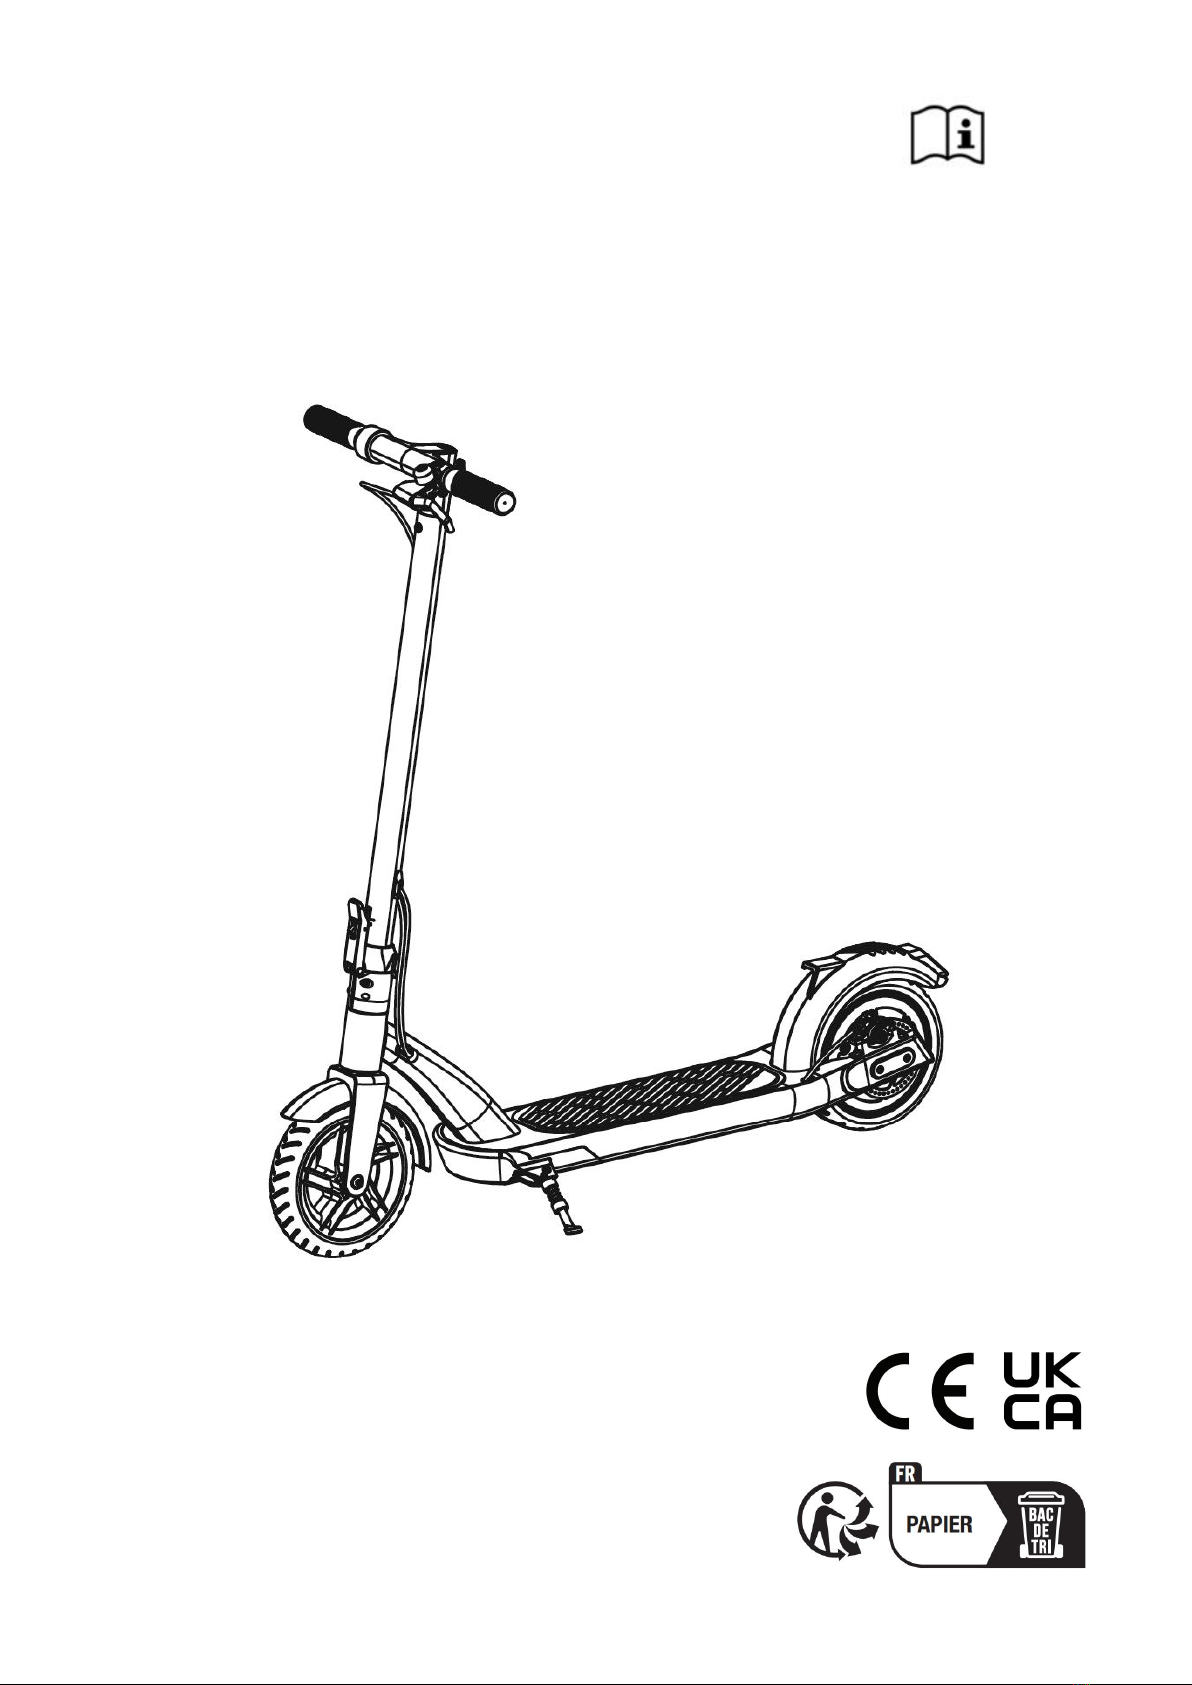
Thorpe Electric Scooter
Model: G75
USER MANUAL

1. WARNINGS AND INSTRUCTIONS
WARNINGS! Protective equipment (helmet, gloves, wrist-guards, elbow
and knee pads) should be worn. Not to be used in traffic. Max weight: 100
kg (220 lbs). Read carefully and keep this manual for future reference.
INSTRUCTIONS:
Recommended Age: adult
Skills are required to properly use the product, and to avoid falls or collisions
that could cause injury to the user or third parties. The user has to check the
limitation of use according to regulations of road safety.
WARNING ! As with any mechanical component, a PLEV is subject to high
stresses and wear. The various materials and components may react
differently to wear or fatigue. If the expected service life for a component has
been exceeded, it may break suddenly, therefore risking causing injuries to the
user. Cracks, scratches and discoloration in the areas subject to high stresses
indicate that the component has exceeded its service life and should be
replaced. For the purposes of recharging the battery, only use the detachable supply unit
provided with this appliance.
detachable supply unit
Before each use, ensure:
-Regularly check the tightening of the various bolted elements, in
particular the wheel axles, the folding system, the steering system and
the brake shaft.
-Eliminate any sharp edges caused by use.
-The rear wheels move smoothly and the action decks are properly fixed.
-Understand and strictly follow the local traffic rules.
-Wear safety helmet, knee, elbow and wrist protector before driving,
which is the most effective protection for you.
-Make sure you in good condition and conscious, no drinking, taking
sedative or other psychiatric drugs before driving.
-When not in use, the scooter must be locked with U-shaped padlock.
-This appliance can be used by persons with reduced physical, sensory
or mental capabilities or lack of experience and knowledge if they have
been given supervision or instruction concerning use of the appliance in
a safe way and understand the hazards involved. Children shall not play
with the appliance.
-The battery must only be removed and changed by an official repair
center. No attempt should be made to dismantle the product and repair
it yourself. Any attempt to do so will invalidate the warranty.
-The user is wearing closed shoes.
DO NOT:
-Use on wet, oily, sandy, dirty, icy, rough or uneven surfaces. Use only on
flat, clean and level ground.
-Jump stairs, curbs or do other stunts.
-Use on roads, paths or other places with motor vehicle traffic.
-Ride in the darkness.
-Use near pools or bodies of water.
-Ride at excessive speed or down steep hills.
-Modify or transform the vehicle, including the steering tube and sleeve,
stem, folding mechanism and rear brake.
-Touch the brake pad. It will become hot from continuous use.
-Leave the product outside overnight or under wet conditions.
-Allow several persons to climb on the product. One user at a time only.
-Ride the product with one hand only.
-Make sharp turns, and/or place your weight on the handlebar. Please
note that any load attached to the handle-bar will affect the stability of
the vehicle. The scooter may go out of control, and cause the user to
fall.
2. ASSEMBLY
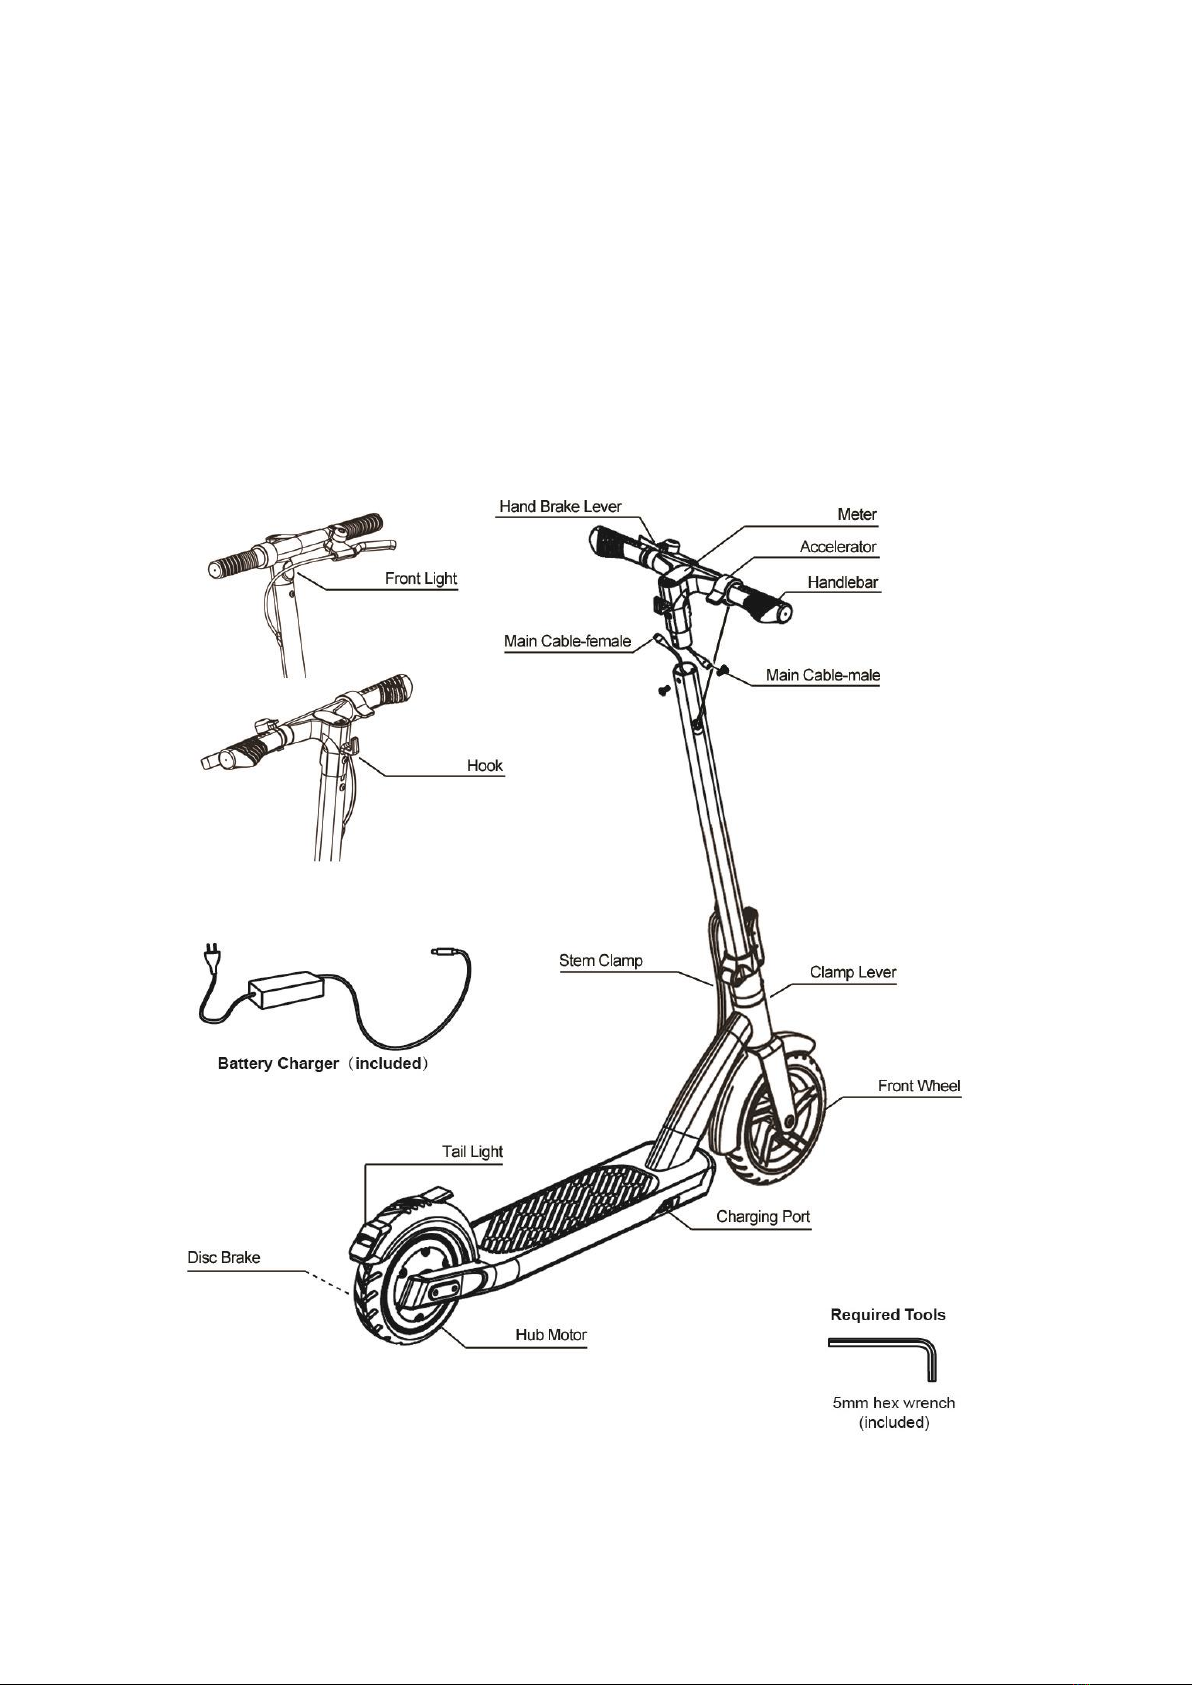
2.1 Parts Diagram

2.2 How To Assemble
Step1. Open the lever and raise the stem to the maximum.
Step2. Close the folding lever completely and ensure that the red button is
clipped into the square hole.
Note: Please make sure that the folding lever is in open position
before you raise the stem. Otherwise, it will be blocked.

Step3. Unscrew the bolt, connect the Main Cable together (please align the
male port and the female port carefully), insert the handlebar into the stem,
screw in the bolt and then tighten it with two Hex spanners completely.
Note: Please ensure that the hole is not blocked by the cable when you
screw in the bolt.
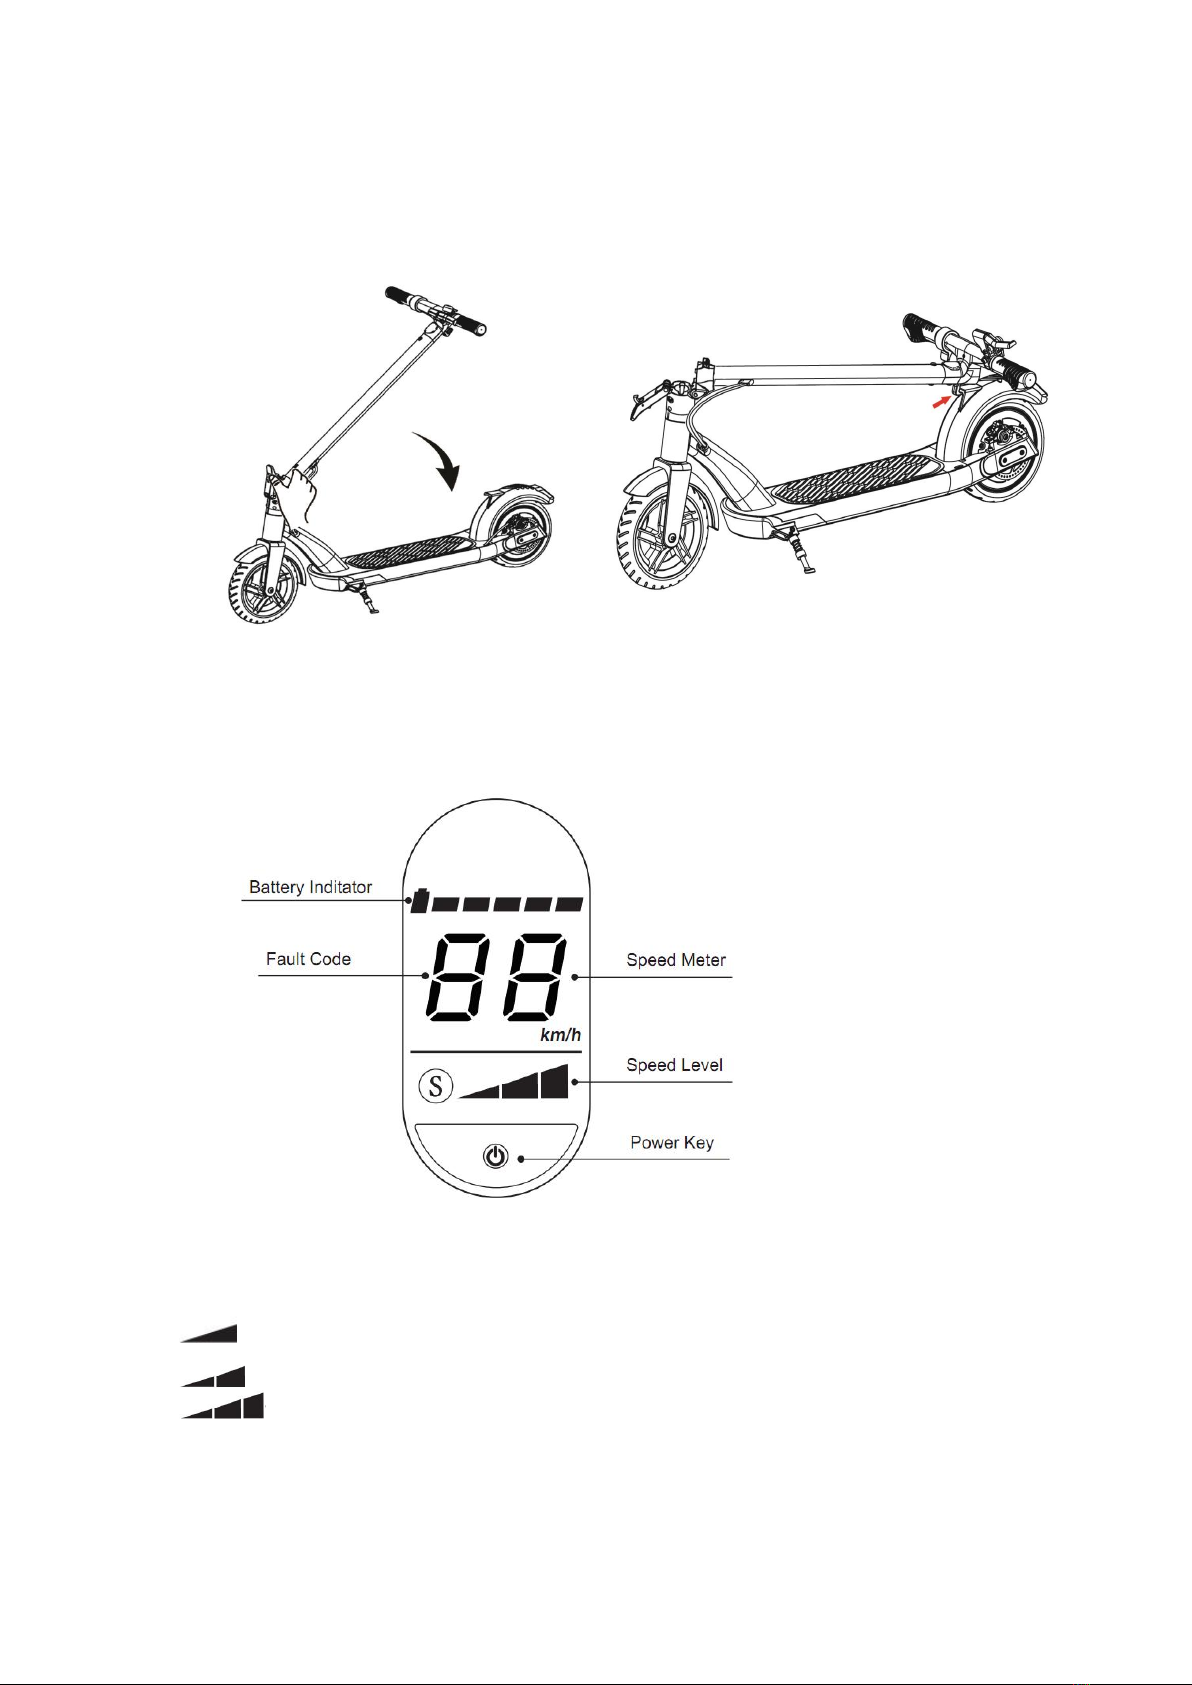
2.3 Folding Instruction
Press the red button, open the folding lever, and then lower down the stem
until the hook on handlebar is clipped into the brake pad.
3. LCD Meter
3.1 Operation of LCD Meter
Speed Meter: display the real-time speed.
“S”: Speed Level
Note: Level1 is pedestrian mode. Under this mode, the maximum speed is
6km/h, and the rear lights are flashing.
Level1--- the maximum speed is 6km/h.
Level2----the maximum speed is 18km/h.
Level3---the maximum speed is 25km/h.

Battery Indicator: each bar means 20% of the full battery capacity.
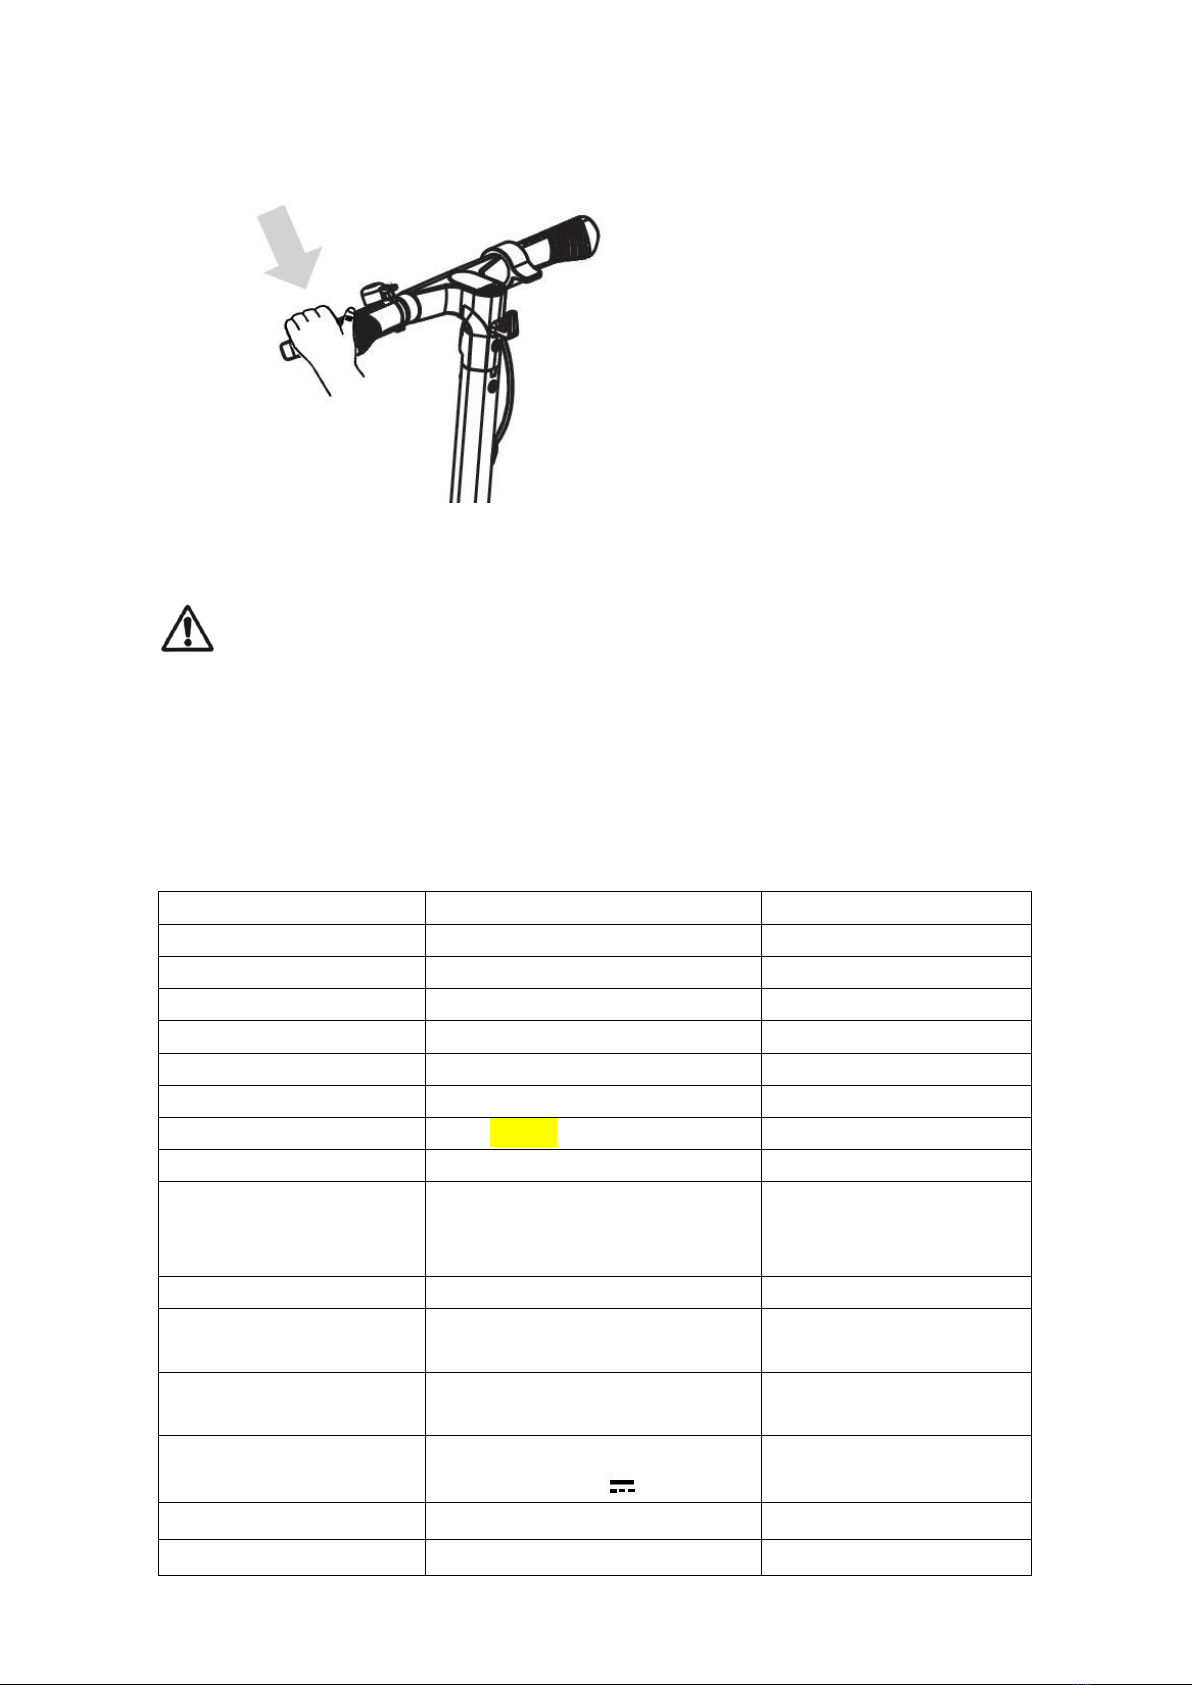
Power Key: It is a muti-functional button.
-Long press it to turn on/off the scooter.
-Short press it to turn on/off the front light and rear light.
-Double press it within 1 second to switch between different speed levels.
3.2 Fault Code
3.3
Code
Diagnosis
E1/F1
Brake error--- Replace brake dial to test, it is a dial
fault if no error is reported again. Check whether the
dial wire is plugged correctly and dial hall output
voltage is abnormal.
E2/F2
Accelerator error--- Replace accelerator dial to test,
it is a dial fault if no error is reported again. Check
whether the dial wire is plugged correctly and dial
hall output voltage is abnormal.
E3
Communication error--- Replace a new connecting
line of instrument and controller, if no error is
reported again, the connecting line is short-circuited
or disconnected, just replace it; if the error is still
reported, it is considered to be hardware fault of
instrument or controller, interchange new
instrument or new controller to test and find faulty
hardware. Then arrange after-sales repair.
E4
Over current protection--- If E4 error is reported
continuously, it is considered to be hardware fault of
controller. Just go after-sales repair process.
E7
Hall error--- Motor Hall error, check whether the hall
wiring is loose, if the wiring is good but the error is
still reported, the motor hall is damaged and needs
to be repaired.
E9
Hardware error--- Controller’s fault, repair it if it still
reports error after restart many times.

4. GUIDE FOR SAFE RIDING
4.1 Precautions For Civilization/Safe Riding
-Traffic in the city has many obstacles to cross such as curbs or steps. It
is recommended to avoid obstacle jumps. It is important to anticipate
and adapt your trajectory and speed to those of a pedestrian before
crossing these obstacles. It is also recommended to get out of the
vehicle when these obstacles become dangerous due to their shape,
height or slippage.
-Take the time to learn the basics of the practice to avoid any serious
accident that can take place in the first months
-Get closer to your seller so he can refer you to an appropriate training
organization;
-Avoid high traffic areas or overcrowded areas;
-In any case, anticipate your trajectory and your speed while respecting
the code of the road, the code of the sidewalk and the most vulnerable;
-Notify your presence when approaching a pedestrian or cyclist when
you are not seen or heard.
-Cross the protected passages while walking.
-Any other relevant information may be added, at the manufacturer's
discretion.
-In all cases, take care of yourself and others
-Do not divert the use of the vehicle
4.2 How to Ride
- Turn on the scooter by long press the Power button on the Meter.
-Put one of your feet onto the footplate, kick the scooter to give it a minimum
speed of 3km/h, and press the accelerator simultaneously, then it runs.
-If you want to slow down the speed or stop, please press the hand brake
lever with your hand.
-The scooter will be powered off automatically when it stays inactive for 10
minutes.
-When you brake, tilt your weight backwards, and so it can reduce the
risk of forward turning over.
-Braking distances are increased in rainy weather or when wheels are
wet.
5. PARAMETERS
Style
Parameter
Remark
Net Weight
13.5kgs
Unfolded Dimension
109*47*112cm
Folded Dimension
109*47*45cm
Maximum Load
100kgs
Maximum speed limit
25km/h
Do not exceed
Range
25 km
Battery
36V, 7.8AH Lithium-ion
Power requirement
AC100-240V/50-60 HZ
Global compatible
Wheel
Front: 8.5inch inflatable tire
Rear: 8.5inch hub motor with
inner honey comb tyre
Motor:
350Watt
Transmission frequency
band
2402MHz-2480MHz
Maximal transmission
power
3.24 dBm
Charger
AC input 100-240v 50/60HZ
DC output 42V 1.5A
Charging time
5-6 hours
Waterproof Level
IPX4
6.USAGE OF BATTERY
This section mainly describes the charging method of Thorpe electric scooter,
how to maintain the battery, some security issues, and battery specifications.
6.1 Battery Power
For users' safety, and the maximum extent of prolonging the battery life and
improved battery performance, please adhere to the following operations for
using the battery.
Do not use the battery or the device in the following cases:
-The battery gives off a smell or the temperature inside the appliance is too
high.
-Leaks on the deck of the scooter.
If in doubt please contact with the retailer.
Important:
- The battery must only be removed and changed by an official repair center.
No attempt should be made to dismantle the product and repair it yourself. Any
attempt to do so will invalidate the warranty.
- In case of battery leakage, do not touch it.
- Keep children away from the battery if it is leaking or displays any other
problems.
- Batteries contain dangerous substances. Do not attempt to open the battery
or to insert any solid or liquid substance into the battery or into the body of the
appliance.
- Using the battery is subject to authorization by the local authorities.
6.2 Specifications:
Contents
Parameters
Battery
Lithium Battery
Charging time
5-6h
Voltage
36V
Capacity
7.8 AH
Working Temperature
-15℃~50℃
Charging Temperature
0℃~40℃
Storage Time(-20℃-25℃)
12 months
Storage Humidity
5%-95%
Lithium battery contains dangerous articles. Ship
lithium battery only according to the local law.

6.3 Charging Process
-Ensure that the scooter is switched off before charging.
-Ensure charging port is dry.
-Open the charging port.
Plug the charging cable into the Thorpe Electric Scooter, then connect
the cable with the power supply (100V~ 240V; 50, 60 Hz).
The red light indicates that it has begun to charge, otherwise check
whether the cable is connected.
-When the indicator light goes from red to green, it indicates that battery
is fully charged. This takes approximately 3 hours. Stop charging
when the LED turns green; charging the battery for too long time will
reduce its lifetime.
-The protective cover is used to protect the charging port from splashing
water or dust. Be sure to replace the cap after each charging and before
each use.
-Only use the charger supplied with your electric scooter. Using a
charger other than supplied will invalidate the warranty.
-To optimize the performance and lifetime of your electric scooter battery,
fully charge the battery before using it for the first time and fully charge it
once a month.
-Do not cover the battery compartment or the charger. There must be

good ventilation conditions at all times during charging.
-The charging environment must be clean. Ensure there are no traces of
damp or water in the electric socket before plugging in.
-Ensure you use a standard socket.
7.SHIPPING AND MAINTENANCE
Thorpe electric scooter requires the user to do routine maintenance.
This chapter describes maintenance steps and important operating tips.
Before you perform the following operations, ensure the power and charging
cable are disconnected. If the battery is charging, the operation is not allowed.
7.1 Clean Thorpe electric scooter
Disconnect the charger and turn off Thorpe electric scooter.
Wipe the cover.
Avoid using water or other liquids on the Thorpe electric scooter for
cleaning. If water or other liquids seep into Thorpe electric scooter, it will
cause permanent damage to the internal electronics.
7.2 Store Thorpe electric scooter
Always power off the switch whenever the scooter is not in use.
Fully charge your battery before storing.
If you store Thorpe electric scooter more than one month, please charge it
at least every three months.
If the storage ambient temperature is below O℃, please do not charge.
You can bring the Thorpe electric scooter into a warm environment (above
10 ℃) for charging.
To prevent dust from entering the Thorpe electric scooter, you should cover
your Thorpe electric scooter.
Store Thorpe electric scooter indoors in a dry and suitable temperature. If
you do not use it for a long time, please do not connect the power.
7.3 Maintenance
●Check that all parts are sufficiently tightened and the handlebar is securely
fixed.
●All nuts and bolts may lose their tightness over time, please check the
tightness of all nuts and bolts every time you ride.
●The wheels and wheel bearings may become worn out with natural wear
and tear over time. Please check the condition of the wheels and bearings
regularly and replace them when necessary. Please contact the place of
purchase for new wheels.
●Do not use attachments not included with the scooter. Do not attempt to
make any modifications to the scooter by yourself.

8. TROUBLESHOOTING
Problem
Possible Cause
Solution
Can’t not be powered on
1. Battery has no power
2. Wires of connectors
are loose or unplugged
1. Charge the battery
2. Check all wires and
connectors to make
sure they are
connected and secure.
Can’t not charge
1. The charger is not
connected well to the
AC outlet or the
scooter
2. The charger is
defective
1. Check the connection
2. Replace the charger
Scooter suddenly stops
working
1. Overload protection
(such as steep incline
or too heavy rider).
2. Battery has no power.
3. Wires of connectors
are loose or unplugged
1. Turn off the scooter,
and turn it on again.
2. Charge the battery
3. Check all wires and
connectors to make
sure they are
connected and secure.
Table of contents
Other Smyths Toys Scooter manuals


