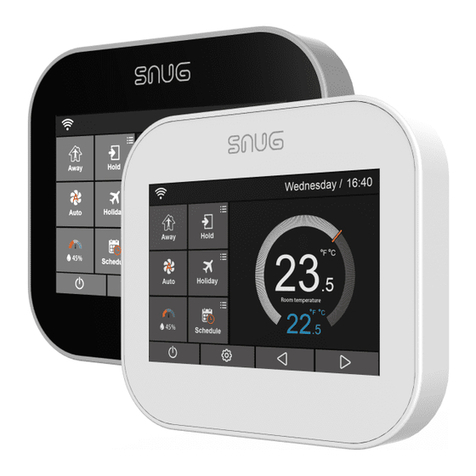
snug SnugStat User manual

SnugStat Duo
2 Channel Wi-Fi Thermostat
Instruction Manual

32
WELCOME
The Snugstat Duo 2 Channel
Wi-Fi Thermostat makes smart,
high performance heating,
easier than ever.
This guide tells you everything
you need to know.

4 5
CONTENTS
Pairing with SnugStat App 10
LCD Display 17
Operation of Main Display Icons 19
Schedule 20
Programming Timer Mode Schedule 22
Copy To 23
Hold Mode 24
Boost Mode 25
Holiday Mode 26
Humidity Sensor 27
Away 27
Feature Settings Explained 28
Operation of Feature Settings 33
Language & Time Zone Selection 34
Clock Setting 35
Backlight Setting 35
Standby Screen 36
Screen Lock 37
Temperature Format 37
Temperature Limit 38
Away 38
Defrost 39
Sensor Selection 40
Floor Temperature Limit 40
Humidity Sensor Calibration 41
Open Window Function 41
Optimum Start 42
Daylight Saving Time 42
System Information 43
Reset to Factory Settings 44
Installation 44
Wiring Diagrams 48
Recalibration 53

INTRODUCTION
76

98
INTRODUCTION
What is a Programmable Thermostat?
A programmable room thermostat is a device that combines the functions
of both a room thermostat and timed heating controller into a single unit.
The programmable thermostat is used to switch the heating system in
It’s important to note that adjusting a room thermostat to a higher setting
will not make the room heat up more quickly. How quickly the room heats up
depends on the design of the heating system and heat-loss of the building.
18°C, and then adjust the temperature gradually up or down by one degree
each day until you are comfortable with the temperature. The higher a
temperature setting required will result in more energy and fuel cost.
temperature, so they must not be placed in a cupboard or covered by
curtains or blocked by furniture. Radiant heat created by the sun, shining
directly onto the thermostat through a window and heat from nearby
correct temperature in the room.
Our SnugStat Duo model allows for the use of one thermostat when the
both a 13A and 5A relay, allowing for this multifunctional control of more
power consuming items.

1110
02
03 A countdown will then begin.
04 On your thermostat, press the icon.
05
a few moments to pair.
On your app, select ‘Heating Thermostat’, then ‘Add Device Location’.
07 Then select a pre-written room name or create your own.
08
seconds before connection is fully established.
09 The app will display ‘Is Connected to the Wi-Fi’ and the thermostat will
read ‘App Matching Successful’.
GETTING STARTED
Pairing the SnugStat Thermostat with the
SnugStat App
Download the free SnugStat App from the Apple Store or the Google Play
Store by searching SnugStat.
01 Open the SnugStat App and register your account.
02 Login to your account.
03 Press the Icon.
04 Select your preferred pairing mode from the list below:
01
Device Location’.

1312
Scan QR Code
01 On the SnugStat app, select ‘Scan QR Code’ and then ‘Add
Device Location’.
02 Allow the SnugStat app camera access.
03 On the thermostat, press the icon.
04 Go to Page 5 and select ‘System Information’.
05 Align the QR code on the thermostat screen inside the square on
Select ‘Heating Thermostat’, then ‘Add Device Location’.
07 Then select a pre-written room name or create your own.
08
seconds before connection is fully established.
09 The app will display ‘Is Connected to the Wi-Fi’ and the thermostat will
read ‘App Matching Successful’.
Manual Entry
01
you to enter your thermostats MAC address.
02
03 Go to Page 2 and select ‘Network Setting’.
04 Select your Wi-Fi network and enter your Wi-Fi password, then select
‘Join’.
05 Press and hold your connected Wi-Fi network, this will appear at the
top of the list.
Your MAC address is on this screen, enter the number into the ‘MAC

1514
Note: DO NOT enter the colons – enter as just the numerical
digits with no spaces.
07 Select ‘Add Device Location’.
08 Then select a pre-written room name or create your own.
09
seconds before connection is fully established.
10 The app will display ‘Is Connected to the Wi-Fi’ and thethermostat
will read ‘App Matching Successful’.

16 17
LCD DISPLAY
01 Temperature Hold
02 Adjusting the optional settings.
03 Day indicator and clock.
04 ‘Away’: Means the thermostat is
maintaining a lower temperature
05 Boost Mode- Select to open the
Boost menu
Air humidity.
07 Power ON/OFF.
08 ‘Holiday’: Displayed when
thermostat is in holiday mode.
09 ‘Schedule’: Programming your ON/
OFF heating cycles.
10 Setup button.
11 Adjusting the temperature setting.
12 or turning a page.
13 Target temperature.
14 Actual temperature display.
15 Temperature reading is in C
or F.
means the heating is ON. If there is
17 Timer ON
07 08 09 10 11 12
04
13
14
15
17
05
01 02 03

OPERATION OF MAIN
DISPLAY ICONS
19

2120
07
to set the hour.
08 Press the second column and use the scroll function or the
icons to set desired minute.
For Example: The Setting Time is 04 (Hour):00 (Minute)
09 Press the third column of ‘Temperature’, use the scroll function or the
icons to set desired temperature.
For Example: The Setting Temperature is 20C
10 Repeat these steps for Day, Evening, Night.
11 Once all steps are complete press the icon.
12 Press ‘Day / Days’ and input the time and temperature settings.
13 Once complete press the icon.
Your programming schedule is now complete.
OPERATION OF MAIN
DISPLAY ICONS
Schedule
Programming Heating Mode Schedule
This is the default mode. If you would like to change this, turn to page 28.
01 Press the ‘Schedule’ icon on the main screen.
02 Press the ‘Heating’ option.
03 On the schedule page, select the days you wish to edit.
04 There are four time periods that can be selected:
Morning/Day/Evening/Night
05 Each Period has ON/OFF icon /
Morning:/ON

2322
Programming Timer Mode Schedule
01 Press the schedule icon on the main screen.
02 Press the ‘Timer’ option.
03 On the schedule page, select the days you wish to edit.
04
05 You can use the scroll function or the icons to select your
selected on the right. Select the time of day from the menus across
the top, these are a guide, and can be set to any allotted time.
Once complete press the icon.
If you would like to modify your schedule, visit page 28.
Copy To
The ‘Copy To’ feature allows you to copy times and schedules across
multiple days, without inputting the data again.
01 To use this, simply select your time and press ‘Copy To’. Then select
your day/sequence of days you wish to copy the same time to.

2524
Boost
The boost function allows you to override the timer function of the
thermostat outside of the programmed times.
steps:
01 Press the ‘Boost’ icon
02 Select your desired ‘Boost’ mode ON or OFF.
03 Press ‘Hour’ and use the icons to set the hours desired.
04 Press ‘Minutes’ and use the icons to set the minutes desired.
05 Press the icons to save and return to main screen.
The ‘Boost’ time remaining, will be displayed at the top of the screen.
07 To cancel ‘Boost’ press the ‘Boost’ main icon, press cancel and
press the return icon.
Hold
The temperature hold function allows you to manually override the current
is useful for when you want the temperature to remain for a longer period
of time.
01 Press the Hold icon.
02 Press the First column of ‘Hold Temp’, use the scroll function or the
icons to set the desired Hold Temperature. (Temperature Range
5C-35
03 Press the Second/Third columns of Hour/Minute, use the scroll
function or the icons to set the desired ‘Hold Time’.
04 Press the icon to save and return to main display, or click
‘Cancel’ to delete the setting and then back.
You will see the ‘HOLD’ time remaining: **:** indication is displayed on
screen. The time will count down for the set duration and then revert
to the normal program setting.

2726
Holiday
The SnugStat Duo Wi-Fi Thermostat will maintain the defrost preset
temperature for the duration of the holiday and will then automatically return
to the programmed mode on your return.
01 Press the ‘Holiday’ icon on the main screen.
02 Select the holiday OFF/ON icon.
03 Under Holiday Start, press the column of Day/Month/Year and use the
scroll function or the icons to set the Day/Month/Year values.’
04 Under Holiday End, press the column of Day/Month/Year and use the
scroll function or the icons to set the Day/Month/Year values.
05 Press the icon twice to save and return to the screen or press
to cancel.
The screen shows; ‘Holiday until’ **/** **/**
Note: Set your thermostat to end the day before you come home, as
the timer will end at 23:59 that night, ensuring you come home to a
warm house.
Humidity Sensor
Selecting the Humidity Sensor option on the main screen will show
Away
The ‘Away Mode’ should be used for short periods away from the
property. This overrides any programmes and settings and will only turn
the heating ON should the room temperature drop below the set Away
temperature, this is preset to 7
page 38 for details.

2928
FEATURE SETTINGS
EXPLAINED
The following settings are optional and in most cases do not need
adjusting.
Schedule: The SnugStat Duo thermostat provides three programming
modes and can also be set to a non-programmable mode:
periods for the weekday and 4 time periods for the weekend. This is the
preset setting. To change this, follow the below:
01 Press the icon and enter Feature Settings.
02 Find ‘Schedule’ and press it.
There are four options:
7 day programming mode - Can be programmed each day for
4 time periods.
24 hours mode - Every day can be edited for 4 time periods.
Weekday/Weekend - One program can be set for Mon-Fri and another
for Sat-Sun.
None Mode - The controller will maintain the set temperature continuously.
03 Press the icon to the left of the desired icon.
04 Press the icon to save and return to the main screen.
Back Light - Ambient Light Dimming: If this function is enabled, the
internal light sensor will detect when to dim the thermostat display as the
so the SnugStat Duo Wi-Fi Thermostat does not light up the room.
Temperature Format: Selecting between C and F.
This function allows you to increase the switching
Switching Time Delay: To prevent rapid switching, a switching delay can
be entered. This function delays how often the thermostat can call for heat.

3130
Output Delay: This setting is to stop rapid switching, if set to 15min, once
the thermostat stops calling for heat it will not switch on for 15 minutes.
Away: This is the temperature maintained when the thermostat is turned
ON. The range is 7-35. The default is 7.
Defrost: This is the temperature maintained when the thermostat is turned
OFF. The range is 5-10C. The default is 5C and is suitable for most
applications.
Sensor Selection: You can select which sensor should be used. You can
remote air sensor is only used in bathrooms and wet rooms because the
thermostat is not IP rated. The remote air sensor can’t be used in tandem
Open Window Function:
1 minute. Sensor selection should be set at built in or remote air to operate
correctly.
Floor Temp Limit:
C
(default is 27
Note: The Air Sensing Only Mode must not be used for controlling
Optimum Start: This function will calculate how much time the heated
space needs, to ensure the required temperature you have set, at the time
you have set, is achieved (assuming the heating system has been installed
21C at 8am, the thermostat will calculate how much time in advance, the
system needs to operate to achieve this setting. This time is calculated by
the thermostat in minutes per 1C room temperature rise.

32
OPERATION OF
FEATURE SETTINGS
33

3534
OPERATION OF
FEATURE SETTINGS
Language
01 Press the icon and enter Feature Settings.
02 Press ‘Language’ to enter the setting interface.
03 Select your desired language.
04 Press the icon twice and return to the main screen.
Time Zone Selection
01 Press the icon and enter Feature Settings.
02 Press ‘Time Zone Selection’ to enter the setting interface.
03 Select your desired time zone.
04 Press the icon twice to save and return to the main screen.
Clock Setting
To set the clock, follow these steps.
01 Press the icon and enter Feature Settings.
02 Press ‘Clock’ Setting.
03 Press the column of Day/Month/Year, use the icons to set the
Day/Month/Year values.
04 Press the column of ‘Time’, use the icons to set Hours/ Minutes.
05 Press the icon twice to save and return to the main screen.
Backlight
01 Press the icon and enter Feature Settings.
02 Press ‘Backlight’ and enter Backlight setting.
03 When Ambient Light Dimming is in mode, this automatically
adjusts the backlight brightness.

3736
04 When Ambient Light Dimming is in mode, you can manually
adjust the backlight brightness.
05 Use the icons to adjust to the desired brightness..
Press the icon twice to save and return to the main screen.
Standby Screen
01 Press the icon and enter Feature Settings.
02 Press ‘Standby Screen’ and enter setting interface.
03
standby screen time.
04
to the left of the ‘10 Min’.
05 Press the icon twice to save and return to the main screen.
For complete darkness after standby, set ‘After Standby, Black
Screen?’ to . If you would still like a dimmer version of
the screen, set it to
Screen Lock
01 Touch the icon and enter Feature Settings.
02 Press ‘Screen Lock’ and enter setting interface.
Lock Pin ON/OFF Icon / options
03
04 Press the icon twice to save and return to the main screen.
05 The screen will only lock once it goes into standby mode.
The screen will stay in lock mode until the lock function
is disabled.
Temperature Format
01 Press the icon and enter Feature Settings.
02 Find ‘Temperature Format’ option and press.
03 There are two options C and F.

3938
04 Press the icon to the left of C or F.
05 Press the icon twice to save and return to the main screen.
Temperature Limit
01 Press the icon and enter Feature Settings.
02 Find ‘Temperature Limit’, press it and enter setting interface.
03
adjust Minimum Temperature to 5-34°C.
04 Press the second column, use the scroll function or the icons to
05 Press the icon twice to save and return to the main screen.
Away
The Away function is activated when the Away icon on the main screen
is pressed. The thermostat will automatically drop to preset Away
temperature, when activated. To adjust this see below:
01 Press the icon and enter Feature Settings.
02 Find ‘Away’ option and press it.
03 Use the scroll function icons to adjust the temperature.
04 Press the icon twice to save and return to the main screen.
Defrost
The thermostat will automatically enter the ‘Defrost’ mode when the room
temperature drops below the preset temperature when set to
01 Press the icon and enter Feature Settings.
02 Find ‘Defrost’ and press it.
03 Use the scroll function or icons to adjust the temperature.
04 Press the icon twice to save and return to the main screen.
05 Note:
although this is NOT RECOMMENDED
Other manuals for SnugStat
2
Table of contents
Other snug Thermostat manuals
Popular Thermostat manuals by other brands
Venstar
Venstar TSTATEZ owner's manual

Trane
Trane Schlage LiNK TZEMT400BB32MAA Installation and setup guide

Aube Technologies
Aube Technologies TH109 user guide
Airxcel
Airxcel 9630-352 Installation, operation & application guide

Gemtech
Gemtech GT5020 install guide

Honeywell
Honeywell Super Tradeline T874G installation instructions