SNUPI Technologies WallyHome User manual
Product Manual
Version 1.0

WELCOME TO WALLYHOME:
The wireless sensor network that allows you to
monitor the moisture, temperature and humidity
levels throughout your entire home. We are
excited that you have decided to protect your
home using Wally.
YOUR WALLYHOME SYSTEM INCLUDES:
These pieces are all you need to get started.
Hub x 1 Sensor x 6
Ethernet cord x 1 Power cord x 1

COMPATIBLE WITH:
WallyHome is compatible with Internet Explorer 10+ and the most recent
versions of Chrome, Firefox and Safari. To download the most recent
version of your browser, visit www.wallyhome.com/support/downloads/
REQUIREMENTS:
1. Wally is intended for indoor use only.
2. Wally should be used in temperatures ranging from 0°F to 140°F.
Prolonged exposure of Wally to extreme temperatures will degrade
its performance and lifespan.
3. Wally requires a working DSL/cable modem, or LAN-based,
always-on, high-speed Internet connection in your home that is
positioned to communicate reliably with the Wally Devices. If your
modem is not a modem/router combination, you should install a
router between your modem and your computer, to share the
Internet connection with your Wally Hub. Visit
wallyhome.com/support/ for a solution to limited access to
Ethernet ports.
4. Wally is most compatible with the following browsers: Internet
Explorer 10+ and recent versions of Chrome, Firefox and Safari.
To update your brower, visit wallyhome.com/support/downloads/
5. Wally requires that you establish an account at wallyhome.com
6. Some Wally functionality requires mobile clients such as a supported
phone or tablet.
7. Wally requires an Ethernet connection to your router or other
Internet connection.
8. Wally must be connected directly to a 120v grounded wall outlet.
This Requirements Policy is part of the Terms of Use between you and
SNUPI (the “Terms”). Capitalized terms used in this Requirements Policy
have the meaning given in the Terms.

TO BEGIN:
Open a web browser on your computer and go to
www.wallyhome.com/mywally. You will be
presented with the following page:
Requirements:
Welcome to Wally. Lets get started.
Create a Wally Account
HOW IT WORKS MY WALLY BLOG BUY NOW
Email
Retype Email
Password
Retype password
Mobile
Property Name
Suit or Apt
City
State Zip
All fields are required
Zip
Full Name
Address
Suit or Apt
City
State Zip
Same as mailing address
I accept the Terms of Use
Property Name
Address
Suit or Apt
City
State
Create My Account
HOW IT WORKS MY WALLY BLOG BUY NOW
Email
Password
Can't access your account?
Sign in
Create an account
Click on the “Create
an Account” button.
You will be redirected
to this page:
Create an Account
Enter in your
information and then
continue by clicking the
orange “Create an
Account” button. You
will be a directed to a
page allowing you to
add additional contacts.
Set Up Alert List
Add any additional contacts that you would like alerted should Wally detect a
hazard or conditions that require maintenance. You have the option to designate
contacts as “Primary” or “Secondary”. Primary contacts will be alerted to
impending hazards, as well significant changes in temperature or humidity, which
should be monitored for potential mold growth.
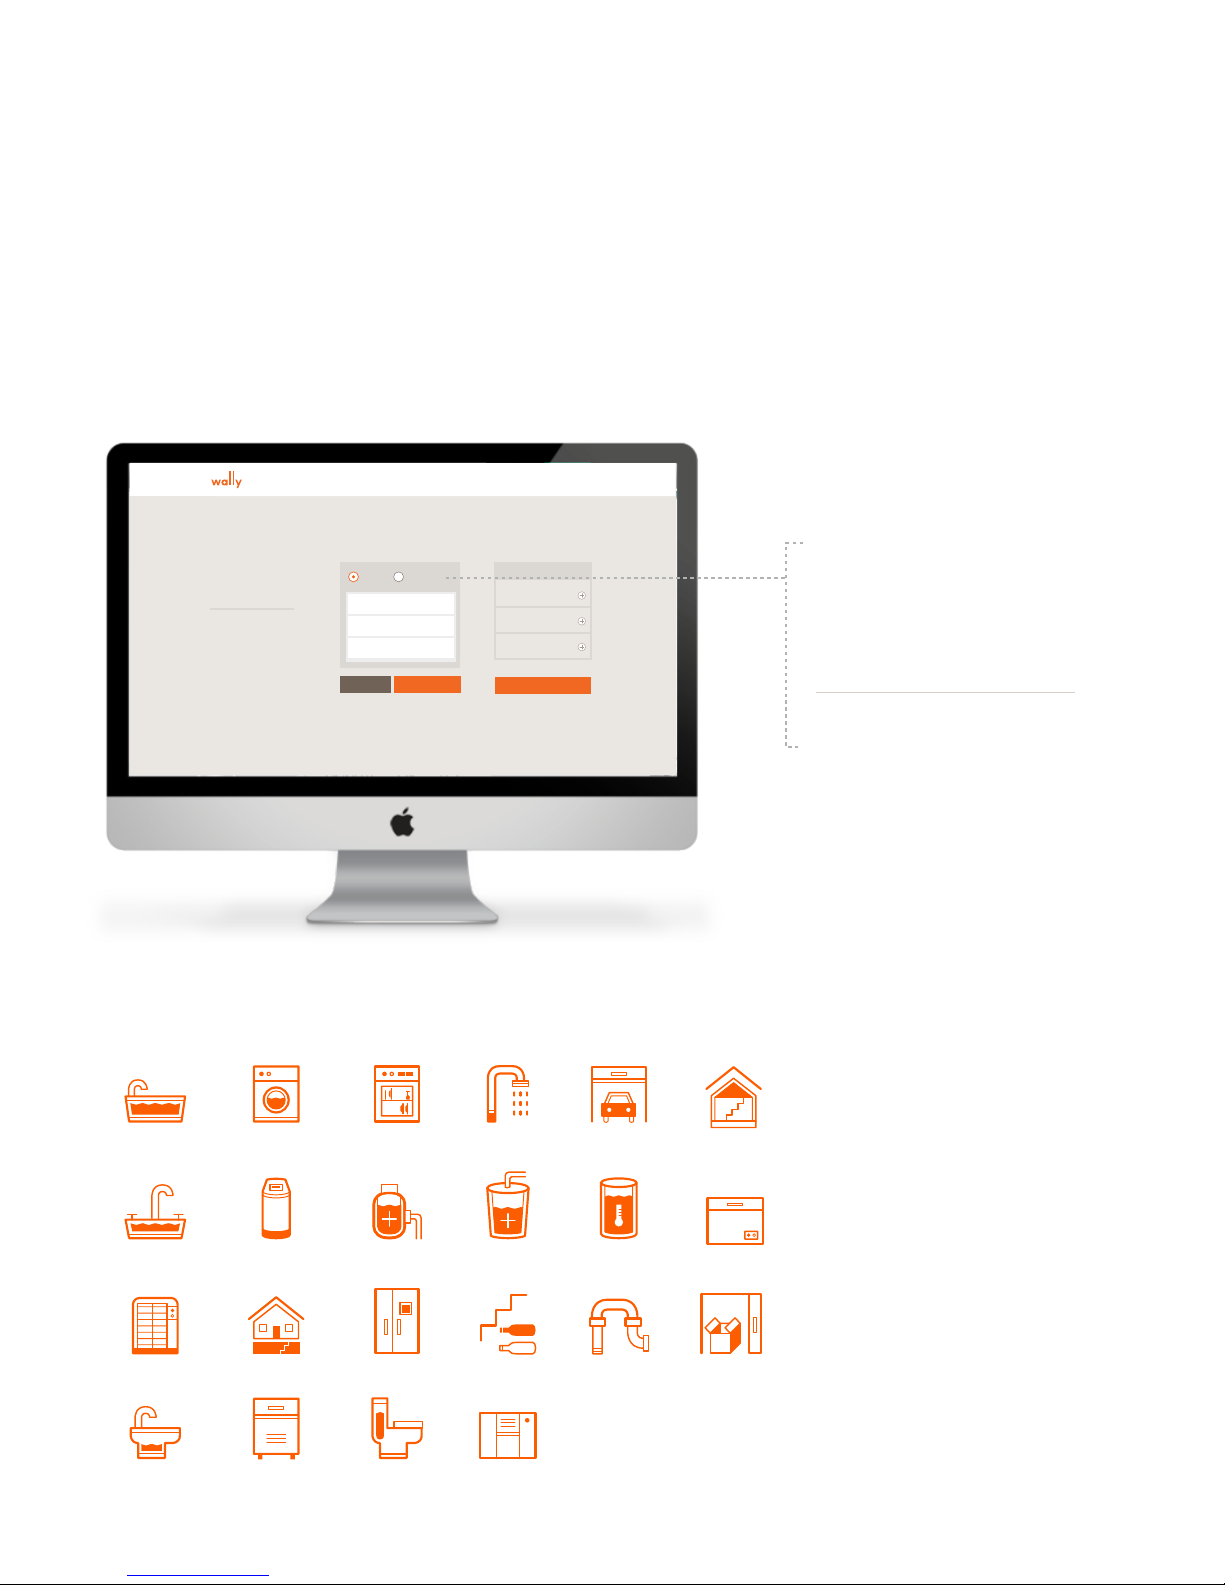
The icons on this page
represent commonly
chosen locations to
place Wally sensors.
SIGNOUT NEED HELP ?
Full Name
Email Address
Mobile Phone
Set Up Alert List
Primary Contact Primary Secondary
Secondary Contact
Receives all Wally activity
alerts via text and email.
Receives only a text alert in
the case of an emergency.
Cancel Add Continue
Alert list
Contact 1
Type
Contact 2
Type
Contact 3
Type
Primary contacts
may be alerted via
email, text or push
notification.
Secondary contacts
will only receive text
messages if a sensor
detects moisture.
BATHTUB WASHING
MACHINE
DISHWASHER SHOWER GARAGE
AIR CONDITIONER BASEMENT REFRIGERATOR WINE CELLAR PIPES
SINK WATER SOFTENER POOL PUMP SUMP PUMP WATER HEATER
BIDET ICE MAKER TOILET HUMIDIFIER
STORAGE
ATTIC
FREEZER
Plan of Attack

Next, you will have the opportunity to “plan your attack.” On this set-up page,
you will be able to designate where each sensor will go within your home.
Simply click on : One of the tiles1and then customize the floor and specific
room2 to make the reading applicable to your home. Finish by clicking the
orange “Add to My Locations3” button. This will add the tile to the right column
titled “My Locations4”.
Once you have added all six locations to “My Locations” Click the grey “Continue”
button to finish planning your attack.
Set Up Sensors
You know your home better than we do, but here are some suggestions we have for where you might place your sensors.
Consider the age of the appliances and the finishes and valuables stored around them when making your choices.
Suggested Locations
Sink WC Storage Room
Wine Cellar
Sink Pipes AC Fridge
SIGNOUT NEED HELP ?
Continue
My Locations
North Sink
Kitchen
Water Heater
Garage
Sensor 3
Location
Sensor 4
Location
Sensor 5
Location
Sensor 6
Location
Simply click on the icon
of each area that you’d
like to place a sensor
and then use the drop
down menus to
designate the floor and
room for each sensor.
Use this page to plan
where each of your six
sensors will be placed
throughout your home.
Sink WC Storage Room
Wine Cellar
Main Floor
Location
Add to my sensor location
Keep your wine at optimal conditions with
Wally. Maintain the perfect flavor by keeping
your cellar at 70% humidity and 45°-65°F.
Doing so will prevent oxidation from
damaging your wine.
Source: http://www.kenswineguide.com/wine.php?page=76
Wine Cellar
Set Up Sensors
You know your home better than we do, but here are some suggestions we have for where you might place your sensors.
Consider the age of the appliances and the finishes and valuables stored around them when making your choices.
Suggested Locations
Sink WC Storage Room
Wine Cellar
Main Floor
Location
Add to my sensor location
Keep yourwine at optimal conditions with
Wally. Maintainthe perfect flavor by keeping
your cellar at 70% humidityand 45°-65°F.
Doing so will prevent oxidationfrom
damaging your wine.
Source: http://www.kenswineguide.com/wine.php?page=76
Sink Pipes AC Fridge
Wine Cellar
SIGNOUT NEED HELP ?
Continue
My Locations
North Sink
Kitchen
Water Heater
Garage
Sensor 3
Location
Sensor 4
Location
Sensor 5
Location
Sensor 6
Location
01
03
04
02

Now that you have planned your attack, connect your Hub to your router with
the orange Ethernet cord provided. Next, using the white power cord, connect
the Hub directly into an outlet. Avoid using a power strip whenever . Once both
You will see a spinning orange wheel and a message stating “Listening for a
signal directly from the Hub.”
At this point, you may continue installation on a mobile device. If you prefer not
to move to a mobile device, simply press the grey button labeled “Continue” and
proceed as directed. If you prefer to continue on a mobile device, please skip to
page to learn how to access your account on a mobile device and continue
installing sensors.
Once the Hub connects to the network, your installation page will progress to:
Note: It may take a couple
of minutes for the Hub to
connect to the network
and download updates.
Power up
the Wally Gateway
Use Ethernet cable to plug Wally into
your router.
Plug directly into the wall outlet.
Note:
It may take up to two minutes after
the gateway is plugged in for us to
“hear” it.
Animation
SIGNOUT NEED HELP ?
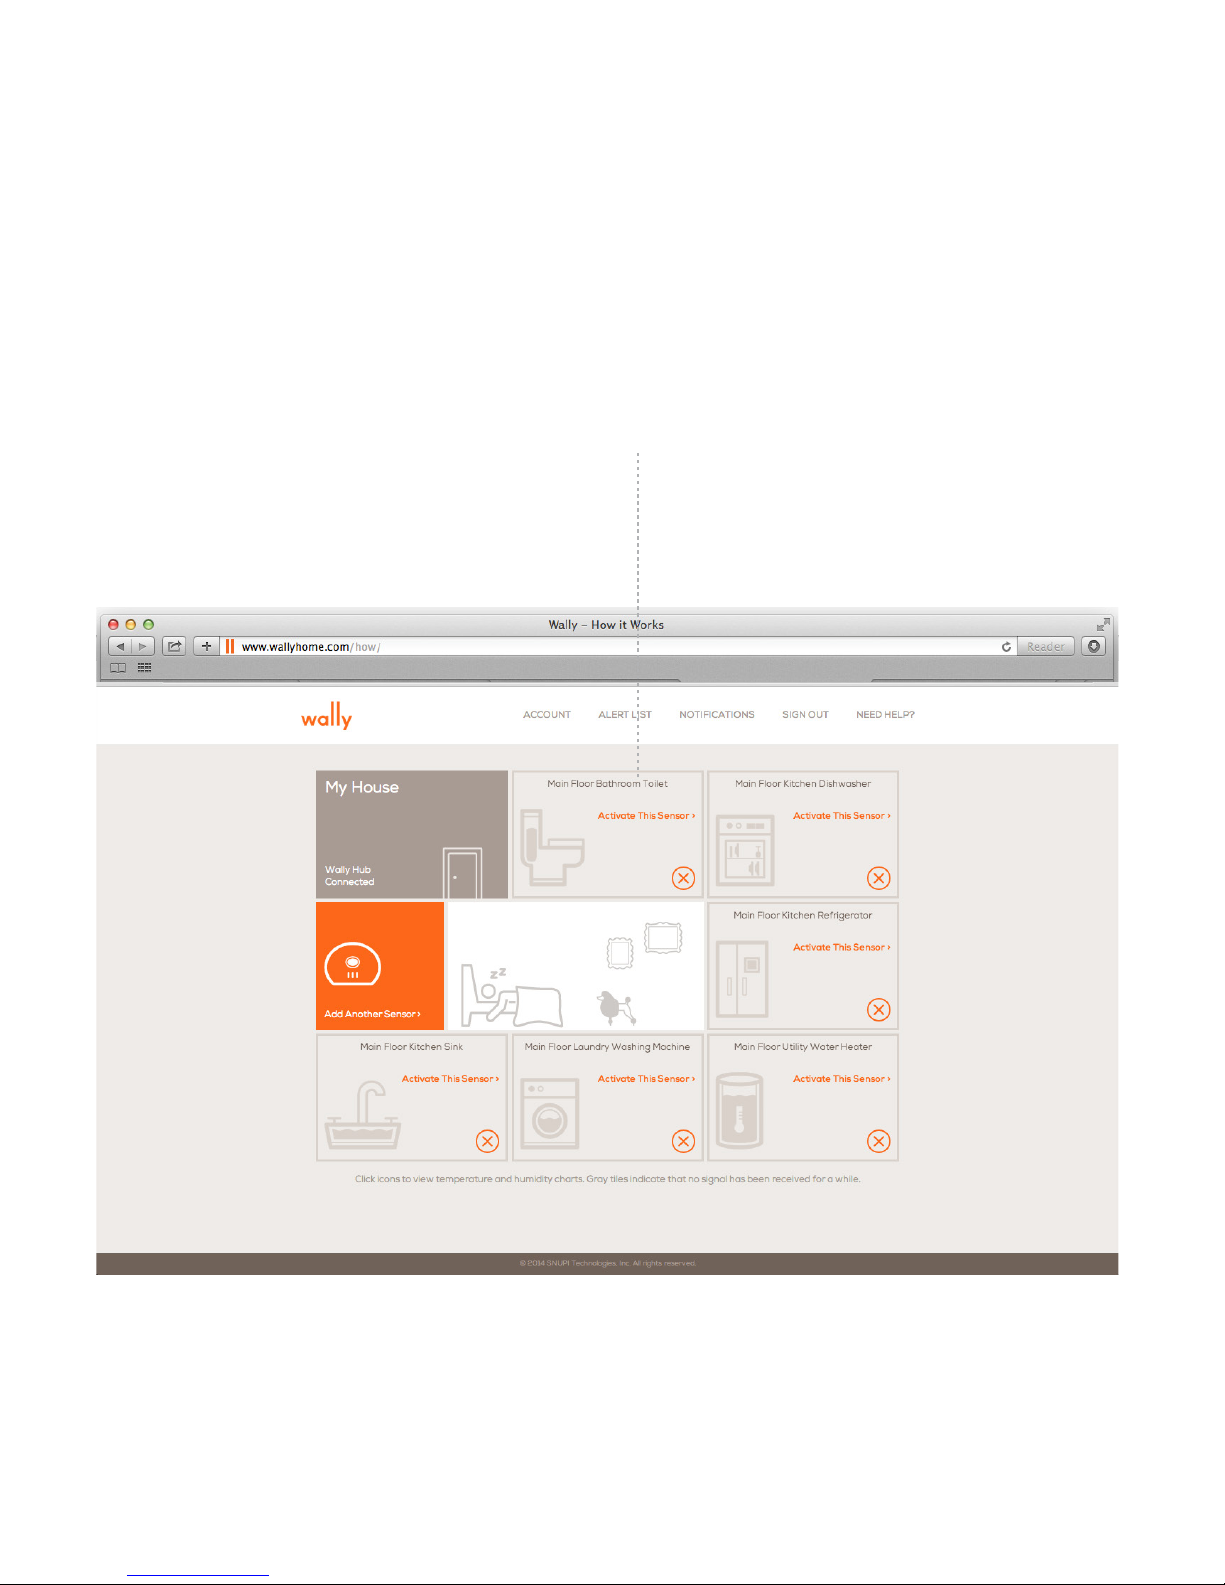
Once you have established your plan of attack and connected your Hub, you will
need to now activate all of your sensors. Each grey tile represents an inactive
sensor on your dashboard. To activate a sensor, click on the orange “Activate
This Sensor” link of the sensor you wish to activate. Once you click this button,
you will be directed to the “Activate a Sensor” page.
My Home
Follow the onscreen instructions in order to activate your sensor.
- Press the button on the sensor so that the lighted ring stays illuminated for
one second and then continues to flash in one-second intervals.
- The screen will display an orange, spinning wheel while the sensor connects
to the Hub.
- Once the sensor connects, a chime will sound and you will advance to the
next page.
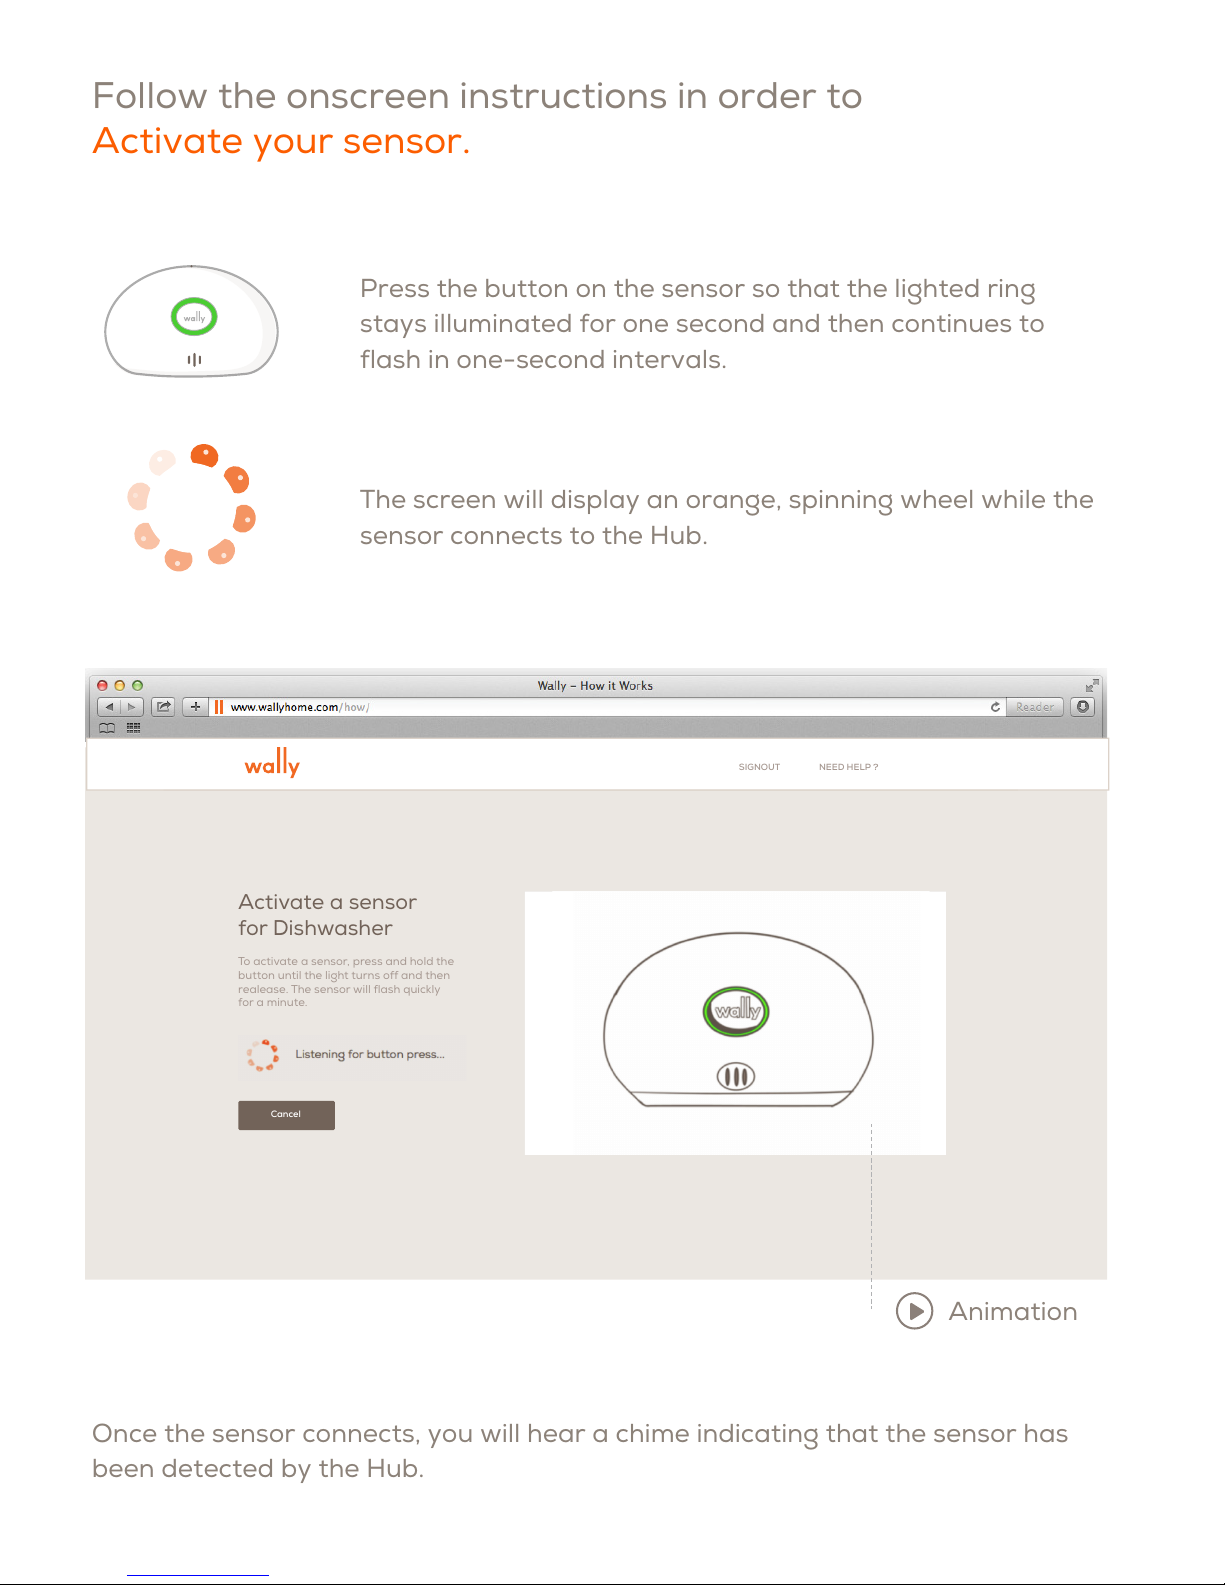
Follow the onscreen instructions in order to
Activate your sensor.
Press the button on the sensor so that the lighted ring
stays illuminated for one second and then continues to
flash in one-second intervals.
The screen will display an orange, spinning wheel while the
sensor connects to the Hub.
Activate a sensor
for Dishwasher
To activate a sensor, press and hold the
button until the light turns off and then
realease. The sensor will flash quickly
for a minute.
Cancel
Animation
SIGNOUT NEED HELP ?
Once the sensor connects, you will hear a chime indicating that the sensor has
been detected by the Hub.

Repeat this step for your remaining sensors.
You will then be directed to a page that displays the recommended location for
the sensor. Once you place the sensor in the desired location, press the orange
“Continue” button to proceed to the next page.
Place a sensor for
Dishwasher
Tip: The best place for a sensor
is under the dishwasher, near
Water Pipes
Done Cancel
Note:Do not place the sensor on a
metal surface.
Animation
SIGNOUT NEED HELP ?
A Wally sensor has been activated.
HOW IT WORKS MY WALLY BLOG BUY NOW
My Wally
Home >
29O l 32%
Wine Cellar
22O l 62%
Washing Machine
22O l 62%
Fridge
Add more sensors >
Once you have installed all
sensors, you can view the
overall health of your home
using your dashboard.

INSTALLING WITH THE IOS APP:
At this point, you can continue installation using the Wally app on a mobile
device. In order to proceed using your mobile device, visit the Apple Store and
download the Wally iOS app.
When the application launches, remember to accept
push notifications from Wally. This will allow you to be
alerted of significant changes detected in your home,
such as a water leak.
Once you have accepted push notifications, the app
will prompt you to log into the account that you have
recently created on the Wally web app.
Switch to mobile device?
To make placing your Wally sensors easier, you can switch to mobile device or download the Wally app to follow installation
instructions from anywhere in your home.
Using your phone or tablet, login to your account at
https://www.wallyhome.com/my/ to continue. OR
Click to continue installing with this device.
Continue
Need the Wally app?
Download below.
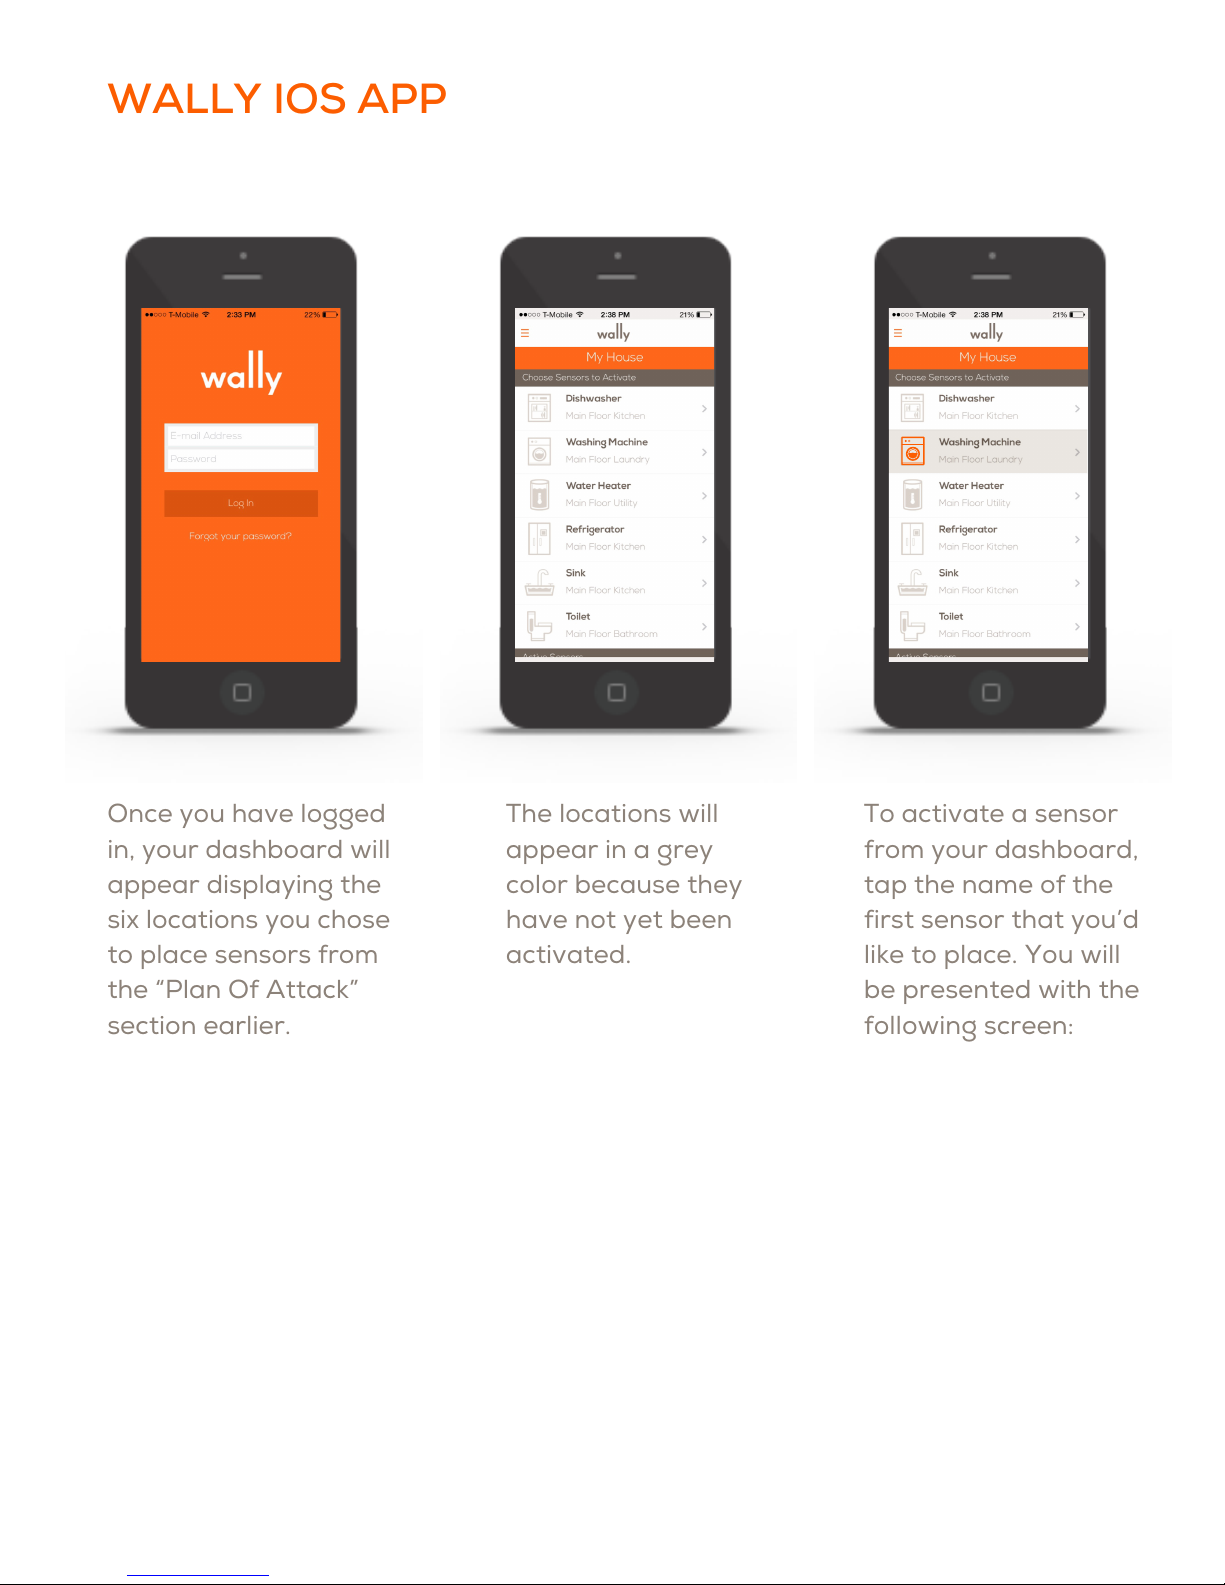
WALLY IOS APP
Once you have logged
in, your dashboard will
appear displaying the
six locations you chose
to place sensors from
the “Plan Of Attack”
section earlier.
The locations will
appear in a grey
color because they
have not yet been
activated.
To activate a sensor
from your dashboard,
tap the name of the
first sensor that you’d
like to place. You will
be presented with the
following screen:

WALLY IOS APP
Press the button on the sensor so
that the lighted ring stays illuminated
for one second and then continues to
flash in one-second intervals.
While the sensor attempts to connect
to the Hub, the mobile dashboard
screen will display a “spinner” to let
you know that the sensor is
attempting connection.
Once the sensor connects, a chime
will sound and you will advance to
the following page.
Because you have already picked the
appliance and location for where you
want to place the sensor, you will be
immediately directed to an
animation of how best to place the
sensor in the desired location.
A steadily blinking label saying
“Wally Sensor Activated” appears on
the top to confirm that the button
press triggered a successful
activation of the sensor.
The animation will loop to make sure
that you understand the best
location for the sensor. After placing
the sensor, press “Done” on your
mobile device. You will be taken
back to your dashboard screen.

The sensor you have just activated
will appear under the “Active
Sensors” banner on the dashboard.
The remaining sensors will remain
under the “Sensors To Activate”
banner.
The “Recent Activity” section will
display a message indicating which
sensor was just paired.
Repeat this process until all the
sensors have been activated.
WALLY IOS APP
Once all of your sensors have been
activated, you can tap on any one of
your active sensors to see the
“Sensor Detail” page.
This will display the humidity and
temperature readings of an
individual sensor. You can also set
the humidity and temperature
thresholds for the sensor.

Should this situation be detected, Wally will send a text message to your primary
and secondary contacts as well as an email and push notification to the primary
contact. These messages will be sent immediately and then repeated after 5
minutes unless acknowledged by one of the contacts.
A contact can acknowledge an alert through a text message or by clicking on the
link sent via email. An alert acknowledgement will be sent to all contacts (primary
and secondary) in order to notify them of who accepted the alert. In addition to
notifications, an alert icon will appear in the dashboard. Once the alert is
acknowledged, the sensor will not be triggered again for 20 minutes.
WALLY IOS APP
Wally Alerts:
WallyHome has three levels of alerts to better reach you and those on your
contact list.
High-priority alerts:
Wally will send a high-priority alert should any of the following circumstances
be detected:
•One of your Wally sensors detects water.

Medium-priority alert:
Wally will send a medium-priority alert should any of the following circumstances
be detected:
Ũƚ ƚÜÂÜÉØƚØÜƚäÁÕØäçØƚÂƚ§çÁªªäúƚä§äƚªÜƚÉçäܪƚÉ¡ƚä§ƚÜÕª¡ªƚØ¢ƚƚ
for an assigned area.
Ũƚ vÉçØƚ)çƚÜäÉÕÜƚÉÁÁçªäªÂ¢ƚôªä§ƚä§ƚÜÂÜÉØÜů
Ũƚ vÉçØƚ)çƚÜäØäÜƚÉÁÁçªäªÂ¢ƚôªä§ƚúÉçØƚÜÂÜÉØÜƚ¡äØƚªÂ¢ƚçÂØÜÕÉÂܪóů
Ũƚ HÂƚÉ¡ƚúÉçØƚp»»úƚÜÂÜÉØÜƚ§ÜƚÜäÉÕÕƚÉÁÁçªäªÂ¢ƚôªä§ƚä§ƚ)çů
Ũƚ HÂƚÉ¡ƚúÉçØƚp»»úƚÜÂÜÉØÜƚ¢ªÂÜƚÉÁÁçªäªÂ¢ƚôªä§ƚä§ƚ)çƚ¡äØƚªÂ¢ƚƚ
unresponsive.
Ũƚ a§ƚ)çƚääÜƚƚp»»úƚÜÂÜÉØƚçääÉÂƚÕØÜÜů
Ũƚ AÉóÁÂäƚÉ¡ƚƚp»»úƚÜÂÜÉØƚªÜƚääů
Should any of these situations be detected, Wally will send an email and a silent
push notification to all primary contacts. In addition, an alert icon will appear on
your dashboard.
Low-priority alert:
Wally will send a low-priority alert should any of the following circumstances
be detected:
Ũƚ HÂƚÉ¡ƚúÉçØƚp»»úƚÜÂÜÉØÜƚ§Üƚƚ»ÉôƚääØúů
Ũƚ p»»úƚÜÂÜÉØÜƚääƚɪäªÉÂÜƚä§äƚØƚÉÂçªóƚäÉƚÁÉ»ƚ¢ØÉôä§ů
Should any of these situations be detected, Wally will send an email to all primary
contacts. In addition, an alert icon will appear on your dashboard.

ALERT THRESHOLDS:
Location Temp: Temp: Humid: Humid: Notes
Appliance Min Max Min Min
Outdoor N/A N/A N/A N/A
Any heated indoor 50F 100F N/A N/A Recommended range location
(bathroom, for preventing freezing pipes
bedroom, etc.) based on indoor temp
Attic 35F 120F N/A N/A Freezing pipes, overheating attic
(can shorten life of shingle)
Crawlspace/basement
35F 100F N/A N/A
Garage 35F 100F N/A N/A
Water heater 35F 100F N/A N/A Freezing pipes
Under sinks 50F 100F N/A N/A
Dishwasher, 50F 100F N/A N/A
washing machine
Refrigerator 50F 100F N/A N/A
Wine cellar 45F 65F N/A N/A

HANGING YOUR HUB:
In order to hang your Hub on a wall, simply remove the back plate on the bottom
of the unit. Place a screw in your wall where you want to hang the Hub. Place the
Hub over the top of the screw and insert it into the larger portion of the wall hole
and then allow the Hub to slide down over the screw in order to lock it in place.
Your Hub should be secure on the wall.
Federal Communications Commission (FCC)
Compliance Notice
This equipment has been tested and found to comply with the limits for a Class B
digital device, pursuant to part 15 of the FCC Rules. These limits are designed to
provide reasonable protection against harmful interference in a residential
installation. This equipment generates, uses and can radiate radio frequency
energy and, if not installed and used in accordance with the instructions, may
cause harmful interference to radio communications. However, there is no
guarantee that interference will not occur in a particular installation. If this
equipment does cause harmful interference to radio or television reception, which
can be determined by turning the equipment off and on, the user is encouraged to
try to correct the interference by one or more of the following measures:
ŨƚƚWÉتÂäƚÉØƚØ»Éäƚä§ƚتóªÂ¢ƚÂäÂÂů
Ũƚƚ,ÂØÜƚä§ƚÜÕØäªÉÂƚäôÂƚä§ƚ×çªÕÁÂäƚÂƚتóØů
ŨƚƚÉÂÂäƚä§ƚ×çªÕÁÂäƚªÂäÉƚÂƚÉçä»äƚÉÂƚƚªØçªäƚª¡¡ØÂäƚ¡ØÉÁƚä§äƚäÉƚô§ª§ƚƚƚƚ
the receiver is connected.
ŨƚƚÉÂÜç»äƚä§ƚ»ØƚÉØƚÂƚùÕتÂƚتÉŶaoƚä§ÂªªÂƚ¡ÉØƚ§»Õů
This device complies with part 15 of FCC rules. Operation is subject to the
following two conditions:
This device may not cause harmful interference.
This device must accept any interference received, including interference that
may cause undesired operation.
Change or modifications that are not expressly approved by the manufacturer
could void the user’s authority to operate the equipment.

Wally Home
SNUPI Technologies
4512 University Way NE
Seattle, WA 98105
t: (206) 673-2707
https://www.wallyhome.com/support/
Table of contents
Popular Accessories manuals by other brands


Byron
Byron DB421E-F quick start guide

Beurer
Beurer HK 123 XXL Instructions for use

Arlec
Arlec MAL343 Series 2 Installation instructions manual

Campingaz
Campingaz Powerbox PLUS 24L 12V/230V Instructions for use

Cuisinart
Cuisinart CEK-30C Instruction booklet

Dometic
Dometic WAECO TC07 Installation and operating manual


