manuals.online logo
Brands
  1. Home
  2. •
  3. Brands
  4. •
  5. Solid State Logic
  6. •
  7. Computer Hardware
  8. •
  9. Solid State Logic C100 HDS User manual

Solid State Logic C100 HDS User manual

Installation Guide
C100HDS Installati n Guide
Digital Broadcast Console
Installation Guide
Version 1.1.0
82BCBG01B
Solid State Logic
SVISINOO UND
Begbroke, Oxford, England, OX5 1 U • +44 (0)1865 842300
320 West 46th Street, 2nd Floor, New York, NY 10036, USA • +1 (1) 212 315 1111
5757 Wilshire Blvd, Suite 401, Los Angeles, CA 90036, USA • +1 (1) 323 549 9090
3-55-14 Sendagaya, Shibuya-Ku,Tokyo 151-0051, Japan • +81 (0)3 5474 1144
7 bis, rue de la Victoire, le Blanc Mesnil, Paris 93150, France • +33 (0)1 48 67 84 85
Via Timavo 34, 20124 Milano, Italy • +39 (0)39 2328 094
Visit SSL at U L: http://www.solid-state-logic.com
© Solid State Logic
All ights reserved under International and Pan-American Copyright Conventions
C100HD, C100HDS, C200HD, C300HD, Blackrock, RIO, NetBridge,
Solid State Logic and SSL are trademarks of Solid State Logic
All other product names and trademarks are the property of their respective owners
No part of this publication may be reproduced in any form or
by any means, whether mechanical or electronic, without the
written permission of Solid State Logic, Oxford, England
Solid State Logic
SVISINOO UND
As research and development is a continual process, Solid State Logic reserves the right
to change the features and specifications described herein without notice or obligation
E&OE
Contents
1 Introduction 2
2 Safety Considerations 3
Safety Warnings 4
CE/ CC/WEEE Certification and Directives 5
3 Pre-Installation Information 6
Services Provided by SSL 6
Physical & Structural Requirements 7
Console Service Access Diagram 8
Blackrock and RIO Service Access Diagram 10
Technical Requirements 11
4 System Components 13
Console rame 13
The Blackrock Processor 15
Remote I/O Rack (RIO) 17
RIO I/O Cards 19
MORSE (option) 21
Script Tray (option) 23
Loudspeaker Shelf (option) 23
T T Video Switcher(option) 23
Phasescope (option) 23
5 Installation Detail 25
Power Supplies 25
Console Connection 27
Console ID Address 27
Sync Source 29
MADI Link Connections 29
I/O – MicAmp Card 31
I/O – Analogue Card 31
I/O – Digital Card 33
RIO GP-I/O 35
ile Management 37
Talkback and Oscillator 39
Mechanical Meters and Phasescope Wiring 41
User Option Switches 43
Redundancy Options 45
Appendices
A Console ootprint 46
Equipment Specifications: – Console 47
– Blackrock 48
– RIO 49
B Connector Details 50
C Connector Pinouts: – Console 51
– RIO 53
D Audio Interfacing 57
E Environmental Specification 59
Page 1
Section 1 – Introduction
The object of this manual is to provide purchasers of the C100HDS™ Console, Blackrock™ processor and RIO
stageboxes with information in the following areas:
• Safety considerations
• Installation requirements
• Items supplied: – Main components and optional items
• Installation: – Physical assembly
– Electrical connections and cabling
– System options
• Specifications and Physical dimensions
• Pinouts of standard connectors
The information provided by this manual is relevant to all of the versions of the C100HDS.
Those aspects of the C100HDS system which may be subject to specific customisation – Master Channel layout and meter
panel as examples – will be documented in the Custom Specification information for a specific console.
The Custom Specification information, which details the actual console as built, will be found in Section 10 of the console’s
Service Manual.
C100HDS Installati n Guide
Page 2
Section2 – Safety Considerations
This section contains definitions and warnings, and practical information to ensure a safe working environment. Please take
time to read this section before undertaking any installation work.
Definitions
‘Maintenance’
All maintenance must be carried out by fully trained personnel.
Note: It is advisable to observe suitable ESD precautions when maintaining electronic assemblies.
‘ on-User Adjustments’
Adjustments or alterations to the equipment may affect the performance such that safety and/or international
compliance standards may no longer be met. Any such adjustments must therefore only be carried out by fully trained
personnel.
‘Users’
This equipment is designed for use solely by engineers and competent operators skilled in the use of professional
audio equipment.
‘Environment’
This product is a class A product intended to form an integrated component part of a professional audio recording,
mixing, TV, radio broadcast or similar studio wherein it will perform to specification providing that it is installed
according to professional practice.
Installation Instructions
Voltage Selection and Fusing
All C100HDS systems use auto-ranging power supplies. These are designed to operate at input voltages in the range 100
to 240VAC (±10%) so do not require setting to suit the local supply.
If, where fitted, it is ever necessary to replace a blown mains-fuse, then always use the correct rating and type of
replacement. If a correctly rated fuse continues to blow, then a fault exists and the cause should be investigated or the
unit returned to SSL for repair/replacement as appropriate.
Details of mains settings and correct fuse ratings can be found in Appendix A of this manual.
Electrical Safety Warning
When installing or servicing any item of SSL equipment with power applied, when cover panels are
removed, HAZARDOUS CONDITIONS CAN EXIST.
These hazards include: • High voltages
• High energy stored in capacitors
• High currents available from DC power busses
• Hot component surfaces.
Any metal jewellery (watches, bracelets, neck-chains and rings) that could inadvertently come into contact
with uninsulated parts should always be removed before reaching inside powered equipment.
Safety C nsiderati ns
Secti n 2
Page 3
Safety Earth Connection
Any mains powered item of SSL equipment that is supplied with a 3-core mains lead (whether connectorised or not) must
always have the earth wire connected to the mains supply ground. This is the safety earth and grounds the exposed metal
parts of the racks and cases and should not be removed for any reason.
Mains Supply and Phases
To ensure safe operation of this equipment, connect only to an ac. power source that contains a protective earthing (PE)
conductor. This equipment is designed for connection to single phase supplies with the neutral conductor at earth
potential – category TN or TT – and is fitted with a protective fuse in the live conductor only. This equipment is not
designed for use with live and neutral connections reversed or where the neutral conductor is not at earth potential (IT
supplies). This equipment should not be connected to a power system that switches open the return (neutral) lead when
the return lead also functions as the protective earth (PE).
All mains powered assemblies must be connected to the same mains phase. In particular, note that as PSU redundancy is
standard, the two input leads must NOT be connected across different phases of a 3-phase supply.
Mains cables will be coded with either of the following colour schemes:
1or 2
LIVE: Brown Black
NEUTRAL: Blue White
EARTH: Yellow/Green Green
The ratings label, which details the console power requirements, is located adjacent to the mains inlet connectors on the
power input panel beneath the rear of the console.
Mains Isolation and Over-Current Protection
An external disconnect device (switch) is required for this equipment which must be installed according to current wiring
regulations. A detachable power cord, if fitted to this equipment, is a suitable disconnect device, otherwise an approved
disconnect switch is required – the rating of which is defined in the product specification (Appendix A) and on the
equipment itself.
An external over-current protection device is required to protect the wiring to this equipment which must be installed
according to the current wiring regulations. The fusing or breaking-current is defined in the product specification. In
certain countries this function is supplied by use of a fused plug.
Some units (specifically, those fitted with PSU Redundancy) utilise multiple power sources. This is clearly marked on the
equipment. The finished installation must also be clearly marked to ensure that all sources of power are removed before
servicing work begins.
Physical Safety
The console surface is too heavy for one person to move, ensure sufficient manpower is available when positioning the
console. Take particular care when removing a fully populated RIO chassis from the equipment rack.
If the console trim is removed for any reason then there may be sharp edges exposed on the frame metalwork.
C100HDS Installati n Guide
Page 4
CE Certification
The C100HDS system is CE compliant. Note that the majority of cables supplied with SSL equipment are fitted
with ferrite rings at each end. This is to comply with the current regulations and these ferrites should not be
removed.
If any of the console metalwork is modified in any way – particularly the addition of holes for custom switches etc. – this
may the adversely affect the CE certification status of the product.
FCC Certification
This equipment has been tested and found to comply with the limits for a Class A digital device, pursuant to part
15 of the CC Rules. These limits are designed to provide reasonable protection against harmful interference
when the equipment is operated in a commercial environment.
This equipment generates, uses and can radiate radio frequency energy and, if not installed and used in accordance with
the instruction manual, may cause harmful interference to radio communications. Operation of this equipment in a
residential area is likely to cause harmful interference in which case the user will be required to correct the interference
at his own expense.
Instructions for Disposal of WEEE by Users in the European Union
The symbol shown here, which is on the product or on its packaging, indicates that this product must not
be disposed of with other waste. Instead, it is the user’s responsibility to dispose of their waste equipment
by handing it over to a designated collection point for recycling of waste electrical and electronic
equipment. The separate collection and recycling of your waste equipment at the time of disposal will help
to conserve natural resources and ensure that it is recycled in a manner that protects human health and
the environment. or more information about where you can drop off your waste equipment for
recycling, please contact your local city office, your household waste disposal service or where you
purchased the product.
AAA
AAA
AAA
Safety C nsiderati ns
Secti n 2
Page 5
Section 3 – Pre Installation Information
Physical installation of the console is normally carried out by a specialised transportation company. In some cases this will
have been arranged by the local SSL office, in other cases by the facility.
Before the console is installed all building work should be completed and the environment MUST be clean otherwise the
warranty will be rendered invalid.
Before commissioning can take place the following must be completed:
• Air Conditioning installed, tested, blown-through and working
• Lighting installed and tested
• Cable Trunking installed
• Wall and floor finishes completed
• Power Distribution installed and tested
• Cables installed and tested
• Monitor loudspeakers installed and working
• Other utilities (telephone, water etc.) available
The cables that run between console and processor can be shipped in advance of the console in a separate kit (the pre-
install kit). These cables should be installed by the facility engineers. Instructions for installing these cables are found on
pages 25 to 35 of this manual.
Cables that may be required for the connection of ancillary functions – meters, talkback or any custom switching etc. –
are OT supplied by SSL and will need to be provided by the facility. Refer to pages 38 to 41 for cabling information.
Services Provided by SS
Commissioning
All C100HDS systems include on-site commissioning by an SSL engineer. This is usually expected to take from 2 to 4 days
depending on system size, configuration and options. Large systems, or consoles split for shipment, may require an
additional 1–2 days of commissioning time.
You will be contacted by your local SSL office or agent shortly before delivery to arrange a commissioning date.
Training
Three days of standard operator training are provided with each C100HDS system. If required, this is scheduled to take
place immediately following the commissioning period and is usually carried out by the commissioning engineer. A further
day of advanced operator training is available at additional cost.
On-site maintenance training is also available at additional cost. Training duration can be either one day for a basic
overview or two days to progress to a more advanced level.
Training should be requested at the time of order. or all training we recommend that no more than five persons attend
each session. If the use of an interpreter is necessary the training period may need to be extended (at additional cost).
Note that travel and subsistence costs are not normally included. or further information please contact SSL’s training
department at: [email protected].
Warranty
All systems normally include 13 months warranty from date of shipment. This does not include consumable items such as
magnetic media, disks etc. urther details may be found in SSL’s Conditions of Trading (printed on the reverse of all SSL
invoices).
C100HDS Installati n Guide
Page 6
Physical Requirements
Console Control Surface
The console control surface consists of a single Master section (usually called the Centre Section) and channel bays
containing 8 faders each. Consoles can be specified to have from 24 to 64 channels so the size and weight will vary
considerably. A dimensioned footprint drawing showing the channel layout for a specific console control surface can be
provided by SSL’s Project Engineering Department. See page 46 for the drawing of a standard 32-channel footprint.
Consoles can be built with a split point at any 8-channel profile. The console can then be separated at this point into
smaller sections to simplify installation into client’s premises. A split console will require additional commissioning time;
reassembly will be by SSL engineers.
The side panels of the console are flat to reduce the overall width and to simplify the location of adjoining furniture.
Contoured side arms are available as an option for installations where the console is freestanding.
The console surface is connected to its processing rack using two standard Ethernet cables. These cables provide all the
data for control, metering and touchscreen display information. These cables are supplied with each system.
Cable sets are available in 10, 15, 20, 25, 50 and 100m standard lengths; 100m is the maximum distance between the
console and its computer rack.
Refer to Appendix A for weights and power consumption information.
Rack Mounting Equipment – Blackrock and RIO
All audio processing functions are provided by a separate 2U rack mounted computer unit referred to as the ‘Blackrock’.
The system’s DSP resource, Madi interfacing and file handling is all contained within the Blackrock unit. Connections are
made to the rear of the rack.
Systems may be specified to have processor redundancy for on-air or critical operations. These systems will feature a
second Blackrock chassis unit so an additional 2U of rack space will be required.
All input and output for the C100HDS is made using remote input/output racks referred to as ‘RIOs’. A RIO is a 7U rack
mounting unit with slots for up to five plug-in I/O cards. Each RIO is connected to the Blackrock processor using industry
standard fibre Madi cables.
A 19” equipment rack will almost certainly need to be provided into which the Blackrock and/or RIO units can be
mounted. Note that when locating remote RIO units that all connections are made to the front. See page 10 for service
clearance diagrams.
The SSL MORSE Router and remote Stageboxes may also be specified to form part of the C100HDS system. These are
either 3U or 6U rack units.
Blackrock and RIO units must be supported on shelves fitted to the equipment rack and not solely by the rack ‘ears’.
Acoustic Isolation
The Blackrock processor is fitted with cooling fans and is expected to be housed in a separate ‘machine’ room. Adequate
noise isolation should exist between the machine room and control room/recording areas.
The RIO chassis is fitted with low-noise fans and requires a lower degree of noise isolation.
Noise figures for individual units are given in Appendix A.
Pre Installati n Inf rmati n
Secti n 3
Page 7
C100HDS Installati n Guide
Page 8
Connector panels
Connector panelMains Panel
Master Section9 – 16 17 – 24 25 – 321 – 8
Power Supplies
Top Trim access
Connector Panels and Power Supplies
Refer to page 46 for console dimensions
Air Conditioning Requirements
Air conditioning will almost certainly be required for both the Machine and Control rooms in order to maintain the
temperature and humidity to within the required levels.
Power dissipation figures for console control surface and equipment rack are listed in Appendix A.
Appendix E contains the environmental specification for SSL equipment.
Cable Ducting
Cable ducting will be required between the console and the Machine room (as well as to any outboard racks and the
recording areas). The ducting provided should be of sufficient size such that approximately 50mm x 35mm is available for
console surface connection. This should be sufficient for the analogue and digital cabling for metering and the T/B Mic etc.
in addition to the console connections.
The connectors for all control and interface cables are located beneath the console’s Centre Section. The connector
panels are orientated so that cables will exit downwards at the rear of the desk. It is not possible to route cables through
the console legs.
The mains input connectors are located on a separate panel. This panel is normally positioned in the bay to the left of the
Centre Section.
Service Access
Access to all electronic assemblies within the frame is from either the front or above the console. The power supplies are
located in the knee panel area. There are PCB assemblies located behind the channel T T meter screens. To remove a
T T screen it will be necessary to remove the top trim. This trim is secured using screws along the rear of the top edge.
If the console is being built into restricted space – as in some mobile installations – then allow sufficient clearance above
the top trim for access to the fixing screws.
Clearance for service access will also be required in front of and behind the rack into which the Blackrock processor is
installed so that cards can easily be removed. See the drawing on page 10 for minimum clearances.
Pre Installati n Inf rmati n
Secti n 3
Page 9
C100HDS Installati n Guide
Page 10
Blackrock Processor Chassis (side view) Showing Clearances
RIO Chassis (side view) Showing Clearances
Dimensions in mm
429
2U
7U
85
344
Clearance for cabling
Clearance for air vent
270
emovable
Front Panel
Front
I/O Card
100
Technical Requirements
Sync Source
The Blackrock Processor requires a feed of sync in order to operate. Video, Wordclock or AES3id can be used as the
sync reference.
The video sync requirement is 75Ω 1V(pk-pk) black-and-burst. The standard can be either PAL (625 line, 50Hz), NTSC
(525 line, 59.94Hz or 60Hz). Composite sync may also be used.
Tri-level sync cannot be used.
Other studio peripherals (digital recorders, routers, editors and picture recorders) will also require a feed of video sync.
Depending on the studio configuration, a suitable video distribution amplifier may also be required.
The Blackrock processor does not provide internal sync generation or distribution.
Power Connections – Mains Input Voltage & Current
Both the console control surface and the Blackrock processor rack are fitted with auto-sensing power supplies and will
function at any voltage from 100 to 240 volts without adjustment.
The console is supplied with detachable IEC-type mains leads. These leads are 2m in length and the cable diameter is
approximately 6mm. The free end of each lead is unterminated and will need to be connected to a suitable outlet beneath
the console. C100HDS systems are supplied as standard with dual redundant power supplies for ‘on-air’ use so is therefore
fitted with two separate IEC mains input connectors.
The inrush current present when powering the console can be significant – typically ten times the steady current – so the
use of ‘slow’ or ‘motor’ rated fuses/circuit-breakers is recommended.
See Appendix A for equipment specifications.
The console power rating label will be located between the two mains input connectors beneath the rear of the console.
Computer for File Management and Software Updates
It will be necessary to have access to a computer with an Ethernet interface to be able to update the Blackrock’s system
software and also to archive or backup operator projects. SNMP status information is also available over the IP network.
The machine used for communication with the Blackrock can either be connected via the facility’s Ethernet network or
can be a direct Ethernet connection. (Note that if connecting directly then the cable must be of the ‘crossover’ type).
The computer used must have an SSH terminal client installed – ‘PuTTY’, for example, if using a PC. Macintosh users can
use The ‘Terminal’ utility included with OSX.
The Blackrock does not support wireless networking.
Grounding
A standard system should not require any additional grounding over and above that supplied by a correctly installed mains
supply. All rack unit chassis are permanently bonded to mains earth. A mains earth connection via the mains inlet must be
provided.
If due to the quality of the mains wiring within an installation it is deemed necessary to improve upon the mains earthing,
a chassis ground connection point is provided as follows:
• Console chassis ground can be accessed via a stud located on the mains power connector panel.
All audio connectors, both analogue and digital, have their screen pins connected directly to the chassis at the point of
entry to comply with AES/EBU EMC grounding standards.
Pre Installati n Inf rmati n
Secti n 3
Page 11
C100HDS Installati n Guide
Page 12
Input
42
34
30
24
20
18
15
12
9
6
3
2
1
0
Input
42
34
30
24
20
18
15
12
9
6
3
2
1
0
Input
42
34
30
24
20
18
15
12
9
6
3
2
1
0
Input
42
34
30
24
20
18
15
12
9
6
3
2
1
0
42
34
30
24
20
18
15
12
9
6
3
2
1
0
Input
Input
42
34
30
24
20
18
15
12
9
6
3
2
1
0
42
34
30
24
20
18
15
12
9
6
3
2
1
0
Input
42
34
30
24
20
18
15
12
9
6
3
2
1
0
Input
Alt:
Ins:
1234
5678
9 10 11 12
13 14 15 16
17 18 19 20
21 22 23 24
A1A2A3A4
A5A6A7A8
PGM1 PGM2N
∆t dB
Alt:
Ins:
1234
5678
9 10 11 12
13 14 15 16
17 18 19 20
21 22 23 24
A1 A2 A3 A4
A5 A6 A7 A8
PGM1 PGM2N
∆t dB
Alt:
Ins:
1234
5678
9 10 11 12
13 14 15 16
17 18 19 20
21 22 23 24
A1 A2 A3 A4
A5 A6 A7 A8
PGM1 PGM2N
∆t dB
Alt:
Ins:
1234
5678
9 10 11 12
13 14 15 16
17 18 19 20
21 22 23 24
A1A2A3A4
A5A6A7A8
PGM1 PGM2N
∆t dB
Alt:
Ins:
1234
5678
9 10 11 12
13 14 15 16
17 18 19 20
21 22 23 24
A1 A2 A3 A4
A5 A6 A7 A8
PGM1 PGM2N
∆t dB
Alt:
Ins:
1234
5678
9 10 11 12
13 14 15 16
17 18 19 20
21 22 23 24
A1A2A3A4
A5A6A7A8
PGM1 PGM2N
∆t dB
Alt:
Ins:
1234
5678
9 10 11 12
13 14 15 16
17 18 19 20
21 22 23 24
A1A2A3A4
A5A6A7A8
PGM1 PGM2N
∆t dB
Alt:
Ins:
1234
5678
9 10 11 12
13 14 15 16
17 18 19 20
21 22 23 24
A1 A2 A3 A4
A5 A6 A7 A8
PGM1 PGM2N
∆t dB
ATT
OO<>
REMOTE - M
PROTECT - S
CLRMODE
AFL PFL
layer
reset
o'ride
enable
ON
PAN
ATT
OO<>
REMOTE - M
PROTECT - S
CLRMODE
AFL PFL
layer
reset
o'ride
enable
ON
PAN
ATT
OO<>
REMOTE - M
PROTECT - S
CLRMODE
AFL PFL
layer
reset
o'ride
enable
ON
PAN
ATT
OO<>
REMOTE - M
PROTECT - S
CLRMODE
AFL PFL
layer
reset
o'ride
enable
ON
PAN
ATT
OO<>
REMOTE - M
PROTECT - S
CLRMODE
AFL PFL
layer
reset
o'ride
enable
ON
PAN
ATT
OO<>
REMOTE - M
PROTECT - S
CLRMODE
AFL PFL
layer
reset
o'ride
enable
ON
PAN
ATT
OO<>
REMOTE - M
PROTECT - S
CLRMODE
AFL PFL
layer
reset
o'ride
enable
ON
PAN
ATT
OO<>
REMOTE - M
PROTECT - S
CLRMODE
AFL PFL
layer
reset
o'ride
enable
ON
PAN
10
5
0
5
10
20
30
40
50
∞
10
5
0
5
10
20
30
40
50
∞
10
5
0
5
10
20
30
40
50
∞
10
5
0
5
10
20
30
40
50
∞
10
5
0
5
10
20
30
40
50
∞
10
5
0
5
10
20
30
40
50
∞
10
5
0
5
10
20
30
40
50
∞
10
5
0
5
10
20
30
40
50
∞
0
-2
-4
-6
-8
-10
-12
-14
-16
-20
9-16 17-24
THRESHOLD
RATIO
MAKEUP
0
-2
-4
-6
-8
-10
-12
-14
-16
-20
RELEASE
GAINLF
HF
GAIN
LF
GAIN
LMF
Q
HMF
GAIN
HF
IN/M
IN/M
IN/M
IN/M
IN/M
IN/M
IN/M
IN/M
TONE INPUT
PRET/B
N-1
EXT
MONO
LISTEN
TONE INPUT
PRE
MONO
LISTEN
EXT
ROUTE
UOP MIC RELEASE
CHANNEL O/P UTILITY O/P MIC
+48V PAD
HPFS-LIN
INPUT
M/SALT
MONO RMONO L
OROL
BALANCE
TRIM
BUSSES
1234
8765
910 11 12
16151413
17 18 19 20
24232221
ASG 1 ASG 2
ASG 4ASG 3
ASG 5 ASG 6
ASG 8ASG 7
N-1 BUS
PGM 1 PGM 2
AUX SENDS
816 24
71523
6 14 22
5 13 21
4 12 20
3 11 19
2 10 18
1917
COMPRESSOR
IN S/C
ATTACK DELAY AUTO
GATE/EXPAND
IN S/C
RANGE RELEASE
THRESHOLD ATTACKINVERT HOLD
FILTERS
IN
LF SLOPE
PAR
SLOPE Q NOTCH
IN
Q
NOTCH
EQUALISER
PAR
SLOPE Q
ROUTE GROUP COPY MOVE SET SHOW INC MULTI ALL
PROTECT SET SWAP EXCHANGE
Push to select
INSERT DELAY
Push
for IN
Push
for IN
Push
for
units
HF
SLOPE
CHANNEL
SETTINGS
FREE
ASSIGN
EDIT
LAYER
12345678
LCD Meter panel
Bay Control (Master Channel) Tile
Channel Control Tile
Fader Tile
C100HDS Channel Bay ayout
Section 4 – System Components
This section provides greater detail about the main units in the system. See Appendix A for specifications and Appendices
B and C for connector details and pinouts.
C100HDS Console
Each console control surface will consist of the Centre Section and can be specified to have from 16 to 64 channel faders
in groups of 8. (Note: A group of 8 faders and controls and its frame is termed a ‘bay’). Refer to page 46 for frame
dimensions.
The number of physical faders fitted to a console surface does not limit the number of processing channels available;
this is determined solely by the quantity of DSP resource fitted to the Blackrock processor. DSP processing is available
in quantities of 64, 96 or 128 channels.
Each console channel bay comprises four individual sections: aders, Channel Control tile, Master Channel tile and T T
meter panel. The Master Channel tile provides physical access to all operational controls and can be assigned to any of
the channels in the console. As a minimum it is only necessary to have one Master Channel tile fitted to a console as this
can be used to access any DSP channel specified, although, for convenience and additional flexibility, Channel Master tiles
can be fitted to any bay.
Fitting a Master Channel to either side of the Centre section will allow full channel control to be retained even if one of
the two console control cables becomes disconnected.
The Centre Section is always fitted with two analogue mechanical meters; these are VU scale as standard but can be
specified to be PPM. Additionally, there is space available into which a 6 or 8-channel LCD phase-scope can be fitted. There
are three types available: RTW10830 (8ch analogue plus 8ch digital), MSD600C (6ch digital) or the MSD600M (modular
customisable).
Note that the console frame is supplied without moulded side arms as standard to reduce the overall width. Contoured
side arms are available but need to be specified as an option. These will add 72mm to the overall console width.
A dxf CAD drawing of the 32 channel frame layout can be downloaded from the C100HDS area of SSL’s website.
System C mp nents
Secti n 4
Page 13
XGA SSL TCP/IP USB
NET 1 NET 2 SYNC USB
43 2 1
8 7 6 5 54321
C100HDS Installati n Guide
Page 14
ear View
Mezzanine cards
Network switch
CPU and DSP Motherboard
Sync
In TCP/IP
Network
SSL
Network
SSL
Network
USB
Serial
Port
XGA
Madi x 4 USB
12
Blackrock Processor Front
Blackrock Processor Rear
DAW
The Blackrock Processor
The Blackrock processor is a 2U high 430mm deep (excluding connectors) rack unit. The unit is based on an industry
standard industrial PC chassis running SSL’s operating software. There are no 3rd party licensing requirements.
Behind the removable front panel are one or two swappable SATA drives, the filters for the cooling fans and a protected
mains switch. At the rear of the rack are the removable PSU units, the console network and terminal connections, the
optical Madi ports for I/O and a serial port.
Power supplies
The unit is fitted with two removable power supplies, either of which is capable of powering the Blackrock chassis so as
to provide fault redundancy. The units are autoranging and are fitted with a standard IEC male connector for mains input.
Motherboard
This card is the processor for the system files and for project storage and also functions as the interface for remote
diagnostic servicing and storage capability when connected to an IP network.
The Motherboard is fitted with the following connectors:
TCP/IP etwork IP network connection – will need to be connected to the facility’s TCP/IP (Internet) service to
facilitate remote diagnostics (SNMP), project backup and system file management.
SSL etwork Console network connection – must be linked to the built-in hub.
ote that the SSL network is used to transfer control surface data which is not TCP/IP protocol. Do not
combine this network with the TCP/IP network.
DAW Reserved for the implementation of IP MIDI – ot currently available.
USB 1&2 Standard peripheral USB – can be used for direct connection of a keyboard and mouse to facilitate
file management.
XGA Standard analogue video output – combined with above, can be used for direct connection of an
analogue XGA monitor to facilitate file management and backup functions.
Serial Port RS232 D9 female for serial connection to Probel routers to facilitate router name transfer.
CPU and DSP
This single PCie card performs all the system DSP and processing functions. It can be specified as one of three versions
to support 64, 96 or 128 full-function channels at 48kHz simultaneously. Processors specified with less than 128 channels
can be subsequently expanded via a license upgrade.
The DSP card is fitted with the following connectors:
etwork 1&2 Console network output connectors. Connector ‘ et 1’ must be linked to the built-in hub.
Sync in BNC input connector for system reference. A feed of sync must be supplied. The following are
suitable sources: Analogue Video (black&burst 1Vp-p or composite), Wordclock or AES3-id 75Ω .
USB SSL Service use only.
Mezzanine 1&2
A Madi interface card fitted with four off S P fibre sockets. Each of these sockets can be equipped with a duplex LC fibre
interface adapter for connection to a remote I/O unit. Each Madi port provides up to 64†audio channels.
The fibre multiplexers fitted as standard are the 50/125 multimode version which will function at cable lengths of up to
550m. 9/125 singlemode multiplexers which can function at distances of up to 2km are available to order at additional cost.
One mezzanine card (ports 1–4) is included as standard and a second card (ports 5–8) can be specified to provide access
to up to 512 I/O channels.
† The signal capacity of the first Madi link connected to any RIO is reduced to 62 as two channels are reserved for
control and status information. This restriction does not apply to subsequent links connected to the same RIO.
System C mp nents
Secti n 4
Page 15
C100HDS Installati n Guide
Page 16
O
I
O
I
991XA
OUT 13-24
OUT 1-12IN 1-12
IN 13-24
ETHERNETSYNC POWER DATA
RUNNING LOCKED
1
234
2
3
1
2
3
1
2
3
1
2
3
1
2
3
1
2
3
1
2
3
1
2
3
1
2
3
1
2
3
1
2
3
1
2
3
1
IN 1
IN 2
IN 3
IN 4
IN 5
IN 6
IN 7
IN 8
IN 9
IN 10
IN 11
IN 12
2
3
1
2
3
1
2
3
1
2
3
1
2
3
1
2
3
1
2
3
1
2
3
1
2
3
1
2
3
1
2
3
1
2
3
1
IN 1
IN 2
IN 3
IN 4
IN 5
IN 6
IN 7
IN 8
IN 9
IN 10
IN 11
IN 12
2
3
1
2
3
1
2
3
1
2
3
1
2
3
1
2
3
1
2
3
1
2
3
1
2
3
1
2
3
1
2
3
1
2
3
1
IN 1
IN 2
IN 3
IN 4
IN 5
IN 6
IN 7
IN 8
IN 9
IN 10
IN 11
IN 12
9-16 1-8
25 - 32 17 - 24
9-16 1-8
25 - 32 17 - 24
AES/EBU IN
AES/EBU OUT
A1
A1
ANALOGUE IN
ANALOGUE OUT
RIO Rack (front view)
I/F
1
2
3
4
5

Other manuals for C100 HDS

4

Other Solid State Logic Computer Hardware manuals

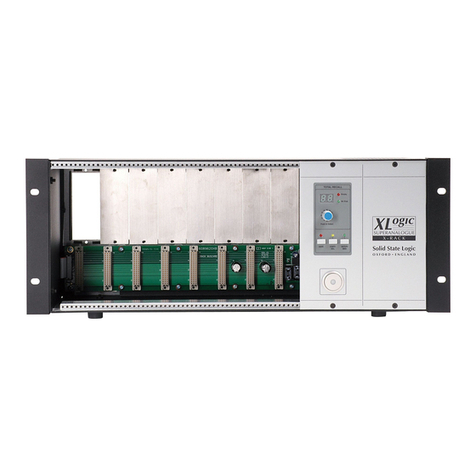
Solid State Logic C300 HD User manual

Solid State Logic

Solid State Logic C300 HD User manual

Solid State Logic DSP-Powered PCI Audio Card 4.3 Datasheet

Solid State Logic

Solid State Logic DSP-Powered PCI Audio Card 4.3 Datasheet

Solid State Logic XLogic Super-Analogue X-Rack User manual

Solid State Logic

Solid State Logic XLogic Super-Analogue X-Rack User manual

Solid State Logic Duende Mini User manual

Solid State Logic

Solid State Logic Duende Mini User manual

Popular Computer Hardware manuals by other brands

EVS Synapse SFR04 Installation & configuration manual

EVS

EVS Synapse SFR04 Installation & configuration manual

Cincoze MXM-P2000 Series Quick installation guide

Cincoze

Cincoze MXM-P2000 Series Quick installation guide

VIA Technologies P4M900 user manual

VIA Technologies

VIA Technologies P4M900 user manual

Digilent chipKIT Motor Shield Reference manual

Digilent

Digilent chipKIT Motor Shield Reference manual

AMCC 9690SA Series specification

AMCC

AMCC 9690SA Series specification

Measurement Computing PCI-DAS6013 user guide

Measurement Computing

Measurement Computing PCI-DAS6013 user guide

ASROCK ROMED8HM3 user manual

ASROCK

ASROCK ROMED8HM3 user manual

Analog Devices EVAL-ADG5401FEBZ user guide

Analog Devices

Analog Devices EVAL-ADG5401FEBZ user guide

Renesas R8C/27 quick start guide

Renesas

Renesas R8C/27 quick start guide

Texas Instruments bq24650EVM user guide

Texas Instruments

Texas Instruments bq24650EVM user guide

Rabbit 2000 Getting started

Rabbit

Rabbit 2000 Getting started

Supermicro AOC-SLG3-2M2-O user guide

Supermicro

Supermicro AOC-SLG3-2M2-O user guide

Renesas TQFP-100G user manual

Renesas

Renesas TQFP-100G user manual

Agilent Technologies 6050A operating manual

Agilent Technologies

Agilent Technologies 6050A operating manual

Bizfon 2000 user guide

Bizfon

Bizfon 2000 user guide

Tech tools EconoROM III user manual

Tech tools

Tech tools EconoROM III user manual

StarTech.com 4P6G-PCIE-SATA-CARD quick start guide

StarTech.com

StarTech.com 4P6G-PCIE-SATA-CARD quick start guide

OSS ExpressBox 7 x8G2-RAS user manual

OSS

OSS ExpressBox 7 x8G2-RAS user manual

manuals.online logo
manuals.online logoBrands
  • About & Mission
  • Contact us
  • Privacy Policy
  • Terms and Conditions

Copyright 2025 Manuals.Online. All Rights Reserved.