Solo 110 User manual

Important
Information
Symbols
The following symbol is used throughout this User Manual
and on the product.
This symbol on the product indicates that
there is a safety hazard or an operation
requiring care to avoid damage to the product
or environment. You must read the
appropriate sections of the User Manual to
understand the nature and severity of all the
potential hazards present and the action you
must take.
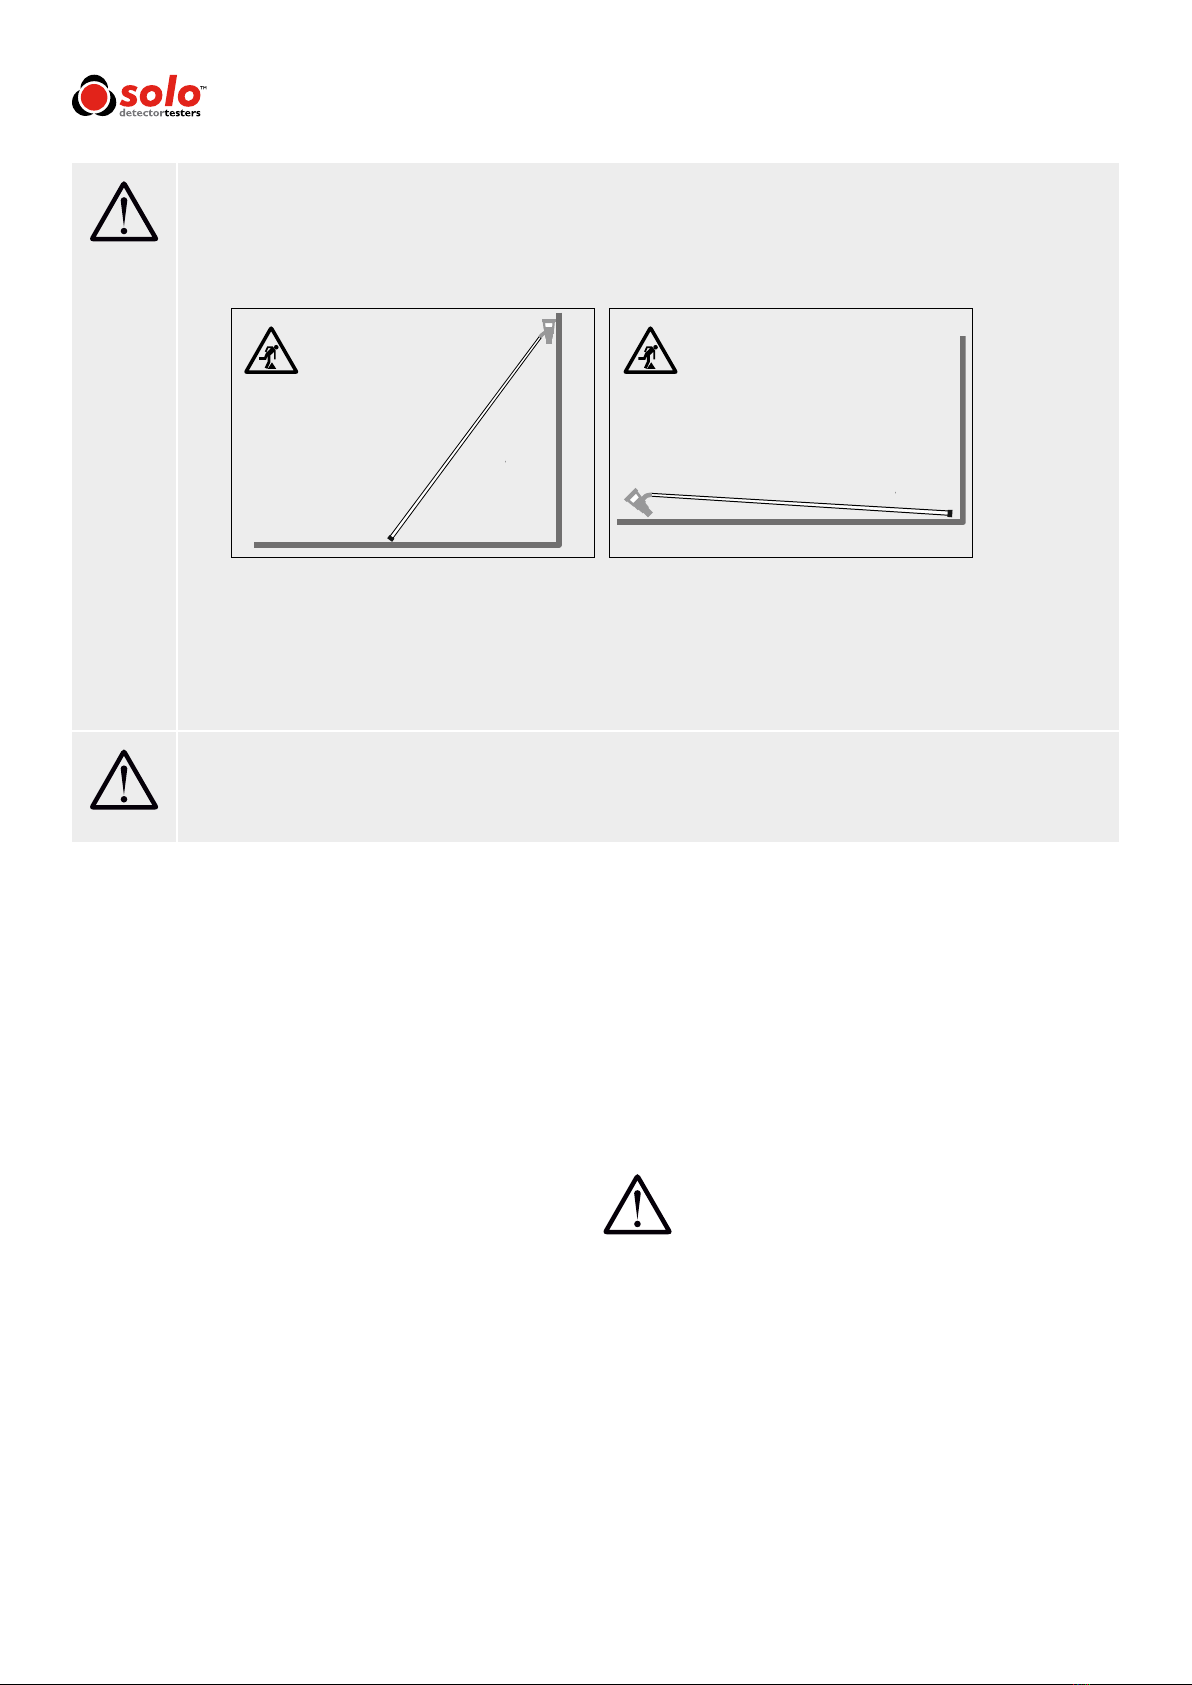
• Never allow an extended pole section to collapse uncontrolled. Risk of injury and equipment damage.
• Do not create trip hazards by leaving poles unattended in public spaces and avoid leaving poles extended when not in
use (against walls, across desks etc.). Risk of injury and equipment damage.
• Solo poles are not specied for use in high voltage areas. Risk of injury and equipment damage.
• When working at height it is recommended that a competent person carries out a suitable risk assessment. This will
identify any risk to the user and/or the environment, or other safety measures, and hence any need for Personal
Protective Equipment (PPE).
• Do not use Solo poles if unable to control their use properly e.g. when fatigued. Risk of injury and equipment damage.
It is recommended that Solo poles are inspected before and after use and if any signs of damage, abnormal wear or
modication are found, the poles should not be used.
Warning
Caution
2
• Solo poles are designed only to be used with Solo and
Testire product ranges.
• Read this User Manual completely before using Solo
Access Poles
• Keep this User Manual - Save all safety and operational
instructions for future reference.
• Take note of the Warnings - Read carefully and follow
all warning labels on the product and those described
in this User Manual.
x
x
www.acornfiresecurity.com
www.acornfiresecurity.com


4
Using
Solo Access Poles
Figure 1
• Solo poles should always be held vertically when
raising or lowering. Ensure that all extension poles
and test tool buttons are locked into position before
extension and use. (Fig.1)
• When using Solo 111 extension poles in conjunction
with Solo 110 telescopic pole, the telescopic pole
should be at the shortest length, i.e. not extended,
before attaching or removing the Solo 111 extension
pole(s) or tool.
• No more than 3 x Solo 111 extension poles should
be used at the same time (see General
Recommendations for height & angle advice).
• When lowering, always hold in the vertical. Lower
telescopic sections rst, before removing Solo 111
extensions.
• When lowering telescopic poles, rest the base of the
pole on the oor and depress the locking button,
while lowering the upper sections with the other
hand.
General Recommendations
The maximum working height using Solo 110 & Solo 111
poles is 4.5 metres for Solo and Testire.This is achieved
using 1 x Solo 110 telescopic pole and a maximum of 3
x Solo 111 extension poles. It is recommended to stand
directly under the detector (pole vertical).
If vertical working is not possible, do not exceed 3.75m
reach and stand no more than 1 metre away from a point
directly beneath the detector. (Fig. 2)
Figure 2
Solo & Testire
1 x Solo 110
3 x Solo 111
Max
‘Click’
Solo & Testire
1 x Solo 110 +
3 x Solo 111
Max
4m Max.
4.5m
1m Max
www.acornfiresecurity.com
www.acornfiresecurity.com

5
Figure 5
Figure 4
Figure 3
H O
2
Tips to prevent user fatigue
• Stand with one foot half a stride ahead of the other to
increase balance and reduce strain.
• Where possible, share testing workload with others.
• Alternate using the poles between the left and right
hand side of the body.
• Take regular breaks.
Use with Testire 25 Remote Control (Fig. 3)
Storage and Maintenance
Solo poles which are not in use should always be returned
to protective storage bag. (Fig. 4)
Solo poles can be wiped clean using a damp cloth. Only
mild detergents or water may be used. (Fig. 5)
Solo poles are covered by a limited lifetime warranty.
Accidental damage or user modication will invalidate this
warranty.
Disposal (End of Life Statement)
Solo poles are manufactured from breglass (GRP) and are
classied as Non-Hazardous Waste and can be disposed of
at municipal or industrial landll when in compliance with
local regulations.
Do not burn, incinerate, or cut into pieces. Dispose as a
whole.
Warning
Use of the Testire 25 Remote Control in
conjunction with any of the Solo poles requires
the user to momentarily release one hand
from the pole to activate the remote control.
• Extra care should be taken when
doing this.
• Read the Testire 25 User Manual
prior to use.
www.acornfiresecurity.com
www.acornfiresecurity.com

This manual suits for next models
1


