Sony JE81352 User manual

DPS Super Wide Dynamic Camera
User Manual
Super WDR HighResolution Color Camera
Super WDR HighResolution Day&Night Camera

Content
Content
Safe Warnings 1
Notice 1
Introduction of WDR 2
Function Character 4
System Functions 4
Connecting Example 6
Back Panel Instruction 7
Main Camera Function Settings 8
Menu Tree 8
Basic Operations 10
Menu Instruction 10
Production Specifications 14
Remove Common Troubles 15
1
!
!
NOTICENOTICE
Toprevent fire or shock hazard,do not expose
the unit to rainor moisture.
The symbol is intendedto alert the userto the
presence of important operating and
maintenance(servicing)instructions in the
literature accompanying the appliance.
The symbol is intendedto alert the user to
the presence of uninsulated"dangerous
voltage"within the product's enclosure that
may be of sufficient magnitude to result in
a risk of electricshock to persons.
CAUTION
RISKOF ELECTRIC
SHOCKDO NOTOPEN
CAUTION To reduce the risk of electric
shock, do not remove cover or back no
user serviceable parts inside refer
servicing to qualified service personnel
CAUTION:
Toprevent electric shocks
and risk offire hazards .
Do not useother than
specified power source.
1.Toreduce the risk of electric shock, do not remove cover.
2.No user servicable partinside. Refer servicing to qualified
service personal.
3.This device should only be operated with the power supply
included with the kit orprovided as an accessory.
Warning

2
Compared with commoncameras, WDR (Wide Dynamic
Rang) can revertto filmed image more correctly. If thefilmed
region has alarge contrast, stronger bright covers alarge
area of filmedregion, common camera's electronic shutter
will work ina higher speed after lighting, atthe same time,
dark region willbe darker, even black, onthe contrary, If
the dark coversa larger area, common cameras' electronic
shutter will workin a low speed, at thistime, bright areawill
over-exposure, resulting ina white and can not beresolved.
WDR cameras isusing some kind technologies, making dark
in the lightof different circumstances can reproduce the
brightest objects, alsocan reproduce the dark objects.
In some complexenvironment, common cameras film
some objects, onlyto give up.
Introduction of WDR
WDR camera
Common camera
Introduction of WDR

3
Above featuresof WDR camera can be moresuitable for
the using ofsome environment has large brightness
contrast, such asATM automated tellermachine, the
entrance of thebuilding, wharf, etc.
Common camera
BLC ON
Common camera
BLC OFF
WDR CAMERA
Introduction of WDR
4
DC 12V
AC 24V
DC 12V
Function Characters
Function Characters
1.Super Wide DynamicRange, up to 120dB.
2. Taking advanced DPS camera technique needsmuch
less storage capabilityof DVR thanCCD camera.
3. Be moreconvenient for users to operate with English
and Chinese OSDmenu.
4. Revert tohighly real color.
5. Supports PAL and NTSC systems.
6. With movingIR cut filter to enhance S/N ratio in night
(several models useonly).
System Function
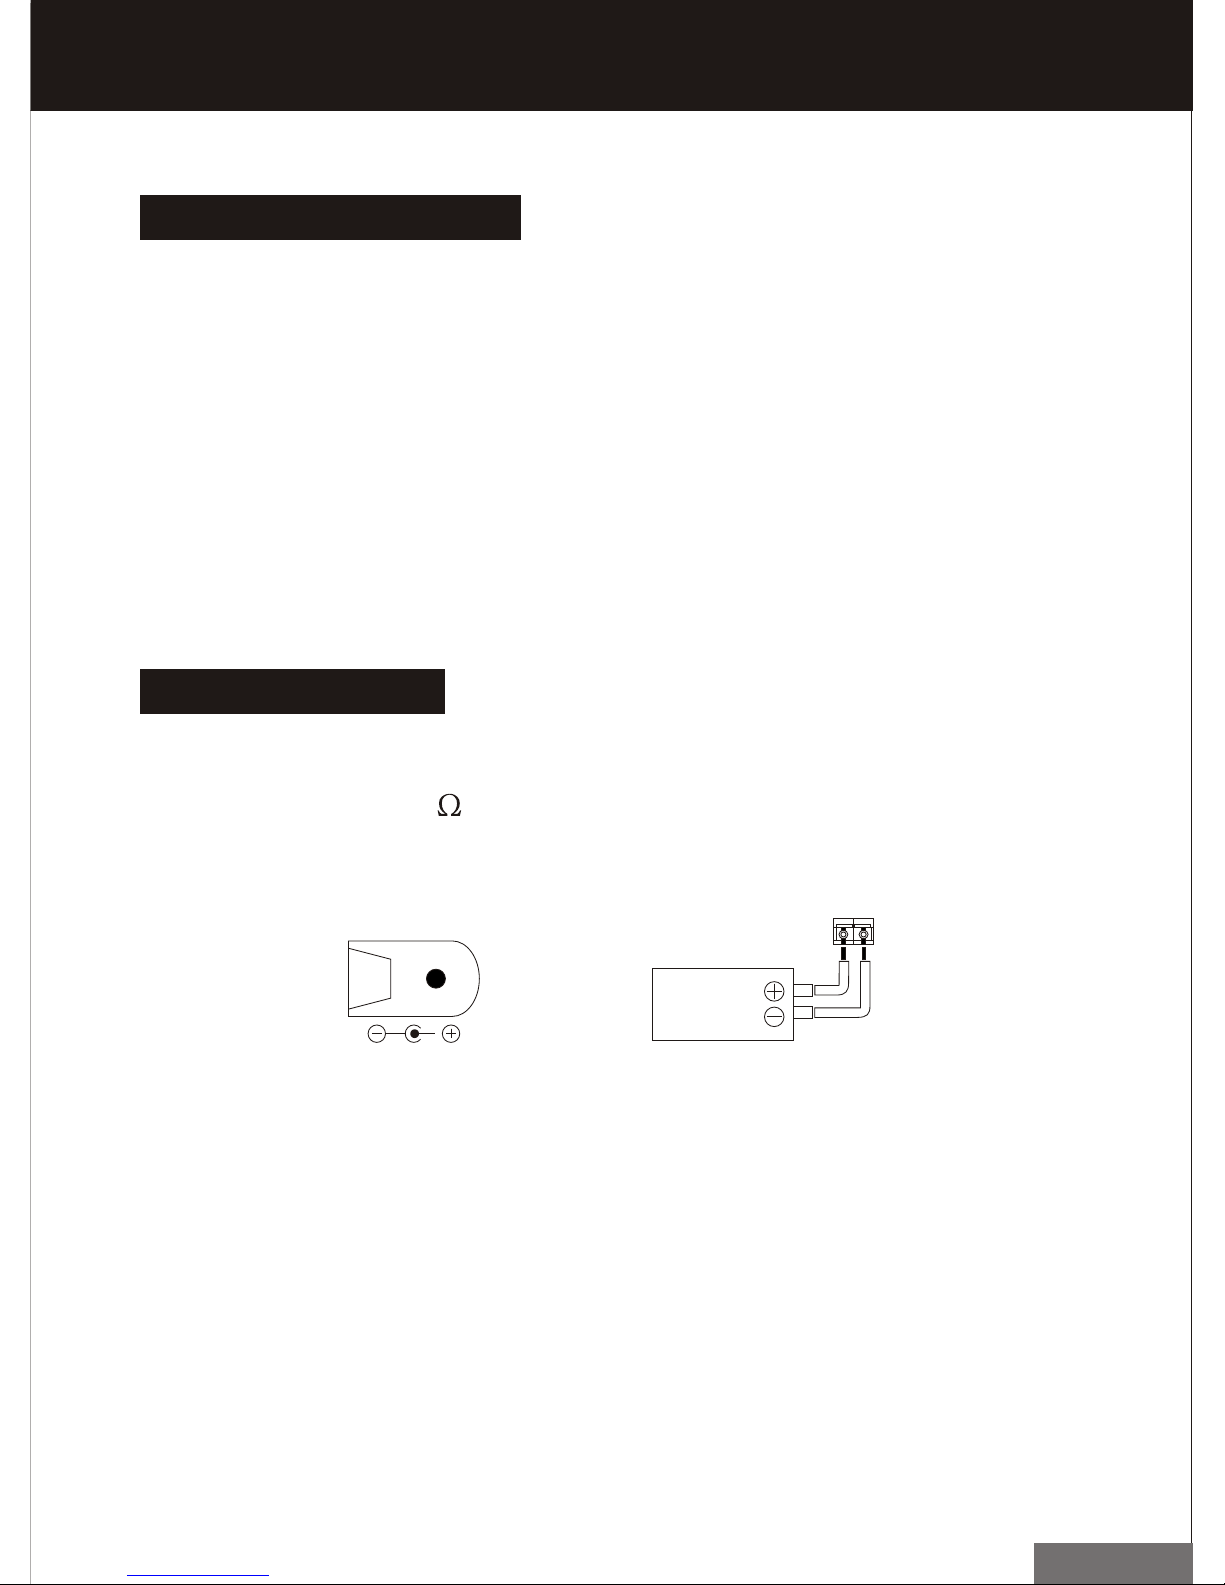
1.Video output connection port (BNC, VIDEO OUT)
1.0 Vp-p@75 , Signal ofvideo output issupplied by
this connection.
2.Power input connectionport.
This port connector accepts DV12V (AC24V power
supply only suitablefor specifically cameras)
Recommendation power supply: 500-1500mA DC
It can beoperated with specificationvoltage.
3.DC automatic aperturelens and manualboard lens
optional, use menuto adjust theright type of lens match
with this machine.For DC automaticaperture lens,
can set menuparameter to controllens aperture's size.
5
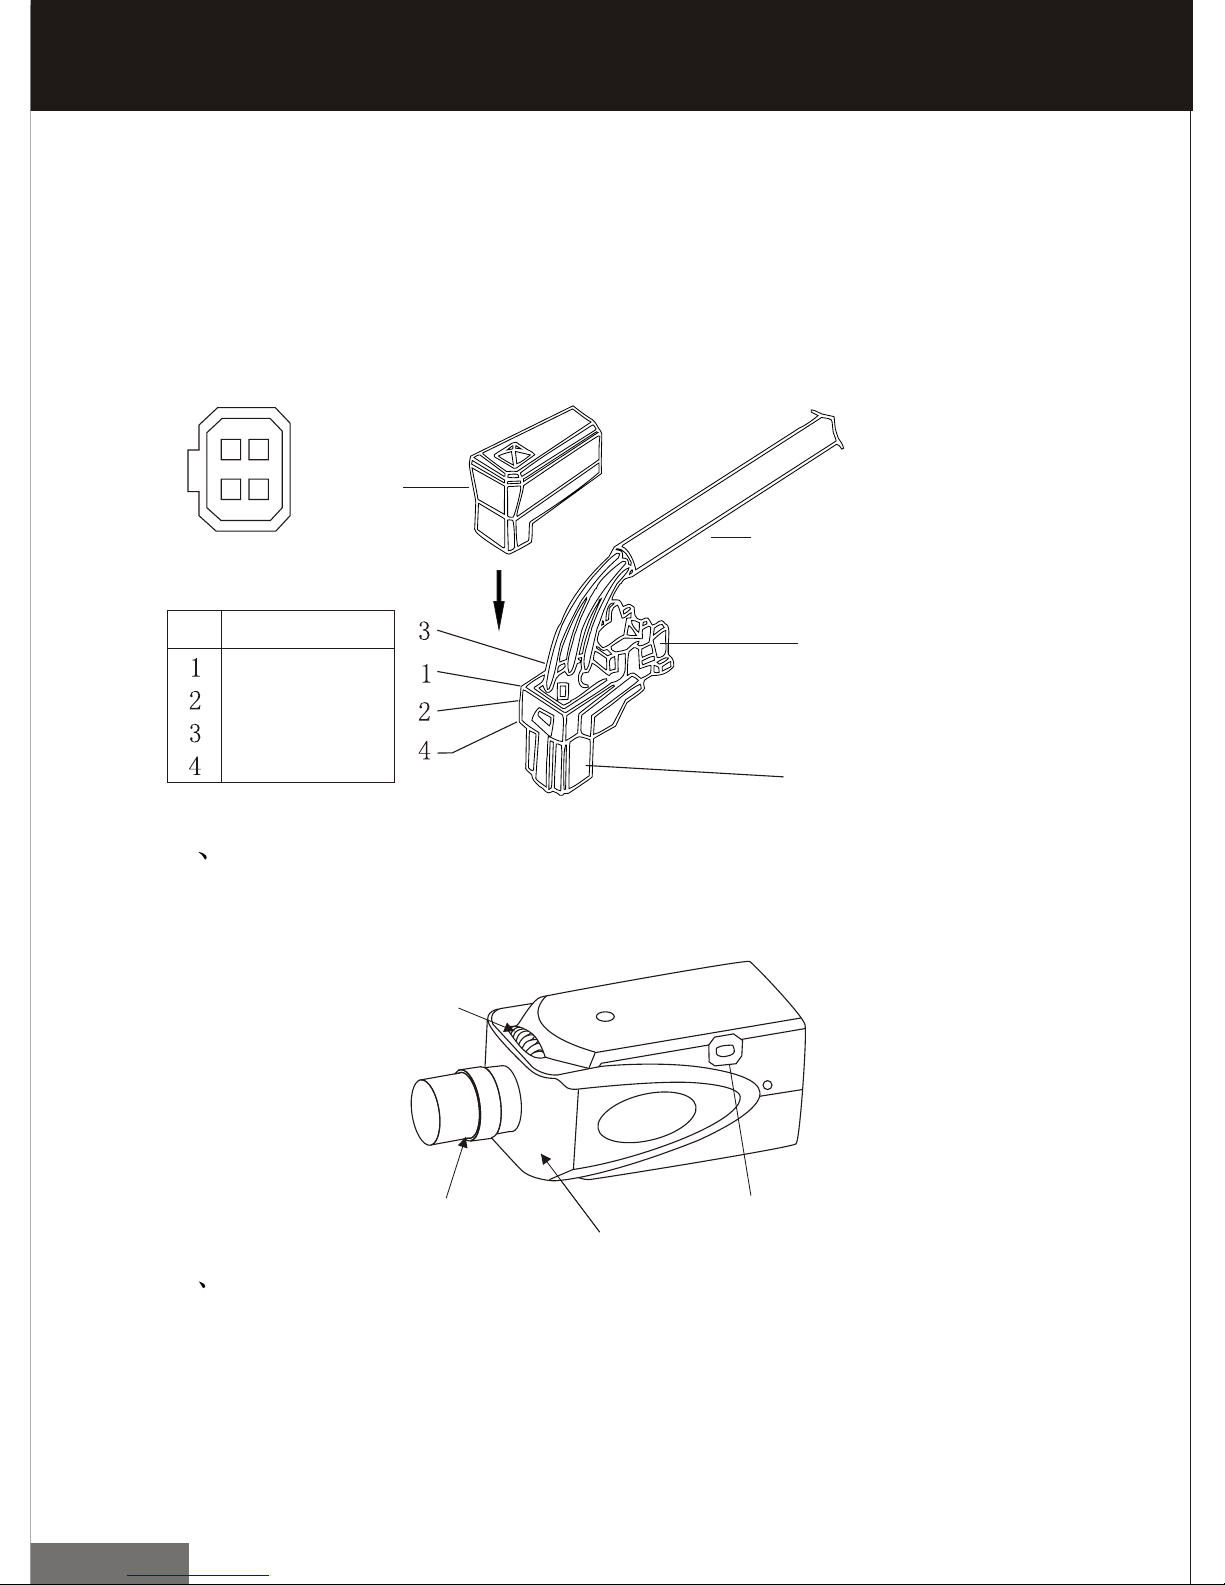
1 3
42
PIN SIGNAL
DAMP-
DAMP+
DRIVE+
DRIVE+
4. Power supplyindicator light (LED)
When the powersupplies normally, power indicator
light will lightup.
5. AutomaticIRIS lens interface (AUTO IRIS)
Plug
AUTO IRIS lens wire
If the cableis
thick or theplug
cover does notfit
properly cut this
rib away
Lens plug
6 Assisted Focus Knob
To a certainratio, if usingC or CSlens can notfocus,
please adjust thisknob.
Assisted Focus Knob
Lens (FTP Client)
Knob Fixing Screw
Auto Iris Interface
7 Dust Guard
Unload the dustguard before installinglens.
Do not bringor leave the camera after unloading the
dust guard.
System Function
6
A
B
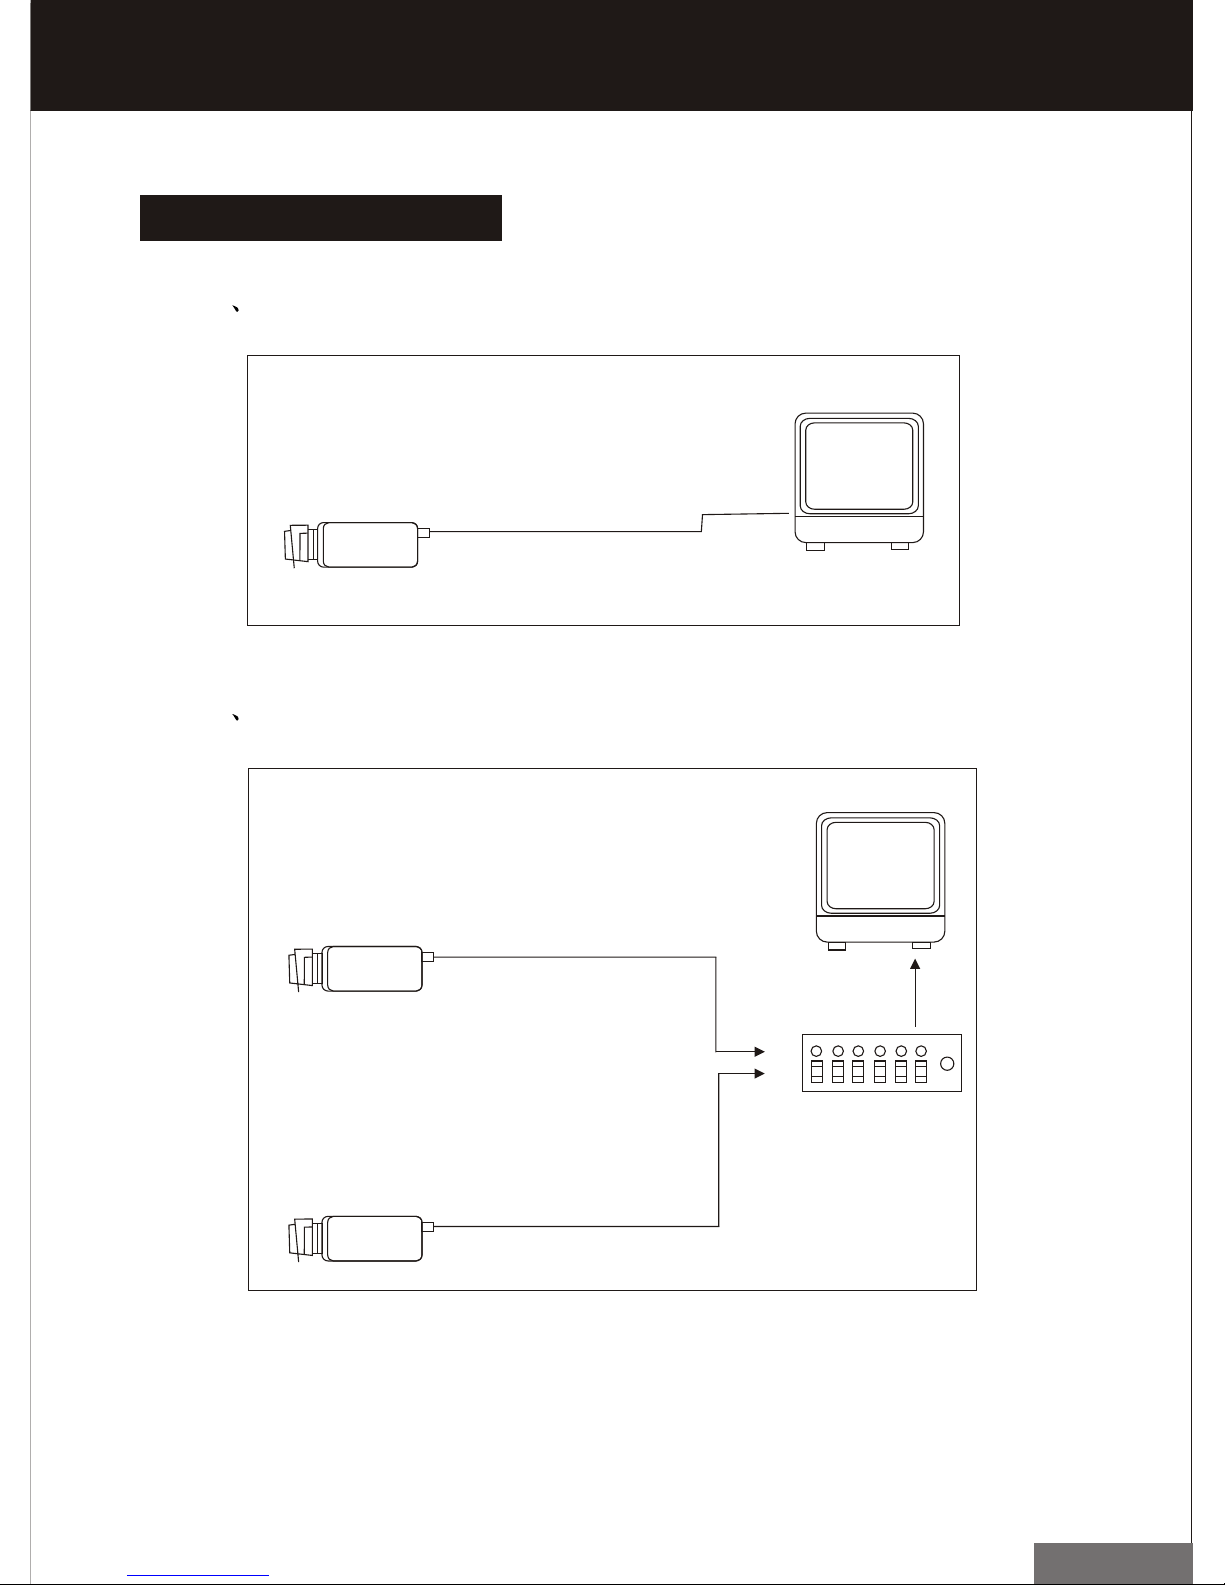
* Make surepower off before comecting.
Connecting Example
1 The way ofsingle camera connecting.
Camera
Video Coaxial Cable
Monitor
Video Sequential
Switching
Connecting Example
2 The way ofMuli-camera connecting.
7
AC24V/DC12V
LEDDOWN
LEFT MENU RIGHT
VIDEO OUT
UP
1
3
2
4
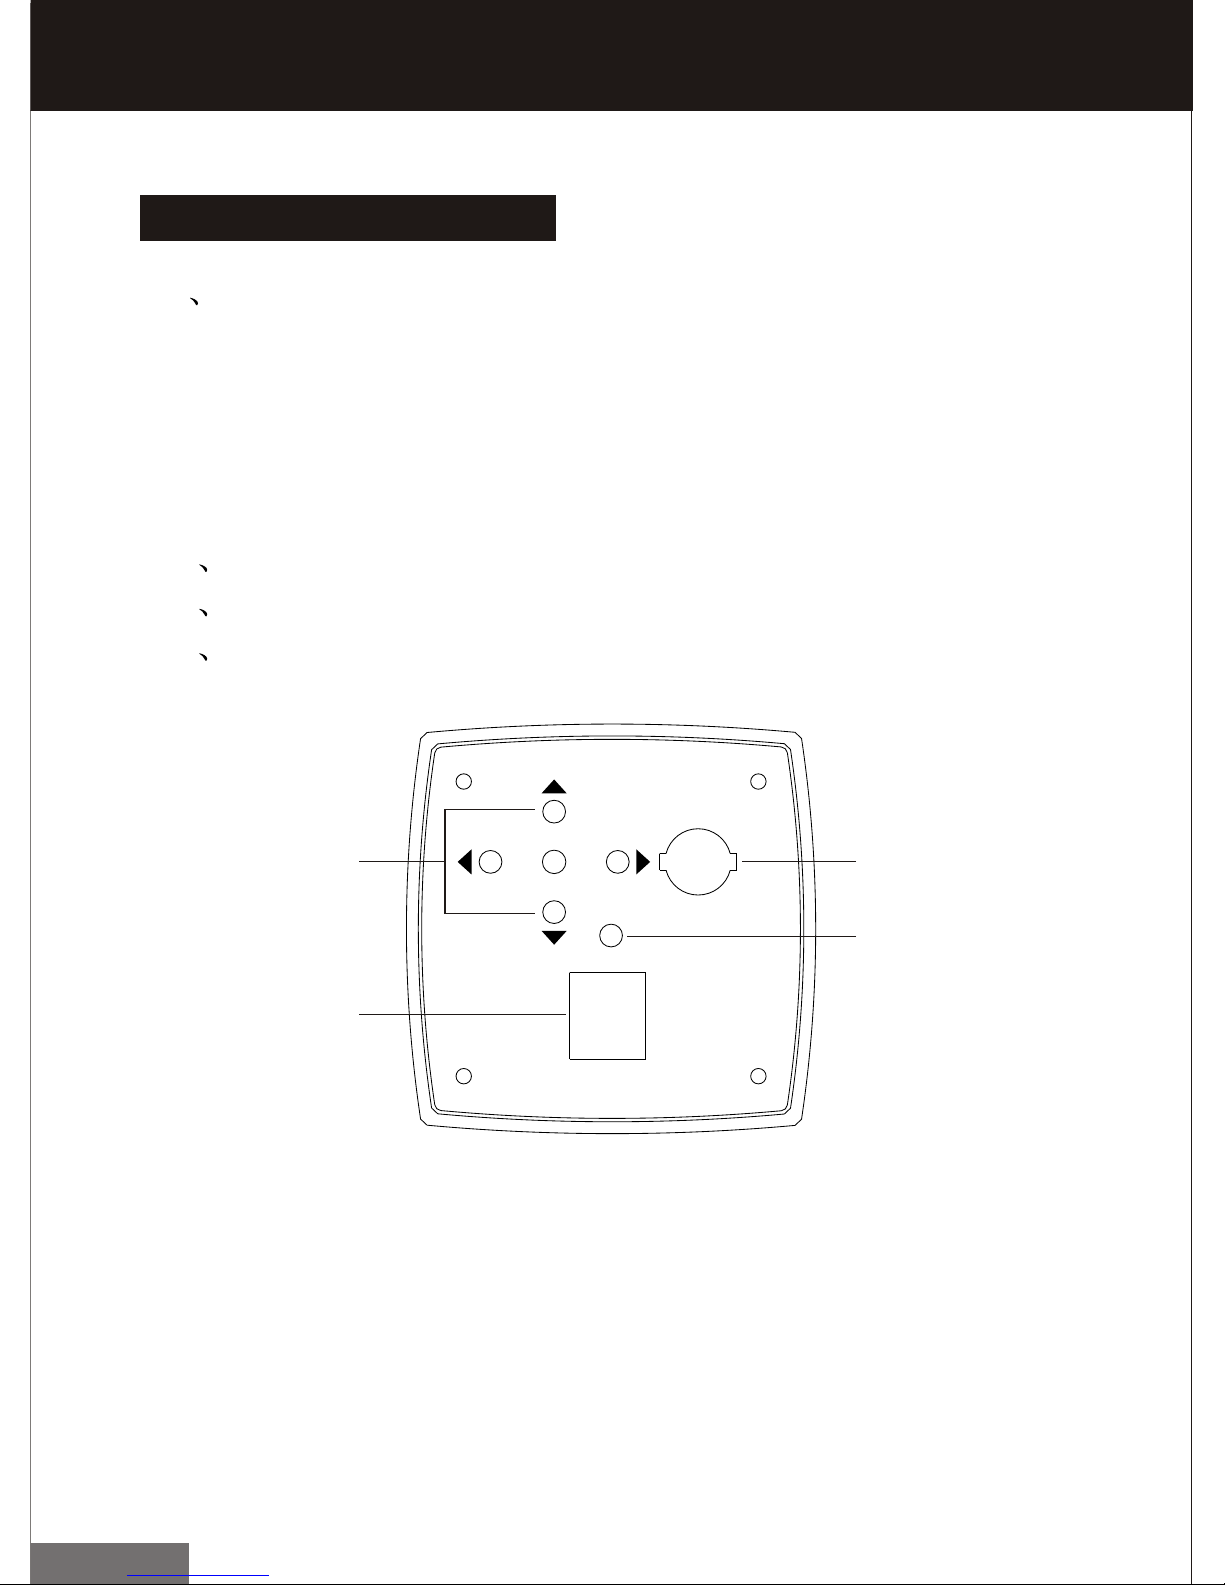
Back Panel Instruction
Back Panel Instruction
(1) Key-press
UP Upward selection push-button to move the menu.
DOWN Downward selection push-buttonto move themenu.
LEFT Leftward selection push-button toselect menu.
RIGHT Rightward selection push-button toselect menu.
MENU Menu functionalKey-press.
(2) Video output port (BNC VIDEOOUT)
(3) Power supply inputport
(4) Power supply indicatorlight (LED)
8
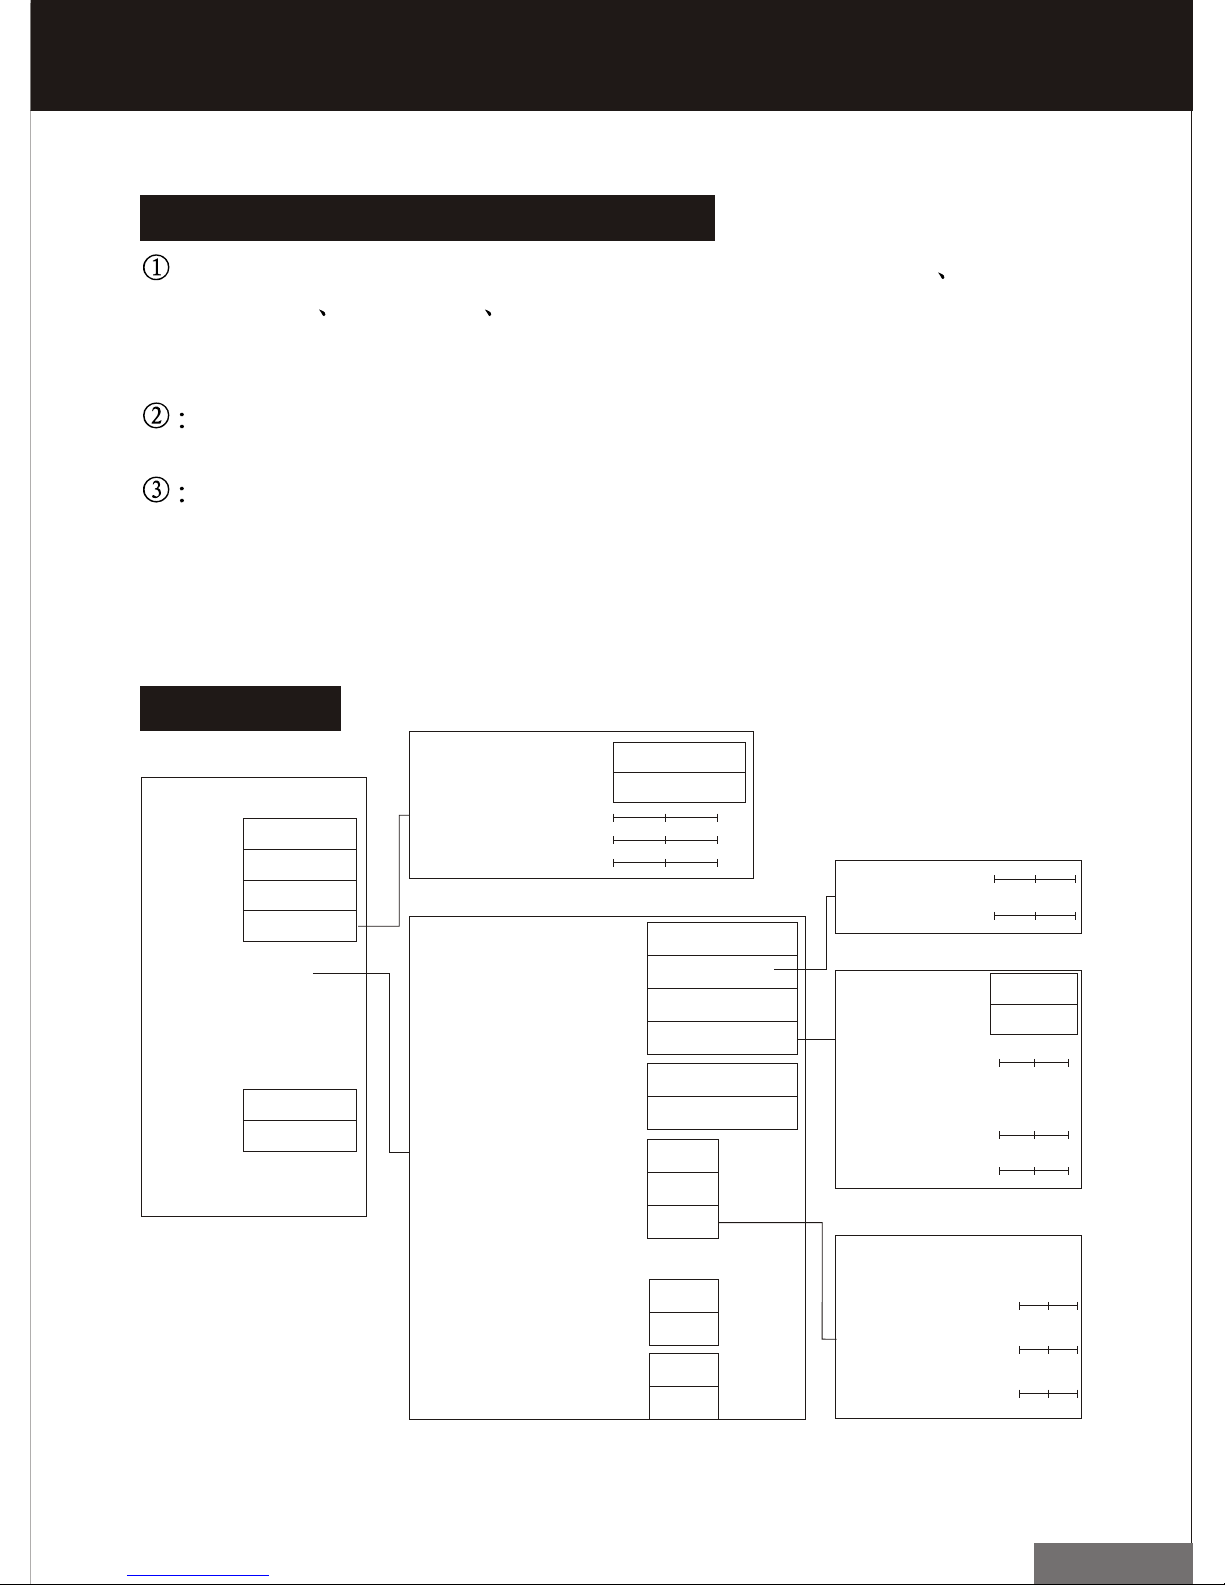
Main Camera Function Settings
: WDR camerahas 4 optional models : common
indoor outdoor user-defined (Details ofthe
reference manual 1.1); Also can select regionto be
optimized (Details ofthe reference manual 4.3).
Video format (MENU->BASIC SETUP->VIDEO
FORMAT), Set signal systemas PAL or NTSC.
Use line lockof AC 24 V cancontrol the colorrolling
(This feature onlyapplies to some models products).
Enter MENU (MENU->SETUP->SYNC->LINELOCK),
and regulate verticalphase until the color rolling
phenomenon disappear.
80-150(INCREASING 5)
WDR MODE
WDR CAMERA
NORMAL
INDOOR
OUTDOOR
CUSTOM
IMAGE ADJUST
BASIC SETUP
ADVANCED SETUP
LANGUAGE
ENGLISH
CHINESE
EXIT MENU
1.2 EXPOSURE SETUP
AE PREFs HIGHLIGHTS
SHADOWS
DYNAMIC RANGE
BIAS
AGC LIMIT
IMAGE ADJUST
2.1WHITE BALANCE AWB
ATW Xtnd
ATW Desat
MANUAL
2.2RESOLUTION 520TVL
540TVL
2.3D/N CONTROL DAY
NIGHT
AUTO
2.4VIDEO LEVEL
2.5HORIZONTAL FLIP ON
OFF
2.6COLOR BAR ON
OFF
WHITE BALANCE LIMITS
LOWLIMIT
HIGHLIMIT
MANUAL WHITE BALANCE
ADJ MODE KELVIN
KELVIN
R/B
R/B
RED
BLUE
INPUT DELAY 1-20SEC
IN NIGHT GAIN
OUT NIGHT GAIN
D/N LIMIT
Menu Tree
Main Camera Function Settings
Table of contents
Other Sony Action Camera manuals


