Soredex made easy TWAIN 4.6 User manual

Digital imaging
made easy™
SOREDEX™ TWAIN 4.6
User manual
207892 rev. 6
ENGLISH


207892 iii
TWAIN 4.6
SOREDEX™TWAIN 4.6
User manual
Medical Device Directive
93/42/EEC
SOREDEX™ TWAIN 4.6
User manual
207892 rev. 6
Original approved English language version
Manufactured by Soredex, PaloDEx Group Oy
Nahkelantie 160
FI-04300 Tuusula,
FINLAND
Tel. +358 (0)10 270 2000
www.kavo.com

iv 207892
TWAIN 4.6
Documentation, trademark and the software are copyrighted with all rights re-
served. Under the copyright laws the documentation may not be copied, photo-
copied, reproduced, translated, or reduced to any electronic medium or machine
readable form in whole or part, without the prior written permission of SOREDEX.
SOREDEX, CRANEX, DIGORA, SCANORA and MULTICONNECT are either
registered trademarks or trademarks of Soredex in the United States and/or other
countries.
All other trademarks are property of their respective owners.
SOREDEX reserves the right to make changes in specication and features shown
herein, or discontinue the product described at any time without
notice or obligation. Contact your SOREDEX representative for the most current
information.
This software distributes and dynamically links to unmodied version of cross-plat-
form application and UI framework called Qt. The Qt UI framework is licensed
under GNU LGPL and the Qt source code is available from https://www.qt.io/.
Questions about the usage of components under GNU LGPL in this product can

207892 v
TWAIN 4.6
Contents
1. TWAIN................................................................................................................. 1
1.1 Introduction ................................................................................................... 1
1.2 About this manual.......................................................................................... 1
1.3 Software compatibility ................................................................................... 2
1.4 Symbols that may appear on the product ..................................................... 2
2. User’s Guide ...................................................................................................... 3
2.1 Opening TWAIN and acquiring images ......................................................... 3
2.2 Examining and adjusting images .................................................................. 6
Fullscreen shortcuts ................................................................................... 9
2.3 Saving (Returning) and deleting images ..................................................... 10
2.4 Retrieve last image ......................................................................................11
2.5 Retrieving images ....................................................................................... 12
2.6 Set as Auto-connect .................................................................................... 13
2.7 Device settings............................................................................................ 14
2.8 Closing TWAIN............................................................................................ 14

vi 207892
TWAIN 4.6

1. Introduction TWAIN 4.6
207892 1
1. TWAIN
1.1 Introduction
SOREDEX™TWAIN (hereafter called TWAIN)
is interface software for acquiring, viewing and
processing dental digital images via compatible
third-party dental imaging software.
Examples of this application include dental imaging
software from equipment manufactures, practice
management software and specialist imaging
software such as cephalometric tracing.
TWAIN allows digital dental images to be:
- Captured from SOREDEX, Instrumentarium
Dental, KaVo and Gendex digital imaging
device(s).
- Examined
- Adjusted to enhance their diagnostic value.
1.2 About this manual
This manual describes how to use TWAIN.
A separate installation manual is supplied that
describes how to install and congure TWAIN.
TWAIN must only be installed and setup by KaVo
trained and approved service personnel.
Before installing the software or using a digital
imaging device refer to the documentation supplied
with the device.
2 207892
TWAIN 4.6 1. Introduction
1.3 Software compatibility
TWAIN supports Windows 10, Windows 8.1
and Windows 7 operating systems. Refer to
the documentation supplied with Windows for
information about the Windows environment.
NOTICE:
If the SOREDEX, Instrumentarium Dental, KaVo or
Gendex imaging device(s) are used with a 3rd party
dental imaging software not produced or supported
by SOREDEX, the 3rd party dental imaging
software must comply with all applicable local laws
and regulations regarding dental imaging software.
This includes, for example, the Medical Device
Directive 93/42/EEC and/or FDA if applicable.
1.4 Symbols that may appear on the product
Name and address of the manufacturer
Catalogue number
Consult instructions of use
Electrical and electronic equipment waste,
dispose CD media and other parts according to
national laws and standards.
CE Mark
USA only: Caution: Federal law restricts this
device to sale by or on the order of a dentist.
Rx Only

207892 3
2. User’s guide TWAIN 4.6
2. User’s Guide
2.1 Opening TWAIN and acquiring images
1. Switch on the device(s) connected to the PC in
which TWAIN is installed
2. Open the dental imaging software you are using.
3. From the appropriate menu in the dental imag-
ing software select Acquire Image / Acquire.
4. The TWAIN window will open.
In the Select device eld, icons indicate what
devices have been congured to work with the
PC in which TWAIN is installed.
NOTICE:
If a congured device does not appear in the
Select device eld or if you want to add a new
device contact your service technician.

4 207892
TWAIN 4.6 2. User’s guide
5. From the Select device list click the device you
wish to use. If the device is ready to use the icon
will turn green and a check mark and the word
Ready will appear.
The device can now be used.
NOTICE:
If the device is Ready when TWAIN is opened, it
indicates that the auto-connect feature has been
activated. See 2.5 Set as Auto-connect.
If the device does not become ready after it has
been selected, dierent icon colors/symbols
indicate the status of the device.
The other device statuses are as follows:
Green, circle - Idle.
The device is ready but not reserved. Click the
icon to reserve it.
Yellow, dash - Busy.
The device is reserved by someone else or is
not ready for connection. Wait until the device is
released or ready.
Gray, disconnected line - Not connected.
The device cannot be found, or is switched o or
disconnected. Check that the device is on and
connected to the PC.
Gray, rotating circle - Waiting.
Connecting to a device.
Red, cross - Error.
Device error. Make sure that the device is on
and functioning correctly.

207892 5
2. User’s guide TWAIN 4.6
6. Use the selected device to acquire the required
image. The image will appear in TWAIN in a
preview window.
If you take more than one image using the same
or a dierent device, the additional images will
appear as thumbnail images below the preview
image.
Click the thumbnail image you wish to examine
and it will appear in the preview window.

6 207892
TWAIN 4.6 2. User’s guide
2.2 Examining and adjusting images
The image can be examined and adjusted in either
the preview window or in the fullscreen window.
1. To open the fullscreen window click the
fullscreen button in the toolbar or double-click
the image in the preview window
Preview window Fullscreen window
To return to the preview window click the pre-
view button or double-click the fullscreen win-
dow.
207892 7
2. User’s guide TWAIN 4.6
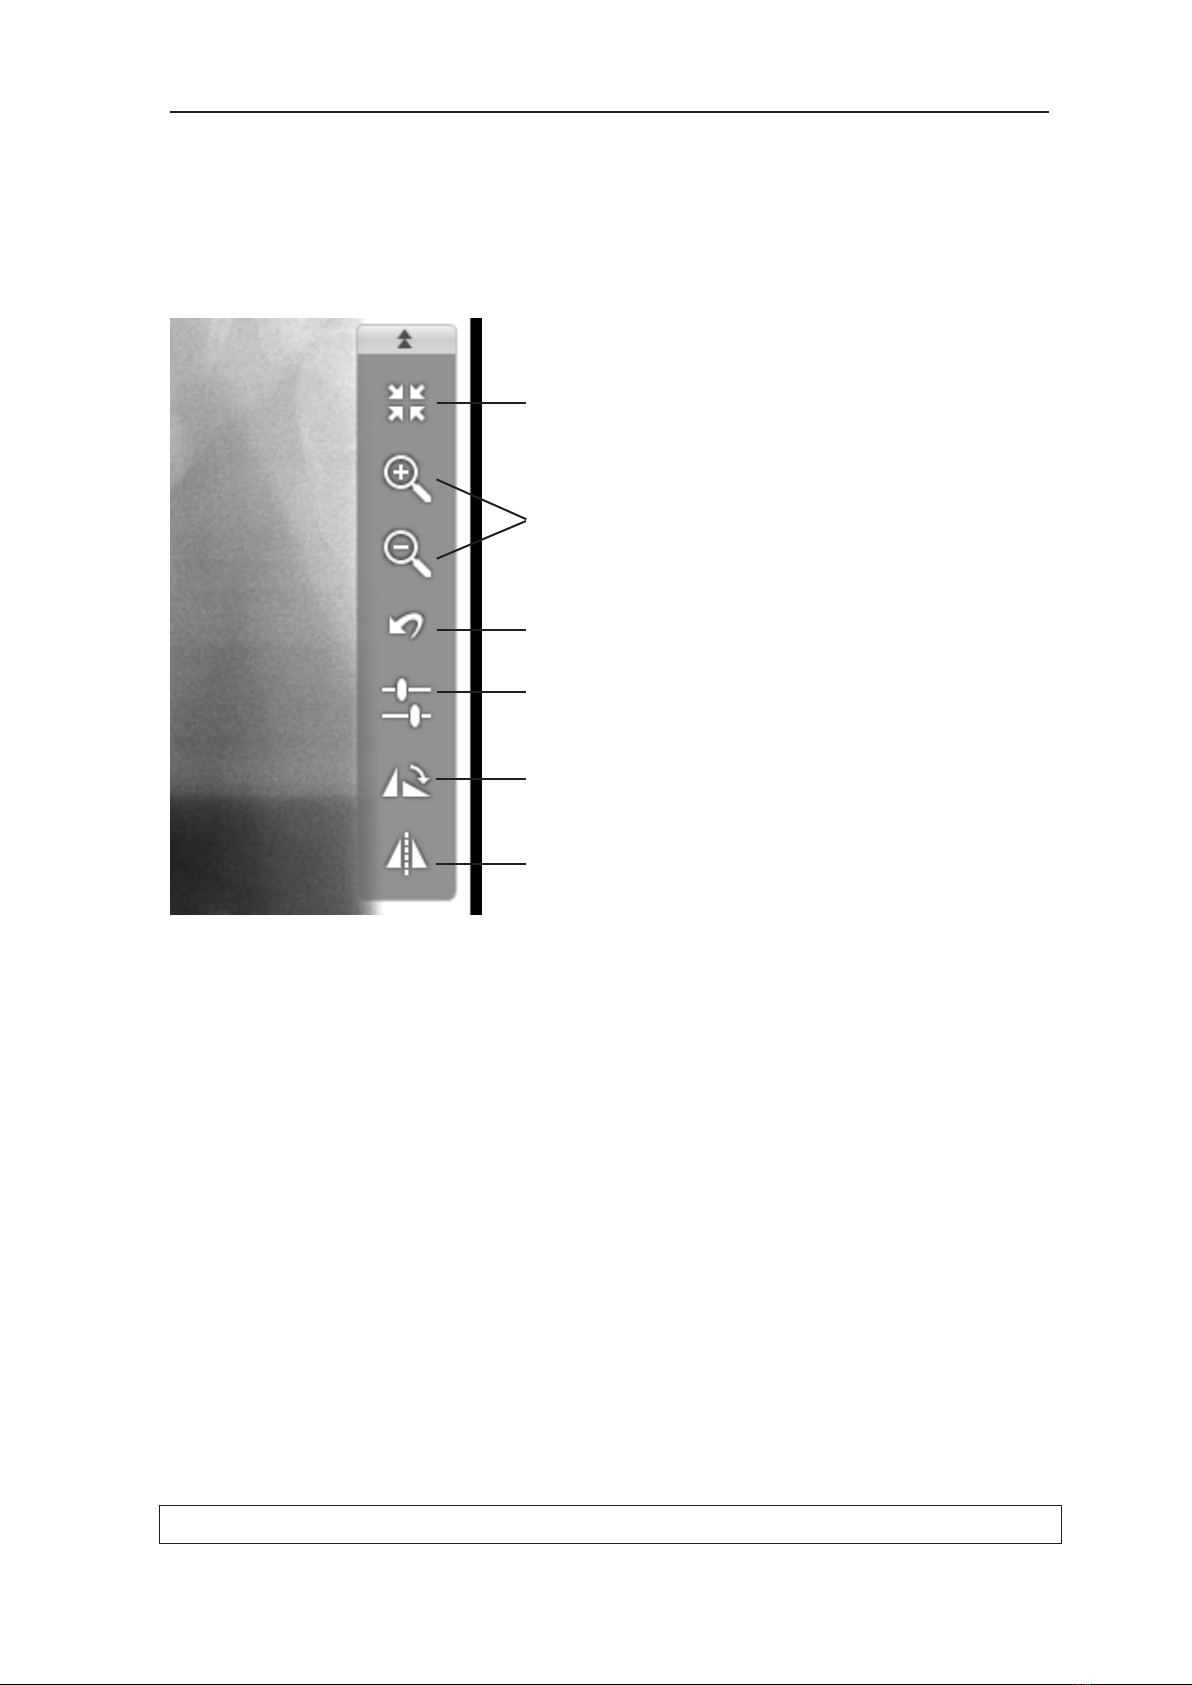
The image adjusting tools in both the preview
window and the fullscreen window function in
the same way.
2. The tools on the right-hand side of the image
can be used to examine and adjust the image.
The tools are as follows:
Fullscreen/Preview. Selects fullscreen or pre-
view window.
Zoom in/out. Magnies or reduces the size of
the image. Fullscreen only.
Restore image. Restores original image.
Image controls. Adjusts image parameters:
Rotate image. Rotates the image clockwise in
90° steps.
Mirror. Mirrors the image.
NOTICE:
In the fullscreen window most of the tools can
also be activated using the mouse or the key-
pad. This is not possible in the preview window.
See section: Fullscreen shortcuts.
8 207892
TWAIN 4.6 2. User’s guide
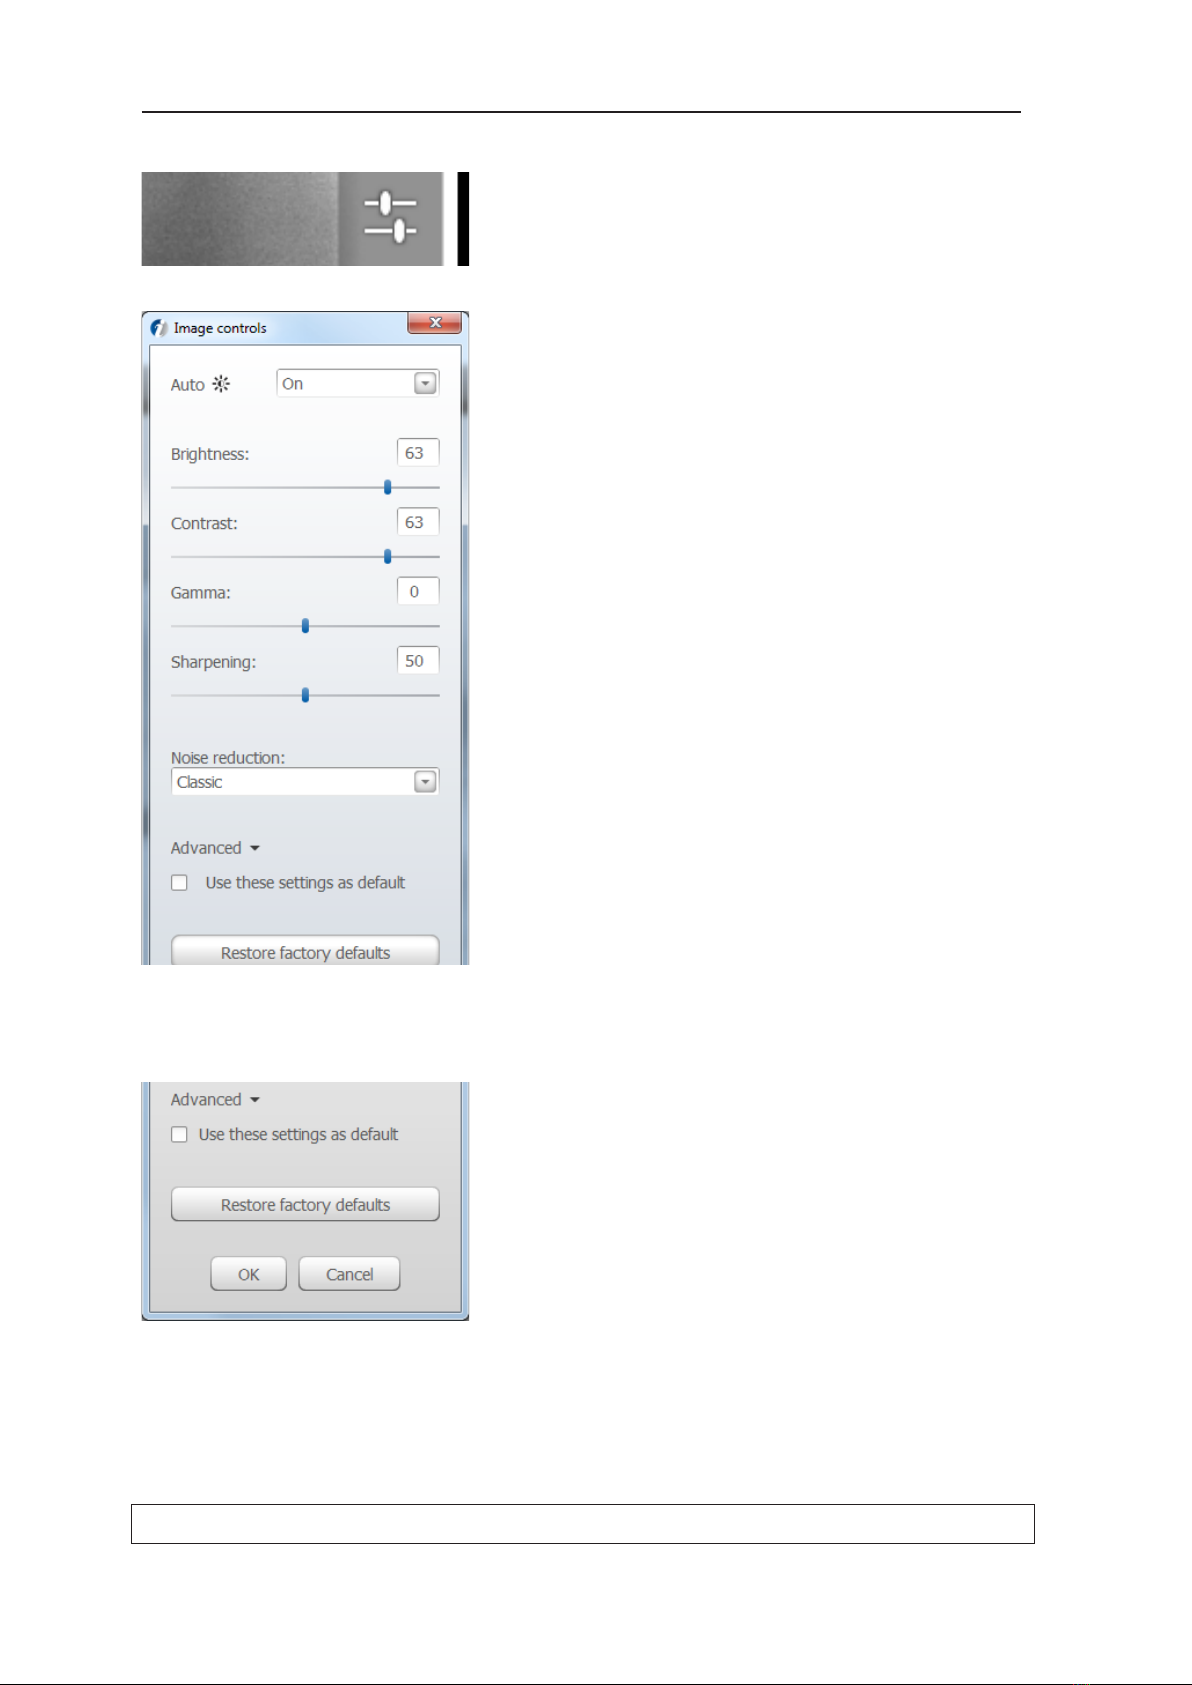
Image controls
When the Image controls tool is selected the
Image controls window will appear. This allows
the image settings to be adjusted.
The image settings are:
Auto Brightness: On - O
Brightness: -100 – 100
Contrast: -100 – 100
Gamma: -100 – 100
Sharpening: 0 - 100
Noise reduction: O, Classic & Progressive
After adjusting the image settings click OK to
save the changes.
NOTICE:
The changes will only be applied to the open
image.
To apply the changes to ALL subsequent im-
ages, of the same modality, taken using the
same device, click Advanced and select the
Use these settings as default function.
Advanced options:
Use these settings as default
Click the Use ... default check box to apply any
changes made to the open image to all subse-
quent images of the same modality, from the
selected device. Click OK to save the changes.
Restore factory defaults
Click the Restore factory defaults button to
restore the factory default settings to the open
image. Click the Use ... default check box to
apply the factory default settings to all subse-
quent images of the same modality, from the
selected device. Click OK to save the changes.

207892 9
2. User’s guide TWAIN 4.6
Fullscreen shortcuts
If the image is being examined and adjusted in
the fullscreen window the following Keyboard and
mouse shortcuts can be used:
Keyboard
Zoom in: Pg Up (page up) key.
Zoom out: Pg Dn (page down) key.
Pan image when zoomed: arrow keys.
Previous image: -(minus) key.
Next image: +(plus) key.
Undo changes (Restore original image): Ctrl+z
keys.
Return to preview window: Esc key.
Mouse
Fullscreen image: double-click large image in
preview window.
Preview image: double-click fullscreen image.
Zoom in: roll mouse wheel forward.
Zoom out: roll mouse wheel backwards.
Pan: hold left mouse button down and drag.
Adjust brightness: hold right mouse button
down and drag horizontally (left decreases, right
increases)
Adjust contrast: hold right mouse button down
and drag vertically (down decreases, up increas-
es)
10 207892
TWAIN 4.6 2. User’s guide
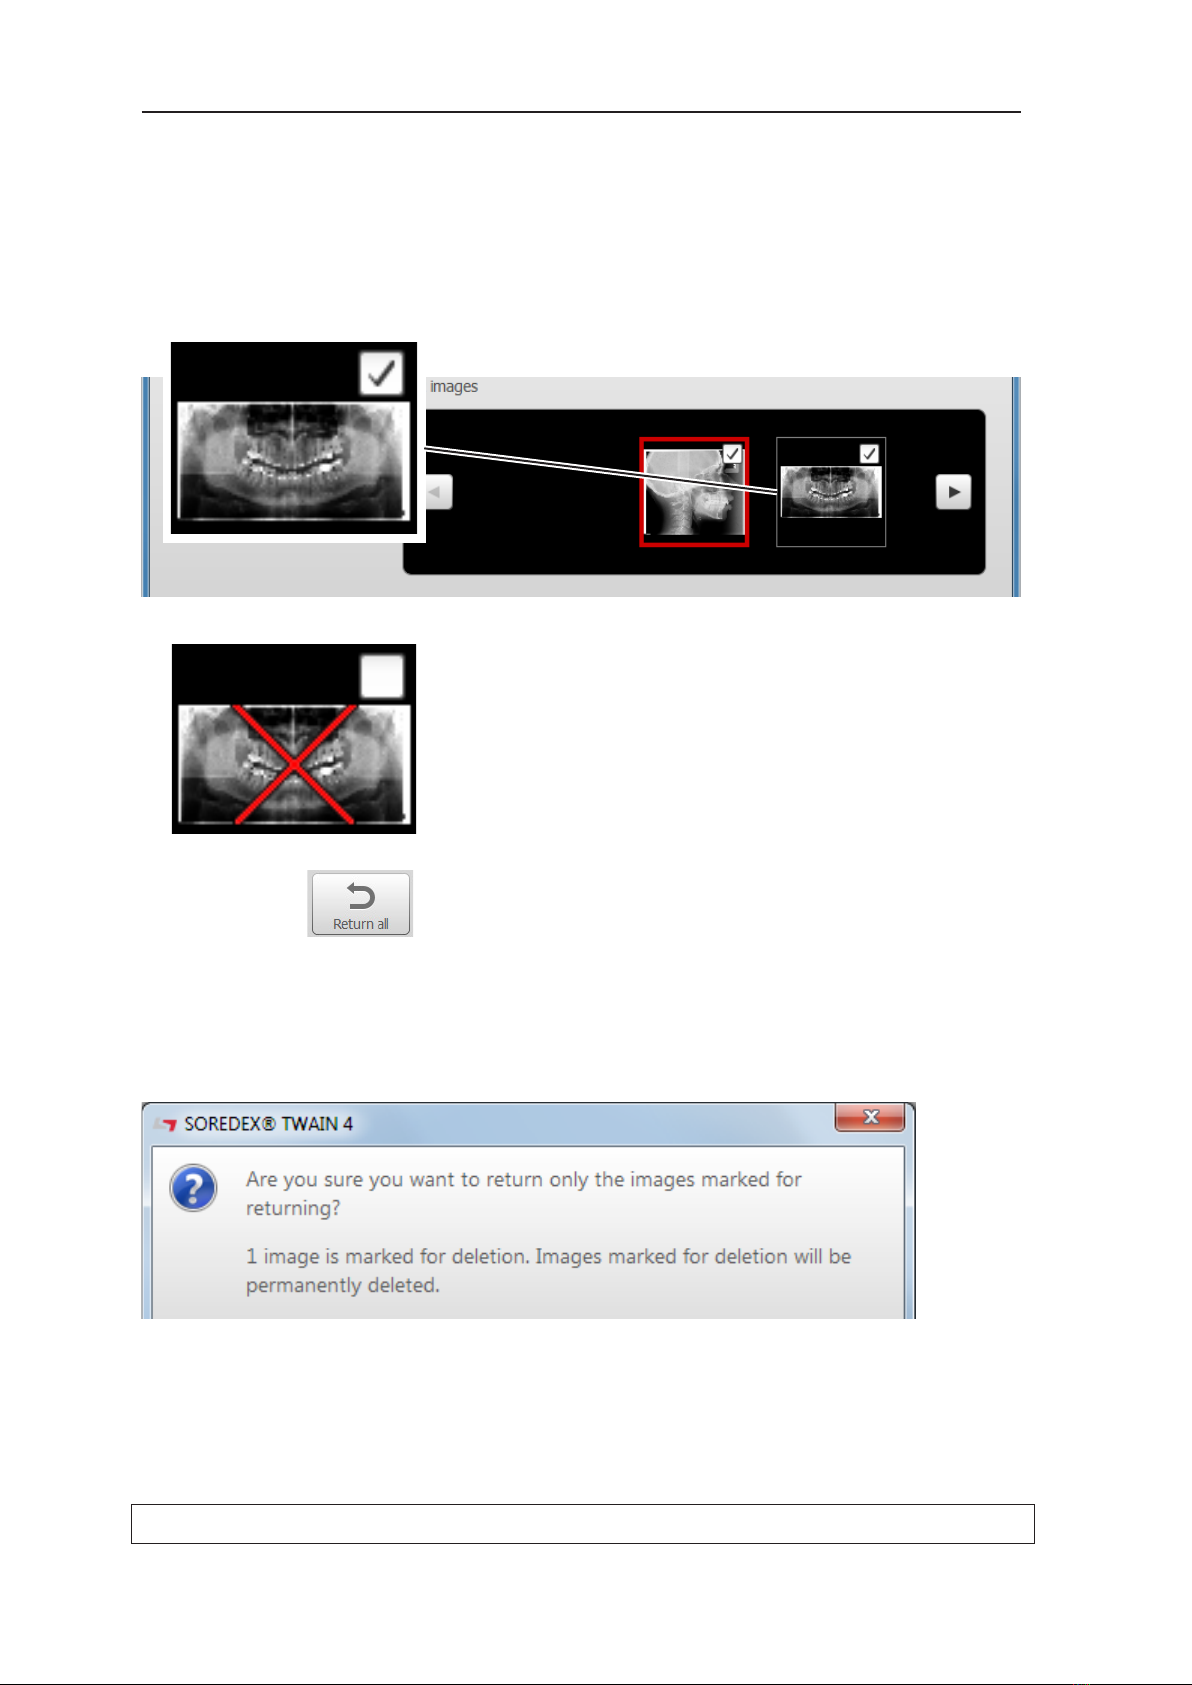
2.3 Saving (Returning) and deleting images
1. Return to the preview window.
2. Click the check mark in the top right-hand cor-
ner of the thumbnail image that represents the
image you wish to delete.
A red cross will appear on the thumbnail image.
2. Click the Return all button to return (transfer)
the selected image to the dental imaging soft-
ware you are using. The image marked with the
red cross will be deleted.
3. A deletion conrmation message will appear.
Click Yes to save (return) the images and delete
any marked images.

207892 11
2. User’s guide TWAIN 4.6
2.4 Retrieve last image
NOTICE:
This feature is not available for all devices.
The last image taken can be retrieved from the de-
vice memory. Note that if the device is restarted the
last image taken will be lost.
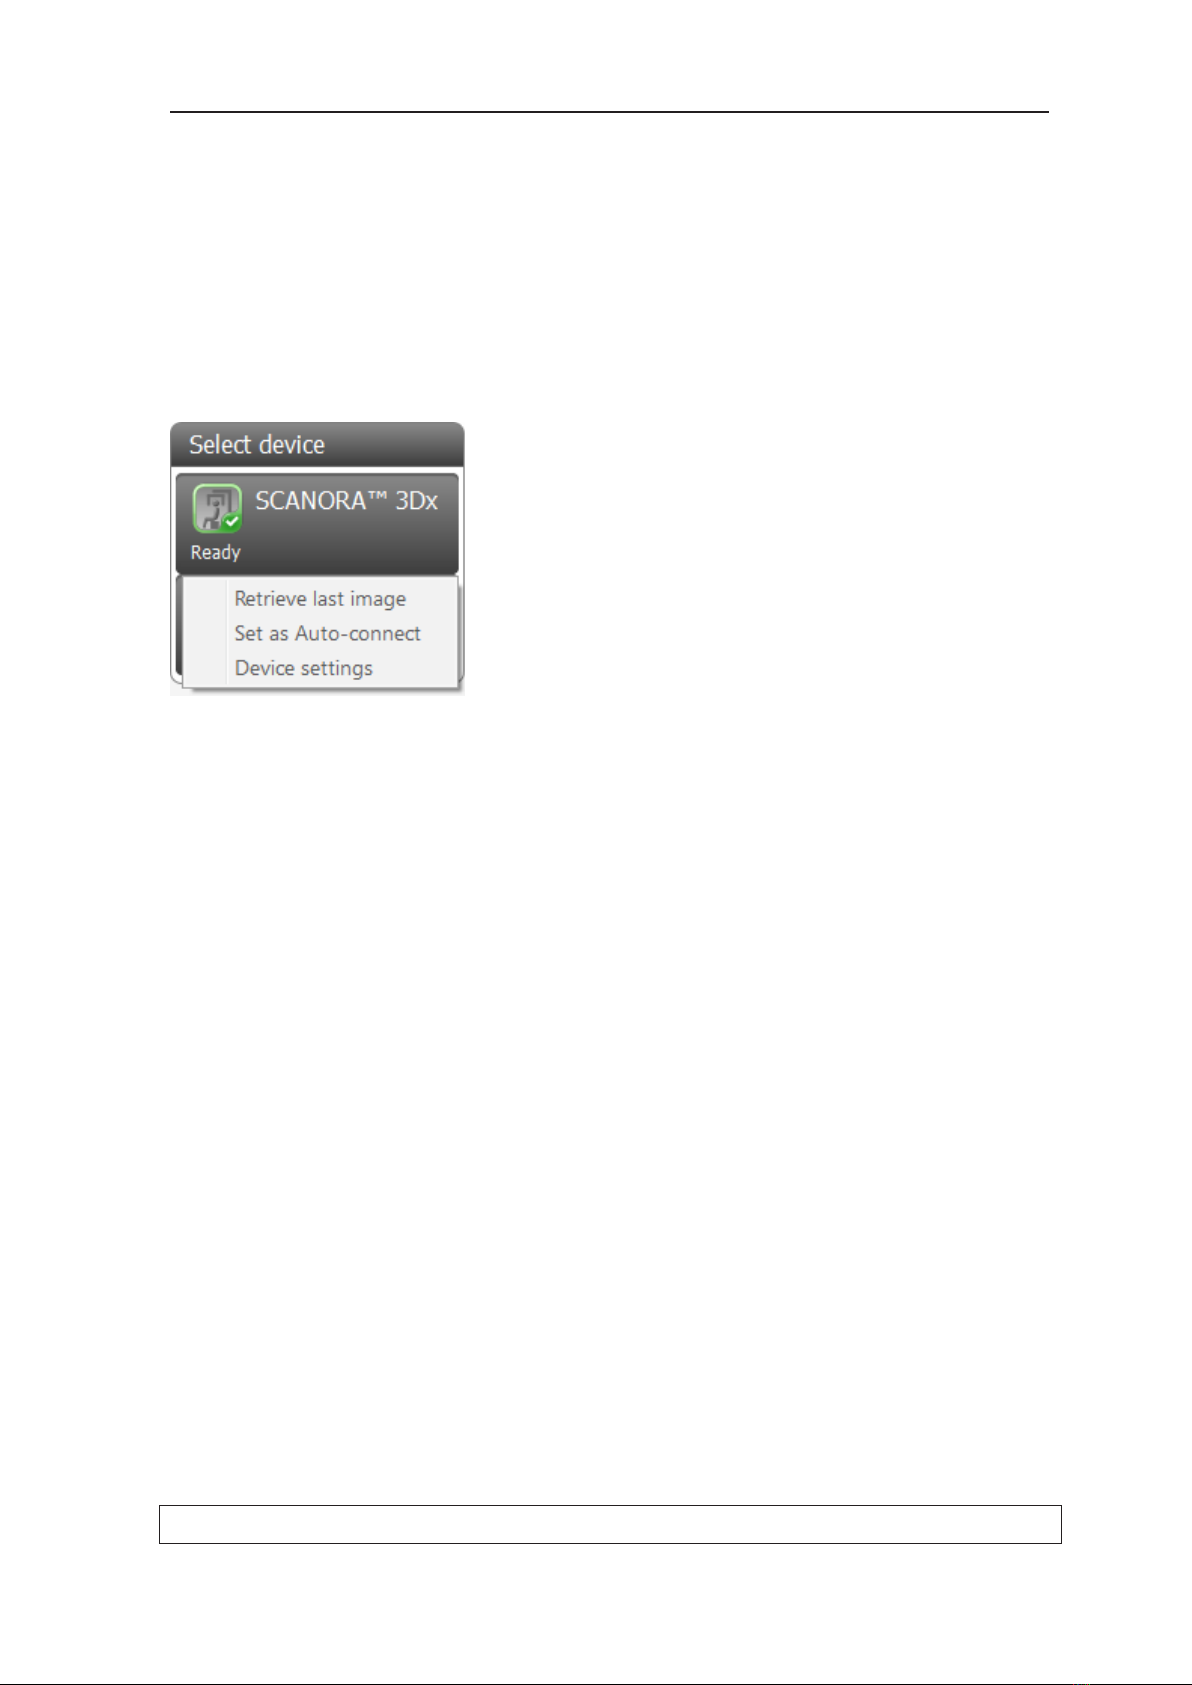
1. From the Select device list, right click the se-
lected device or the device from which you wish
to retrieve the last image.
A menu will appear.
2. Click Retrieve last image. The last image taken
will open.
NOTICE:
The last image taken can also be retrieved using
the Device settings.
Refer to the device user manuals or TWAIN
installation manual for more information.
12 207892
TWAIN 4.6 2. User’s guide
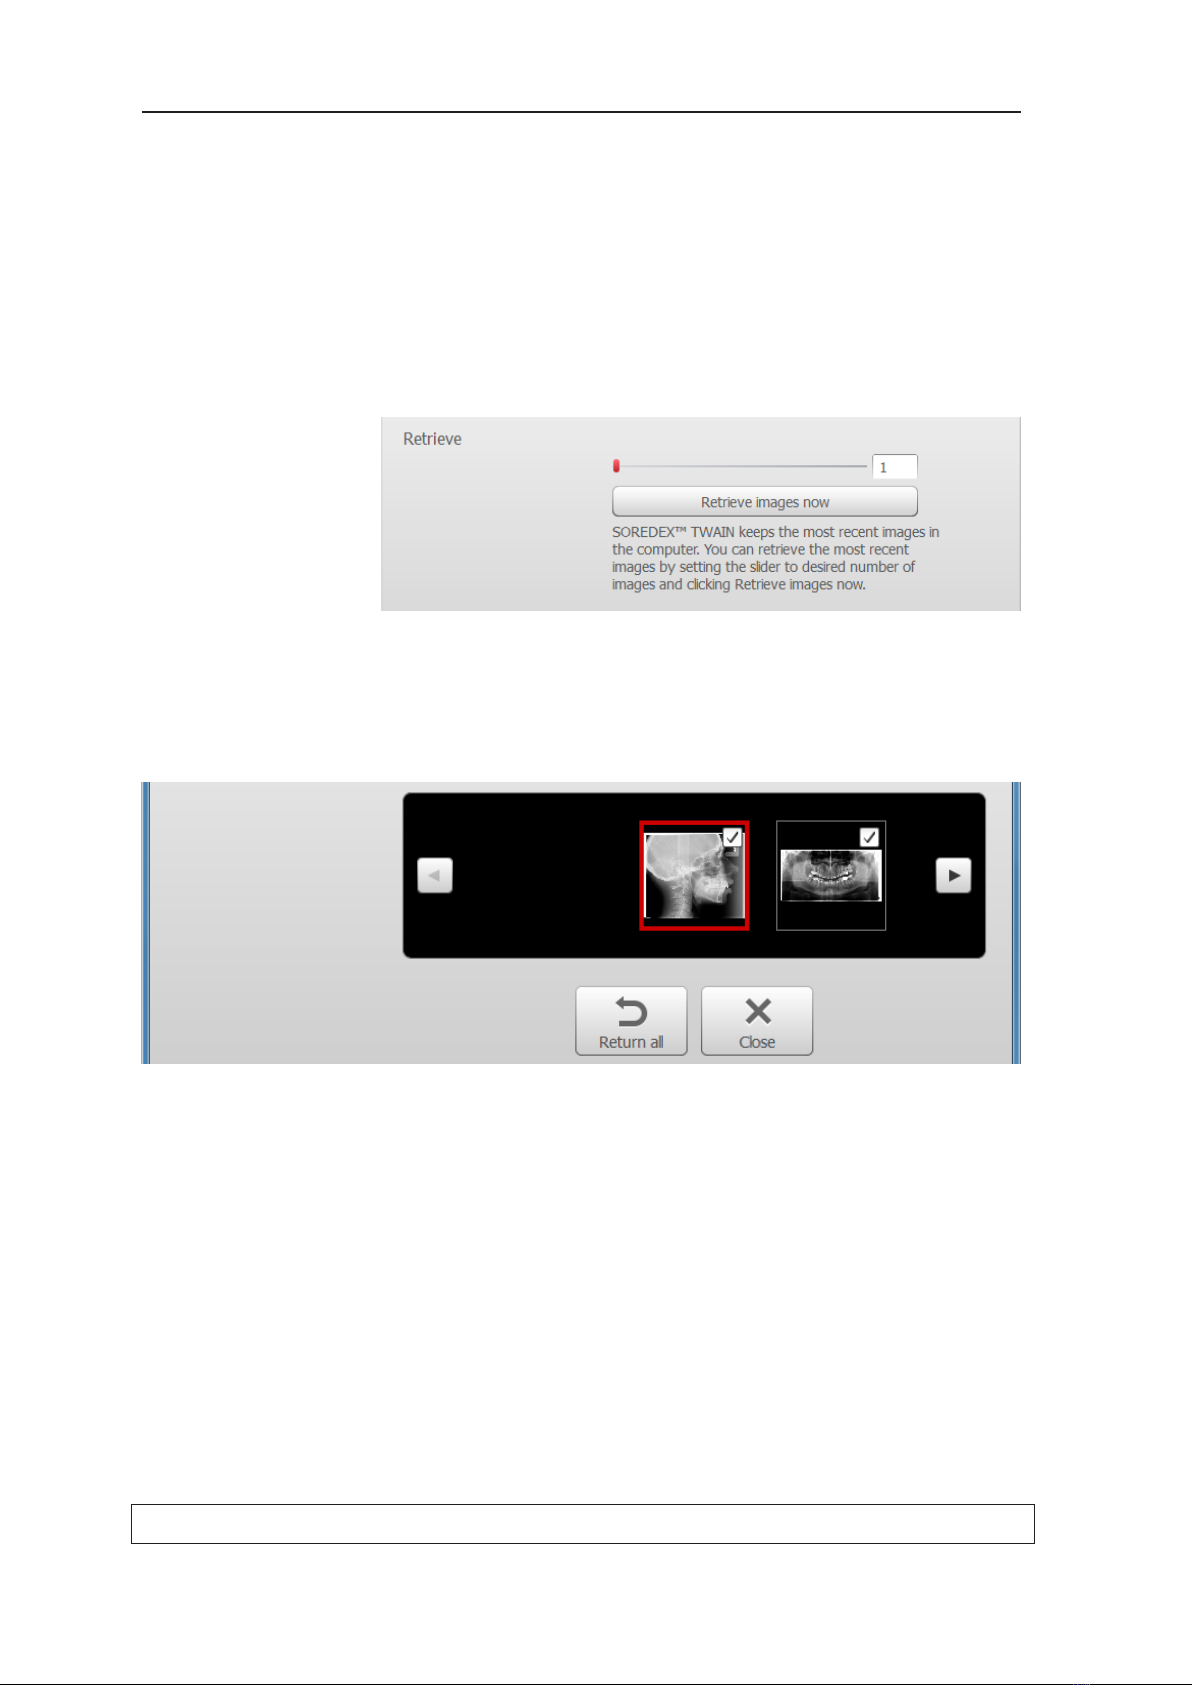
2.5 Retrieving images
TWAIN saves the thirty last images it received from
the device(s). If required these can be retrieved for
troubleshooting purposed.
To retrieve the images:
1. Use the Retrieve slider to select the number of
images you wish to retrieve.
2. Click Retrieve images now button, the images
will appear in the thumbnail row of the preview
window.
207892 13
2. User’s guide TWAIN 4.6
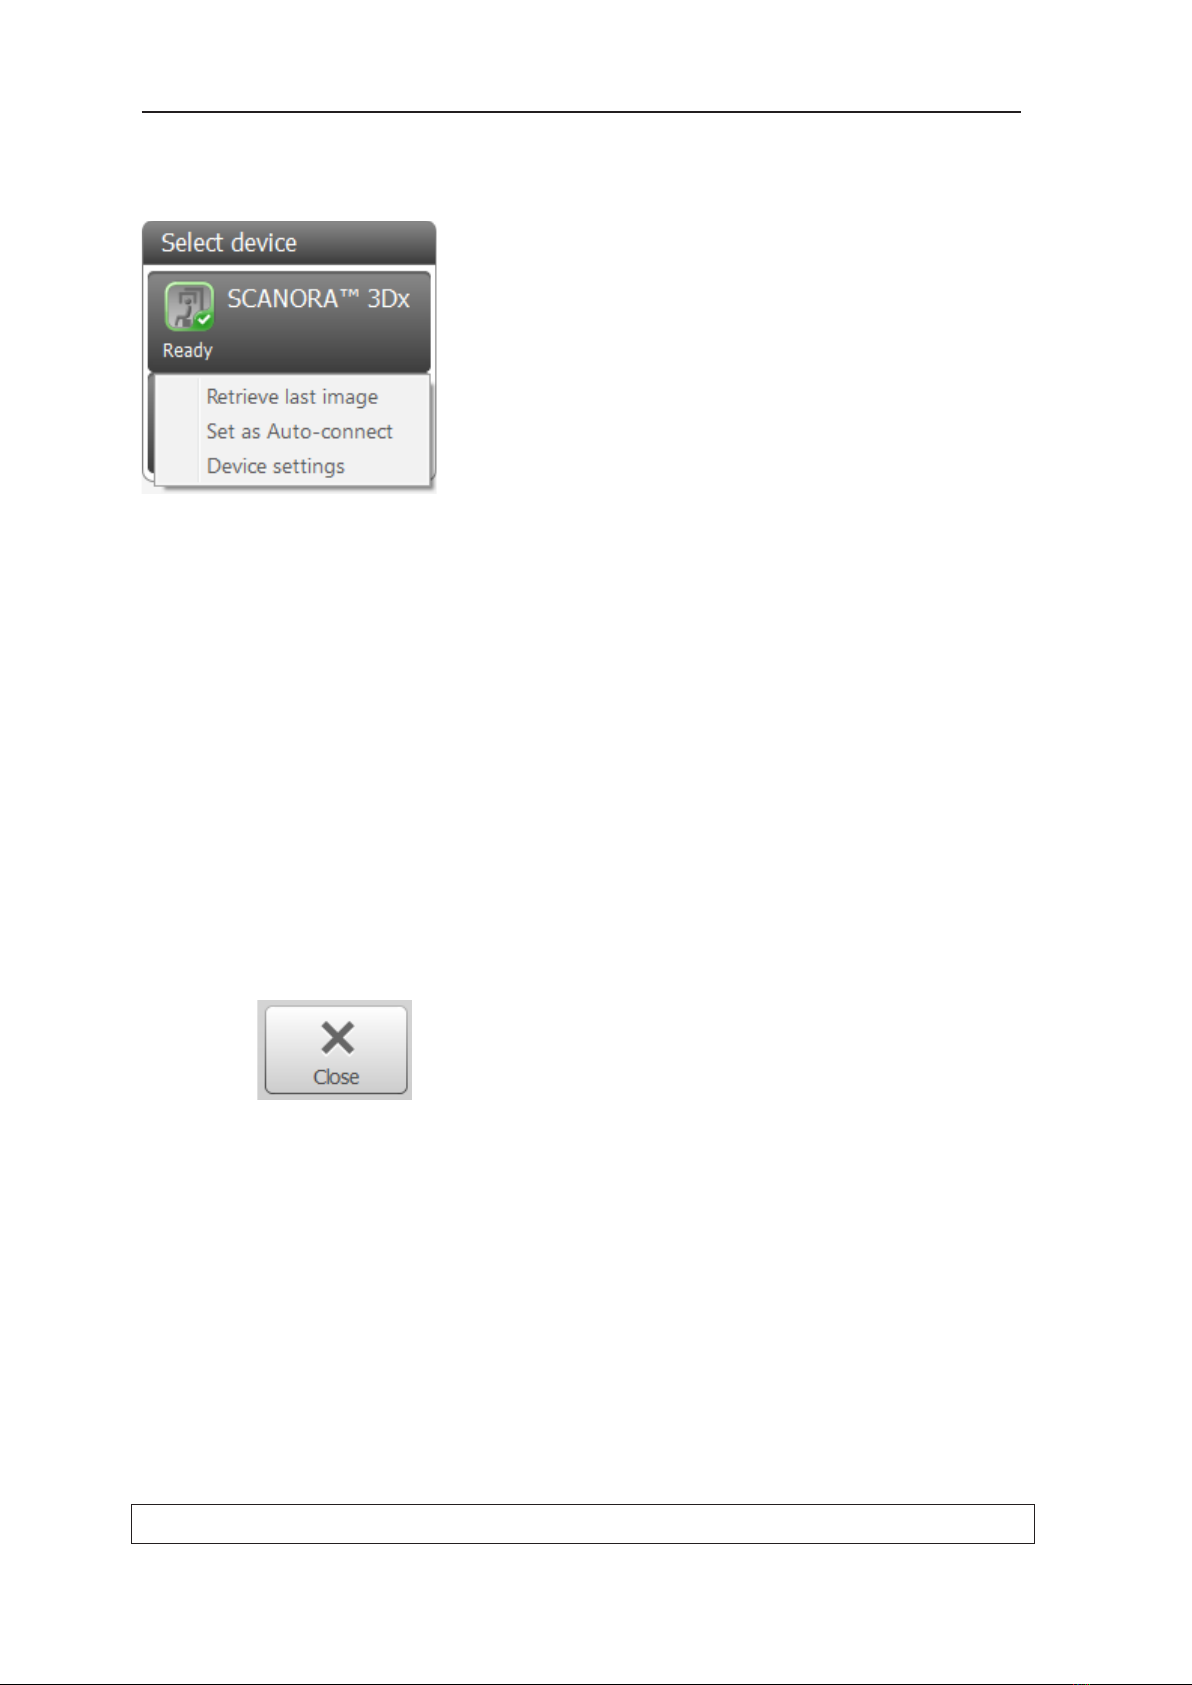
2.6 Set as Auto-connect
Devices can be set so that they will be automatically
connected when TWAIN is opened.
NOTICE:
The rst device congured to work with the PC in
which TWAIN is installed will be set to automatically
connect when TWAIN is opened.
All intraoral sensors are set to Auto-connect when
they are congured to work with the PC.
1. From the Select device list, right click the se-
lected device or the device that you wish to
Auto-connect.
A menu will appear.
2. Click Set as Auto-connect. A tick will appear
next to the feature. This indicated that the de-
vice will now be automatically connected when
TWAIN is opened.
NOTICE:
The Set as Auto-connect check box can also
be accessed through the Settings button in the
top right-hand corner of the TWAIN window.
14 207892
TWAIN 4.6 2. User’s guide
2.7 Device settings
Devices settings can be selected and changed from
this option.
1. From the Select device list, right click the de-
vice the settings of which you wish to display.
A menu will appear.
2. Click Device settings. The device settings win-
dow for the selected device will appear.
NOTICE:
Refer to the device user manuals or TWAIN
installation manual for more information.
NOTICE:
Device settings can also be opened by clicking
the Settings button in the top right-hand corner
of the TWAIN window, selecting the device and
then clicking Edit.
2.8 Closing TWAIN
1. Click Close.
CAUTION:
If you click Close all the images in the preview
window will be permanently deleted.
2. A conrmation message will appear. Click Yes to
close TWAIN and delete all the images.
Table of contents
Other Soredex All In One Printer manuals


