SOtM tX-USBhubIn User manual

tX-USBhubIn Operating Instructions Rev1.1
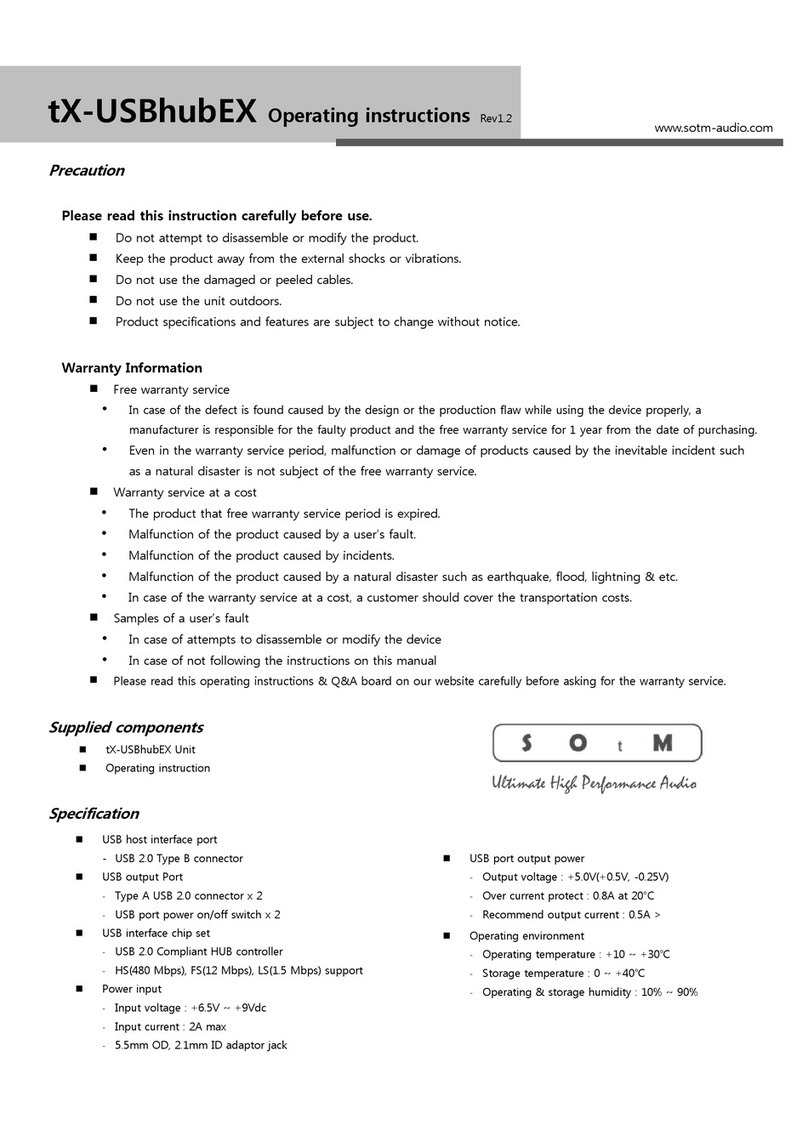
Precaution
Please read this instruction carefully before use.
Do not attempt to disassemble or modify the product.
Keep the product away from the external shocks or vibrations.
Do not use the damaged or peeled cables.
Do not use the unit outdoors.
Product specifications and features are subject to change without notice.
Warranty Information
Free warranty service
In case of the defect is found caused by the design or the production flaw while using the device properly, a manufacturer is
responsible for the faulty product and the free warranty service for 1 year from the date of purchasing.
Even in the warranty service period, malfunction or damage of products caused by the inevitable incident such as a natural
disaster is not subject of the free warranty service.
Warranty service at a cost
The product that free warranty service period is expired.
Malfunction of the product caused by a user’s fault.
Malfunction of the product caused by incidents.
Malfunction of the product caused by a natural disaster such as earthquake, flood, lightning & etc.
In case of the warranty service at a cost, a customer should cover the transportation costs.
Samples of a user’s fault
In case of attempts to disassemble or modify the device.
In case of not following the instructions on this manual.
Please read this operating instructions & Q&A board on our website carefully before asking for the warranty service.
Supplied Components
tX-USBhubIn Unit with Slim size bracket
Standard size bracket
Internal USB cable to connect the computer main board
Gender changer to connect 2.54mm USB header
Gender changer to connect 2.0mm USB header
Operating Instruction
Specification
USB host interface
-3 pins internal USB signal connector
-Connecting to the computer main board USB
header by the internal USB cable
USB output Port
-Type A USB 2.0 connector x 2
-USB power on/off switch
USB interface chip set
-USB 2.0 Compliant HUB controller
-HS(480 Mbps), FS(12 Mbps), LS(1.5 Mbps) support
Internal power input
-Input voltage : +12.0V(+0.5V, -0.5V)
-Input current : 2A max
-15pin SATA power connector
External power input
-Automatic external power selection
-Input voltage : +6.5V ~ +9Vdc
-Input current : 2A max
-5.5mm OD, 2.1mm ID adaptor jack
USB port output power
-Output voltage : +5.0V(+0.5V, -0.25V)
-Over current protection : 0.8A at 20°C
-Recommend output current : 0.5A >
Operating environment
-Operating temperature : +10 ~ +30℃
-Storage temperature : 0 ~ +40℃
-Operating & storage humidity : 10% ~ 90%
www.sotm-audio.com
Ultimate High Performance Audio

③
④
①
②
⑤
⑥
⑦
Product outline
①USB port 1 : connect USB device.
②Power switch of USB port 1 : Switch ON if the connected USB device requires USB power. Otherwise, switch OFF.
③USB port 2 : Connect USB device.
④Power switch of USB port 2 : Switch ON if the connected USB device requires USB power. Otherwise, switch OFF
⑤External power input jack : Connect the external power of 6.5Vdc ~ 9Vdc, 2A to feed external power. (5.5mm OD, 2.1mm ID)
⑥Internal USB port connector : Connect to the computer main board USB header connector by the internal USB cable and the gender changer.
⑦Internal power connector : Connect to the SATA power cable inside of PC.
Precaution
Recommend using one of USB ports only. If you use both USB ports at the same time, sound quality may degrade.
How to use
tX-USBhubIn is 2 ports USB2.0 internal hub designed for the best USB audio performance.
Install one of the supplied brackets to the products according to the height of PC case.
-The slim size bracket is assembled with the product, so if the PC case is the slim size, don’t need to change the bracket.
-If the PC case is the standard size, unscrew the slim size bracket and replace to the standard size bracket and fasten the screws.
Open the PC case and place the product into the empty card slot. Fasten the product bracket by using the screws of PC case.
Connect the internal USB port connector of the product to the USB header connector of the computer main board.
-Use the internal USB cable and the gender changer to connect them accordingly.
Caution : A mark ▼on the gender changer should be located to the no.1 or no.2
position of the mainboard USB header connector. You should check the direction of the
no.1 position of the main board USB header connector and make connections. Normally,
the no.1 position of 10pin USB header connector is located opposite side of ‘No pin’
direction or the no.1 position is marked as a thicker line or printed as no.1.
-If the pitch of main board USB header connector is 2.54mm like a standard main board, use the 2.54mm gender changer.
-If the pitch is 2.0mm like a Intel NUC board, use the 2.0mm gender changer.
-Connect the product to the main board by the gender changer and the internal USB cable.
Connect SATA power cable to the internal power connector of the product.
Connect 6.5Vdc ~ 9Vdc, 2A power to the external power input jack if wanted to use the external power.
-Disconnect the internal power conection if used the external power.
Place USB power switch to OFF if the USB device doesn’t use +5V of USB port.
Close the PC case and connect one of USB ports of the product to a USB device by external USB cable.
The product will be recognized and operate automatically without the driver installation once PC is powered on.
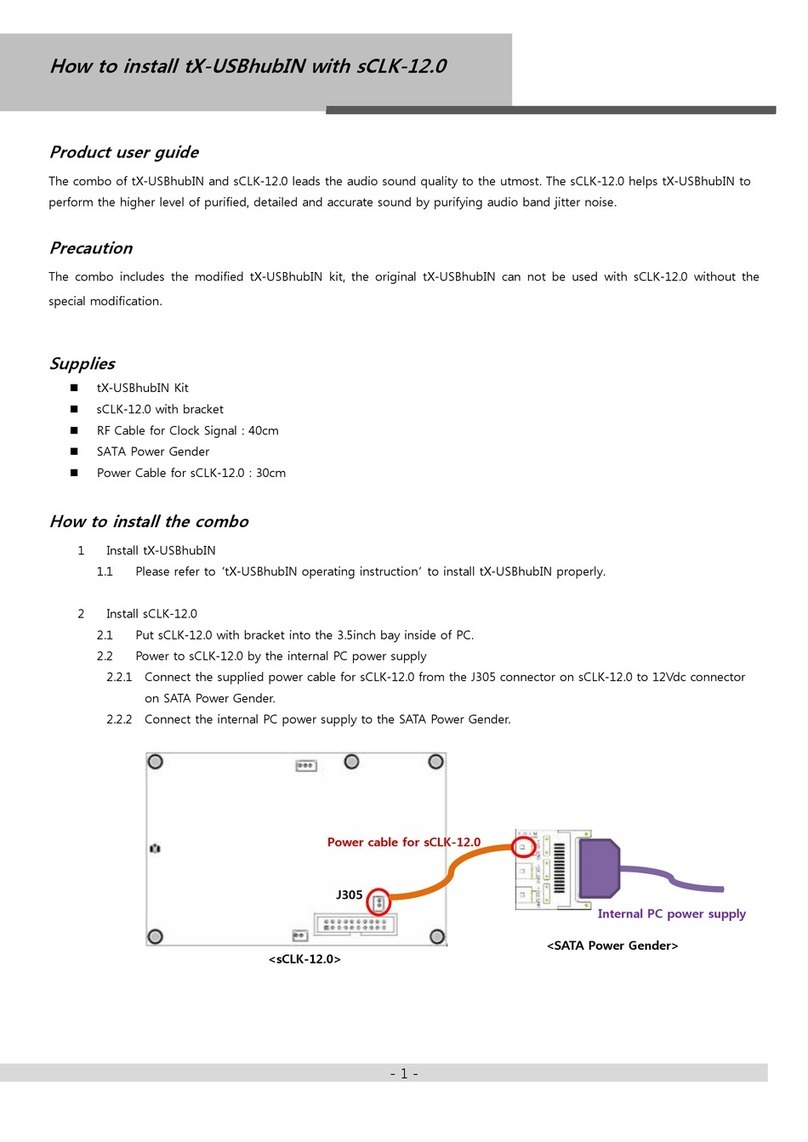
USB Header
USB Gender
Computer main board
tX-USBhubIn
SATA Power cable
Internal USB cable
External USB cable
Table of contents
Other SOtM Sound Card manuals
