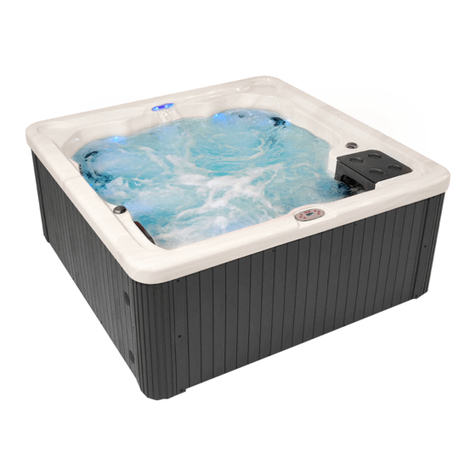
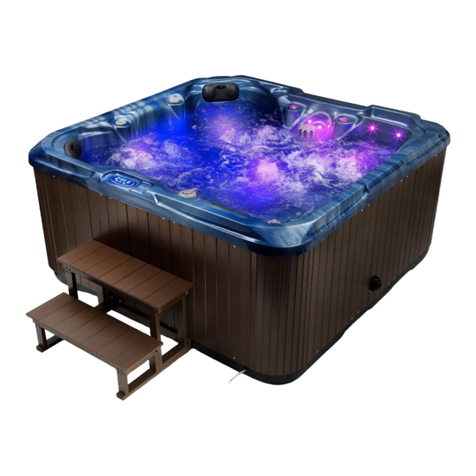
South Seas Spas Allegro Spas 2009 User manual

Spas Owners Manual
NEW PART #11-0097-11
Revision 12/30/2008
South Seas Spas
Allegro Spas
2009
OWNERS MANUAL

TABLE OF CONTENTS
Congratulations....................................................................................1
Safety Warnings......................................................................................3
Electrical Requirements and Installation..............................................6
Electrical Wiring for 240VAC Setup .............................................6
GFCI Wiring Diagram....................................................................7
Procedurefor120VACconguration............................................8
Power Terminals Diagram for 120V Setup.................................9
Spa Start Up...........................................................................................10
Selecting a Location...................................................................10
Inspection...................................................................................11
Filling the Spa with Water...........................................................11
Turning the Power On................................................................12
Verifying Water Circulation.........................................................12
Testing the GFCI Breaker...........................................................13
Priming the Pump.......................................................................14
Water Preparation.......................................................................14
Controller Instructions..........................................................................15
Initial Start up.............................................................................15
Temperature setup.....................................................................15
Light...........................................................................................16
Setting Up Different Modes........................................................16
Freeze Protection.......................................................................16
Jets.............................................................................................17
Preset Filter Cycles.....................................................................17
Diagnostic Messages........................................................................... 18
Maintaining Your Spa............................................................................20
Pillow Care.................................................................................20
Jet Care......................................................................................20
Removing, Installing, and Cleaning Filters.................................21
Winterizing Your Spa..................................................................22
Replacing the Light Bulb............................................................22
Spa Cabinet Care.......................................................................23
Cleaning Your Spa Interior.........................................................23
Cover Care.................................................................................24
Chemical Treatment of Water.....................................................25

TABLE OF CONTENTS cont...
WaterChemistry.....................................................................................26
Water Treatment Glossary..........................................................26
Spa Chemicals Glossary............................................................31
Maintaining the Proper pH...................................................33
Product Warranty Information....................................................34
Interior Spa Diagram.............................................................................40

1
Congratulations...
Congratulations on the purchase of your new spa. We know you
will enjoy your spa. Although spas are relaxing and fun, we be-
lieve they can be an indispensable part of a healthy lifestyle.
The spa lifestyle is one that encourages health and well-being.
Owning a spa brings some responsibility. With proper care,
your spa will provide years of enjoyment and therapy for
your family and friends. Please take time to read and under-
stand all of the instructions provided before you install your
Artesian spa. This owner’s manual is meant to be a sup-
plement to the training you should receive from your deal-
er when you purchase and start up your spa for the rst time.
Please remember your spa is a powerful piece of electrical equip-
ment. It is extremely important that you have it properly installed to
ensure safe use. This manual explains safety precautions, instal-
lation instructions, and operating and maintenance procedures. If
youhaveanyquestionsregardingthismanual,pleasecallyourcom-
petent Artesian spa dealer, who will be happy to further assist you.

2
For your future reference and convenience, please record the
Serial and Model number along with the installation date in
the spaces provided below. STORE THIS MANUAL WHERE
YOU CAN EASILY FIND IT WHEN NEEDED. The serial and
model numbers are mounted on the base of the equipment
enclosure area, as shown below.
Spa Serial Number_____________________________________
Spa Model Number_____________________________________
Spa Installation Date____________________________________
Dealer Name, Address, and Telephone Number
____________________________________________________
____________________________________________________
____________________________________________________
Diagram of Where to Find Serial Number
Serial Number Information

SAFETY WARNINGS
PLEASE TAKE THE TIME TO READ ALL OF THESE WARNINGS AND
CAUTIONS PRIOR TO USING YOUR SPA.
PLEASE, be a responsible spa owner. When installing and using this spa,
always adhere to basic safety precautions. Be sure to list emergency tele-
phone numbers at the telephone nearest the spa, including physician, hospi-
tal,ambulance,police,andtheredepartment.Becertaintoexplainsafety
precautions to all new or occasional users of your spa. Remember, they may
not be aware of the possible risks associated with the spa water temperature.
Have at least one family member learn CPR (cardiopulmonary resuscita
tion). IT COULD SAVE A LIFE!
1. READ AND FOLLOW ALL INSTRUCTIONS!
2. WARNING - To reduce the risk of injury, do not permit children
to use this product unless they are closely supervised at all times.
3. A wire connector is provided on this unit to connect a mini-
mum 8 AWG (8.4 mm ) solid copper conductor between this unit
and any metal equipment, metal enclosures of electrical equip-
ment, metal water pipe, or conduit within 5 feet (1.5 m) of the unit.
4. DANGER - Risk of Accidental Drowning - Extreme caution must be exer
cised to prevent unauthorized access by children. To avoid accidents, en-
sure that children cannot use this spa unless they are supervised at all times.
5. DANGER - Risk of Injury - The suction ttings in this area are
sized to match the specic water ow created by the pump. Should
the need arise to replace the suction ttings or the pump, be sure
the ow rates are compatible. Never operate spa if the suction t-
tings are broken or missing. Never replace a suction tting with one
rated less than the ow rate marked on the original suction tting.
6. DANGER - Risk of Electrical Shock - Install at least 5 feet (1.5
m) from all metal surfaces. As an alternative, a spa may be within
5 feet of metal surfaces if each metal surface is permanently con-
nected by a minimum 8 AWG (8.4 mm) solid copper conductor to the
wire connector on the terminal box that is provided for this purpose.
7. DANGER - Risk of Electric Shock - Do not permit any electrical appliance
such as a light, telephone, radio, or television, within 5 feet (1.5 m) of a spa.
3

SAFETY WARNINGS cont...
8. WARNING - To reduce the risk of injury:
a) The water in a spa should never exceed 40ºC (104ºF). Water tempera-
tures between 38ºC (100ºF) and 40ºC are considered safe for a healthy
adult. Lower water temperatures are recommended for young children
and when spa use exceeds 10 minutes.
b) Since excessive water temperatures have a high potential for causing
fetal damage during the early months of pregnancy, pregnant or possibly
pregnant women should limit spa water temperatures to 38ºC (100ºF).
c) Before entering a spa, the user should measure the water temperature
with an accurate thermometer since the tolerance of water temperature
regulating devices varies.
d) The use of alcohol, drugs, or medication before or during spa use may
lead to unconsciousness with the possibility of drowning.
e) Obese persons and persons with a history of heart disease, low or high
blood pressure, circulatory system problems, or diabetes should consult a
physician before using a spa.
f) Persons using medication should consult a physician before using a
spa since some medication may induce drowsiness while other medica-
tion may affect heart rate, blood pressure, and circulation.
AUDIO COMPONENT WARNINGS
Spas equipped with the Audio system should follow these guide-
lines for safety:
1. CAUTION - Risk of Electrical Shock - Do not leave compartment door
open.
2. CAUTION - Risk of Electrical Shock - Replace components only with
identical components.
3. Do not operate the audio controls while inside the spa.
4. WARNING - Prevent Electrocution - Do not connect any auxillary
components (for example cable, additional speakers, headphones, ad-
ditional audio/video components, etc.) to the system.
5. These units are not provided with an outdoor antennae; when provided,
it should be installed in accordance with Article 810 of the National Electri-
cal Code, ANSI/NFPA 70.
4

6. Do not service this product yourself as opening or removing coversmay
expose you to dangerous voltage or other risk of injury. Refer all servicing
toqualiedservicepersonnal.
KEEP THESE SAFETY INSTRUCTIONS IN A CONVENIENT AND READ-
ILY ACCESSIBLE LOCATION!!
5

ELECTRICAL REQUIREMENTS AND
INSTALLATION
The following information is provided for hooking up electrical supply to
yournewspa.Aqualied,licensed,electricianmustperformthiswork.
Failure to follow these instructions will terminate all warranty coverage
and can cause serious injury or death.
Your Allegro spa is preset at the factory to run on 240V 60Hz with a 37
amp input. This feature gives you the most performance out of your spa.
This will require a 240V, 50-amp GFCI. If a 50-amp service is not avail-
able.
The Allegro spas may also be setup to run off of 120VAC. See page 14
for conversion information.
ELECTRICAL WIRING FOR 240VAC SETUP
WARNING:Yourspamustbewiredbyacertiedelectricianandac-
cording to these instructions. Failure to do so will terminate all warran-
ties and all listings from the independent listing facility.
1) The Allegro Class Spa requires a 240 VAC dedicated system. The
spa must be hardwired to the power supply, with no plug-in connections,
extension cords, or sharing of service.
2) The spa requires that you run 6 or 8 AWG copper wire, depending on
the GFCI size. Do Not Use Aluminum Wire.
3) The power supply must have a suitable Ground Fault Circuit Inter-
rupter (GFCI), according to Section 422-20 of the National Electrical
Code, ANSI/NFPA 70-7987. This could be used as the shut-off switch,
which must be installed in plain view of the spa. This electrical service
must be readily accessible to the spa occupants, but must not be within
5 feet of the spa.
4)Useonly non-metallicconduit andttings wheninstallingpower to
the spa.
5) After your spa has been positioned, route lines through the knockout
on the left or right front corner of the spa.
6) Connect the power to the spa.
6

Electrical 60Hz Wiring Diagram
7

PROCEDURE FOR 120VAC CONVERSION
Verify that the required equipment attached to the VS Series spa control is
rated for 120VAC
When using 120VAC service, the effective heater output will be 25% of the
240VAC rating.
Example: A 5.5kW @240VAC heater becomes approximately
1.25kW@120VAC
1. Verify that power is disconnected prior to performing any work on the sys
tem.
2. Add jumper wire (14AWG minimum) from White AC voltrex (typically J11)
to Red AC voltrex (typically J32). Most systems will have this wire included in
a plastic pouch on the back of the enclosure.
3. Adjust DIP switches to “Low Amperage” mode.
a. Some systems use DIP A10 only. Set this DIP switch in the “ON”
position.
b. Some systems use multiple DIP switches to controll amperage.
Refer to product Hot Sheet and set number of pumps with heat to “0” accord-
ingly
4. Connect Line wire from AC service to “HOT BLACK” terminal to TB1.
5. Connect Neutral wire from AC service to “NEUTRAL WHITE” terminal of
TB1. Spa will now operate using 120VAC service.
6. There should be NO Line 2 of Red conductor attached to TB1 when the
system is running in 120VAC mode.
Note: When using 120VAC service, the effective heater output will
be 25% of the 240VAC rating.
-example: A 5.5 kW @240VAC heater becomes approximately
1.25kW @120VAC
8

Power Terminals Diagram for 120VAC setup
9

SPA START-UP
Please read each step of the Start-up section prior to doing the
step.
SELECTING A LOCATION
In preparation for installing your new Artesian spa, you should en-
sure that your chosen location meets some minimum guidelines:
1) Place your spa on a surface that is large enough for the entire spa to
t.Considerthespaceneededtoeasilyaccessequipmentcompartments
and circuit breakers. Remember, all electronics must be kept dry.
2) The spa must be on a solid, level foundation. Recommended: 4- inch
cement slab that has cured for at least 72 hours. Your warranty will be
voided if the spa is not properly installed. Structural damage due to an
improper foundation is not covered under warranty.
3) To avoid potential water damage to the skirt and frame, your spa should
be placed on a site where it will not be in the way of water sprinklers.
4) OUTDOOR SPAS: Consider building codes, electrical and plumbing
codes, desired proximity to house, wind and sun exposure, location of
trees (falling leaves, shade), dressing area, landscaping and lighting when
selecting a location.
5) INDOOR SPAS: Floor surface must have traction to prevent slipping
whenwet. Aoor drainisoptimum.As roomhumiditywill increasebe-
cause of the spa, provide ample ventilation to prevent dry rot, mildew and
mold. Use materials that will withstand humidity. There may be a need for
cross-ventilationfansand/ordehumidiers.Thespachemicalsmaycor-
rode some household metals. Provide ample room if servicing should be
needed. Strong foundational support is vital, particularly if a second-story
site is selected.
6) Ensure the equipment compartment is in a location where it will not
be damaged by water drainage. Cover the equipment compartment with
a heavy screen if rodents are a problem. Damage due to rodents is not
covered under warranty.
10

7) Have the spa deck installed by a knowledgeable contractor to ensure
proper support.
8). If the spa is placed on the ground, even for a short period of time, it
must be supported by stones that are at least 2 inches thick and 12 inch-
es square. A solid foundation is recommended as soon as possible.
INSPECTION
Youwillwanttoinspectyourspa,priortollingitupwithwater.Lookfor
andremoveanydebrisinthespatubandinthelter.Verifythatpump
plugs are installed on the pumps and the pump unions are tight.
FILLING THE SPA WITH WATER
NOTE:DONOTllyourspawithhotwaterstraightoutofyourwater
heater or tap. This water may be as hot as 180º F and will cause dam-
age to the surface and plumbing of the spa. This will void your warranty.
Levelthespabeforelling.
1)Preparetollthetubbyremovingalldebris.
2)Removetheltersfromyourspa(seeRemoving,Installingandclean-
ing Filters, page 21)
3)Insertthehoseintheareawherethelterwaslocatedasshownin
the picture below.
11

SPA START-UP cont...
FILLING THE SPA WITH WATER cont...
4) Fill the spa to the bottom of the pillows or about 6-8 inches from the
top of the spa Note: DO NOT OVER-FILL YOUR TUB!
5) With the front panel off, verify there are no leaks at the pump union.
Note: Pump unions can become loose during shipping. Verify that there
arenoleaksduringllingofthespa.
TURNING THE POWER ON
Turn the power to the spa on at the main circuit breaker. Verify that your
spa has no error codes. (See page 12) Verify that there is good water
circulation in the spa. The pump will initially come on for 5 minutes at
start up.
VERIFYING WATER CIRCULATION
1) Open all the jets.
2) Press the Pump 1 key to turn the pumps on or off.
3)Makesureeachseathaswaterow.
12

TESTING THE GFCI BREAKER
NOTE: The electrical service panel for your spa should be equipped
with a GFCI breaker. To avoid the risk of electrical shock, perform the
following safety test before each use of your spa.
1) Make sure the power is turned on at the electrical service panel.
2) Turn on the GFCI breaker. If the breaker stays on, it is functioning
properly.
DANGER: RISK OF ELECTRICAL SHOCK
If the GFCI breaker fails to operate as described, there is a possibility of
an electric shock if the spa is used. Shut off the power at the main elec-
tricalservicepaneluntilthesourceoftheproblemhasbeenidentied
andcorrectedbyalicensedelectricianorqualiedspatechnician.
13

14
SPA START-UP cont...
TESTING THE GFCI BREAKER cont...
NOTE: When power is turned on, your spa is automatically pro-
grammed to start circulating water for 5 minutes. Adjust your tem-
perature by pressing the “Warm” button on your touchpad until the
desired temperature is displayed. This setting will allow your spa
to heat to the set temperature.
CAUTION: If water is not noticeably coming from your spa jets dur-
ing the automatic purge, turn on the high speed pump. If water
is still not coming from the jets, the pump needs to be manually
primed, following the steps below.
PRIMING THE PUMP
1) Turn off power at electrical service panel.
2) Locate and loosen the pump by turning it counterclockwise one half
of one turn.
3)Allowairtoescapefromthetting.Whenasteadystreamofwater
owsfromthepumpplug,closeitbyturningitclockwiseuntiltight.
4) Turn on power at electrical service panel.
5)Checkoncemoretomakesurethatwaterisowingfromthejetsdur-
ing auto purge. If so, continue. If no water is coming from your spa jets,
please call your Artesian dealer for further assistance.
WATER PREPARATION
NOTE: Before putting your new spa into operation, understand
that preparing your new water is an important part of maintenance.
Failure to properly prepare your water can result in substantially
decreasing the life of the components and may void your warranty
in severe cases. Your Artesian dealer should have a start-up and
maintenance kit available for you when you receive your spa.

15
Whenyourspaisrstactuated,itwillgointoPrimingmodewhich
is indicated by “Pr”. This Priming mode will last for 5 minutes and
then the spa will begin to heat the spa and maintain the water tem-
perature in the Standard Mode.
Temp/Set (80°F - 104°F / 26°C - 40°C)
The start-up temperature is set to 100°F/37°C. The last measured
temperature is constantly displayed on the LCD.
NOTE: The last measured spa temperature displayed is current
only when the pump has been running for at least 2 minutes.
To display the set temperature, press the “Cool” or “Warm” pad
once.
To change the set temperature, press the pad a second time before
theLCDstopsashing.Eachpressofthe“Cool”or“Warm”padwill
continue to either lower or raise the set temperature respectively.
Controller Instructions
Initial Start up / Temperature setup

Light/ Mode/ Freeze Protection
Light
Press the “Light” button to turn the light on and off. If left on, the
light automatically turns off after 4 hours.
Mode
The mode is changed by pressing the “Warm” or “Cool” button, then
pressing the “Light” button.
Standard Mode is programmed to maintain the desired tempera-
ture. Note that the last measured spa temperature is current only
when the pump has been running for at least 2 minutes. “St” will be
displayed momentarily when you switch into Standard Mode.
Economy Mode heats the spa to the set temperature only during
ltercycles.“Ec”willdisplaysolidwhentemperatureisnotcurrent,
and will alternate when temperature is current.
Sleep mode heats the spa to within 20°F/10°C of the set tempera-
tureonlyduringltercycles.“SL”willdisplaysolidwhentempera-
ture is not current, and will alternate when temperature is current.
Freeze Protection
If the temperature sensors detect a drop to below 44°F/6.7°C within
the heater, the pump will automatically activate to provide freeze
protection. The equipment stays on until 4 minutes after the sen-
sors detect that the spa temperature has risen to 45°F/7.2°C or
higher. In cold climates, an additional freeze sensor may be added
to protect against freeze conditions that may not be sensed by the
standard sensors. Aux freeze sensor protection acts similiarly ex-
cept with the temperature thresholds determined by the switch and
without a 4-minute delay in turnoff. See your dealer for details.
16

17
Controller Instructions cont...
Jets/ Preset Filter Cycles
Jets
Touch the “Jets” button once to activate the pump for the jets. Touch
the “Jets” button again to turn off the pumps. If left running, the
pumps will automatically turn off after 15 minutes.
Preset Filter Cycles
Theltercyclebegins6minutesafterthespaisenergized.The
secondltercyclebegins12hourslater.Filterdurationisprogram-
mable2,4,6,or8hoursforcontinuousltration(Indicatedby“FC”).
The default lter time is 2 hours. To program, press “Warm” or
“Cool” then “Jets”. Press “Warm” or “Cool” to adjust. Press “Jets”
to exit programming.
Other manuals for Allegro Spas 2009
1
Table of contents
Other South Seas Spas Hot Tub manuals
Popular Hot Tub manuals by other brands
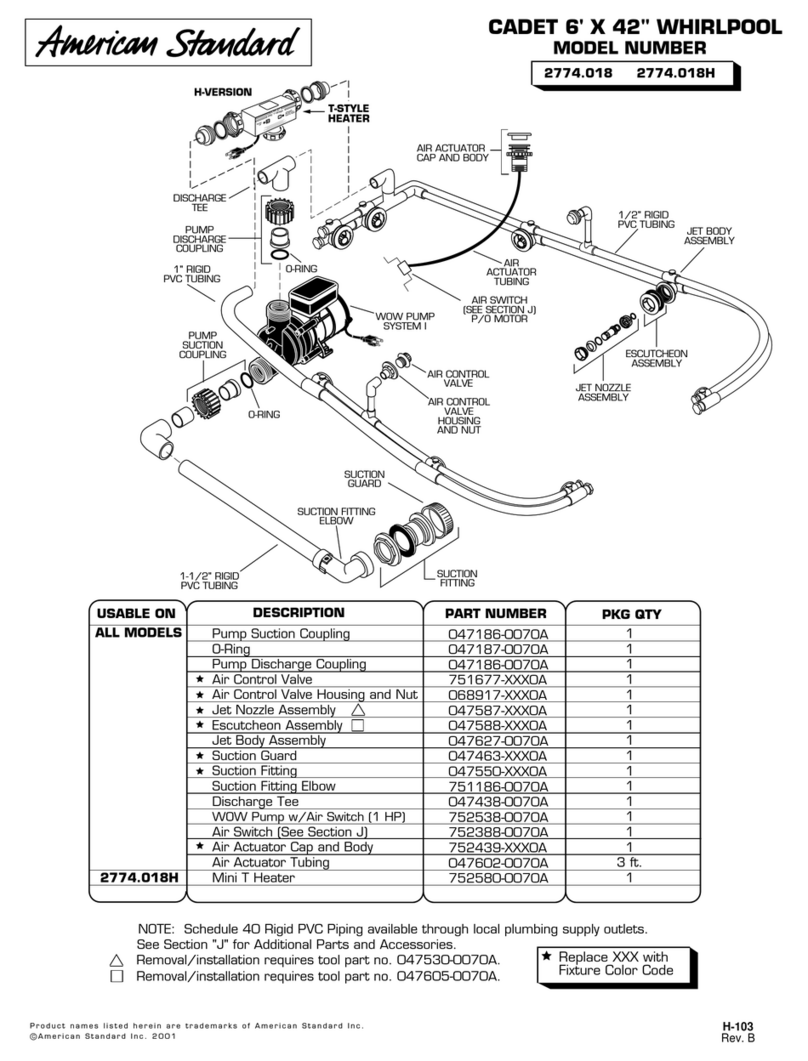
American Standard
American Standard Cadet 6'x42 2774.018H parts list
Jacuzzi
Jacuzzi J - 210 Installation manual and use & maintenance

ThermoSpas
ThermoSpas 100 Series owner's manual
Aquatic
Aquatic HOTSOAK 92 AI35AIR6036HS Specification sheet

HoMedics
HoMedics BubbleBliss FB-50 instruction manual
Aquatic
Aquatic AI35LUX6642 Specification sheet
