Soyntec mp3 arena 200 User manual

www.soyntec.com 1

www.soyntec.com 2
Notice
1. Please use provided format tool to format your MP3
player, it will not work if you use Windows format
Tool. If you haven’t installed the provided Digital
Audio Management System, please use the “delete”
command to the erase files in your player. The MP3
player will be damage if formatted under Window’s
format tool.
2. When transferring files between your MP3 player
and PC, please note the MP3 player’s LCD display.
The transferring rate is displayed on your screen.
The transmission is completed when the LCD stops
displaying the moving note.
3. The “Plug and Play” function is only for
Win2000/winXP operating system or higher. User
needs to install driver under Win98/win98SE that is

www.soyntec.com 3
build into the Digital Audio Management System. If
still can not find the device, please refer to the
CD-ROM and install the files of Win98 driver folder
from the driver CD.
Subject
Operational Notes ........………...…….….............3
Player overview ..............................……............5
Accessories .....................................……...........7
LCD .................................................……...........8
Turning the power on/off .................……...........9
Playing MP3 music ..........................……......... 10
Use menu under the playing mode ....…...........12
Voice Recording Function ...................……......14
The menu under Voice Recording mode .….....17
Exit the voice recording mode ...............….......19
To Delete files .....................................……......20
EQ (Equalizer) ....................................…..........22
Repeat mode ......................................…..........24

www.soyntec.com 4
The Backlight ......................................…….......27
Examine the utilization of the internal memory .29
USB Connection .......................................…....30
System Requirements .................................….31
Installation of Manager Software .................….32
How to use Digital Audio Management System .33
Sending files to Digital Audio ......................…...34
Sending files from Digital Audio to PC .........…..37
Formatting the memory of Digital Audio ......…...39
To Delete files ........................................……....41
To refresh USB connection ....................……....43
Internal Memory Display .........................……...44
Pre-listen ................................................……....45
Trouble Diagnosis ................................…..........47
Fixtool User Manual.............................…........……48
Fechnique Spec .....................................…….....50

www.soyntec.com 5
Operational Notes
If the Mp3 player will not be operated for a
prolonged period, remove the batteries to avoid
possible damage caused by electrical leakage.
The Mp3 player should be kept in areas free
from extreme temperature changes, moisture
and dust.
Set the HOLD switch to the release position
before operation.
Do not drop the player, which probably
cause battery fall off or damage its surface.

www.soyntec.com 6
Battery Status (Time unit: hour)
Battery Digital Audio
Alkaline battery
Size AAA×1 12
*Battery life may vary with different using
condition, manufacturer and manufacture date.
*Please change the battery under following
conditions:
Indicator appears and display the
“Low Battery” then shut down.
All buttons make no response and are not
workable even after the battery is taken out and
reinstalled.

www.soyntec.com 7
Note:
To avoid static electricity, please If possible,
avoid operating the player in extremely dry
environment.
If the player stops running under proper
operation, please reset it by taking out battery
.
Player overview
Front
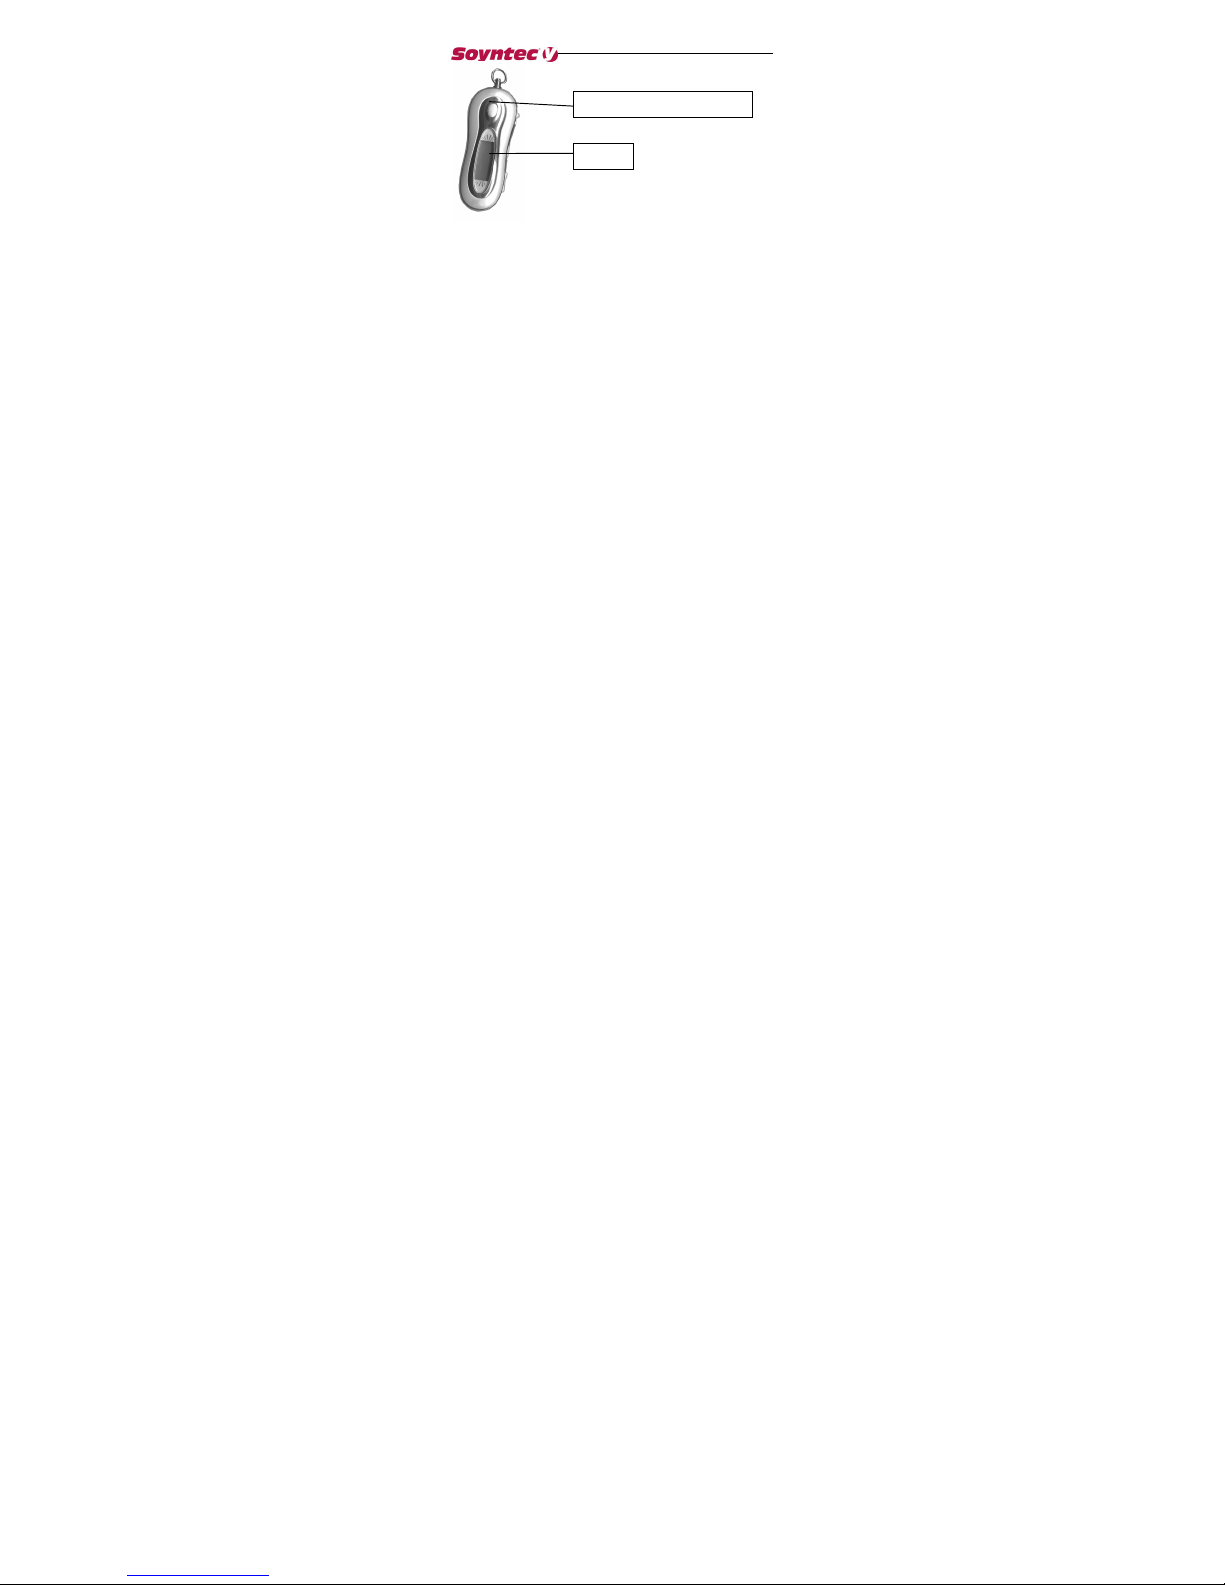
www.soyntec.com 8
Side face
Play/pau
se (stop)/power
LCD

www.soyntec.com 9
Accessories
Volume+/Volume-
Hold button
FF/Mode/Rew

www.soyntec.com 10
AAA Battery
Installation CD USB Cable
Stereo Phone
Manual/
Maintenance Certificate

www.soyntec.com 11
LCD
Repeat modes include Repeat, Repeat All,
Random,
Preview and Normal (Normal mode isn’t illustrated
in the figure.)
Equalizer modes include Jazz, Classic, Rock, Pop
and Normal
Play repeat mode
Hold icon
Battery indicator
Type of the song
Current situation
The singer and the s
ong
Playback time

www.soyntec.com 12
Turning the power on/off
The power will be turned on when PLAY/STOP
button is pressed momentarily. In 2 seconds, a
glorious picture with blue backlight appears. The
backlight will be turned on by user setting and will
last different seconds if some button is pressed; if
not, the backlight will be automatically turned down
after user setting seconds.
Pressing PLAY/STOP button for more than
3 seconds until “Power OFF” appears on the
screen, then it’s safe to turn the power off.

www.soyntec.com 13
Playing MP3 music
1. Turning on the power by pressing PLAY/
STOP button momentarily, you could see the
following interfaces: the 03-33 means there
are 33 songs in the Digital Audio and it’s the
third.
2. When you press PLAY/STOP button again,
the current track will be played as shown
above. The top left corner is the playback
time indicator.
3. If you want to select previous/next piece,

www.soyntec.com 14
turn the rolling wheel up and down to get the
track. The music will stop if you press PLAY/
STOP.
4. By pressing the PLAY/STOP button for 3
seconds, you could turn the power off.
5. By pressing VOL+/VOL- button, you could
control the volume under either PLAY or
PAUSE status. The volume steps (see
illustration) will increase or decrease when
the VOL+/VOL- button is pressed
correspondingly. There are 32 volume steps
and the volume level ranges from 0 to 31.
Caution

www.soyntec.com 15
The battery status indicator may flicker while
MP3 is playing, which results from battery supply
vibration while different power is consumed.
Use menu under the playing mode
1. Press PLAY/STOP to turn on the Digital Audio
2. Press the Menu button (in the middle of the
rolling wheel). So you can see the function
menu of the Digital Audio as following:
REC Enter into record operation
EQ Equalizer mode
Repeat Repeat mode

www.soyntec.com 16
Backlight Background light
Del File Delete audio files
Memory Info Memory information
Return Return
All the options are listed in the below table.
You may select every item by the rolling up or
down wheel.
1. You can use Last or Next button to select
every item in the function menu and press
Mode button to enter the function.
2. When you select “Del File”, you will enter
the Delete interface. More information is to
be mentioned behind.
3. The Digital Audio would pops up a dialog
box about the capacity of the memory when
the “Memory Info” is selected. With no button
being pressed, it will return to Play interface

www.soyntec.com 17
after 2 seconds. You can see your Digital Audio
memory as following:
Voice Recording Function
1. After turning on the power by pressing PLAY/
STOP button, press the Menu button (in the
middle of the rolling wheel), and then you
can see the menu as illustration.
2. Select REC item, enter into the interface of
Voice Recording (See illustration)

www.soyntec.com 18
3. Now you can select the files to be played by
the up/down button. Press the PLAY/STOP
button to listen to the recorded files (see the
left illustration) If there are no recorded files,
the interface would be as following(see the
right illustration):
4. Then press Mode button (in the middle of
rolling wheel), you will see the function menu
under the Voice Recording mode as following

www.soyntec.com 19
left illustration. Select Record in menu
and press Mode button to start voice
recording. The Recording interface is presented
as the following right figure.
5. You could stop recording by pressing PLAY/
STOP button momentarily and exit from
Voice Recording mode and switch to MP3
function by select Function menu.
Note: While recording, all buttons except
PLAY/STOP or Hold button are not workable.

www.soyntec.com 20
The menu under Voice Recording
mode:
You can use the function menu to operate
the Digital Audio under Voice Recording mode:
1. Turn on the Digital Audio by pressing Play/
Stop button.
Table of contents


