Setting Up Emulator Hardware
1. Plug the supplied USB cable into an available port on
your PC or HUB. Use of a USB HUB is
recommended as it provides added isolation between
your debug environment and PC.
2. Connect the included 5V power adapter brick to your
AC power source using the AC power cord.
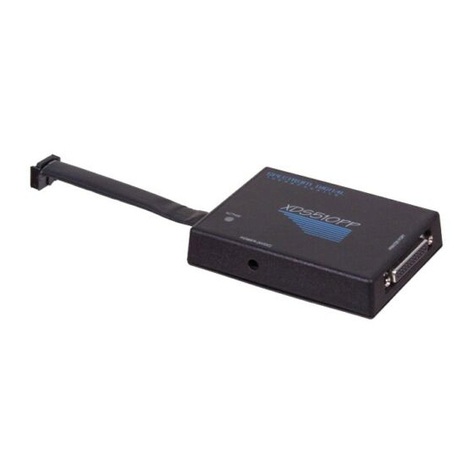
3. Apply power to the XDS560R by connecting the
power brick to the 5V input on the XDS560R located
at the rear of the emulator. When power is connected
the “PWR” led on the XDS560R should illuminate.
After about 3 seconds LED 0 should begin blinking
slowly and LED 1-3 should begin sequencing. At this
point the XDS560R has gone through it’s power on
self-test, entered boot mode and is ready for USB
enumeration.
4. Make sure your driver CD-ROM is installed in your
CD-ROM drive. Now connect the XDS560R USB to
your PC using the included USB cable. At this point
led 0 should begin blinking at a faster rate and
Windows will launch its "Add New Hardware Wizard"
and prompt for the location of the XDS560R drivers
5. Follow the instructions on the screens and let
Windows find the USB driver files “xds560r.inf” and
“sdusb2em.sys” on the driver CD-ROM. On XP
systems Windows will find the drivers automatically.
If properly installed Windows will create a new device
class named “SD USB Based Debug Tools”. The
XDS560R device will show up as a “Spectrum Digital
XDS560R USB” under this class. You can view this
information under Windows Device Manager. If you
are not installing from a CD-ROM then instruct
Windows to include your
“<CCS_InstallDir>\specdig\xds510usb” directory in
the search path. Spectrum Digital stores its XDS510
emulator, XDS560R emulator and DSK USB drivers
in this common directory.
Setting Up Code Composer
1. Select the Code Composer Setup icon from the
desktop.
2. From CC Setup you can either import a new
configuration or select from an existing one. From the
filters pane select the platform “sdxds560r emulator”.
This will give you a list of predefined configurations for
the SD XDS560R emulator. If one of these
configurations does not exactly match your target
then select the closet configuration. You can then
modify this configuration to meet your needs.
3. If you want to change the configuration of your setup
simply right mouse click on the configuration under
System Configuration then select Properties. You
can modify the individual properties for your setup.
The I/O Port under Board Properties should be set to
0 for the SD XDS560R emulator.
4. Save your configuration and exit CC Setup.
Running Code Composer
1. Connect the XDS560R target cable to your target
system.
2. Apply power to your target system.
3. You can now start Code Composer by double-clicking
on the appropriate CCS icon. If you are running CCS
3.1 or higher, once CCS has started select Debug-
>Connect from the menu bar. Target
Connect/Disconnect is a new feature in CCS 3.1, for
more details go to your CCS online help.
XDS560R vs XDS510 Support
The XDS560R is a XDS560 class emulator which uses TI
supplied emulation drivers and support utilities. XDS560R
or other XDS560 class emulators do not support the
Spectrum Digital SdConfig, SdFlash, SdTsrv or SdJtag
utilities and interfaces.
When manually configuring the XDS560R through
CCSetup you will always select TI XDS560 class
emulation drivers’ vs the familiar Spectrum Digital drivers.
507356-4001A Page 2 of 2
12502 Exchange Dr., Ste 440, Stafford, TX. 77477 T:281.494.4505, F:281.494.5310 www.spectrumdigital.com
