Spendor C9e User manual
309VER1.DOC Page 1of 7
Instruction Manual
C9e Loudspeaker
Spendor Audio Systems Ltd

309VER1.DOC Page 2of 7
1 POSITIONING
•PLEASE READ THESE INSTRUCTIONS CAREFULLY BEFORE INSTALLING YOUR NEW SPENDOR
LOUDSPEAKER
•FOR ANY SPECIAL INSTALLATION ARRANGEMENT ALWAYS SEEK ADVICE FROM YOUR SPENDOR
DEALER OR A QUALIFIED CUSTOM INSTALLER
•Please use the following guidelines to ensure that your Spendor C9e is installed for optimum performance.
•The Spendor C9e delivers a wide and uniform energy pattern to create a clearly focussed and naturally
balanced sound over a wide and deep listening area. This ensures that all listeners/viewers, including those
who may not be sitting centre-stage, will hear a vivid and seamless surround-sound.
•The C9e is designed for installation on a wide variety of rigid furniture or equipment shelving. If necessary the
C9e can be placed directly on a floor but you may find the sound is slightly more ‘open’ if it is placed on a
shelf, support or platform at least 200mm above floor level.
•The C9e can be placed close to a rear wall.
•The C9e is fitted with four acoustically isolating non-slip feet. Always ensure that all four feet are in complete
contact with a horizontal, secure and stable surface.
•In a typical home living/listening room try to position the base of the cabinet 200-600mm above floor level.
•If possible arrange the cabinet so that the front centre section is slightly clear of any sound reflecting shelves
or equipment.
•The C9e has full magnetic shielding to avoid interaction with magnetically sensitive screens or equipment. It
can be placed close to a TV or computer screen, for example on top of a large TV cabinet.
•See figure 1 for a typical installation.
•See figure 2 for examples of optimum layouts for a surround system with 5 or 7 loudspeakers.
•If your room has a hard reflecting floor, e.g. wood or stone, a rug or carpet on the floor between your front
loudspeakers and the main seating area may dramatically improve the sound.
•Where space and equipment layout permits, e.g. in large-screen home theatre installations or dedicated
music-only surround sound systems, the C9e can be placed on a rigid stable stand up to 1000mm high in
‘free-space’.
•If you have an acoustically transparent (perforated) video screen, installthe cabinet behind the screen as
close as possible to the centre of the screen and remove all three loudspeaker grilles.
•For special or custom installations the C9e can be fixed securely to a shelf or bracket via four M8 mounting
points. To access the mounting points remove the 4 x M8 hex drive screws holding the feet onto the base of
the cabinet using a 6mm hex wrench (not supplied). The cabinet can then be fixed to a specially prepared
shelf or bracket(s) using 4 x suitable length M8 hex-drive screws or hex-head bolts. In most installations it is
best to leave the four acoustically isolating feet between the cabinet and the shelf or bracket. The length of
any M8 fixings must allow 15-30 mm of free thread to be screwed into the base of the cabinet.

309VER1.DOC Page 3of 7
Figure 1
Figure 2
309VER1.DOC Page 4of 7
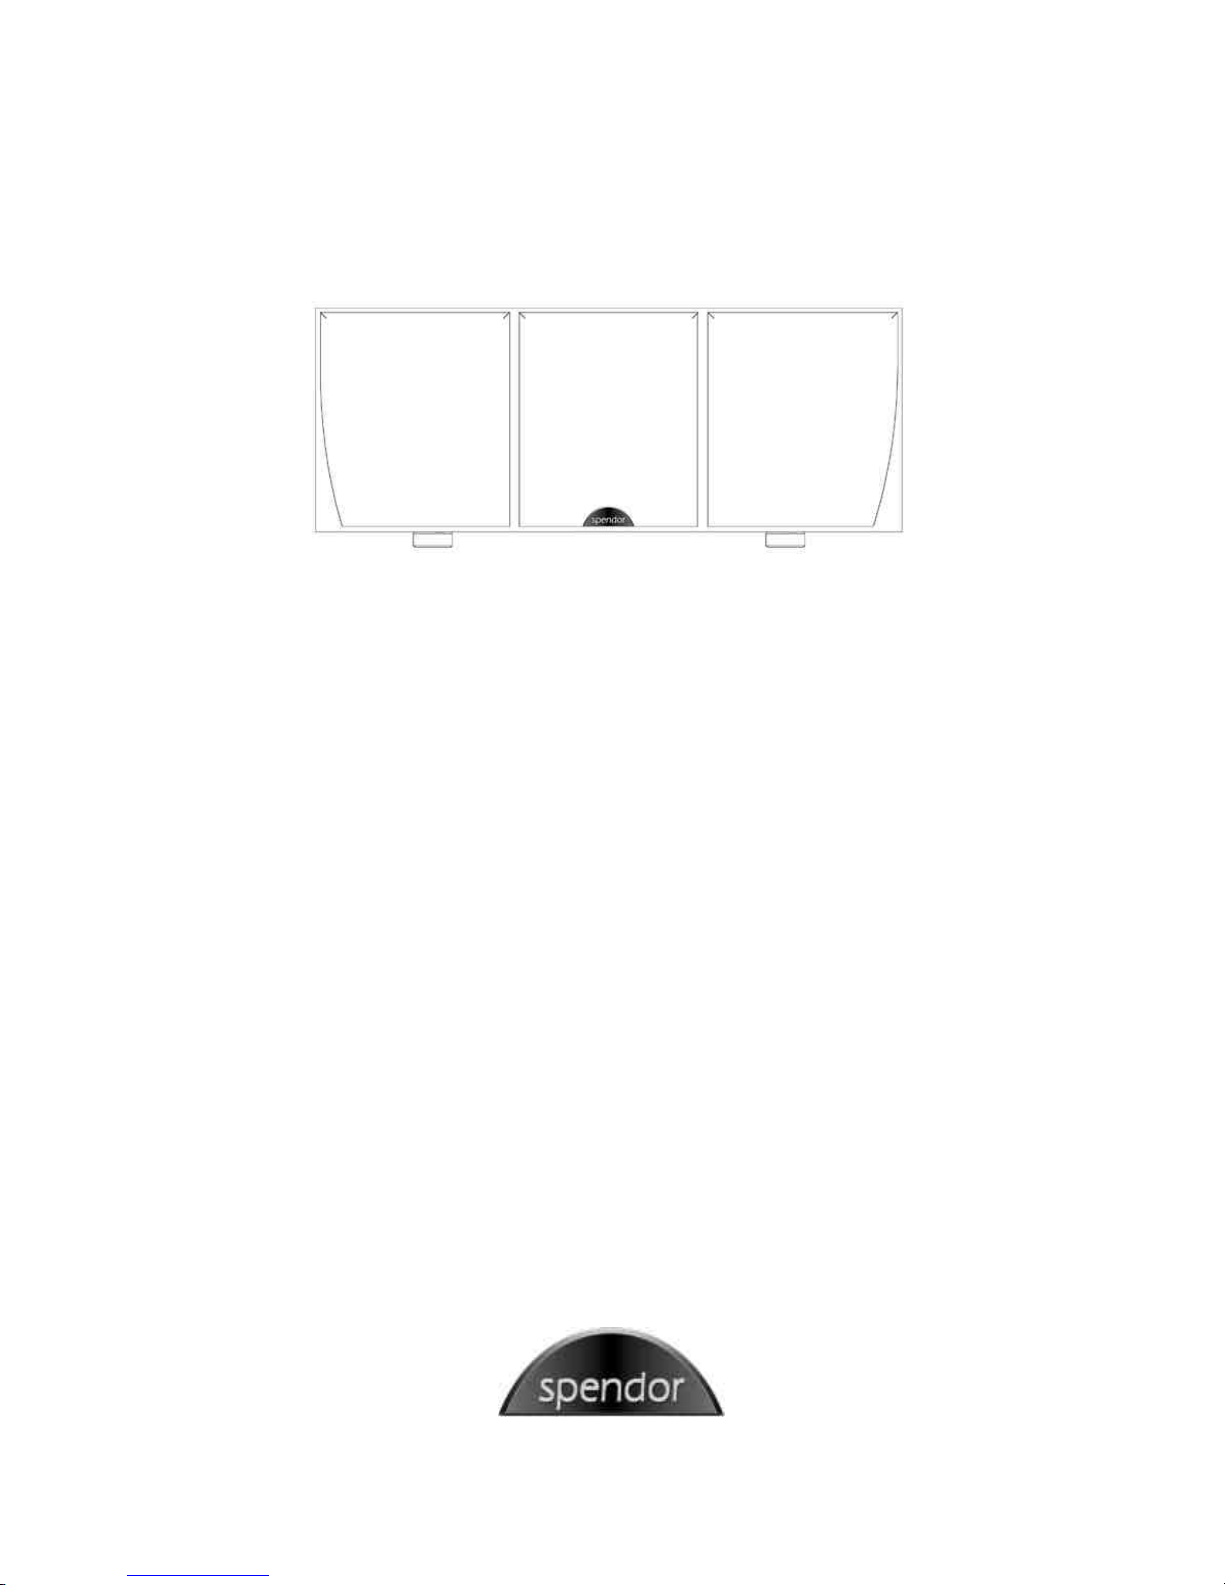
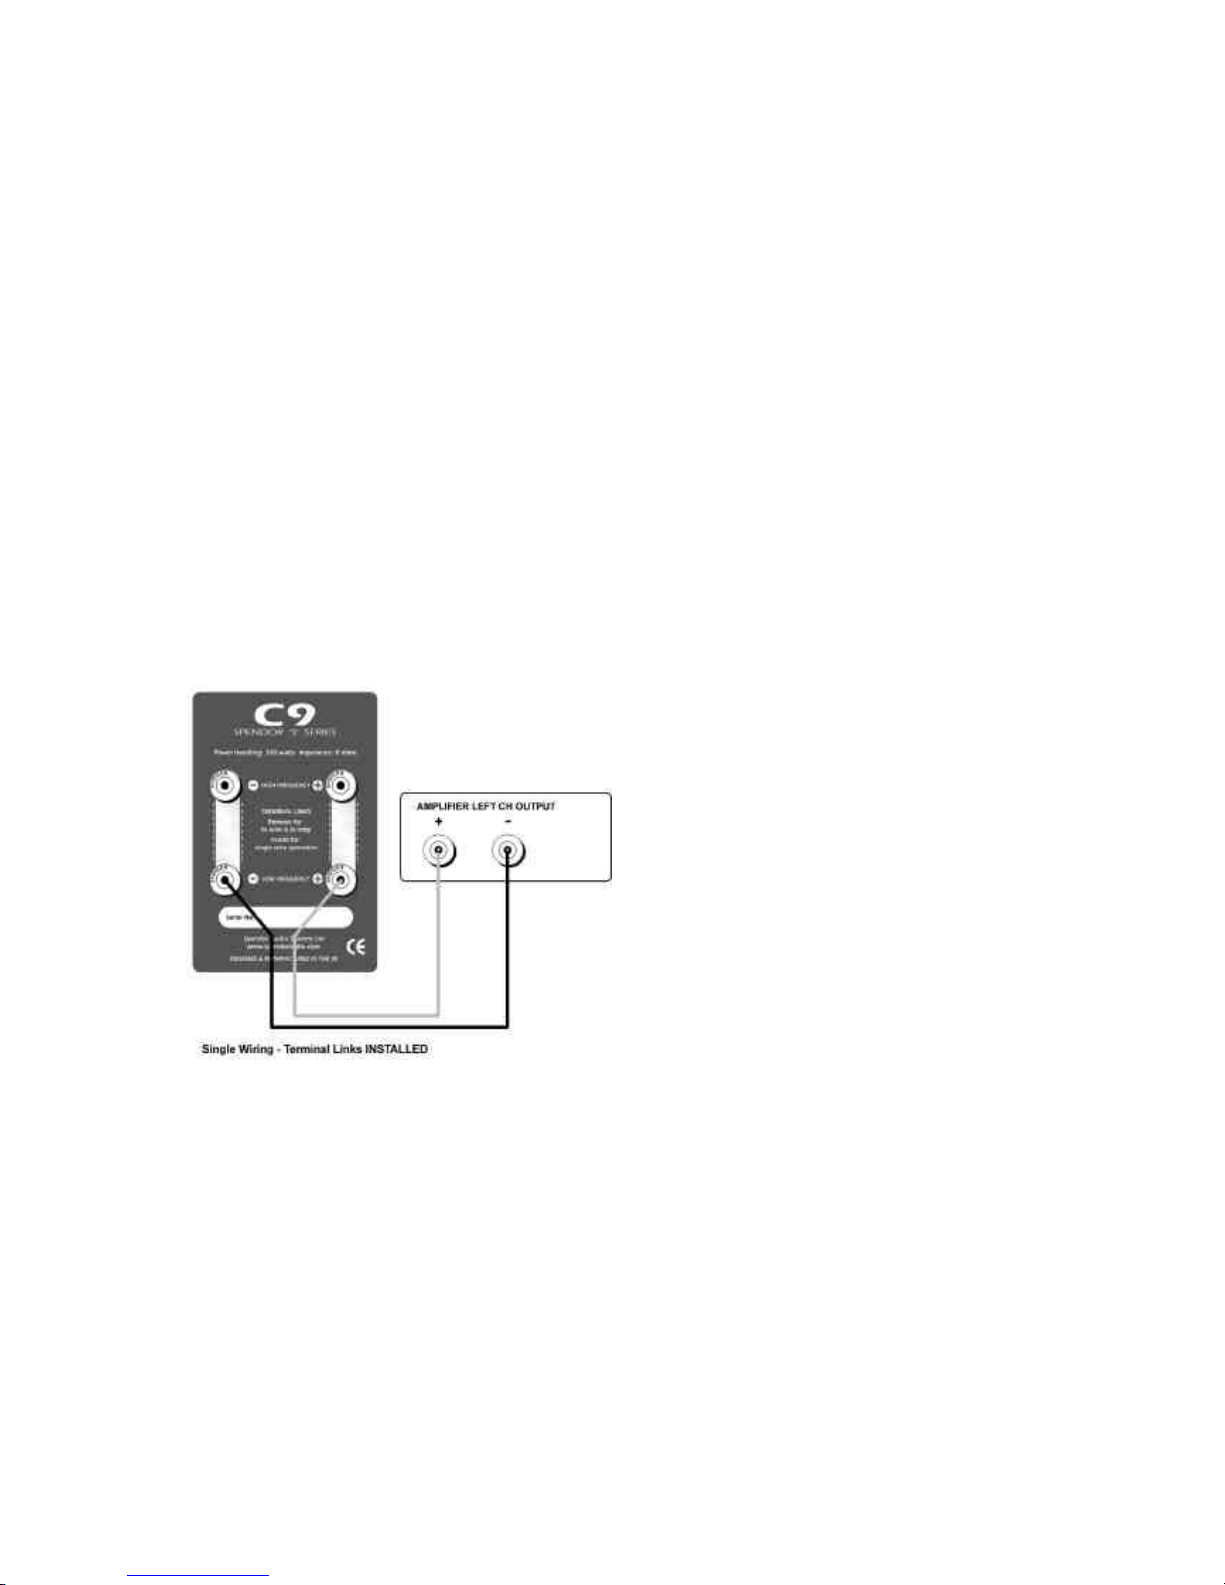
2 CABLES AND CONNECTIONS
•Loudspeaker cables can have a noticeable effect on sound quality. Choose good quality low resistance
cables with high purity metal conductors and low-loss dielectric insulation. Ask your dealer for advice on
cables to suit your system and budget.
•Set amplifier(s) to minimum volume and switch off the power.
•Always connect the–ve (usually black) loudspeaker output terminal of the amplifier to the corresponding –ve
(Black) terminal on the loudspeaker.
•Always connect the +ve (usually red) loudspeaker output terminal of the amplifier to the corresponding +ve
(Red) terminal on the loudspeaker.
•Always connect the left channel amplifier output to the left loudspeaker and the right channel amplifier output
to the right loudspeaker.
•For surround sound systems the centre, surround and rear loudspeakers must be connected to the
appropriate amplifier outputs.
•Make the connections as shown in figure 3. Only the left channel connection is shown.
•When all connections have been made. Switch on the amplifier(s). Pick a sound source (e.g. CD or FM) and
advance the volume control carefully.
SINGLE WIRING
Figure 3

309VER1.DOC Page 5of 7
BI-WIRING
•IMPORTANT: REMOVE the terminal links andstore them safely.
•Bi-wiring can improve sound quality by separating the current paths for Low (LF) and High (HF) frequencies.
Figure 4
BI-AMPING
•IMPORTANT: REMOVE the terminal links and store them safely.
•Bi-amping allows two independentaudio power amplifier of equal or similar quality to be used for LF and HF
signals. The benefits of bi-amping include reduced intermodulation distortion because the low and high
frequency signals are amplified independently, and more power reserve and dynamic range because each
amplifier has less ‘work’ to do than a corresponding single amplifier.
Figure 5

309VER1.DOC Page 6of 7
3 POWER RATING
The technical specification shows a nominal power rating for your loudspeaker and the figure can be taken as a
rough guide to the power rating, Watts per channel into 8ohm load, for a complementary amplifier. However,
provided you NEVER play at levels where the sound is strained or distorted, the power rating is not critical
provided you have a minimum of about 15 Watts per channel and a maximum of 250 Watts per channel available.
If the sound is strained always turn the playing level down immediately. Ask your dealer for advice if you are
unsure or if you are choosing a new amplifier.
4 RUNNING-IN
The performance of any loudspeaker will improve subtly during initial use especially if the loudspeaker has been
stored in a cold environment or not used for an extended period. The drive unit suspension and any damping
materials will ‘break in’ and settle during the first 24-48 hours of playing. This running-in period may vary. Allow up
to a week for the loudspeaker temperature to stabilise and a further 48 hours of continual operation for the
loudspeaker to deliver its full potential.
5 MAINTENANCE
Spendor’s realwood veneers and solid timber elements should be treated like high quality furniture. Routine
dusting with a soft cloth is recommended. Do not apply any aerosol spray directly as this could damage the drive
units or grille fabric. Dust on the grille clothcan be removed with a sticky roller or a piece of sticky tape or by
gentle vacuuming with a soft brush adaptor. Do not expose the cabinets to damp, widely fluctuating temperatures
or direct sunlight, the appearance and performance may suffer. The C9e cabinet is finished in natural wood, over
time the wood will age and mature, often darkening the surface colour while highlighting the natural grain and
patina.
6 QUERIES AND SERVICE
If you require advice or service for your audio system please contact your Spendor dealer. We recommend that
you retain all the packaging for your loudspeakers in case you need to transport them safely in the future.
7 WARRANTY
All Spendor 'S' Series loudspeakers (‘The Equipment’) are guaranteed against defects in components and
materials for a period of 5 years from date of purchase. Within this period parts will be replaced free of charge
provided that failure is not due to accident, negligence or misuse. Labour and carriage are not covered except by
local agreement.
The guarantee offered does not affect the consumer's statutory rights.
To obtain Service under guarantee the equipment together with an original or clear copy of proof of purchase
must be delivered to a local Spendor dealer or distributor at the owner's expense.
Spendor Audio Systems Ltd and any of its authorised distributors or dealers reserve the right to refuse service
under guarantee if the equipment has been subject to unauthorised modification or any of the serial numbers
identifying the equipment have been defaced or removed.
Please register ownership of your Spendor loudspeakers by completing and returning the enclosed registration
card. This will help us to deal quickly with any queries regarding your equipment.
309VER1.DOC Page 7of 7
8 C9e SPECIFICATION
Description 3 way centre channel loudspeaker
Enclosure type Sealed enclosure
Drive units HF 25mm coated fabric dome, damped vented enclosure
Drive units LF/MF 140mm ep38 polymer cone
Drive units LF 2 x 165mm ep38 polymer cone
Frequency response 40Hz -20kHz ± 3dB on reference axis
Frequency range -6dB at 30Hz
Dispersion Within 3dB of response on reference axis
Horizontal over 40° arc ( ±20°)
Vertical over 20° arc ( ±10°)
Sensitivity for 1W @ 1m 88dB
Impedance nominal 8 ohms
Impedance minimum 5.0 ohms
Crossover frequencies 350Hz and 4.6kHz
Power handling 30 –250 watts into 8 ohms unclipped
Harmonic distortion <1%100Hz –20kHz 90 dB @ 1m
Connections 2/3 way gold plated bi-wireable terminal
Magnetic shielding All drive units completely screened
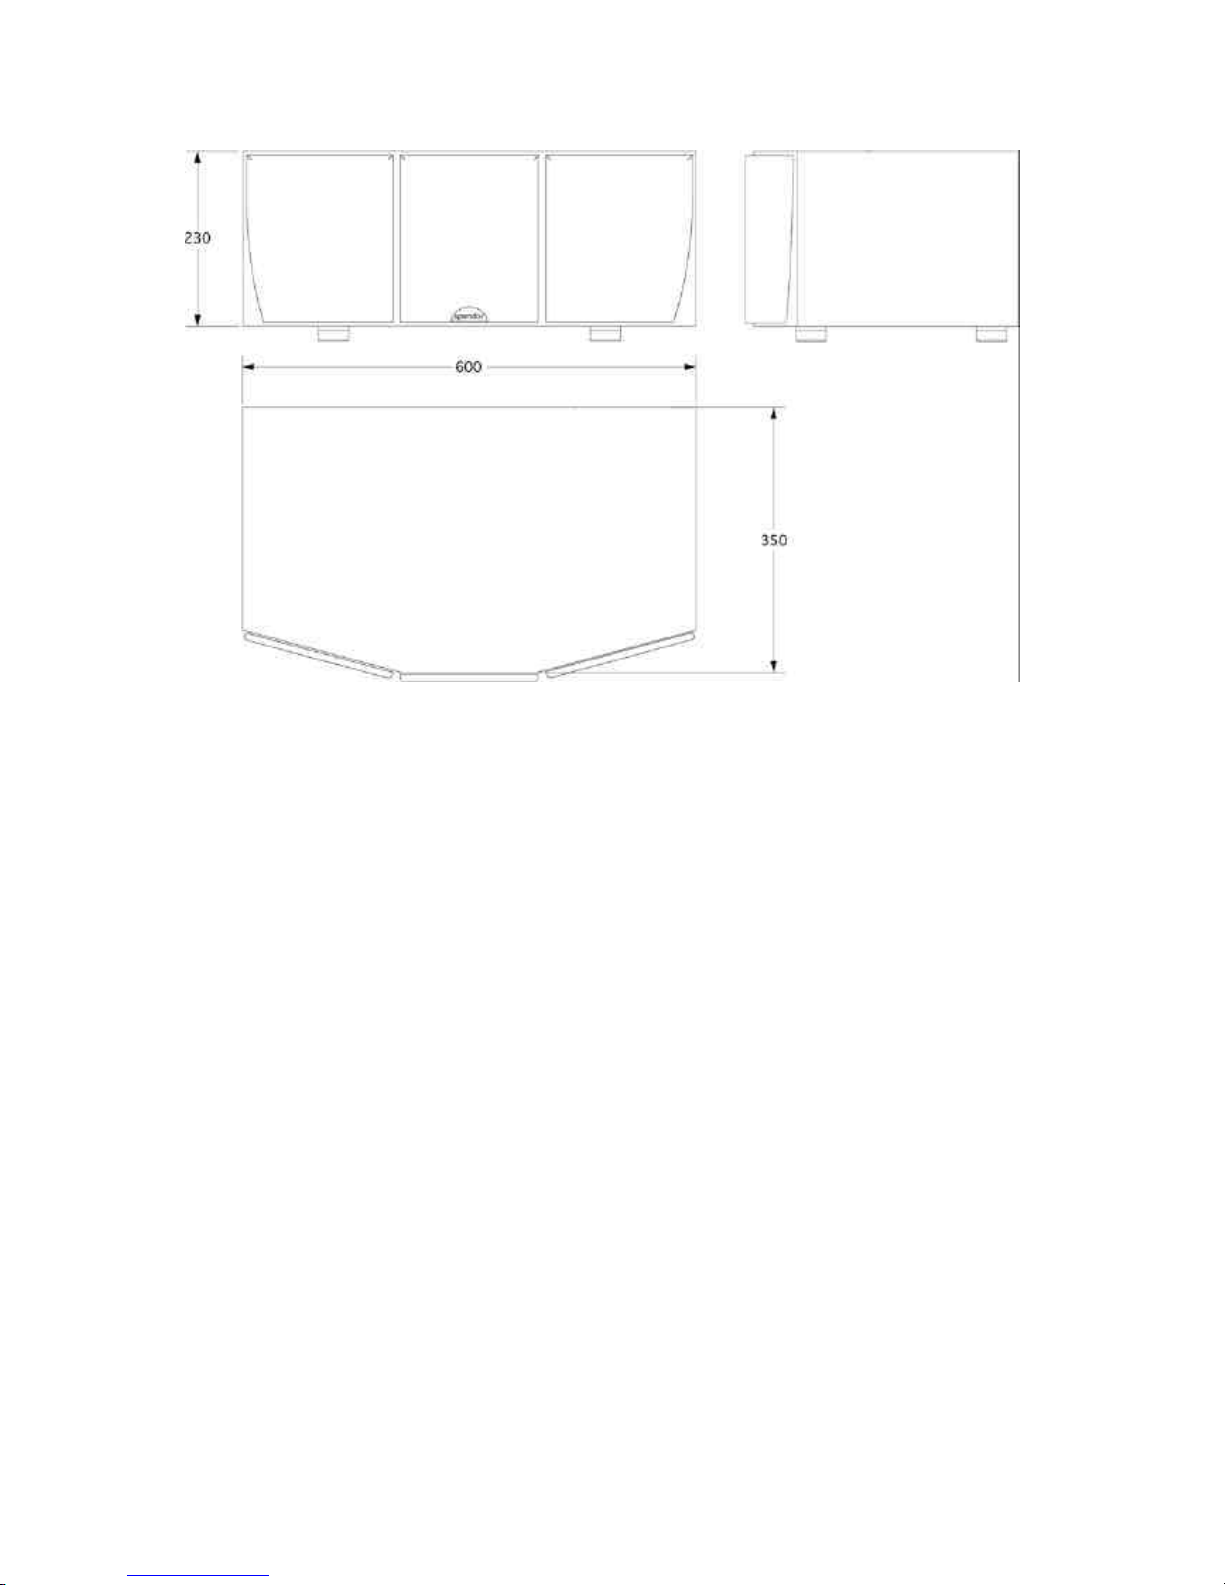
Dimensions H x W x D 230 x 600 x 360mm (9.1 x 23.6 x 14.2 in)
Plinth maximum W x D -
Spikes/feet/stand height 21 mm
Net weight 19.0 kg (41.9 lb)
Shipping weight 22.3 kg (49.1 lb)
Accessories supplied Removable non-slip feet
Cabinet real wood veneer finishes Cherry, Maple, Rosenut, Black Ash
Spendor C9e has full magnetic shielding to avoid any interaction with magnetically sensitive screens or equipment
Spendor Loudspeakers are designed and manufactured by Spendor Audio Systems Ltd
Spendor Audio Systems Ltd reserve the right to alter designs and specifications without notice
Spendor is a registered trademark of Spendor Audio Systems Ltd
Spendor Audio Systems Ltd
Station Road Industrial Estate, Hailsham, East Sussex, BN27 2ER UK
T+44 (0) 1323 843474 F+44 (0) 1323 442254
www.spendoraudio.com
Table of contents
Other Spendor Speakers manuals


Popular Speakers manuals by other brands
 manual")


Martin Audio
Martin Audio LE2100 Specification sheet

Voxx
Voxx PNP100 quick start guide

Loewe
Loewe Individual Sound Universal Speaker operating instructions

Conceptronic
Conceptronic CLLDWASPKW Multi Language Quick Guide

Interfire
Interfire IFC-525 Installation instructions manual

REVELL
REVELL Ultima Gem owner's manual


