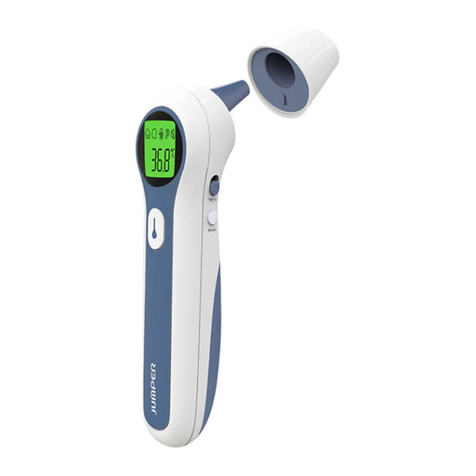
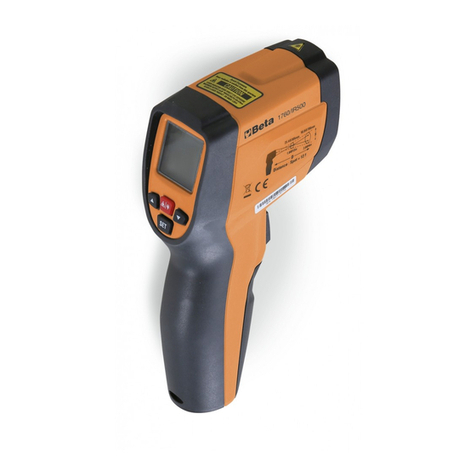
Spengler Temp'O Laser User manual

Manuel d’utilisation - Instruction manual
Th rmomètr sans contact à visé las r
Non-contact las r th rmom t r
T mp’O Las r
No ice Temp'O Laser_No ice Temp'O Laser 09/11/10 15:28 Page1

FR
2
EN
Spengler
Ce produit est conforme aux exigences des normes EN60601-1 et EN12470-5
TABLE DES MATIÈRES
Chapitre 1- résentation et classification du produit
Chapitre 2- rincipe de fonctionnement
Chapitre 3- Caractéristiques du produit
Chapitre 4- rincipales données techniques
Chapitre 5- Composants de base et description externe
Chapitre 6- Mode d’emploi
Chapitre 7- Spécifications des boutons et symboles de l’affichage
Chapitre 8- Réglages
Chapitre 9- Stockage et transport
Chapitre 10- Guide de réparation des pannes
Chapitre 11- Méthode d’étalonnage
Chapitre 12- récautions
Chapitre 13- Engagement sur la qualité et service apès-vente
*Liste des accessoires
Chapitre 1- résentation et classification du produit
Le thermomètre infrarouge Temp’O Laser est un dispositif permettant
de mesurer la température du corps humain en utilisant le principe
de réception des infrarouges. Pour l’utiliser, il suffit d’aligner la fenêtre
de détection avec le front de la personne pour mesurer rapidement et
précisément la température corporelle.
Classification du produit:
Classification du produit: type B
Classification de l’alimentation: équipement à alimentation interne
Chapitre 2- rincipe de fonctionnement
Tout objet dont la température est supérieure au zéro absolu irradie une
certaine quantité d’énergie infrarouge en fonction de sa propre tempéra-
ture. La quantité d’énergie irradiée et sa distribution selon les longueurs
d’onde sont étroitement liées à la température de la surface de l’objet.
Conformément à ce principe, la température de la surface du front peut
être mesurée de façon précise, et la température corporelle exacte peut
être déterminée en corrigeant la différence entre la température superfi-
cielle du front et la température réelle du corps.
No ice Temp'O Laser_No ice Temp'O Laser 09/11/10 15:28 Page2

FR
EN
3
Temp’O Laser
Chapitre 3- Caractéristiques du produit
Cet appareil est conçu spécialement pour mesurer la température
corporelle, avec un mécanisme de compensation dynamique pour
la température ambiante et la température corporelle.
• Utilisation exclusive de la sonde infrarouge Heimann pour la mesure
de la température, présentant une haute précision de mesure et des
performances plus stables.
• Notification par signal sonore des températures corporelles élevées.
• Capacité d’enregistrement de 32 ensembles de données de mesure.
• Écran LCD numérique avec rétroéclairage.
• Choix entre deux unités de température, Fahrenheit et Celsius.
• Fonction d’arrêt automatique permettant d’économiser l’alimentation
électrique.
• Taille réduite, structure bien conçue et fonctionnement pratique.
• Sélection du mode de mesure de la température de surface afin de déter-
miner la température de tout objet dont la température est inférieure
à 110°C et dont l’émissivité est égale à 0,95.
Chapitre 4- rincipales données techniques
1. Conditions de fonctionnement normales:
a) Température ambiante de travail: 16°C – 40°C.
b) Humidité relative: ≤85%.
c) Alimentation: courant continu 3 V (2 piles AA).
2. Dimensions:
87mm × 43mm × 148mm (longueur × largeur × hauteur).
3. oids (poids net): 108g (sans les piles).
4. Résolution de l’écran LCD (définition): 0,1°C.
a) Intervalle de mesure: température corporelle: 32,0°C à 42,0°C;
89,6°F à 107,6°F
b) Température des surfaces: 0,0°C à 110,0°C; 32,0°F à 230,0°F.
6. Alimentation: courant continu 3 V (2 piles AA)
Consommation d’énergie: ≤50mW
7. Erreur de mesure: sous environnement normal : ± 0,2°C.
en dehors d’un environnement normal : ± 0,3°C.
8. Temps de mesure: ≤0,5s.
9. Distance de mesure: 50mm à 150mm.
10. Délai avant l’arrêt automatique: 6s.
11. Émissivité: 0,95.
12. Répétabilité : 0,2°C
No ice Temp'O Laser_No ice Temp'O Laser 09/11/10 15:28 Page3

Chapitre 5- Composants de base et description externe (voir la figure ci-
dessous)
Chapitre 6- Mode d’emploi
Afin d’obtenir une valeur de mesure plus précise de la température
corporelle, avant de pratiquer une mesure, le thermomètre frontal doit être
laissé au repos pendant 10 minutes après l’installation des piles ou
lorsqu’il est déplacé dans un nouvel environnement (nouvelle pièce).
Aligner la fenêtre de détection avec le front de la personne en respectant
une distance de 50 à 100 mm du front, puis appuyer sur le bouton
de mesure situé à l’avant de la poignée. Le thermomètre fonctionne alors
automatiquement, et affiche le résultat de la mesure, comme expliqué ci-
après :
Utilisation des boutons de réglage des fonctions:
appuyer sur le bouton SET pour afficher et faire une recherche dans l’his-
torique des mesures. Appuyer sur le bouton ou pour afficher le ré-
sultat précédent ou le résultat suivant de l’historique, comme expliqué
ci-après :
Relâcher le bouton ou pour afficher le résultat de l’historique.
FR
4
EN
Spengler
Couvercle
du logement
des piles
Plaque
du fabricant
Écran LCD
Boutons
de réglage
des fonctions
Sonde de mesure
Bouton
de mesure
Rayon laser
No ice Temp'O Laser_No ice Temp'O Laser 09/11/10 15:28 Page4

FR
EN
5
Temp’O Laser
Chapitre 7- Spécifications des boutons et symboles de l’affichage
Symbole Spécifications du symbole de la fonction
Bouton de fonction: utilisé pour augmenter les valeurs des
réglages et tourner les pages lors de l’examen des résultats en
mémoire
Bouton de fonction : utilisé pour diminuer les valeurs
des réglages et tourner les pages lors de l’examen des résultats
en mémoire
SET Bouton de fonction : utilisé pour régler les fonctions ou
examiner les données en mémoire
Indicateur de charge des piles
body_temp La valeur affichée représente la température corporelle
surface_temp La valeur affichée représente la température ambiante/
de surface
ºC Unité de température: degré Celsius
ºF Unité de température: degré Fahrenheit
Indicateur sonore
Indicateur laser
Mémoire Informations en mémoire
Chapitre 8- Réglages
1. Réglag d la fonction F-1 : sél ction d l’unité d t mpératur .
a) Après avoir appuyé sur le bouton SET et l’avoir maintenu enfoncé pen-
dant 3 secondes, l’écran LCD affichera F-1, et le symbole ºC clignotera.
b) Appuyer ensuite sur le bouton pour sélectionner les degrés Celsius
(ºC).
c) Ou appuyer sur le bouton pour sélectionner les degrés Fahrenheit
(ºF).
d) Après avoir sélectionné l’unité, appuyer sur le bouton SET pour
enregistrer les réglages, et passer à la fonction F-2.
2. Réglag d la fonction F-2 : réglag du s uil d’alarm .
a) Après avoir appuyé sur le bouton SET et l’avoir maintenu enfoncé
pendant 3 secondes, l’écran LCD affichera F-1.
b) Appuyer à nouveau sur le bouton de réglage pour afficher F-2.
Les chiffres 37.5 s’afficheront en clignotant.
c) Pour augmenter le seuil d’alarme de 0,1°C, appuyer une fois sur le
bouton .
d) Pour diminuer le seuil d’alarme de 0,1°C, appuyer une fois sur le
bouton .
No ice Temp'O Laser_No ice Temp'O Laser 09/11/10 15:28 Page5

FR
6
EN
Spengler
e) Après la sélection, appuyer sur le bouton SET pour enregistrer les
réglages et passer à la fonction F-3.
Remarque: le seuil d’alarme est la limite inférieure de température pour
laquelle l’alarme se déclenchera. Si une température est supérieure à
cette valeur, le thermomètre émettra un signal sonore. Les valeurs du
seuil d’alarme peuvent être sélectionnées et ajustées entre 33,0°C et
40,0°C. La valeur par défaut réglée en usine est 37,5°C.
3. Réglag d la fonction F-3 : Sél ction d s mod s d m sur d s
résultats - t mpératur d surfac ou t mpératur corpor ll .
a) Après avoir appuyé sur le bouton SET et l’avoir maintenu enfoncé pen-
dant 3 secondes, l’écran LCD affichera F-1.
b) Appuyer à nouveau sur le bouton de réglage à deux reprises pour af-
ficher F-3. Les caractères 0 et body_temp s’afficheront en clignotant.
c) Appuyer sur le bouton pour afficher 1, c’est-à-dire un résultat de
mesure représentant la température de surface.
d) Ou appuyer sur le bouton pour afficher 0, c’est-à-dire un résultat
de mesure représentant la température corporelle.
e) Après la sélection, appuyer sur le bouton SET pour enregistrer les
réglages et passer à la fonction F-4.
R marqu : la t mpératur d surfac st la t mpératur d la surfac
xposé aux infraroug s, tandis qu la t mpératur corpor ll st
l résultat basé sur un comp nsation dynamiqu d la t mpératur
ambiant t d la t mpératur frontal .
4. Réglag d la fonction F-4 : réglag d la comp nsation global
a) Après avoir appuyé sur le bouton de SET et l’avoir maintenu enfoncé
pendant 3 secondes, l’écran LCD affichera F-1.
b) Appuyer à nouveau sur le bouton de réglage à trois reprises pour af-
ficher F-4. Les caractères 0.0 s’afficheront en clignotant.
c) Appuyer une fois sur le bouton pour augmenter la valeur de com-
pensation de 0,1°C.
d) Appuyer une fois sur le bouton pour diminuer la valeur de compen-
sation de 0,1°C.
e) Après la sélection, appuyer sur le bouton SET pour enregistrer les
réglages et passer à la fonction F-5.
R marqu : la val ur ré ll d la t mpératur st ajusté s lon un int r-
vall d comp nsation compris ntr -3,0°C t +3,0°C n fonction d
la distanc d m sur t d l’ nvironn m nt. Par x mpl , l résultat
d la m sur d la t mpératur corpor ll d’un p rsonn st 35,9°C
dans un nvironn m nt particuli r, mais la t mpératur corpor ll ré ll
d la p rsonn st 36,6°C. Dans c cas, la val ur d t mpératur corrigé
d 36,6°C p ut êtr obt nu par l’ajust m nt du réglag d comp nsation
n utilisant la fonction F-4. (Lorsqu la comp nsation st négativ ,
No ice Temp'O Laser_No ice Temp'O Laser 09/11/10 15:28 Page6

FR
EN
7
Temp’O Laser
l résultat corrigé st la val ur d la m sur moins c tt comp nsation.
Lorsqu la comp nsation st positiv , l résultat corrigé st la val ur d
la m sur plus c tt comp nsation. Lorsqu la comp nsation st d 0,0,
l résultat corrigé corr spondra à la val ur m suré .)
5. Réglag d la fonction F-5 : Mod d réglag du signal sonor
a) Après avoir appuyé sur le bouton SET et l’avoir maintenu enfoncé
pendant 3 secondes, l’écran LCD affichera F-1.
b) Appuyer à nouveau sur le bouton SET à quatre reprises pour
afficher F-5. Le caractère 1s’affichera en clignotant.
c) Appuyer sur le bouton pour afficher 1, c’est-à-dire pour activer
le signal sonore.
d) Ou appuyer sur le bouton pour afficher 0, et faire disparaître le
symbole de l’écran LCD, c’est-à-dire pour désactiver le signal
sonore.
e) Après la sélection, appuyer sur le bouton SET pour enregistrer les
réglages et passer à la fonction F-6.
6. Réglage de la fonction F-6 : activation du faisceau laser
a) Après avoir appuyé sur le bouton SET et l’avoir maintenu enfoncé
pendant 3 secondes, l’écran LCD affichera F-1.
b) Appuyer à nouveau sur le bouton SET à cinq reprises pour afficher
F-6. Le caractère 1 s’affichera en clignotant.
c) Appuyer sur le bouton pour afficher 1, c’est à dire pour activer la
fonction laser.
d) ou appuyer sur le bouton pour afficher 0, et faire disparaitre le
symbole de l’écran LCD, c’est à dire pour désactiver la fonction laser.
e) Après la selection, appuyer sur le bouton SET pour enregistrer les
réglages.
7. Sortie du mode réglage.
a) Après avoir réglé les paramètres de fonction, continuer à appuyer
sur le bouton SET pour sortir du mode réglage.
b) Si aucun bouton n’est utilisé (aucune opération) pendant 12 secon-
des, l’appareil sortira automatiquement de la fonction de réglage.
8. R mplac m nt d s pil s
Lorsque le symbole de pile vide apparaît en clignotant sur l’écran LCD,
cela indique que le niveau de chargement des piles est faible.
Opération:
Ouvrir le logement des piles et remplacer les piles usagées par des piles
alcalines AA neuves.
Chapitre 9- Stockage et transport
le thermomètre infrarouge TempO Laser doit être entreposé dans un local
bien ventilé, dépourvu de gaz corrosifs, à une température de -25~55°C et
No ice Temp'O Laser_No ice Temp'O Laser 09/11/10 15:28 Page7

FR
8
EN
Spengler
une humidité relative inférieur à 90%. Faire tomber, secouer, mouiller ou
piétiner l’emballage doivent être évités pendant le transport et le charge-
ment/déchargement. En outre, il doit être placé selon la direction indiquée
sur l’emballage.
Chapitre 10- Guide de réparation des pannes.
Dysfonctionnement
constaté Solution Autre méthode
Température
mesurée trop faible
ou trop élevée
1. Vérifier que la touche de fonc-
tion « F4 » a été ajustée, la
valeur par défaut à la sortie
d’usine est 0.0.
2. Le dispositif peut
compenser automatiquement
les variations de la tempéra-
ture ambiante, mais si les
changements de température
ambiante sont trop importants
ou si la mesure est effectuée
dans un environnement à
température élevée, puis
rapidement dans un environ-
nement à température basse,
le dispositif doit être laissé au
repos dans un environnement
stable pendant 10 à 30 minutes
avant la mesure suivante.
La distance de mesure efficace
est de 5 à 10cm.
1. Retourner l’appareil au
service d’entretien agréé
pour réparation.
2. Retourner l’appareil au
distributeur ou au
vendeur, pour que
l’appareil soit transmis au
fabricant pour réparation
ou remplacement.
L’utilisation des
touches entraîne une
réponse invalide ou
aucune réponse
Ne pas jeter le thermomètre
dans les déchets ménagers.
Idem
Aucune mention
affichée ou
affichage incomplet
(barres manquantes)
Ne pas jeter le thermomètre
dans les déchets ménagers.
Idem
Aucun son Vérifier si le réglage du signal
sonore est activé: si le réglage
est sur «1», le signal sonore est
activé; sur «0 » le signal sonore
est désactivé.
Idem
La touche de mesure
entraîne une réponse
invalide ou aucune
réponse
1. Piles usées, mettre des piles
neuves;
2. Vérifier si la polarité des
piles est respectée.
No ice Temp'O Laser_No ice Temp'O Laser 09/11/10 15:28 Page8

FR
EN
9
Temp’O Laser
Chapitre 11- Méthode d’étalonnage
Fréquence:
un étalonnage par mois.
Méthode d’étalonnage:
mesurer la température avec des thermomètres cliniques (par exemple,
un thermomètre à mercure à l’aisselle) afin de comparer le résultat avec
celui de l’appareil. Si la déviation est trop importante, la fonction de com-
pensation «F4» doit être utilisée pour obtenir la valeur correcte.
Remarque:
Si les résultats diffèrent de la température mesurée avec des
thermomètres cliniques de façon importante, l’appareil doit être
IMMÉDIATEMENT étalonné.
Chapitre 12- récautions
1.La lentille de protection de la sonde est la partie la plus fragile du
thermomètre infrarouge. Il faut par conséquent en prendre le plus grand
soin.
2.Méthode de nettoyage de la lentille de la sonde:
utiliser un tampon de coton ou un linge souple imbibé d’eau ou d’alcool
pour essuyer la lentille avec précaution.
3.Ne jamais charger les piles ni les jeter au feu. Veuillez éliminer
les piles usagées dans un lieu de recyclage. L’utilisation des piles de mau-
vaise qualité peut provoquer un départ de feu ou une explosion.
4.Précaution:
Lorsque le produit n’est pas utilisé pendant une période prolongée,
les piles doivent être retirées.
5.Le produit ne doit pas être immergé dans l’eau ni exposé directement
à la lumière du soleil.
6.Ne jamais jeter le produit ni lui faire subir de choc, au risque de l’endom-
mager.
7.Si la mesure est effectuée en ne respectant pas la distance efficace ni
l’alignement avec la position centrale de l’objet à mesurer, un écart avec
la température réelle peut être observé. Il est suggéré de renouveler
la mesure.
8.Les piles doivent être retirées si le produit est mis au rebut. (Aucune
circonstance spécifique n’est nécessaire).
9.Le thermomère sans contact à infrarouge a la fonction d’indication avec
laser. lors de l’utilisation, prendre des précautions suivantes :
a) Ne jamais pointer le laser dans les yeux d’une personne.
b) Ne jamais utiliser un instrument d’optique tels que téléscope, etc pour
regarder le faisceau laser.
é
e
No ice Temp'O Laser_No ice Temp'O Laser 09/11/10 15:28 Page9

FR
10
EN
Spengler
c) La puissance moyenne du laser est 0,65mW, et sa puissance maximal
sera de 1mW.
d) Il y a une étiquette indiquant l’utilisation permanante du laser sur le
produit.
Chapitre 13- Engagement sur la qualité et service après-vente
Le produit est sous garantie pendant un an à partir de la date d’achat.
Précaution :
Les dommages provoqués par une utilisation incorrecte ou le démontage
par l’utilisateur ne sont pas couverts par la garantie.
Remarque :
Veuillez conserver l’emballage d’origine et la facture d’achat en cas de
demande de réparation.
Liste des accessoires :
Manuel d’utilisation.
Deux piles AA.
Ce produit est conforme aux exigences des normes EN60601-1, EN12470-5
Nº de licence de production : 20091750 de la Guangdong Food & Drug
Administration
Shenzhen TSGE Electronics Co., Ltd
Adresse : 3F, East Side of Building 78, No.9 Daxin Road, Majialong Industrial
Zone, Nanshan District, Shenzhen, China.
Sungo Group Company Limited - 78 York street, London, W1H
IDP England
Nom du produit Temp'O Laser
Temp'O Laser
température cible (ºC)
30 33 35,6 37 50
Résultat de la mesure (ºC)
No ice Temp'O Laser_No ice Temp'O Laser 09/11/10 15:28 Page10

FR
EN
11
This product complies with EN60601-1, EN12470-5 required standard
TABLE OF CONTENTS
Chapter 1- roduct introduction and classification
Chapter 2- Basic operating principle
Chapter 3- roduct features
Chapter 4- Main technical indicators
Chapter 5- Basic components and external form
Chapter 6- Method of use
Chapter 7- Specifications for buttons and display symbols
Chapter 8- Settings
Chapter 9- Storage and transportation
Chapter 10- roducts troubleshooting
Chapter 11- Calibration method
Chapter 12- Cautions
Chapter 13- Quality commitment and after-sales service
* List of accessories
Chapter 1- roduct Introduction and classification
Temp’O Laser infrared thermometer is a thermometer that measures the
temperature of human body by using the principle of receiving infrared.
When using, it is only required to align the detection window with the fore-
head to measure the body temperature quickly and accurately.
Product classification:
Product Classification: Type B
Power Classification: internal power supply equipment
Chapter 2- Basic Operating rinciple
Any object with its temperature higher than the absolute zero will radiate
a certain proportion of infrared energy according to its own temperature.
The amount of radiation energy and its distribution by wavelength are
closely related to the object’s surface temperature. In accordance with this
principle, the surface temperature of forehead can be measured accurately,
and the accurate body temperature can be determined and shown by off-
setting the difference between the surface temperature of forehead and the
actual body temperature.
Temp’O Laser
No ice Temp'O Laser_No ice Temp'O Laser 09/11/10 15:28 Page11

FR
12
EN
Spengler
Chapter 3- roduct features
Specially designed for measuring the body temperature, with a dynamic
offset for the ambient temperature and body temperature.
• Exclusively using the Heimann infrared probe for temperature measure-
ment, with a high accuracy of measurement and a more stable perform-
ance.
• Providing the function of sound notification of higher body temperature.
• Capable of storing 32 sets of measurement data.
• Backlight LCD digital display.
• Providing two temperature modes, i.e., Fahrenheit scale and Celsius
scale, for selection.
• Providing the function of auto shutdown to save electric power.
• Small size, reasonable structure and convenient operation.
• Selecting the surface temperature measurement mode to measure the
temperature of any object with its temperature less than 110ºC and its
emissivity equal to 0.95.
Chapter 4- Main technical indicators
1. Normal operating conditions:
a) Working ambient temperature: 16ºC - 40ºC.
b) Relative humidity: ≤ 85%.
c) Power supply: DC 3V (two AA batteries).
2. Basic dimensions:
87mm × 43mm × 148mm (length × width × height).
3. Weight (net weight): 108g (not including the batteries).
4. LCD display resolution (definition): 0.1ºC.
5. Range of measurement: Body temperature: 32.0ºC - 42.0ºC; 89,6ºF -
107.6ºF.
Surface temperature: 0.0ºC - 110.0ºC; 32.0ºF - 230.0ºF.
6. ower: DC3V (2pcs AA Batteries)
power consumption: ≤50mw
7. Measurement error: Under Normal Environment: ±0.2ºC.
Above Normal Environment: ±0.3ºC.
8. Measurement time: ≤0.5s.
9. Measurement distance: 50mm – 150mm.
10. Auto-shutdown time: 6s.
11. Emissivity: 0.95.
12. Repeatability: 0.2ºC.
No ice Temp'O Laser_No ice Temp'O Laser 09/11/10 15:28 Page12

FR
EN
13
Chapter 5- Basic components and external form (see the figure below)
Chapter 6- Method of use
In order to get a more accurate measurement value of body temperature,
before the measurement, the forehead thermometer shall be put aside for
10 minutes after installation of batteries or when it is moved to a new en-
vironment (new place).
Align the detection window with a person’s forehead while having a distance
of 50-100mm to the forehead, and then push the measurement
button in front of the handle. Now the thermometer will start up automat-
ically and display the measurement result, as shown in the figure below:
In the function setting buttons, press the SET button to show and search
the historical measurement results. Press the or button to view the
previous or next historical measurement result, as shown in the figure
below:
Release the or button to shown the historical result.
Chapter 7- Specifications for buttons and display symbols
Symbol Specifications for symbol function
Function button: used to increase values in setting and turn
pages in checking memory
Function button: used to decrease values in setting and turn
pages in checking memory
SET Function button: used to set functions or check memory data
Battery indicator
body_temp The display value represents body temperature
Temp’O Laser
Battery cover
Nameplate
LCD screen
Function setting
buttons
Measurement probe
Measurement
button
Laser beam
No ice Temp'O Laser_No ice Temp'O Laser 09/11/10 15:28 Page13

FR
14
EN
Spengler
Symbol Specifications for symbol function
Surface_tempThe display value represents ambient/surface temperature
ºC Unit of temperature: Celsius degree
ºF Unit of temperature: Fahrenheit degree
Sound indicator
Laser indicator
Memory Memory information
Chapter 8- Settings
1. Function setting F-1: selection of temperature unit
a) After the setting button is pressed and held for 3 seconds, the LCD
screen will display F-1, and meanwhile the ºC symbol flashes.
b) Now press the button to select Celsius scale (ºC).
c) Or press the button to select Fahrenheit scale (ºF).
d) After the selection, press the SET button to save the setting parame-
ters and go to the function setting F-2.
2. Function setting F-2: Setting of alarm threshold
a) After the setting button is pressed and held for 3 seconds, the LCD
screen will display F-1.
b) Press the setting button again to display F-2 and enable the charac-
ters 37.5 to flash.
c) Now the alarm threshold will be increased by 0.1ºC when the button
is pressed each time.
d) Meanwhile, the alarm threshold will be decreased by 0.1ºC when the
button is pressed each time.
e) After the selection, press the SET button to save the setting parame-
ters and go to the function setting F-3.
Note: the alarm threshold is the lower limit of alarm for temperature
measurement. If a temperature is larger than this value, the thermome-
ter will sound for alarm. The alarm threshold ranges from 33.0ºC to
40.0ºC for selection and adjustment, and its factory default value is set
to 37.5ºC.
3. Function setting F-3: selection of measurement-result modes – surface
temperature or body temperature
a) After the setting button is pressed and held for 3 seconds, the LCD
screen will display F-1.
b) Press the setting button twice more to display F-3 and enable the
characters 0and body_temp to flash.
c) Now press the button to display 1, i.e., the measurement result
representing surface temperature.
d) Or press the button to display 0, i.e., the measurement result
No ice Temp'O Laser_No ice Temp'O Laser 09/11/10 15:28 Page14

FR
EN
15
representing body temperature.
e) After the selection, press the SET button to save the setting parame-
ters and go to the function setting F-4.
Note: the surface temperature is the infrared surface temperature of the
ambient/objects, and the body temperature is the result based on dy-
namic offset of ambient temperature and offset of forehead temperature.
4. Function setting F-4: setting of overall offset
a) After the setting button is pressed and held for 3 seconds, the LCD
screen will display F-1.
b) Press the setting button for three more times to display F-4 and en-
able the characters 0.0 to flash.
c) Now the offset value will be increased by 0.1ºC when the button is
pressed each time.
d) Meanwhile, the offset value will be decreased by 0.1ºC when the
button is pressed each time.
e) After the selection, press the SET button to save the setting parame-
ters and go to the function setting F-5.
Note: the actual value of temperature measurement is adjusted with the
offset ranging from -3.0ºC to +3.0ºC according to the actual measurement
distance and environment. For example, the measurement result of a
person’s body temperature is 35.9ºC in a special environment, but the
actual body temperature of the person is 36.6ºC. In this case, the correct
temperature value of 36.6ºC can be achieved through adjustment with the
offset set by F-4. (When the offset is negative, the correct result is the
measurement value minus this value. When the offset is positive, the cor-
rect result is the measurement value plus this value. When the offset is
0.0, the correct result is the measurement value.)
5. Function setting F-5: sound switch mode
a) After the setting button is pressed and held for 3 seconds, the LCD
screen will display F-1.
b) Press the setting button for four more times to display F-5 and enable
the character 1to flash.
c) Now press the button to display 1, i.e., switching on the sound func-
tion.
d) Or press the button to display 0with the symbol on the LCD
screen disappearing, i.e., switching off the sound function.
e) After the selection, press the SET button to save the setting parameters
and go to the function setting F-6.
6. Function setting F-6: Laser guide mode
a) After the setting button is pressed and held for 3 seconds, the LCD
screen will display F-1.
b) press the setting button for five more times to display F-6 and enable
Temp’O Laser
No ice Temp'O Laser_No ice Temp'O Laser 09/11/10 15:28 Page15

FR
16
EN
the character 1to flash.
c) Now press the button to display 1, i.e., switching on the laser func-
tion.
d) Or press the button to display 0 with the symbol on the LCD screen
disappearing, i.E., switching off the laser funcion.
e) After the selection, press the SET button to save the setting parameters
7. Exiting the setting mode
a) When setting the function parameters, continuously press the SET but-
ton to exit the setting function.
b) When no button is pressed (no operation) for 12 seconds, it will exit the
setting function automatically.
8. Changing the batteries
Display: when the battery symbol flashes on the LCD screen, it indicates
the batteries are low.
Operation: open the battery cover and change the old batteries with two new
AA alkaline batteries.
Chapter 9- Storage and transportation
The non contact infrared TempO Laser shall be stored in a well-ventilated
room free of corrosive gases, with a temperature of -25~55°C and a relative
humidity of not higher than 90%. Sling , stress, drench or trample on the
package shall be avoided during transportation and loading/unloading.
Besides, it shall be placed according to the marked direction on the packaging.
Chapter 10- roducts troubleshooting
Symptom
of machine failure
Measured temperature
lower or higher
Solution
1. View whether the func-
tion key “F4” has been
changed, the factory de-
fault value is 0.0.
2. The machine can auto-
matically compensate for
ambient temperature
variations, but if the
ambient temperature
changes too much or test
in a high-temperature
environments then
quickly transfer to a low-
temperature environ-
ments, the equipment
required to be kept in a
stable environment for 10
~ 30 minutes for the next
Other method
1. To the designated
maintenance depart-
ment for repair
2. Return to distributors,
dealers, then transfer to
the factory for repair or
replace.
No ice Temp'O Laser_No ice Temp'O Laser 09/11/10 15:28 Page16

FR
EN
17
Chapter 11- Calibration method
Frequency: calibrate once a month.
Calibration methods: via clinical thermometers (such as the axillary mer-
cury thermometer) measurement the temperature, to compare the result
testing by this machine. If the deviation is too large, it can be offset com-
pensation key “F4” to fix the correct value.
Note:
If the measurement results is large different from the temperature tested
by the clinical thermometers, the machine should immediately be cali-
brated.
Chapter 12- Cautions
1. The protective lens of probe is the most damageable part of the infrared
thermometer. Hence, it must be taken good care.
2. Cleaning method of probe lens: use the cotton bud or soft cloth with
water or alcohol to wipe the lens lightly.
3. Never charge the batteries or throw any of them into fire. Please discard
Temp’O Laser
ed
rt-
rs,
to
or
Symptom
of machine failure
ey trigger invalid, no
response
No display or display lack
of strokes
No voice prompts
Press measuring key is
invalid, no response
Solution
measurement.
Note that the effective
measurement of dis-
tance is: 5 to 10cm
Do not self-demolish
thermometer
Do not self-demolish
thermometer
See whether the voice
prompts switch is
turned on, when the
sound identification: “1”
is turn on the sound, “0”
is off the sound.
1. Low battery, please
replace the new bat-
tery;
2. Whether the battery
polarity is correctly in-
stalled.
Other method
Same as above
Same as above
Same as above
Same as above
No ice Temp'O Laser_No ice Temp'O Laser 09/11/10 15:28 Page17

FR
18
EN
Spengler
the used batteries at a specified location for recycle. Using the batteries
with a bad quality may cause fire or explosion.
4. Caution: when the product is not used for a long time, the batteries shall
be removed.
5. The product may not be immersed into water or exposed to the sun di-
rectly.
6. Never hard throw or impact the product. Otherwise, it will be damaged.
7. If the measurement is made without an effective distance or an align-
ment with the central position of the measured object, a deviation from ac-
tual temperature may be caused. It is suggested to repeat the
measurement once or more.
8. The battery should be taken out when the product is invalidated. No spe-
cial circumstances required.
9) The TempO Laser infrared thermometers has the function of laser indi-
cation . When using, please take note of the following requirements:
a) Never shoot anyone’s eyes directly with the laser.
b) Never use any optical instrument like telescope, etc to view the laser
beam.
c) the laser’s average power is 0,65mW, and its maximum power will not
be more than 1mW.
d) There is a label indicating permaent use of the laser on the product.
Chapter 13- Quality commitment and after-sales service
The product is under warranty for one year from the date of purchase.
Caution: damage caused by improper use or disassembly by a user is not
covered under warranty.
Note: please take good care of product original packaging and purchase
bill for application of repair in case of damage.
List of accessories
A user manual.
Two AA batteries.
This product complies with EN60601-1, EN12470-5 required standard
Production License No. 20091750 of Guangdong Food & Drug Administra-
tion
Product name Temp'O Laser
Temp'O Laser
Target temperature (ºC)
30 33 35,6 37 50
Measurement result
No ice Temp'O Laser_No ice Temp'O Laser 09/11/10 15:28 Page18

FR
EN
19
Shenzhen TSGE Electronics Co., Ltd
Add: 3F, East Side of Building 78, No.9 Daxin Road, Majialong Industrial
Zone, Nanshan District, Shenzhen, China.
Sungo Group Company Limited - 78 York street, London, W1H
IDP England
Temp’O Laser
No ice Temp'O Laser_No ice Temp'O Laser 09/11/10 15:28 Page19

DU166/A - Spengler Temp’O Laser 05/2010 - Sous réserve d’erreurs typographiques. Photos non contractuelles. Subject to typographical errors. Non contractual pictures.
No ice Temp'O Laser_No ice Temp'O Laser 09/11/10 15:28 Page20
Table of contents
Languages:
