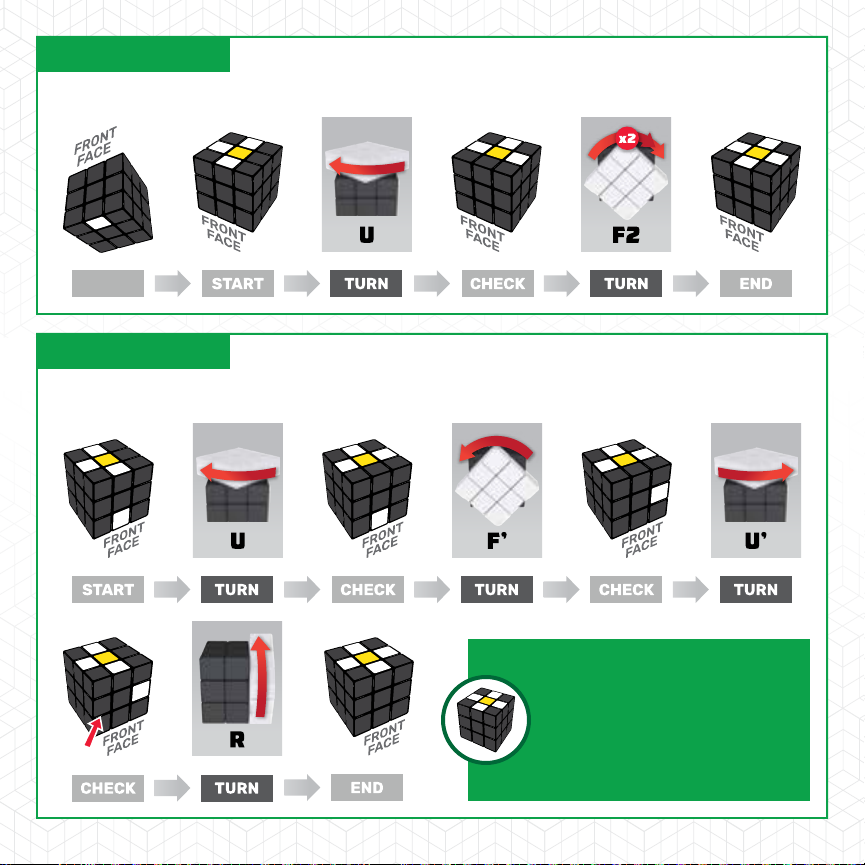
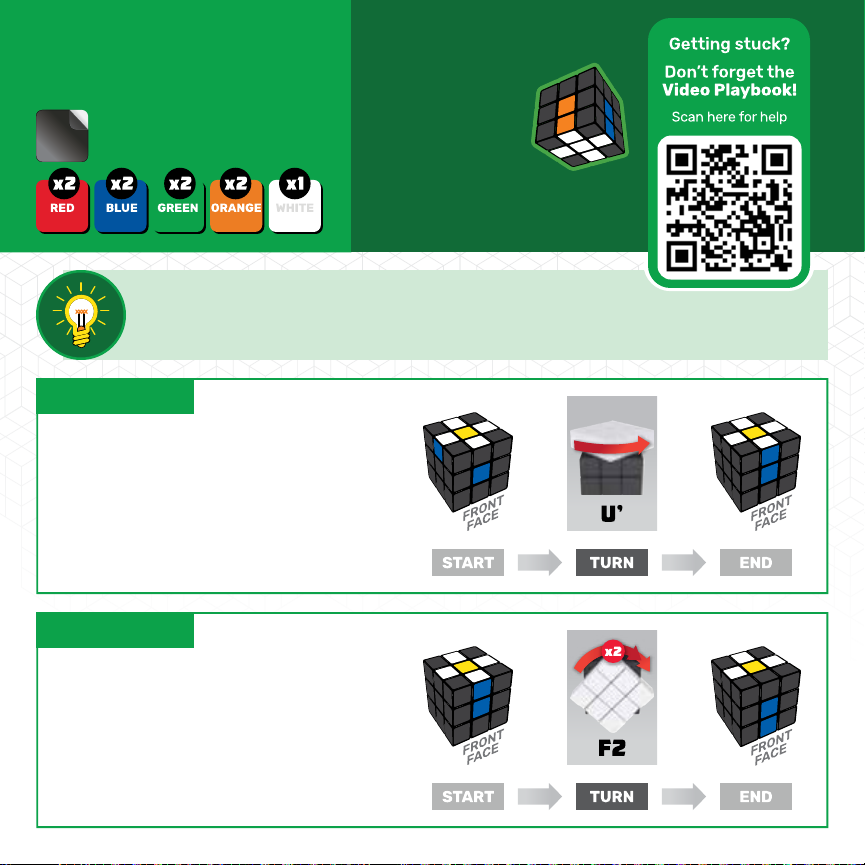
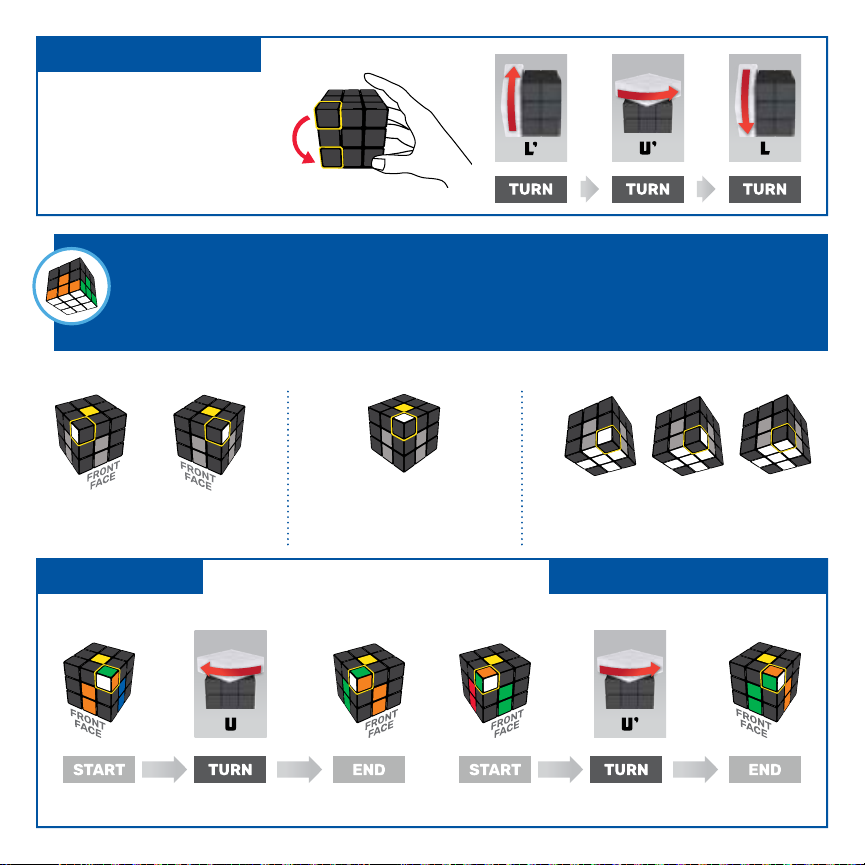
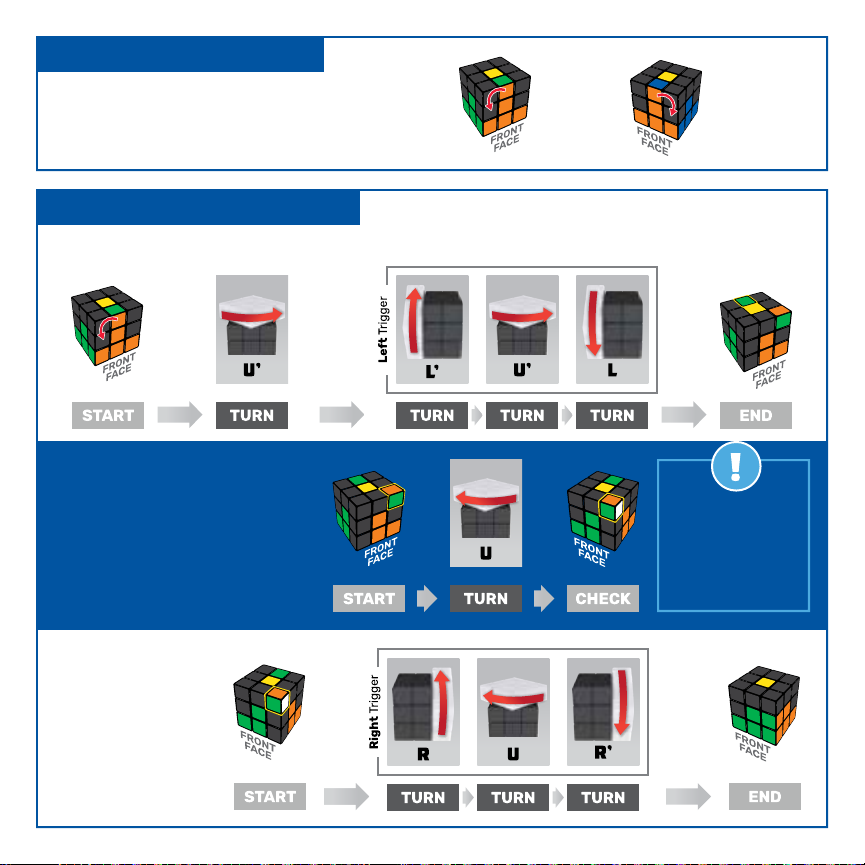
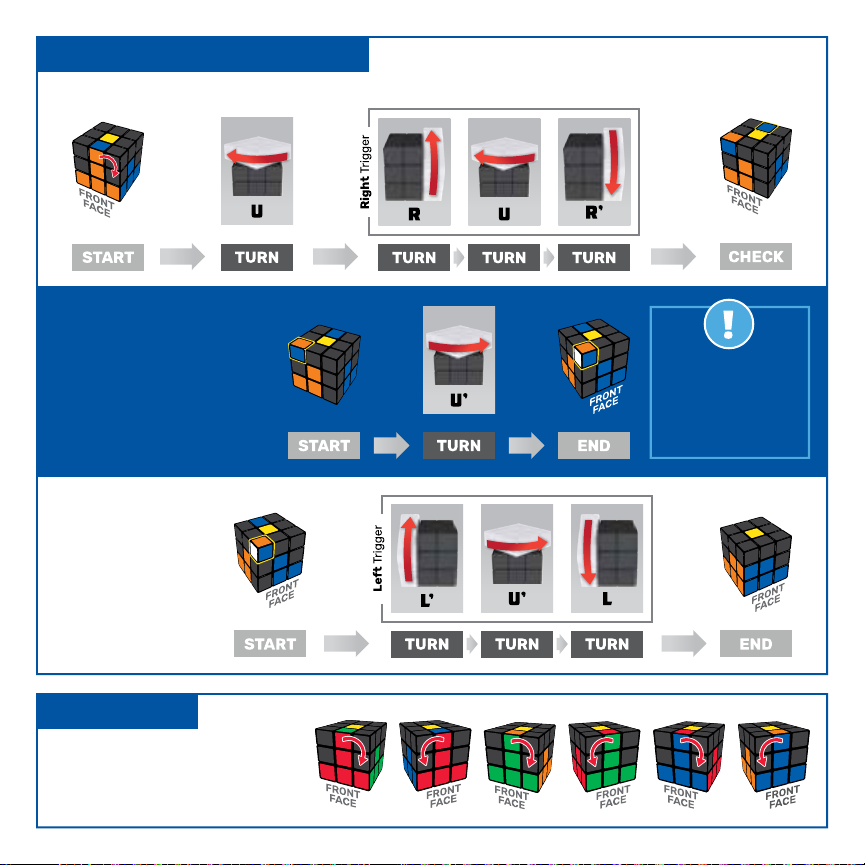
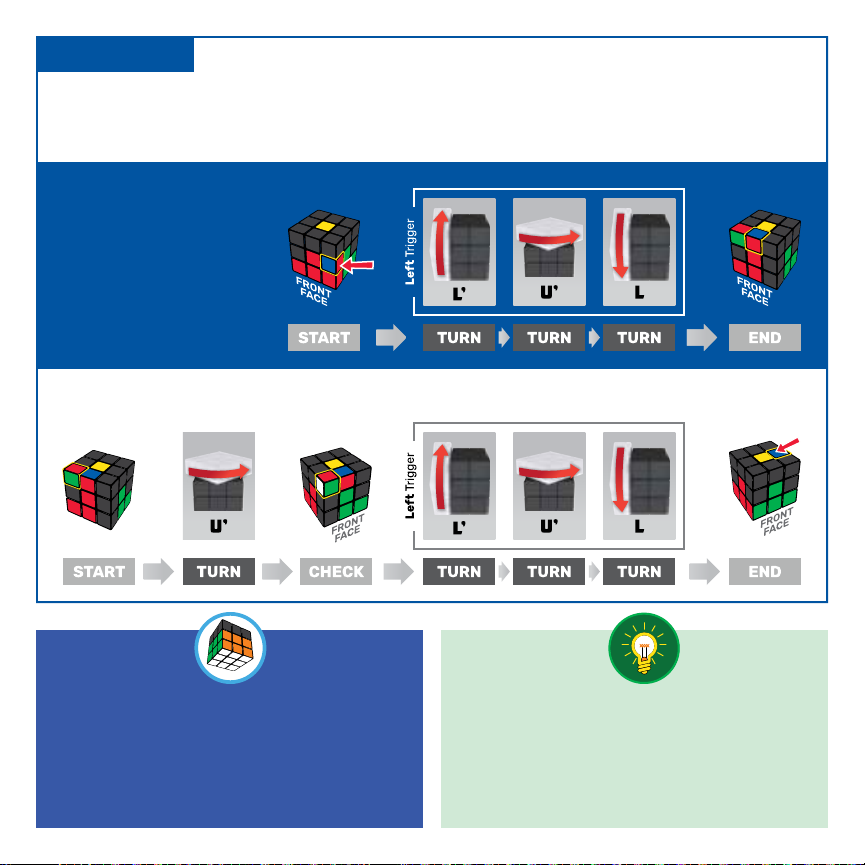
Spinmaster Rubik's Coach Cube Manual


Other Spinmaster Game manuals

Spinmaster
Spinmaster The Wiggles User manual

Spinmaster
Spinmaster Girl Crush Lip Gloss Maker User manual

Spinmaster
Spinmaster Captain Bones Gold User manual

Spinmaster
Spinmaster Black Belts User manual

Spinmaster
Spinmaster Flip Trix User manual

Spinmaster
Spinmaster Bakugan: Battle Brawlers User manual

Spinmaster
Spinmaster Wiggly Wiggly Dance Mat User manual

Spinmaster
Spinmaster Slinky User manual

Spinmaster
Spinmaster Tricky Toby Turtle User manual

Spinmaster
Spinmaster AQUADOODLE Manual
Popular Game manuals by other brands

MD SPORTS
MD SPORTS CB072Y21003 Assembly instructions

Carromco
Carromco Ascot-601 Mounting instructions

DGT
DGT REVELATION II user manual

BCP
BCP 10-in-1 Multi-Game Table instruction manual

Educational Insights
Educational Insights GeoSafari Talking Globe Instruction guide

Hasbro
Hasbro Mickey Mouse Clubhouse instructions

Garlando
Garlando FLORIDA Assembly manual

John Lewis
John Lewis Battleships quick start guide

Automaten Hoffmann
Automaten Hoffmann Profi 5913 Assembly manual

Ravensburger
Ravensburger LEVEL 8 manual

Tiger Electronic Toys
Tiger Electronic Toys Electronic Baseball Super Stars LCD Game... instruction manual

Hathaway
Hathaway METROPOLITAN 54-IN Assembly instructions


