Sports Instruments SI 90HR User manual

CONTACTING SPORTS INSTRUMENTS
SPORTS INSTRUMENTS USA
2064 PROSPECTOR AVE.
SUITE 201
PARK CITY, UT 84060
web: www.sportsinstruments.com
SI 90HR OWNER’S MANUAL
English
Français
Español
Deutsch
Italiano
Nederlander
SI90HR_eng 5/18/04 4:03 PM Page 1

english
21 INTRODUCTION
Congratulations on your purchase of a new Sports Instruments SI 90HR
Wireless Heart Rate Monitor/Cycle Computer.This product features the
state of the art in heart rate monitoring technology for athletes combined
with a full function cycle computer.The SI 90HR is the worlds first
successful wireless cycle computer combined with a heart rate monitor.
Like all Sports Instruments heart rate monitors the new Sports
Instruments SI 90HR utilizes our exclusive IndePad transmitter for the
optimal in comfort and performance. Unlike the transmitters in other heart
rate monitors, the conductive rubber pads that pick up the heart rate signal
from the body, move independently from the main transmitter housing.This
design allows the pads to move freely during exercise assuring smooth and
continuous contact with the skin—eliminating erratic readings.
WARNINGS AND CAUTIONS
WARNING: The Sports Instruments SI90HR heart rate monitors are
training and fitness tools. Before beginning any exercise program, consult
your doctor for a complete physical and to discuss your exercise plans.
Bicycle riding is an inherently dangerous activity.
ALWAYS: Wear a bicycle helmet when riding at any time
ALWAYS: Use front and rear lights when riding at night
ALWAYS: Watch where you are going and NEVER take
your eyes off of the road.
NOTICE TO ALL USERS: High tension power lines, home security systems,
automobiles, televisions, microwave ovens, exercise equipment and other
product cause various types of interference that may temporarily affect the
transmission of heart rate information from the chest strap to the watch
unit. These interference’s are usually temporary and can generally be
eliminated by moving to an area away from the source of the interference.
NOTICE TO PEOPLE WEARING PACEMAKERS: While your heart rate
monitor should have no direct effect on your pacemaker, we strongly
recommend that you consult your physician or cardiologist before using
this product or embarking on an exercise program.
SI90HR_eng 5/18/04 4:03 PM Page 1

HOW A HEART RATE MONITOR WORKS
Your new Sports Instruments Heart Rate Monitor is a sophisticated
athletic training tool that is capable of measuring your heart rate with
99% accuracy. Top quality heart rate monitors use a chest strap to pick
up the electrical signal caused by the contractions of the heart and
transmit the information to the watch.
Every time the heart contracts, a short radio signal is sent from the chest
transmitter to the watch. The watch measures the time between the
incoming signals, filters and averages them and displays a heart rate
number on screen.The heart rate display on the screen is updated every
few seconds to assure you of an accurate measurement.
4
english
HRT CARE & MAINTENANCE
ALWAYS: Rinse your Sports Instruments heart rate transmitter
off in warm water after every use.
NEVER: Lay your Sports Instruments heart rate transmitter on metal
surfaces as this can shorten the battery life.
NEVER: Store your Sports Instruments heart rate transmitter or receiver
in a plastic or other non-breathable container.
3
SI90HR_eng 5/18/04 4:03 PM Page 3

HOW A HEART RATE MONITOR WORKS
Occasionally if you are using your heart rate monitor in close
proximity to other heart rate monitors, it is possible for your
watch unit to pick up the signal from the other transmitters as
well as yours. This is called cross-talk; when you are experiencing
cross-talk you will see a very high heart rate or a heart rate of
zero if the combination of heart rates is greater than 240 beats
per minute. If this happens simply allow a bit more space
between you and the other users.
Some clothing fabrics, especially in dry climates, are capable
of generating a great deal of static electricity. This static
electricity is capable of significantly interfering with the signal
from the transmitter.This shows up as erratic readings on the
display. Over time you should be able to tell what clothing, if
any, you own which cause this problem. Sometimes spraying the
clothing before you workout, with a commercially available
anti-static product will help reduce the problem.
Being aware of these circumstances and knowing how to avoid them will
significantly increase your enjoyment of your new Sports Instruments
Heart Rate Monitor.
6
english
5HOW A HEART RATE MONITOR WORKS
To achieve the most accurate heart rate reading possible, it is important to
be aware of circumstances that can cause false signals to enter the system
and make your heart rate measurement incorrect.
Your chest strap should be worn as tightly as possible without
being uncomfortable. If the chest strap is not tight enough,
movement between it and your body can cause false signals to
be generated that may be seen as heart beats by the watch.
This is especially true during high impact activities such as
running.
Environmental factors such as high-tension power lines, home
security systems and radio towers may interfere with the ability
of the watch to receive a signal from the transmitter. A loss of
the heart rate signal and the heart rate display showing zero
will usually indicate this. This problem is transient in nature
and will stop once you have passed out of the area of
interference.
1
2
3
4
SI90HR_eng 5/18/04 4:03 PM Page 5
WEARING THE SI INDEPAD™
TRANSMITTER ELT
NOTE: Users with a lot of chest hair may have a problem getting
contact between the transmitter electrodes and their skin,
resulting in poor performance. Because of this it may be
necessary for these individuals to shave the area of their chest
beneath the transmitter.
NOTE: In dry and cold climates it may take a few minutes of use for
the electrodes to soften and a layer of perspiration to form
between the contact and the skin for good performance.
Moistening the electrodes with saliva or ECG conductive gel
can speed up this process.
8
english
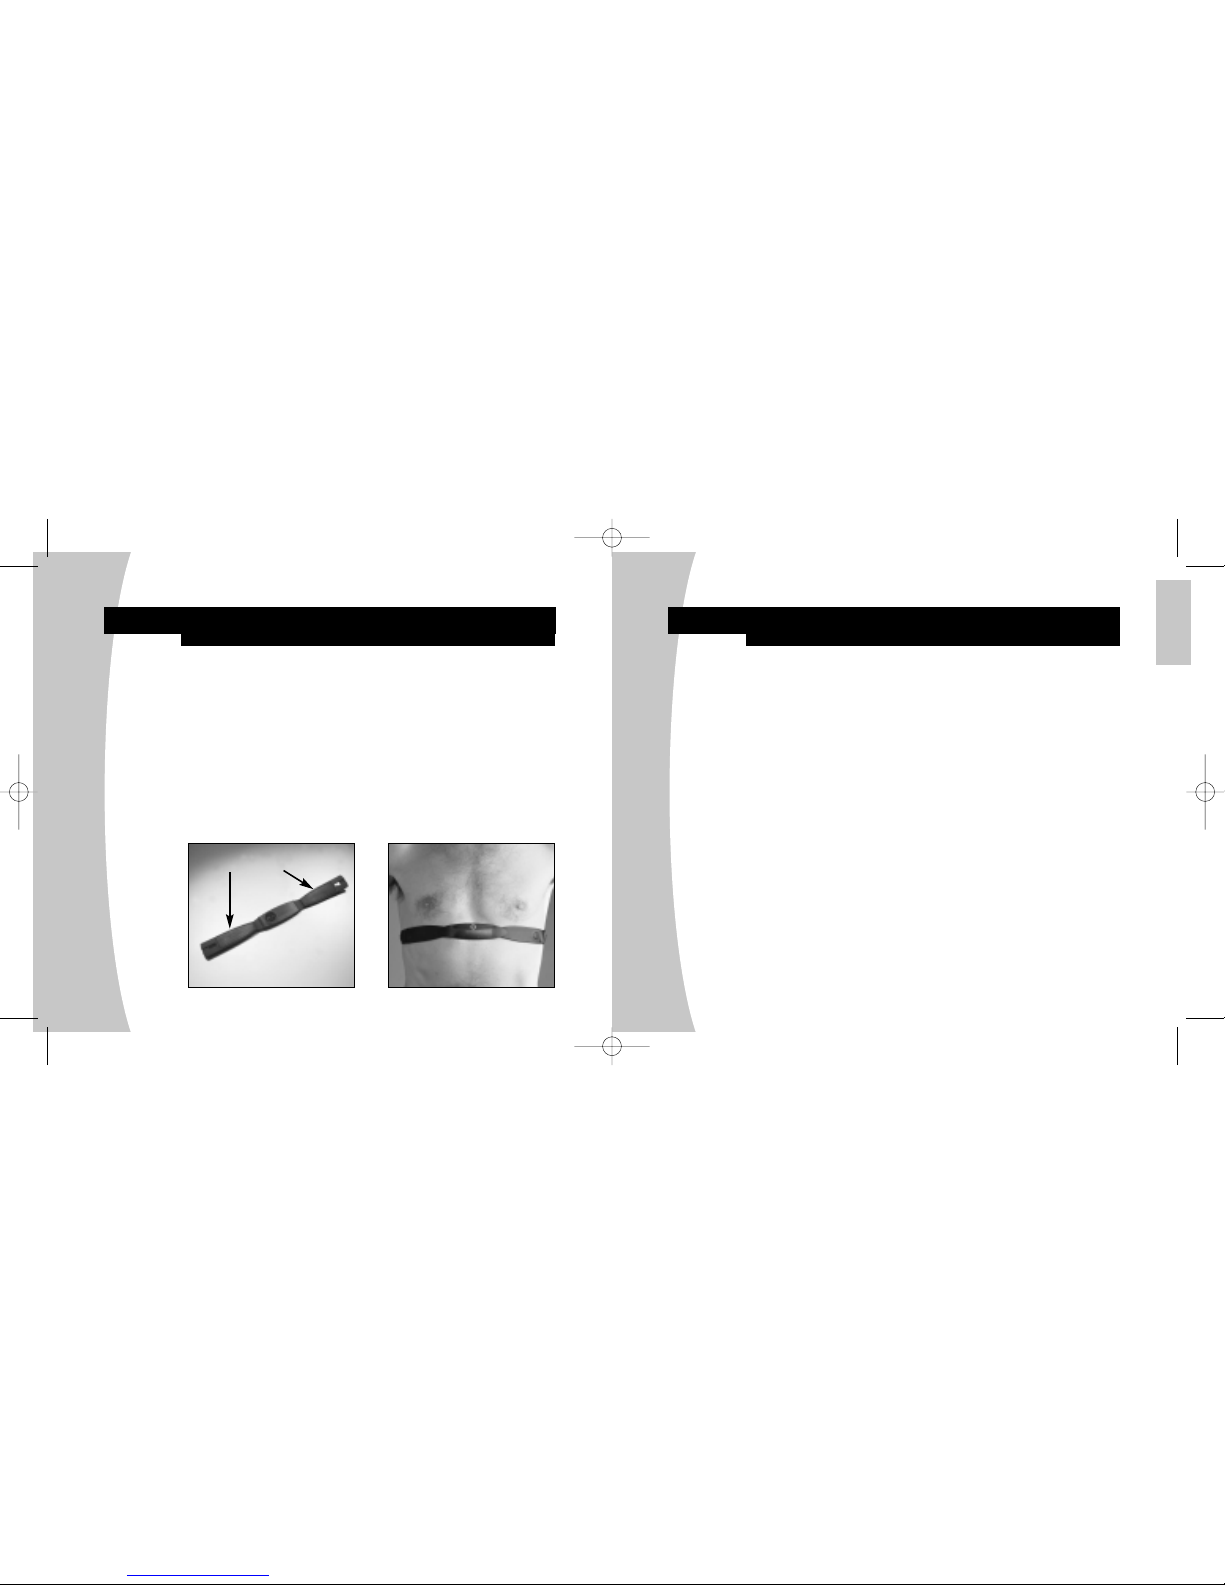
WEARING THE SI INDEPAD™
TRANSMITTER ELT
To ensure a proper heart rate display, the chest transmitter must be
moistened and properly adjusted. Wet the back of the rubber pads located
to the right and left of the main transmitter case with saliva or ECG
conductive gel. Do not use water, moisturizing creams or suntan oil as
these are insulators and will interfere with the heart rate signal. Snap the
plastic tabs at the end of the elastic belt into the holes at the end of the
transmitter and adjust the strap so that the transmitter fits tightly below
the pectoral muscles as shown in the photograph.
NOTE: The position of the chest strap may affect the performance of the transmitter
on some individuals. If you feel that your SI 90HR is not performing properly, try
moving the position of the strap on your body slightly.
7
Rubber Pads
SI90HR_eng 5/18/04 4:03 PM Page 7

THE PARTS OF THE SI 90HR
CYCLE COMPUTER
Sports Instruments SI 90HR
Cycle Computer Unit
Handlebar Mounting Bracket
Handlebar Mounting Bracket
Sizing Strips (3)
Wheel Magnet
Wireless Fork Transmitter
Wireless Fork Transmitter
Mounting Pad
Cable Ties (4)
Sports Instruments IndePad™
Heart Rate Transmitter
IndePad Heart Rate Transmitter
Elastic Strap
10
english
THE ATTERY IN THE TRANSMITTER ELT
BATTERY SIZE
CR2032 3-volt Lithium cell
Your Sports Instruments IndePad transmitter has a user replaceable battery.
The battery life for the Indepad Transmitter is over 2500 hours.
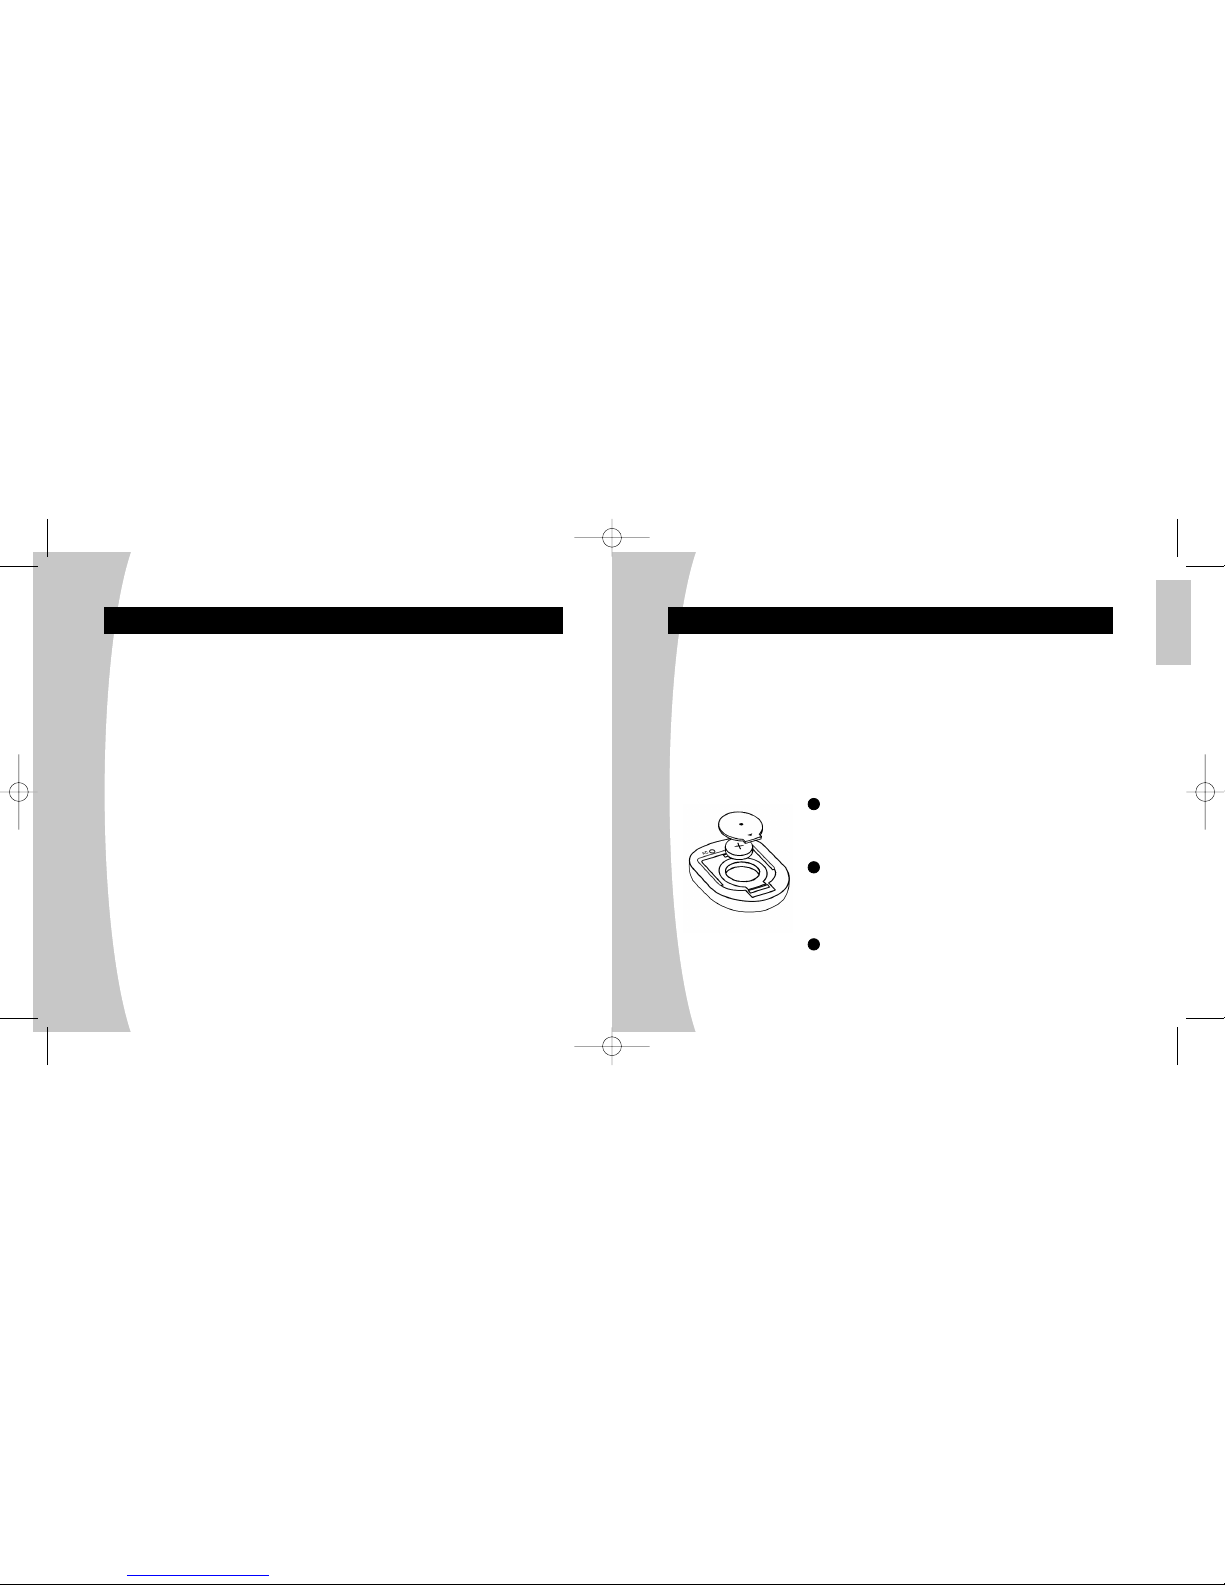
To replace the battery in your transmitter:
Use a coin to remove the battery cap on the back of the transmitter
by turning it 1/4turn counter-clockwise.
Remove the old battery.
Put a new battery in the transmitter positive (+) side up. Replace the
battery cap and tighten by turning 1/4 turn clockwise.
NOTE: Make sure that the small rubber O-ring is in place in the IndePad
transmitter to assure that the unit remains water proof.
9
1
1
2
3
2 3
A
A
B
B
C
C
D
D
E
E
F
F
G
G
H
HI
I
SI90HR_eng 5/18/04 4:03 PM Page 9

english
COMPUTER FUNCTIONS AND RANGES
MAXIMUM SPEED (MXS)
The fastest speed that you have traveled since the last time the computer
was reset. From 0-199.9miles or kilometers/hour.
AUTOMATIC RIDE TIME STOPWATCH (ATM)
Measures only true ride time by turning on and off with the movement
of the wheel. Shows ride time up to 9:59:59.
CLOCK
Gives you the time of day in 12 or 24 hour format.
AUTO-SHUTDOWN SLEEP MODE
As a battery saving measure, the SI series of cycle computers will enter
a sleep mode after a period of 5 minutes of non-use.
Because it uses a wireless transmission system, the SI 90HR needs
to be manually reactivated by pressing either key once it has entered
the SLEEP mode.
12
COMPUTER FUNCTIONS AND RANGES
SPEED (SPD)
Instantaneous speed in either miles or kilometers/hour. 0.5 mile
or kilometer per hour resolution.
TRIP ODOMETER (DST)
Distance of current ride from 0-999.9 miles or kilometers.
TOTAL ODOMETER (ODO)
Total distance for all rides up to 99,999 miles or kilometers.
PROGRAMMABLE ODOMETER
Allows you to set a starting number for the total odometer (ODO).
This allows you to retain your total mileage following a battery change.
AVERAGE SPEED (AVS)
The average speed for the ride using actual ride time. From 0-199.9
miles or kilometers/hour.
11
SI90HR_eng 5/18/04 4:03 PM Page 11
COMPUTER ATTERY INSTALLATION
BATTERY SIZE
CR2032 3-volt Lithium Cell
Under normal use the battery life for the cycle computer unit and wireless
wheel transmitter is approximately one year. Most problems that occur with
cycle computers after extended use are related to dead or weak batteries.
ALWAYS: Check the batteries if you are experiencing problems with the
operation of your computer.
Install battery with positive pole (+) facing the
battery cover. Be careful not to bend any of the
metal battery contacts while installing the battery.
Snap battery cover in place taking care to be
certain that the rubber O-ring is in place.
CAUTION: If O-ring is displaced the unit will not
be water proof and the warranty is void
To remove battery cover lift with flat blade
screwdriver or other thin object.
14
english
HEART RATE FUNCTIONS AND RANGES
ECG ACURATE HEART RATE
Shows your current heart rate from 40-240 Beats per Minute (BPM)
TARGET HEART RATE ZONE
Allows you to set a target heart rate training zone in one beat per minute
increments.The Upper Limit can be set from 100-240 BPM, the Lower
Limit can be set from 40-180 BPM.
TARGET HEART RATE ZONE MEMORY
Tracks time spent ABOVE, BELOW, and IN the target heart rate training
zone that you have set for review after your workout.
TARGET HEART RATE ZONE VISUAL ALARM
Two small arrows show you on screen if you are ABOVE, BELOW,
or IN your target heart rate zone.
13
1
2
3
SI90HR_eng 5/18/04 4:03 PM Page 13

english
PROGRAMMING THE COMPUTER
BUTTON OPERATION
Your Sports Instruments Cycle computer has two buttons:
1616
The ADJUST button controls
advancing through the secondary
function screens (AVS/ODO,
MXS/CLK) and advances numbers
during programming.
The MODE button controls
advancing through the main
function screens (SPD/DST,
SPD/PLS, SPD/ATM) of the unit
and sets numbers during
programming
WIRELESS SPEED TRANSMITTER
ATTERY INSTALLATION
BATTERY SIZE
23A 12-volt Alkaline
Install battery with positive pole (+) facing the battery cover.
Twist battery cover in place using a small coin taking care to be
certain that the rubber O-ring is in place.
CAUTION: If O-ring is displaced the unit will not be water proof
and the warranty is void.
15
1
2
SI90HR_eng 5/18/04 4:03 PM Page 15

SETTING MILES OR KILOMETERS
Sports Instruments Cycle Computers are capable of displaying speed
and distance in either miles or kilometers.They will also convert from
one scale to the other simply by entering the programming sequence
and changing the setting of the unit.
Advance to the SPD/DST screen using the MODE key.
With the unit in the SPD/DST screen, press and hold the MODE
key for 2 seconds.
The screen will clear and display and will show the M/hr icon
flashing in the upper right corner of the display. Press the
ADJUST key to alternate between the M/hr (Miles) icon and the
KM/h (Kilometers) icon.
Set your choice into the computer and advance to the Wheel Size
Setting sequence by pressing the MODE key.
18
english
SETTING THE CLOCK
The SI 90HR is programmed with a digital clock that displays time in a
12 or 24-hour format.
Advance the unit to the MXS/CLK display using the ADJUST key.
Enter the Clock programming sequence by pressing and holding the
MODE key for 2 seconds. The display will clear showing only the
clock with the hour segment flashing 12:
Press and release the ADJUST key to alternate between the 12 and
24 hour formats. Press and release the MODE key to choose the
desired format and proceed to setting the hours.
Advance the hours using the ADJUST key. When you have the
number you desire set the number by pressing and releasing the
MODE key. The unit will automatically advance to the setting
minute’s screen. Repeat the process to set minutes.
17
1
2
3
4
2
1
3
4
SI90HR_eng 5/18/04 4:03 PM Page 17

english
SETTING THE WHEEL SIZE
DETERMINING YOUR WHEEL SIZE: OPTION 2
If your wheel size is not listed on the chart above or you desire even
greater accuracy follow these steps for calculating the circumference
of your wheel.
Measure from the center of the axle of your front wheel straight
down to the ground in millimeters (Multiply inches by 25.4 to get
millimeters). For even greater accuracy do this while sitting on the
bike (you will need a friend).
Multiply the distance in millimeters by 6.28 (2π). Enter this number
into the computer.
20
SETTING THE WHEEL SIZE
The wheel size setting for Sports Instruments cycle computers is 2074.
This is accurate for 700 x 20c road bike and 26 x 2.0 mountain bike
wheels. The programming number corresponds to the circumference of the
wheel in millimeters. While the computers can be programmed with an
accuracy of 1mm for absolute accuracy, differences of as much as 50mm
will not noticeably affect the accuracy of the unit for most normal rides.
DETERMINING YOUR WHEEL SIZE: OPTION 1
Use the following chart to determine your wheel size and enter the
corresponding number into the computer.
19
TIRE SIZE CIRC. TIRE SIZE CIRC.
26 x 1.7 2035 27 x 1-1/4 2180
26 x 1.9 2055 650 x 20c 1945
26 x 2.0 2075 650 x 23c 1990
26 x 2.1 2095 700 x 20c 2074
27 x 1.0 2140 700 x 23c 2114
1
2
SI90HR_eng 5/18/04 4:03 PM Page 19

SETTING THE PROGRAMMA LE ODOMETER
The SI 90HR is equipped with a programmable odometer that allows you
to set a starting mileage for the total odometer.This feature allows you to
retain your computers mileage following a battery change.
Advance to the AVS/ODO screen using the ADJUST key.
From the AVS/ODO screen press and hold the MODE key for 2
seconds. The display will clear and the 5 digit odometer screen
will appear with the right digit flashing.
Press and release the ADJUST key to advance the digits. Press
and release the MODE key to advance to the next digit. Repeat
until all numbers are set.
Press and release the MODE key one final time to set the odometer
and return to the AVS/ODO screen.
22
english
ENTERING YOUR WHEEL SIZE
After you have selected miles or kilometers your SI 90HR will automatically
advance to the wheel size setting mode.The default wheel size setting 2074
will be on screen with the 4 digit flashing.
Advance the digits using the ADJUST key. When you have the
number that you want, set it and advance to the next number in
the sequence by pressing and releasing the MODE key.
Repeat the above for all four digits and press and release the
mode one final time to set the number into memory and return
to the main operating modes.
21
1
2
2
1
3
4
SI90HR_eng 5/18/04 4:03 PM Page 21

english
2423 HEART RATE FUNCTIONS
TARGET HEART RATE ZONE MEMORY PLAYBACK
From the SPD/PLS screen enter the Target Heart Rate Zone
Memory Playback sequence by pressing and holding the MODE
key for two second. The display will clear and the screen will
begin to cycle between Time Above Target Zone, Time Below
Target Zone and Time In Target Zone. The display will show
both the time and the heart rate settings for the zone.
Press and release the MODE key to advance from Target Heart
Rate Zone Memory Playback to Setting the Limits for the
Target Heart Rate Zone.
NOTE: The SI 90HR cycles through the three displays of the memory
playback sequence automatically. If you wish to stop at any single screen,
simply press and hold the ADJUST key. Release key and the display will
begin to cycle again.
1
2
HEART RATE FUNCTIONS
SETTING THE TARGET HEART RATE ZONE
When you enter the Setting the Target Heart Rate Zone sequence from
STEP 2 above the display will clear and the current Upper Heart Rate
Limit setting will appear in the top line of the display along with the up
arrow ( ). Adjust the Upper Limit downward by pressing and releasing
the ADJUST key, you may hold the key to fast advance the digits by 5’s.
Set the number that you want and advance to setting the lower limit by
pressing and releasing the MODE key.The display will clear and the default
lower limit setting of 40 will appear along with the down arrow ( ). Adjust
the Lower Limit upward by pressing and releasing the ADJUST key. Press
and release the MODE key to set the number that you want for your lower
limit and return to the SPD/PLS screen.
SI90HR_eng 5/18/04 4:03 PM Page 23

INSTALLING THE SI 90HR ON YOUR IKE
SI 90HR WIRELESS SENSOR
Pass the two cable ties through the sensor mounting holes
and loosely mount to the left fork leg using the rubber sensor
mounting pad (do not fully tighten the cable ties at this point).
The sensor should be mounted as close to the top of the fork
as possible with the cap for the battery door toward the
ground. Make sure that the distance between the sensor and
the handlebars is no more than 24 in. (610mm).
Loosely install the sensor magnet to one of the spokes of the
front wheel. Adjust the position of the magnet and sensor
together so that the magnet is aligned with the line on the
bottom edge of the sensor and 1-2 mm separates the two
parts and tighten both parts in place. Do not overtighten
the magnet screw.
26
english
RESETTING THE COMPUTER FUNCTIONS
FUNCTION RESET
In the SPD/ATM mode press and hold both keys for 2 seconds to clear all
functions (ATM, DST, AVS, MXS, and HEART RATE MEMORY).
TOTAL RESET
Should it be necessary to clear all information from all memories in the
unit, this can be accomplished in two ways.
Remove and replace the battery in the computer unit.
or
Press the All Clear (AC) button on the bottom of the unit
using as pen or other pointed object.
NOTE: These actions will clear all information from all memories in
the computer.
25
1
2
1
2
SI90HR_eng 5/18/04 4:03 PM Page 25

COMPUTER HEAD INSTALLATION
Push the computer head into the bracket from back to front until it snaps
firmly in place.You should hear an audible click when the unit is locked in.
CAUTION: Because of its wireless design the SI 90HR will function even
if it is not firmly locked in place in the bracket. Make sure that you hear
the CLICK when putting the computer in the bracket otherwise it will
vibrate out and fall off your bike.
28
english
HANDLE AR RACKET INSTALLATION
Mount the handlebar bracket around the handlebars and tighten in place
using the screw provided.The bracket is designed to fit all styles and sizes
of handle bars, but will require the use of the rubber shims provided to fit
smaller diameter bars. Make sure not to over tighten the clamp as this may
result in breakage.The bracket only needs to be tight enough to stop it
from rotating on the bars.
27
SI90HR_eng 5/18/04 4:03 PM Page 27

english
MANUFACTURER'S WARRANTY
This warranty gives the purchaser specific legal rights. The purchaser may
also have other rights depending on state law.
Sports Instruments, Inc. hereby warrants to the original that the product sold
by it is free from defects in the material and workmanship for the period of
two (2) years from the date of purchase. The obligations of Sports
Instruments, Inc. under this warranty are limited to the repair and
replacement of such part or parts of the unit as shall be found upon
inspection to be defective in material or workmanship. Individual models may
differ in parts covered under warranty. Repair and replacement of any part
found defective shall be at Sports Instruments, Inc.'s sole option.
The warranties contained herein are expressly in lieu of any other warranties,
including implied warranty of merchantability and/or fitness for purpose.
30
TESTING THE INSTALLATION
Once everything is installed on your bike, you can test the unit to see if it works.
Use the MODE key to advance the to the SPD/ATM screen.
Pick up the front of the bike and spin the wheel. You should see a
speed register on the display within 2-3 seconds. If you do not see a
speed registering check the following:
Make sure that the magnet is properly aligned and close
enough (1-2mm) to the sensor.
Make sure that there are no breaks in the wire on the
SI 90 or that the computer and the sensor are close
enough (24in.) on the SI 90HR & WL.
Make sure that the transmitter battery is not dead.
29
1
2
3
1
2
SI90HR_eng 5/18/04 4:03 PM Page 29
Table of contents
Popular Heart Rate Monitor manuals by other brands

Garmin
Garmin VIVOFIT JR. owner's manual

Gima
Gima ABPM PULSE RATE MONITOR WITH BLUETOOTH user manual

Oregon Scientific
Oregon Scientific Tap On Sport SE102N user manual

Lohman Technologies
Lohman Technologies AfibAlert instruction manual

Sportline
Sportline DUO 1010W user guide

Zentan Technology
Zentan Technology Fusion 20 manual


