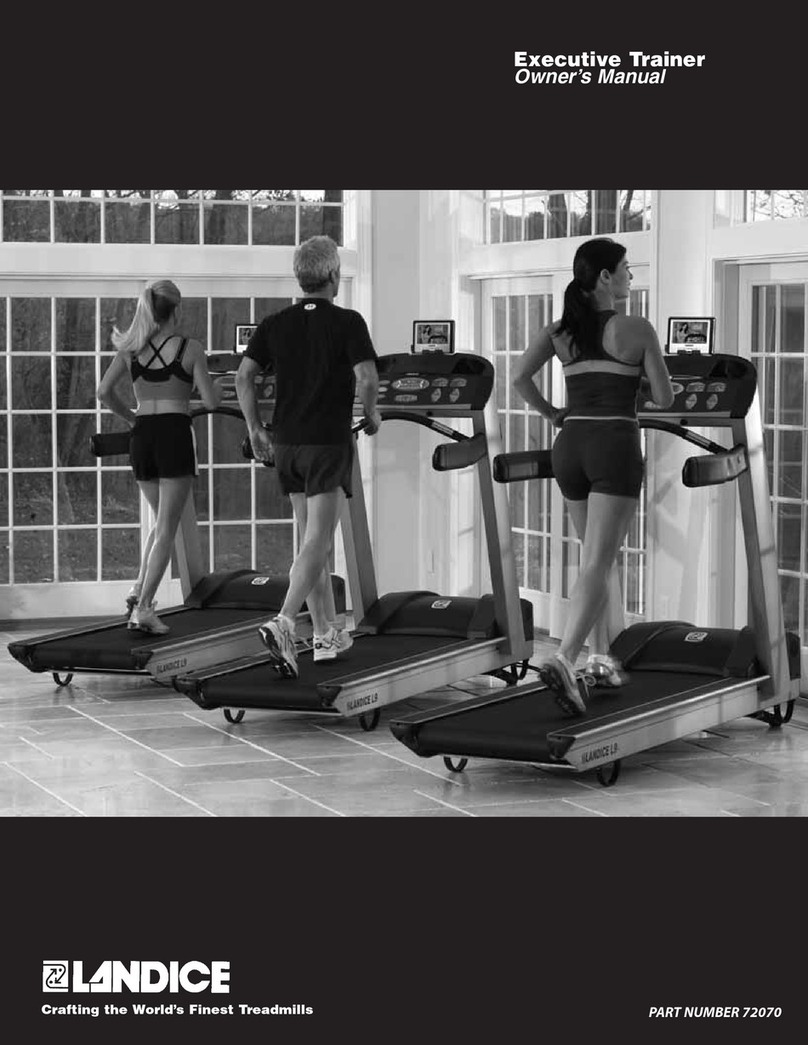
SportTec VISION FITNESS T600 User manual

T600

2
3
17
32
47
62
77
92
107
122
137
ENGLISH
DEUTSCH
NEDERLANDS
FRANÇAIS
ESPAÑOL
POLSKI
PORTUGUÊS
ƺƽƻƻƴƲƳ
傈劤铂+H=5,N-

3
IMPORTANT PRECAUTIONS
SAVE THESE INSTRUCTIONS
• When using a treadmill, basic precautions should always be followed, including the following: Read all instructions before using this equipment. It
is the responsibility of the owner to ensure that all users of this equipment are adequately informed of all warnings and precautions.
• This equipment is intended for commercial use. To ensure your safety and protect the equipment, read all instructions before operating.
DANGER!
TO REDUCE THE RI SK OF ELECTRICAL SHOCK:
• Always unplug the equipment from the electrical outlet immediately after using, before cleaning, performing maintenance and putting on or
taking off parts.
CAUTION!
CONSULT A PHYSI CIAN BEFORE USING THIS EQUIPMENT. READ OWNER’S MANUAL BEFORE USE.
• It is essential that this equipment is used only indoors, in a climate controlled room. If this equipment has been exposed to colder temperatures or high moisture
FOLPDWHVLWLVVWURQJO\UHFRPPHQGHGWKDWWKHHTXLSPHQWLVZDUPHGXSWRURRPWHPSHUDWXUHEHIRUHȴUVWWLPHXVH)DLOXUHWRGRVRPD\FDXVHSUHPDWXUH
electronic failure. The initial (default) starting speed is 0.5 mph (0.8 kph). The default starting speed set too high can be dangerous.
WARNING!
TO REDUCE THE RI SK OF BURNS, FIRE, ELECTRICAL SHOCK OR INJURY TO PERSONS:
• Incorrect or excessive exercise may cause injury. If you
experience any kind of pain, including but not limited to chest
pains, nausea, dizziness, or shortness of breath, stop exercising
immediately and consult your physician before continuing.
• When exercising, always maintain a comfortable pace.
• Do not wear clothes that might catch on any part of the treadmill.
• User must wear proper footwear (i.e. athletic
shoes) when using this exercise device.
• Do not jump on the treadmill.
• At no time should more than one person be
on treadmill while in operation.
• This treadmill should not be used by persons weighing more
WKDQVSHFLȴHGLQWKH2:1(5ȇ60$18$/63(&,),&$7,216
SECTION. Failure to comply will void the warranty.
• Disconnect all power before servicing or moving the equipment.
• To clean, wipe surfaces down with soap and slightly damp
FORWKRQO\QHYHUXVHVROYHQWV6HH0$,17(1$1&(
• Unplug from outlet when not in use, and
before putting on or taking off parts.
• Connect this exercise product to a properly grounded outlet only.
• Do not remove the protected covers unless instructed
by Professional and your local dealer. Service should
only be done by an authorized service technician
• Installation of parts or accessories not originally intended or compatible
with the equipment as sold will void warranty and may impact safety.
• 0HDVXUHGDWW\SLFDOKHDGKHLJKWWKH$ZHLJKWHGVRXQG
pressure level when the Treadmill is running at 12 Km/
Hour (without load) is no greater than 70 dB.
• Noise emission under load is higher than without load.
• At NO time should pets or children under the age
of 14 be closer to the treadmill than 10 feet.
• At NO time should children under the age of 14 use the treadmill.
• Children over the age of 14 should not use the
treadmill without adult supervision.
• This equipment is not intended for use by persons with
reduced physical, sensory or mental capabilities, or lack
of experience and knowledge, unless they have been
given supervision or instruction concerning use of the
equipment by a person responsible for their safety.
• Use the treadmill only for its intended use
DVGHVFULEHGLQRZQHUȇVPDQXDO
• Never operate the treadmill if it has a damaged cord or plug, if it is not
working properly, if it has been dropped or damaged, or immersed
in water. Call Customer Tech Support for examination and repair.
• To avoid the risk of electric shock, this piece of equipment must
RQO\EHFRQQHFWHGWRDFLUFXLWZLWKQRQORRSHGLVRODWHGJURXQG
• Keep power cord away from heated surfaces. Do not carry
this unit by its supply cord or use the cord as a handle.
• Never operate the treadmill with the air opening blocked.
Keep the air opening clean, free of lint, hair, and the like.
• To prevent electrical shock, never drop or
insert any object into any opening.
• Do not operate where aerosol (spray) products are being
used or when oxygen is being administered.
• To disconnect, turn all controls to the off position,
then remove plug from outlet.
• Do not use treadmill in any location that is not temperature controlled,
such as but not limited to garages, porches, pool rooms, bathrooms,
car ports or outdoors. Failure to comply may void the warranty.
• Removal of protective access panels should be done ONLY
E\DTXDOLȴHGVHUYLFHWHFKQLFLDQ(QVXUHDOOIDVWHQHUVDUH
properly reinstalled after replacing access panels.
• To avoid injury, stand on the side rails before starting the treadmill.
• Heart rate monitoring systems may be inaccurate.
• Over exercising may result in serious injury or death.
• If you feel faint, stop exercising immediately.
• To avoid incorrect power cord connection to the
power jack of the machine, install the power cord
ȴ[HUDIWHUFRQQHFWLQJSRZHUFRUGWRPDFKLQH
ENGLISH
PLACE WARNI NG LABEL HERE

4
GROUNDING INSTRUCTIONS
The equipment must be grounded. If it should malfunction or breakdown, grounding
provides a path of least resistance for electric current to reduce the risk of electric shock.
7KHXQLWLVHTXLSSHGZLWKDFRUGKDYLQJDQHTXLSPHQWJURXQGLQJFRQGXFWRUDQGD
grounding plug. The plug must be plugged into an appropriate outlet that is properly
installed and grounded in accordance with all local codes and ordinances. If the user does
not follow these grounding instructions, the user could void the Vision limited warranty.
ADDI TIONAL ELECTRICAL INFO
In addition to the dedicated circuit requirement, the proper gauge wire must be used
from the circuit breaker box, to each outlet that will have the maximum number of
units running off of it. If the distance from the circuit breaker box to each outlet, is 100
ft (30.5 m) or less, then 12 gauge wire should be used. For distances greater than 100
ft (30.5 m) from the circuit breaker box to the outlet, a 10 gauge wire should be used.
ENERGY SAVING / LOW-POWER M ODE
$OOXQLWVDUHFRQȴJXUHGZLWKWKHDELOLW\WRHQWHULQWRDQHQHUJ\VDYLQJORZ
SRZHUPRGHZKHQWKHXQLWKDVQRWEHHQLQXVHIRUDVSHFLȴHGSHULRGRI
time. Additional time may be required to fully reactivate this unit once it has
HQWHUHGWKHORZSRZHUPRGH7KLVHQHUJ\VDYLQJIHDWXUHPD\EHHQDEOHG
RUGLVDEOHGIURPZLWKLQWKHȆ0DQDJHU0RGHȇRUȆ(QJLQHHULQJ0RGH
POWER REQUIREMENTS
DEDICATED CIRCUIT AND ELECTRICAL INFO
A “Dedicated Circuit” means that each outlet you plug into should
not have anything else running on that same circuit. The easiest
way to verify this is to locate the main circuit breaker box, and turn
off the breaker(s) one at a time. Once a breaker has been turned
off, the only thing that should not have power to it are the units
in question. No lamps, vending machines, fans, sound systems, or
any other item should lose power when you perform this test.
1RQORRSHGLVRODWHGQHXWUDOJURXQGLQJPHDQVWKDWHDFKFLUFXLW
must have an individual neutral/ground connection coming from
it, and terminating at an approved earth ground. You cannot
“jumper” a single neutral/ground from one circuit to the next.
ELECTRICAL REQUIREMENTS
For your safety and to ensure good treadmill performance, the ground
RQWKLVFLUFXLWPXVWEHQRQORRSHGLVRODWHG3OHDVHUHIHUWR1(&
DUWLFOHDQG<RXUWUHDGPLOOLVSURYLGHGZLWKDSRZHUFRUG
with a plug listed below and requires the listed outlet. Any alterations
of this power cord could void all warranties of this product.
220 V UNITS
$OO9LVLRQ9WUHDGPLOOVUHTXLUHWKHXVHRID9+]DQGD
$Ȋ'HGLFDWHG&LUFXLWȋZLWKDQRQORRSHGLVRODWHGQHXWUDOJURXQG
IRUSRZHU7KLVRXWOHWVKRXOGEHD1(0$5DQGKDYHWKHVDPH
FRQȴJXUDWLRQDVWKHSOXJ1RDGDSWHUVKRXOGEHXVHGZLWKWKLVSURGXFW
WARNING!
Connect this exercise product to a properly grounded outlet only.
• Never operate product with a damaged cord or plug even if it is working properly.
Never operate any product if it appears damaged, or has been immersed
in water. Contact Customer Tech Support for replacement or repair.
)DLOXUHWRIROORZWKHVHVSHFLȴFDWLRQVFDQFDXVHGDPDJH
to your product and can void the warranty:
• All video and power outlets must be functional the day of delivery /
assembly of the product. The client is responsible for any additional
installation charges associated with return visits.
• (OHFWULFDOVXSSO\PD\ȵXFWXDWHLQ\RXUDUHD7RHQVXUHVWDEOH
performance of the product, use the proper gauge wire.
DANGER!
,PSURSHUFRQQHFWLRQRIWKHHTXLSPHQWJURXQGLQJFRQGXFWRUFDQUHVXOWLQDULVNRI
HOHFWULFVKRFN&KHFNZLWKDTXDOLȴHGHOHFWULFLDQRUVHUYLFHPDQLI\RXDUHLQGRXEWDVWR
whether the product is properly grounded. Do not modify the plug provided with the
SURGXFW,ILWZLOOQRWȴWWKHRXWOHWKDYHDSURSHURXWOHWLQVWDOOHGE\DTXDOLȴHGHOHFWULFLDQ
ENGLISH

5
TOOLS REQUIRED:
FPP7:UHQFK
F8mm Allen Wrench
F6mm Allen Wrench
FPhillips Screwdriver
PARTS I N CLUDED:
F1 Base Frame
F1 Console base set
F1 Console Assembly
F&RQVROH0DVWV
F2 Handlebars
F1 Power Cord
F1 Hardware Kit
UNPACKING
Unpack the equipment where you will be using it. Place the carton
RQDOHYHOȵDWVXUIDFH,WLVUHFRPPHQGHGWKDW\RXSODFHDSURWHFWLYH
FRYHULQJRQ\RXUȵRRU1HYHURSHQER[ZKHQLWLVRQLWVVLGH
IM PORTANT NOTES
During each assembly step, ensure that ALL nuts and
bolts are in place and partially threaded.
6HYHUDOSDUWVKDYHEHHQSUHOXEULFDWHGWRDLGLQDVVHPEO\
DQGXVDJH3OHDVHGRQRWZLSHWKLVRII,I\RXKDYHGLɚFXOW\D
light application of lithium grease is recommended.
WARNING!
There are several areas during the assembly process that special attention must be
paid. It is very important to follow the assembly instructions correctly and to make
VXUHDOOSDUWVDUHȴUPO\WLJKWHQHG,IWKHDVVHPEO\LQVWUXFWLRQVDUHQRWIROORZHG
correctly, the equipment could have parts that are not tightened and will seem
loose and may cause irritating noises. To prevent damage to the equipment, the
assembly instructions must be reviewed and corrective actions should be taken.
NEED HELP?
If you have questions or if there are any missing parts, contact Customer
Tech Support. Visit ZRUOGYLVLRQȴWQHVVFRP for contact information.
ASSEMBLY
ENGLISH

6
A
1
2
6
3
BC
8
9
E
F
10
13
12
ENGLISH
21
+DUGZDUH)RU6WHS
'HVFULSWLRQ 4W\
A
B
C
3UHLQVWDOOHG6FUHZ
Bolt
Flat Washer
2
8
8
,03257$17'RQRWWLJKWHQEROWVXQWLOVWHSLVFRPSOHWH
•5HPRYHSUHLQVWDOOHGVFUHZV$DQGGHWDFKMOTOR COVER (1).
•Open HARDWARE FOR STEP 1.
•Attach LEFT CONSOLE MAST (3) to BASE FRAM E (2) using 4 BOLTS (B)
and 4 FLAT WASHERS (C) from the top and bottom.
•Attach RI GHT CONSOLE M AST (6) to BASE FRAME (2) using 4 BOLTS (B)
and 4 FLAT WASHERS (C) from the top and bottom.
NOTE: Be careful not to pinch wires while attaching the handlebar. +DUGZDUH)RU6WHS
'HVFULSWLRQ 4W\
E
F
Bolt
Arc Washer
4
4
•Open HARDWARE FOR STEP 2.
•Connect the HEART RATE GRIP WIRE (12), discard the wire tie, and tuck the cables
inside the LEFT HANDLE BAR (8) and slide into the CONSOLE BASE (9).
•Connect the HEART RATE GRIP WIRE (13), discard the wire tie, and tuck the cables
inside the RIGHT HANDLE BAR (10) and slide into the CONSOLE BASE (9).
•Attach HANDLEBARS (8 & 10) to CONSOLE BASE (9) using 4 BOLTS (E) and 4
CURVED WASHERS (F).

7
9
G
14
H
4
6
5
3
A
1
3 4
47
11
9
I
K
J
ENGLISH
+DUGZDUH)RU6WHS
'HVFULSWLRQ 4W\
G
H
Bolt
Arc Washer
4
4
•Open HARDWARE FOR STEP 3.
•Attach LEAD WIRE (4) to CONSOLE CABLE (5) and pull lead wire through RIGHT
CONSOLE M AST (6). After pulling the lead wire through the mast, the top of the
console cable should be connected to the M CB (14).
Detach and discard lead wire.
•Attach CON SOLE BASE (9) to CONSOLE MASTS (3 & 6) using 4 BOLTS (G), and 4
CURVED WASHERS (H).
•Tighten all bolts from steps 1–3.
•Install M OTOR COVER (1)XVLQJSUHLQVWDOOHGSCREWS (A).
+DUGZDUH)RU6WHS
'HVFULSWLRQ 4W\
I
J
K
Bolt
Spring Washer
Flat Washer
4
4
4
•Open HARDWARE FOR STEP 4
•Connect the CONSOLE CABLES (4) and HEART RATE WI RES (7) to the CONSOLE
(11) and carefully tuck the excess cable into the CONSOLE BASE (9).
•Attach the CONSOLE (11) to the CONSOLE BASE (9) using 4 BOLTS (I) and 4
SPRING WASHERS (J) and 4 FLAT WASHERS (K).

8
L
0
N
2
ENGLISH
5
+DUGZDUH)RU6WHS
'HVFULSWLRQ 4W\
L
0
N
Screw
Power Cord
Power Cord Retaining Plate
1
1
1
•Install the POWER CORD (M ) to the BASE FRAM E (2).
•Install the POWER CORD RETAI NIN G PLATE (N) to the BASE FREAME (2)
using 1 SCREW (L).
ASSEM BLY COMPLETE!

9
CONSOLE OPERATION
APROGRAM PROFILE WINDOW
5HSUHVHQWVWKHSURȴOHRIWKHSURJUDPEHLQJXVHGVSHHGGXULQJVSHHGEDVHGSURJUDPV
and incline during incline based programs).
BHEART RATE CENTER
Displays your Actual and Target heart rate during the workout. The console displays a
heart rate within 15 to 20 seconds of contact with the sensors or the use of a heart rate
chest strap. In TARGET HEART RATEprogram, the inputted target heart rate will display in
the window every 60 seconds.
CINSTRUCTION CENTER
'LVSOD\VVWHSE\VWHSLQVWUXFWLRQVIRUVHWWLQJXSDSURJUDP'XULQJDZRUNRXWLWGLVSOD\V
7LPH3DFH,QFOLQH'LVWDQFH6SHHG/HYHO&DORULHVDQG0(76
DCONTROL KEYPAD
Allows the user to set up programs and control workout.
1NUMBER KEYPAD
Used to enter program data during program setup. Press to confirm settings.
Press to clear data not yet entered during the workout setup.
2SPEED & I NCLINE
Use to adjust speed or incline.
3GO
Press to begin your workout immediately, without having to select a workout
program.
4STOP
Press to stop your workout. Press and hold for 3 seconds to reset console.
5PROGRAM KEYS
Press to select a program. For Goal+ and Heart Rate+, press the key repeatedly for
additional programs.
6CHANGE DISPLAY (1 – 4)
Press to change display feedback during workout.
NOTE: By default the time window will count down from the total workout time. If no
workout time is set, the time woindow will count up from 0:00.
Please visit Vision website for further
assembly and console information:
ZRUOGYLVLRQILWQHVVFRP
ENGLISH
A
B
C
D
1 22 35
6
4

10
ENGLISH
PROGRAM INFORM ATION
PROGRAM DESCRIPTION DEFAULT
TIM E PROMPT
INPUT PROGRAM
CONTROL
QUICK START
Quick Start is the fastest way to begin exercising and bypasses the setup prompts.
After pressing DFRQVWDQWOHYHOZRUNRXWEHJLQVDQGWKHVSHHGDQGLQFOLQHGRQRW
change automatically.
N/A N/A N/A
0$18$/
0DQXDOLVDFRQVWDQWHIIRUWZRUNRXWLQZKLFKWKHXVHUFDQFKDQJHLQFOLQHRUVSHHGDW
any time. 20:00 Time, Weight N/A
INTERVAL
,QWHUYDOLVSHULRGVRILQWHQVHDHURELFH[HUFLVHVHSDUDWHGE\UHJXODUSHULRGVRIORZHU
intensity exercise. At any point during the workout, the user can change the settings
of the current speed.
20:00 Level, Time, Weight Elevation
GOAL+
7,0( This workout sets duration as the workout goal. Once the duration objective is met,
WKHZRUNRXWJRHVLQWRDFRROGRZQSKDVH 20:00 Time, Start Incline, Start
Speed, Weight N/A
DISTANCE This workout is designed to build endurance in a certain distance. Once the objective
LVPHWWKHZRUNRXWDXWRPDWLFDOO\JRHVLQWRDFRROGRZQSKDVHDQGHQGVDIWHUZDUG N/A
Distance, Start Incline,
Start Speed,
Weight
N/A
CALORIES
This workout is designed to burn a certain number of calories in the selected time
GXUDWLRQ2QFHWKHREMHFWLYHLVPHWWKHZRUNRXWDXWRPDWLFDOO\JRHVLQWRDFRROGRZQ
phase, and ends afterward.
N/A Calories, Start Incline,
Weight N/A
5$1'20
Random creates a random terrain pattern of hills and valleys that varies with each
workout. 20:00 Time, Weight Elevation
HEART
RATE+
TARGET
HR
7DUJHW+5LVDKLJKHULQWHQVLW\ZRUNRXWIRUPRUHȴWXVHUVHPSKDVL]LQJFDUGLRYDVFXODU
EHQHȴWV7KHXVHUPXVWZHDUDKHDUWUDWHFKHVWVWULSRUNHHSKDQGVRQFRQWDFWKHDUW
rate grips continuously. The program adjusts the intensity level, based on the actual
heart rate, to maintain the rate at 80 percent of the theoretical maximum.
20:00
Age, Heart Rate, HR
&RQWURO0D[6SHHG
RU0D[,QFOLQH7LPH
Weight
Speed or
Elevation
WEIGHT
LOSS
:HLJKW/RVVLVDORZLQWHQVLW\ZRUNRXWIRUEXUQLQJWKHERG\ȇVIDWUHVHUYHV7KH
user must wear a heart rate chest strip, or keep hands on contact heart rate grips
continuously. The program adjusts the intensity level, based on the actual heart rate,
WRPDLQWDLQWKHUDWHDWSHUFHQWRIWKHWKHRUHWLFDOPD[LPXP$QGXVH%RG\0DVV
,QGH[%0,WRPHDVXUH\RXUERG\FRPSRVLWLRQ
20:00
Age, Heart Rate, HR
&RQWURO0D[6SHHG
RU0D[,QFOLQH7LPH
Weight, Height
Speed or
Elevation
FITNESS TEST
9LVLRQWUHDGPLOORIIHUVȴWQHVVWHVWVWKH*HUNLQȴUHȴJKWHUSURWRFROWKH*HUNLQSURWRFRO
was developed by Dr. Richard Gerkin of the Phoenix (Arizona) Fire Department. It is
DVXEPD[LPDOJUDGHGWUHDGPLOOHYDOXDWLRQXVHGE\PDQ\)LUH'HSDUWPHQWVDFURVV
WKH8QLWHG6WDWHVWRDVVHVVWKHSK\VLFDOFRQGLWLRQRIWKHȴUHȴJKWHUV7KHWHVWUHTXLUHV
FRQVWDQWPRQLWRULQJRIWKHXVHUȇVKHDUWUDWHVRWKHXVHRIDWHOHPHWULFFKHVWVWUDSLV
highly encouraged.
N/A N/A N/A

11
ENGLISH
PROGRAM S CHARTS
FITNESS TEST - GERKIN
6WDJH 7RWDO
7LPH 6SHHG
MPH ,QFOLQH
%
3UHGLFWHG92
PD[
PONJPLQ
3UHGLFWHG92
PD[0(76
0
ZDUPXS
1:00
2:00
3:00
3.0
3.0
3.0
0
0
0
13.3
13.3
13.3
3.3
3.3
3.3
13:30
4:00
4.5
4.5 0
015.3
17.4 4.4
5.0
24:30
5:00
4.5
4.5 2
219.4
21.5 5.5
6.1
35:30
6:00
5.0
5.0 2
223.6
27.6 6.7
7.9
46:30
7:00
5.0
5.0 4
428.7
29.8 8.2
8.5
57:30
8:00
5.5
5.5 4
431.2
32.7 8.9
9.3
68:30
9:00
5.5
5.5 6
633.9
35.1 9.7
10.0
79:30
10:00
6.0
6.0 6
636.6
38.2 10.5
10.9
810:30
11:00
6.0
6.0 8
839.5
40.9 11.3
11.6
911:30
12:00
6.5
6.5 8
842.6
44.3 12.2
12.7
10 12:30
13:00
6.5
6.5 10
10 45.7
47.2 13.1
13.5
11 13:30
14:00
7.0
7.0 10
10 49.0
50.8 14.0
14.5
12 14:30
15:00
7.0
7.0 12
12 52.3
53.9 14.9
15.4
13 15:30
16:00
7.5
7.5 12
12 55.8
57.8 15.9
16.5
14 16:30
17:00
7.5
7.5 14
14 59.5
61.2 17.0
17.5
15 17:30
18:00
8.0
8.0 14
14 63.2
65.3 18.1
18.7
92PD[PONJPLQ FEM ALES MALES
TEST RESULT PERCEN TILE 20-29 30-39 40-49 50-59 20-29 30-39 40-49 50-59
SUPERIOR 99
95 >53.0
46.8 >48.7
43.9 >46.8
41.0 >42.0
36.8 >58.8
54.0 >58.9
52.5 >55.4
50.4 >52.5
47.1
EXCELIEN T 90
80
44.2
41.0 41.0
38.6 39.5
36.3 35.2
32.3 51.4
48.2 50.3
46.8 48.2
44.1 45.3
41.0
GOOD 70
60
38.1
36.7 36.7
34.6 33.8
32.3 30.9
29.4 46.8
44.2 44.6
42.4 41.8
39.9 38.5
36.7
FAIR 50
40
35.2
33.8 33.8
32.3 30.9
29.5 28.2
26.9 42.5
41.0 41.0
38.9 38.1
36.7 35.2
33.8
POOR 30
20
32.3
30.6 30.5
28.7 28.3
26.5 25.5
24.3 39.5
37.1 37.4
35.4 35.1
33.0 32.3
30.2
VERY POOR 10
5
28.3
25.9 26.5
25.1 25.1
23.5 22.3
21.1 34.5
31.6 32.5
30.9 30.9
28.3 28.0
25.1
1. During the test
1.1 If the STOP key is pressed, the instrument will terminate the test and display
Ȋ7(677(50,1$7('
1.2 When HR(heart rate) > THR(target heart rate) exceeds 15 seconds or completes
18 minute tests, the machine will enter the “COOL DOWN” state to end all test
actions and display the test results.
1.3:KHQ:$5083LVȴQLVKHGLIWKHKHDUWUDWHLVQRWGHWHFWHGWKHLQVWUXPHQWZLOO
show “HEART RATE LOST GRIP SENSORS”. If more than 20 seconds, the heart
rate is still not detected. The machine will terminate the test and enter the COOL
'2:1VWDWHDQGWKHQVKRZȊ7(677(50,1$7('ȋ
2. Test results:
Total Time / Calories / Stage Number / Test Level
3. THR = (220 – AGE) x 0.85
INTERVALS
SEGM ENT 1234567891011121314
LEVEL INCLI NE
L1 11212131212111
L2 12313131313211
L3 12313141313211
L4 13414151414311
L5 23525252525322
L6 24525262525422
L7 24626272626422
L8 35737383737533
L9 35838393838533
L10 369393103939633
Random program map information is come from interval table.

12
ENGLISH
PROPER USAGE
Position your feet on the belt, bend
your arms slightly and grasp the
heart rate sensors (as shown). While
running, your feet should be located
in the center of the belt so that your
hands can swing naturally and without
contacting the front handlebars.
Your treadmill is capable of reaching
high speeds. Always start off using a
slower speed and adjust the speed in
small increments to reach a higher
speed level. Never leave the treadmill
unattended while it is running. When
not in use turn the on/off switch to off
DQGXQSOXJWKHSRZHUFRUG0DNHVXUHWRIROORZWKH0$,17(1$1&(VFKHGXOHLQWKLV
guide to maintain optimal performance and prevent premature electronic failure.
Keep your body and head facing forward. Do not attempt to turn around or look
backwards while the treadmill is running. Stop your workout immediately if you feel
pain, faint, dizzy or are short of breath.
GETTING STARTED
1) Check to make sure no objects are placed on the belt that will
hinder the movement of the treadmill.
2) Plug in the power cord and turn the treadmill ON.
3) Stand on the side rails of the treadmill.
4) Attach the safety key clip to part of your clothing making sure
that it is secure and will not become detached during operation.
A) QUI CK START
Simply press to begin working out. Time will count up from 0:00.
The workout begins at the lowest incline and speed.
B) SELECT A PROGRAM
1) Select a program using the PROGRAM KEYS and press .
2) Follow the prompts on the INSTRUCTION CENTER to set
workout program information using or the NUM BER
KEYPAD. Press after each selection.
3) Press to begin workout.
NOTE: You can adjust the speed and incline levels during your
workout.
C) FINI SHING YOUR WORKOUT
When your workout is complete, your workout information will be
displayed on the console.
TO CLEAR CURRENT SELECTION
To clear the current program selection or screen, press and hold STOP
for 3 seconds.

13
BEFORE YOU BEGIN
LOCATION OF THE TREADM ILL
Place the equipment on a level and stable surface away from direct sunlight. The intense UV light can cause
discoloration on the plastics. Locate the equipment in an area with cool temperatures and low humidity. Please
leave a clear zone behind the treadmill that is at least the width of the treadmill and at least 79” (2 meters)
long. This zone must be clear of any obstruction and provide the user a clear exit path from the machine. For
ease of access, there should be an accessible space on both sides of the treadmill of at least 24” (0.6 meters) to
allow a user access to the treadmill from either side. Do not place the treadmill in any area that will block any
vent or air openings. The treadmill should not be located in a garage, covered patio, near water or outdoors.
LEVELING THE TREADMILL
It is extremely important that the levelers are correctly adjusted for proper operation. Turn leveling foot
FORFNZLVHWRORZHUDQGFRXQWHUFORFNZLVHWRUDLVHWUHDGPLOO$GMXVWHDFKVLGHDVQHHGHGXQWLOWKHWUHDGPLOOLV
level. An unbalanced unit may cause belt misalignment or other issues. Use of a level is recommended.
MOVING THE TREADMILL
To avoid damaging parts when moving the treadmill, only lift from areas Aor Bas shown in the image.
A
B
0.6 M
(2 FT)0.6 M
(2 FT)
0.6 M
(2 FT)
2 M(79”)
0.3 M(1 FT)
WARNING!
Our equipment is heavy, use care and additional help if
necessary when moving. Failure to follow these instructions
could result in injury. Never operate equipment if it has
a damaged cord or plug, if it is not working properly,
if it has been damaged, or immersed in water. Contact
Customer Tech Support for examination and repair.
ENGLISH

14
TENSIONING THE RUNNING BELT
After placing the treadmill in the position it will be used, the belt must be checked for
proper tension and centering. The belt might need to be adjusted after the first two
hours of use. Temperature, humidity, and use cause the belt to stretch at different rates.
If the belt starts to slip when a user is on it, be sure to follow the directions below.
1) Locate the two hex head bolts on the rear of the treadmill. The bolts are located at each
end of the frame at the back of the treadmill. These bolts adjust the rear belt roller.
Do not adjust until the treadmill is on. This will prevent over tightening of one side.
2) The belt should have equal distance on either side between the frame.
If the belt is touching one side, do not start the treadmill. Turn the bolts
FRXQWHUFORFNZLVHDSSUR[LPDWHO\RQHIXOOWXUQRQHDFKVLGH0DQXDOO\FHQWHU
the belt by pushing the belt from side to side until it is parallel with the
side rails. Tighten the bolts the same amount as when the user loosened
them, approximately one full turn. Inspect the belt for damage.
3) Start the treadmill running belt by pressing the GO buttion. Increase speed to 3
mph (~4.8 kph) and observe the belt position. If it is moving to the right, tighten
the right bolt by turning it clockwise ¼ turn, and loosen the left bolt ¼ turn. If it is
moving to the left, tighten the left bolt by turning it clockwise ¼ turn and loosen the
right ¼ turn. Repeat Step 3 until the belt remains centered for several minutes.
4) Check the tension of the belt. The belt should be very snug. When a person
walks or runs on the belt, it should not hesitate or slip. If this occurs, tighten
the belt by turning both bolts clockwise ¼ turn. Repeat if necessary.
NOTE: Use the orange strip in the lateral position of the side rails as criteria
to confirm the belt is properly centered. It is necessary to adjust the belt
until the edge of the belt is parallel to the orange or white strip.
WARNING!
Do not run belt faster than 3 mph (~4.8 kph) while centering. Keep
ȴQJHUVKDLUDQGFORWKLQJDZD\IURPEHOWDWDOOWLPHV
Treadmills equipped with side handrails and front handlebar for user support and emergency
dismount, press emergency button to stop the machine for emergency dismount.
BEFORE USI N G THE TREADM I LL
3HUIRUPLQLWLDOVHWXSDQGFDOLEUDWHWKHWUHDGPLOOXVLQJWKHDXWRFDOLEUDWLRQ
IHDWXUHIRXQGLQȆ0DQDJHU0RGHȇRUȆ(QJLQHHULQJ0RGHȇ
NOTES:
• '2127VWDQGRQWKHEHOWZKLOHWKHDXWRFDOLEUDWLRQVHTXHQFHLVLQSURJUHVV
• DO NOTDGMXVWLQFOLQHXQWLOWKHLQLWLDOVHWXSDQGDXWRFDOLEUDWLRQDUHFRPSOHWHG
• DO NOT start the treadmill running belt or press any speed buttons
until directed to while tensioning the running belt.
BELT I S TOO FAR TO THE RI GHT SI DE BELT I S TOO FAR TO THE LEFT SIDE
TIGH TEN S RI GH T SI DE OF ROLLER TIGH TEN S LEFT SI DE OF ROLLER
ENGLISH

15
ENGLISH
CAUTION!
RISK OF INJURY TO PERSONS
While you are preparing to use the treadmill, do not stand on the belt. Place
your feet on the side rails before starting the treadmill. Start walking on the belt
only after the belt has begun to move. Never start the treadmill at a fast running
speed and attempt to jump on! In case of an emergency, place both hands on the
side arm rests to hold yourself up and place your feet onto the side rails.
USING THE SAFETY KEY
Your treadmill will not start unless the emergency stop button
is reset. Attach the clip end securely to your clothing. This safety
key is designed to cut the power to the treadmill if you should
fall. Check the operation of the safety key every 2 weeks.
WARNING!
Never use the treadmill without securing the safety key clip to your clothing.
Pull on the safety key clip first to make sure it will not come off your clothing.
Only engage reverse belt direction in a supervised environment.
The maximum default belt speed is 2 mph and should
only be changed by an authorized technician.
Your treadmill is capable of reaching high speeds. Always start off using a
slower speed and adjust the speed in small increments to reach a higher
speed level. Never leave the treadmill unattended while it is running.
When not in use turn the on/off switch to off and unplug the power
FRUG0DNHVXUHWRIROORZWKH0$,17(1$1&(VFKHGXOHLQWKLVJXLGHWR
maintain optimal performance and prevent premature electronic failure.
Keep your body and head facing forward. Do not attempt to turn around
or look backwards while the treadmill is running. Stop your workout
immediately if you feel pain, faint, dizzy or are short of breath.
USING THE HEART RATE FUNCTION
The heart rate function on this product is not a medical device. While heart rate grips
can provide a relative estimation of your actual heart rate, they should not be relied
on when accurate readings are necessary. Some people, including those in a cardiac
rehab program, may benefit from using an alternate heart rate monitoring system like
a chest or wrist strap. Various factors, including movement of the user, may affect the
accuracy of your heart rate reading. The heart rate reading is intended only as an exercise
aid in determining heart rate trends in general. Please consult your physician.
PULSE GRIPS
Place the palm of your hands directly on the pulse grip. Both hands must grip the sensors for
\RXUKHDUWUDWHWRUHJLVWHU,WWDNHVFRQVHFXWLYHKHDUWEHDWVVHFRQGVIRU\RXUKHDUW
rate to register. When gripping the pulse grip, do not grip tightly. Holding the grips tightly may
elevate your blood pressure. Keep a loose, cupping hold. You may experience an erratic readout
LIFRQVLVWHQWO\KROGLQJWKHSXOVHJULS0DNHVXUHWRFOHDQWKHSXOVHVHQVRUVWRHQVXUHSURSHU
contact can be maintained.The pulse grips are designed for pulse sensing purpose only.
WARNING!
Heart rate monitoring systems may be inaccurate. Over exercising may result
in serious injury or death. If you feel faint, stop exercising immediately.
PRODUCT SPECIFICATIONS
0D[8VHU:HLJKW 182 kg / 400 lbs.
Product Weight 178 kg / 392 lbs.
Shipping Weight 210 kg /462 lbs.
Overall Dimensions (L x W x H)* 215 x 91 x 154 cm / 85" x 36" x 61"
* Ensure a minimum clearance width of 0.6 meters (24”) for access to and passage around
VISION equipment. Please note, 0.91 meters (36”) is the ADA recommended clearance width
for individuals in wheelchairs.

16
MAINTENANCE SCHEDULE
ACTION FREQUENCY
Unplug the unit. Clean entire machine using water and a
mild soap or other approved solution (cleaning agents
should be alcohol and ammonia free).
DAILY
Inspect the power cord. If the power cord is damaged,
contact Customer Tech Support. DAILY
0DNHVXUHWKHSRZHUFRUGLVQRWXQGHUQHDWKWKHXQLWRULQ
any other area where it can become pinched or cut during
storage or use.
DAILY
Unplug the treadmill and remove the motor cover. Check for
debris and clean with a dry cloth or small vacuum nozzle.
WARNIN G: Do not plug the treadmill in until the motor cover
has been reinstalled.
0217+/<
For touch screen consoles, enter service mode and select
ȆWHVWȇ6HOHFWȆWRXFKFDOLEUDWLRQȇDQGWKHQVHOHFWȆVWDUWȇ
)ROORZWKHRQVFUHHQSURPSWVDQGWRXFKWKHVFUHHQZKHUH
indicated.
QUARTERLY
Clean IR sensors (located on console masts) with a cotton
swab and rubbing alcohol. QUARTERLY
DECK AND BELT REPLACEM ENT
One of the most common wear and tear items on a treadmill is the deck and belt
combination. If these two items are not properly maintained they can cause damage
to other components. This product has been provided with the most advanced
maintenance free lubricating system on the market.
WARNING!
Do not run the treadmill while cleaning the belt and deck. This can cause serious
LQMXU\DQGFDQGDPDJHWKHPDFKLQH0DLQWDLQWKHEHOWDQGGHFNE\ZLSLQJWKHVLGHV
of the belt and deck with a clean cloth. The user can also wipe under the belt 2 inches
(~51mm) on both sides removing any dust or debris. The deck can be flipped and
reinstalled or replaced by an authorized service technician. Please contact Vision
Fitness Systems for more information.
MAINTENANCE
$Q\DQGDOOSDUWUHPRYDORUUHSODFHPHQWPXVWEHSHUIRUPHGE\DTXDOLȴHGVHUYLFHWHFKQLFLDQ
1) DO NOT use any equipment that is damaged and or has worn or broken parts. Use only
UHSODFHPHQWSDUWVVXSSOLHGE\\RXUFRXQWU\ȇVORFDO9,6,21GHDOHU
2) 0$,17$,1/$%(/6$1'1$0(3/$7(6'RQRWUHPRYHODEHOVIRUDQ\UHDVRQ7KH\FRQWDLQ
important information. If unreadable or missing, contact your VISION dealer for a
replacement.
3) 0$,17$,1$//(48,30(173UHYHQWDWLYHPDLQWHQDQFHLVWKHNH\WRVPRRWKRSHUDWLQJ
equipment as well as keeping your liability to a minimum. Equipment needs to be inspected
at regular intervals.
4) Ensure that any person(s) making adjustments or performing maintenance or repair of any
kind is qualified to do so. VISION dealers will provide service and maintenance training at
our corporate facility upon request.
WARNING!
To remove power from the Treadmill, the power cord must be disconnected from the wall outlet.
RECOM M ENDED CLEANING TIPS
Preventative maintenance and daily cleaning will prolong the life and look of your equipment.
1) Use a soft, clean cotton cloth. DO NOT use paper towels to clean surfaces on the treadmill.
Paper towels are abrasive and can damage surfaces.
2) Use a mild soap and damp cloth. DO NOT use ammonia based cleaner or alcohol. This will
cause discoloring of the aluminum and plastics it comes into contact with.
3) Do not pour water or cleaning solutions on any surface. This could cause electrocution.
4) Wipe the console, heart rate grip, handles and side rails after each use.
5) Brush away any wax deposits from the deck and belt area. This is a common occurrence
until the wax is worked into the belt material.
6) Be sure to remove any obstructions from the path of the elevation wheels including power
cords.
For cleaning touch screen displays, use distilled water in an atomizer spray bottle. Spray distilled
water onto soft, clean, dry cloth and wipe display until clean and dry. For very dirty displays,
adding vinegar is recommended.
CAUTI ON!
Be sure to have proper assistance to install and move the unit in order to avoid injury or damage
to the treadmill.
ENGLISH

17
DEUTSCH

18
DEUTSCH
WICHTIGE SICHERHEITSHINWEISE
BEWAHREN SIE DIESE ANLEI TUNGEN AUF
• Beim Gebrauch eines Laufbands sollten die folgenden grundlegenden Sicherheitshinweise unbedingt beachtet werden: Lesen Sie alle
$QOHLWXQJHQEHYRU6LHGDV*HU¦WEHQXW]HQ'HU%HVLW]HULVWGDI¾UYHUDQWZRUWOLFKGDVVDOOH%HQXW]HUGLHVHV*HU¦WV¾EHUDOOH:DUQXQG
Sicherheitshinweise informiert sind.
• Dieses Gerät ist für den kommerziellen Gebrauch gedacht. Lesen Sie alle Anleitungen, um Ihre persönliche Sicherheit zu gewährleisten und das
beschriebene Produkt vor Schäden zu schützen.
GEFAHR!
ZUR MINDERUNG DER GEFAHR EINES ELEKTRI SCHEN SCHLAGS:
• Trennen Sie das Gerät immer sofort nach Gebrauch sowie vor der Reinigung, Wartung oder dem Anbringen oder Abnehmen von Teilen vom
Stromnetz.
ACHTUNG!
UNTERZIEHEN SI E SI CH EINER ÄRZTLI CHEN UNTERSUCHUNG, BEVOR SIE DIESES GERÄT BENUTZEN.
LESEN SIE DAS BENUTZERHANDBUCH VOR DEM GEBRAUCH DIESES GERÄTS.
• Es ist unerlässlich, dieses Gerät nur im Innenbereich in einem klimatisierten Raum zu verwenden. Ist das Gerät niedrigen Temperaturen oder hoher Luftfeuchtigkeit ausgesetzt
gewesen, sollte es vor dem ersten Gebrauch unbedingt auf Raumtemperatur erwärmt werden. Werden diese Hinweise nicht beachtet, kann es zu einer elektronischen
Fehlfunktion kommen. Die standardmäßige Startgeschwindigkeit beträgt ca. 0,8 kmh. Eine zu hoch eingestellte Startgeschwindigkeit kann gefährlich sein.
WARNUN G!
SO REDUZIEREN SI E DAS RISIKO VON VERBRENNUNGEN, FEUER, ELEKTRI SCHEN SCHLÄGEN ODER VERLETZUNGEN VON PERSONEN:
• Falsches oder übermäßiges Training kann zu Verletzungen führen.
Sollten während des Trainings Schmerzen jeglicher Art, einschließlich
aber nicht beschränkt auf Brustschmerzen, Übelkeit, Schwindel
oder Atemlosigkeit auftreten, beenden Sie sofort das Training und
suchen Sie einen Arzt auf, bevor Sie das Training fortsetzen.
• Trainieren Sie stets in einem angenehmen Tempo.
• Tragen Sie keine Kleidung, die sich am Laufband verfangen könnte.
• Nutzer müssen bei der Verwendung dieses Trainingsgeräts
geeignetes Schuhwerk (z. B. Sportschuhe) tragen.
• Springen Sie nicht auf das Laufband.
• Das Laufband darf immer nur von jeweils einer Person verwendet werden.
• Das Laufband darf nicht von Personen benutzt werden, die mehr wiegen,
als im Abschnitt „TECHNISCHE DATEN“ des BENUTZERHANDBUCHS
angegeben ist. Bei Zuwiderhandlungen verfällt die Garantie.
• Trennen Sie das Gerät von der Stromversorgung,
bevor Sie es warten oder umstellen.
• Reinigen Sie das Gerät mit einem leicht angefeuchteten Tuch und milder
Seife. Verwenden Sie niemals Lösungsmittel. (Siehe „WARTUNG“.)
• Ziehen Sie den Stecker aus der Steckdose, wenn Sie das Gerät nicht
benutzen oder bevor Sie Teile anbringen oder abnehmen.
• Schließen Sie das Trainingsgerät nur an eine
ordnungsgemäß geerdete Steckdose an.
• Entfernen Sie die Schutzabdeckungen nur nach Aufforderung durch
Fachpersonal oder Ihren örtlichen Händler. Ein Service sollte nur
durch autorisiertes Servicepersonal durchgeführt werden.
• Das Installierten von Teilen oder Zubehör, die oder das nicht für dieses
Gerät bestimmt oder mit dem verkauften Gerät nicht kompatibel ist, kann
sich auf die Sicherheit auswirken und macht die Garantie ungültig.
• $XIGHUW\SLVFKHQ.RSIK¸KHJHPHVVHQLVWGHU$EHZHUWHWH
Schalldruckpegel beim Betrieb des Laufbands mit einer Geschwindigkeit
von 12 kmh (ohne Belastung) nicht höher als 70 dB.
• Die Geräuschemission unter Belastung ist höher als ohne Belastung.
• Kinder unter 14 Jahren oder Haustiere m üssen einen Abstand von
PLQGHVWHQV0HWHUQ]XGLHVHP/DXIEDQG81%(',1*7HLQKDOWHQ
• Kinder unter 14 Jahren dürfen dieses Laufband NICHT verwenden.
• Jugendliche über 14 Jahren dürfen das Laufband
nur unter Beaufsichtigung verwenden.
• Dieses Gerät ist nicht für die Verwendung durch Personen
vorgesehen, die verminderte körperliche, sensorielle oder geistige
Fähigkeiten haben oder nicht über ausreichende Erfahrung und
Kenntnisse verfügen, außer sie haben von einer Person, die für
ihre Sicherheit verantwortlich ist, Anweisungen für den Gebrauch
des Geräts erhalten oder werden von dieser beaufsichtigt.
• Verwenden Sie das Laufband nur zu dem im
Benutzerhandbuch beschriebenen Zweck.
• Betreiben Sie das Laufband nicht, wenn Kabel oder Stecker beschädigt
sind, wenn es nicht ordnungsgemäß funktioniert, umgefallen,
beschädigt oder in Wasser getaucht worden ist. Wenden Sie sich an den
technischen Kundendienst, um Ersatz oder Reparatur zu beantragen.
• Um das Risiko eines Stromschlags zu m inimieren, darf dieses Gerät nur an
einem vorschriftsmäßig geerdeten Stromkreis angeschlossen werden.
• +DOWHQ6LHGDV1HW]NDEHOYRQDXIJHKHL]WHQ2EHUȵ¦FKHQIHUQ7UDJHQ6LH
das Gerät nicht am Netzkabel bzw. verwenden Sie das Kabel nicht als Griff.
• Betreiben Sie das Laufband niemals, wenn die Belüftungsöffnung
blockiert ist. Halten Sie die Belüftungsöffnung sauber
und frei von Staub, Haaren und dergleichen.
• Zur Vermeidung von Stromschlägen dürfen keine Gegenstände
in Öffnungen am Gerät eingeworfen oder eingeführt werden.
• Nehmen Sie das Gerät nicht an Orten in Betrieb,
an denen Aerosolprodukte (Spray) verwendet
werden oder Sauerstoff verabreicht wird.
• =XP$EVFKDOWHQGUHKHQ6LHDOOH%HGLHQHOHPHQWHLQGLH2II
Position und trennen Sie dann den Stecker von der Steckdose.
• Verwenden Sie das Laufband in keiner Umgebung ohne
Temperaturregulierung, einschließlich aber nicht beschränkt auf
Garagen, Vorbauten, Poolanlagen, Badezimmern, Autostellplätzen
oder im Freien. Bei Zuwiderhandlungen verfällt die Garantie.
• Das Entfernen von Schutzabdeckungen sollte NUR durch
autorisiertes Servicepersonal durchgeführt werden. Stellen Sie
sicher, dass alle Befestigungselemente nach dem Einsetzen der
Schutzabdeckungen ordnungsgemäß installiert wurden.
• Bevor Sie das Gerät starten, stellen Sie sich auf die seitlichen
7ULWWȵ¦FKHQXP9HUOHW]XQJHQ]XYHUPHLGHQ
• Herzfrequenzüberwachungssysteme können ungenaue Daten anzeigen.
• Exzessives Training kann zu ernsthaften Verletzungen oder Tod führen.
• Brechen Sie das Training sofort ab, wenn Sie
Schwindel oder Benommenheit fühlen.
• Um einen fehlerhaften Anschluss des Netzkabels am
Stromversorgungsanschluss des Geräts zu vermeiden,
installieren Sie die Netzkabelhalterung, nachdem Sie
das Netzkabel am Gerät angeschlossen haben.
WARNETIKETT HIER ANBRINGEN

19
DEUTSCH
HINWEI SE ZUR ERDUNG
Das Gerät muss geerdet sein. Im Falle einer Fehlfunktion oder eines Ausfalls bietet die
Erdung dem elektrischen Strom den Weg des geringsten Widerstands, was das Risiko
eines Stromschlags verringert. Das Gerät ist mit einem Kabel ausgestattet, das über
einen Geräteschutzleiter und einen Erdungsstecker verfügt. Der Netzstecker muss
in eine geeignete Steckdose gesteckt werden, die entsprechend den örtlichen Vorschriften
und Verordnungen installiert und geerdet ist. Bei Nichtbeachtung dieser Erdungshinweise
durch den Anwender kann die eingeschränkte Garantie von Vision erlöschen.
ZUSÄTZLICHE I NFORM ATI ONEN ZUR ELEKTRI K
Zusätzlich zu der Bedingung des eigenen Stromkreises ist die richtige
Leitung vom Sicherungskasten zu jeder Steckdose zu verwenden, an der
die maximale Anzahl von Geräten angeschlossen ist. Beträgt der Abstand
vom Sicherungskasten zu den Steckdosen 30,5 m oder weniger, sollte ein
SROLJHV.DEHOYHUZHQGHWZHUGHQ%HL(QWIHUQXQJHQYRQ¾EHUPYRP
6LFKHUXQJVNDVWHQ]XU6WHFNGRVHVROOWHHLQSROLJHV.DEHOYHUZHQGHWZHUGHQ
ENERGIESPARMODUS
$OOH*HU¦WHVLQGVRNRQȴJXULHUWGDVVVLHEHLO¦QJHUHP1LFKWJHEUDXFKLQGHQ
Energiesparmodus wechseln. Es kann etwas Zeit in Anspruch nehmen, bis das Gerät aus
dem Energiesparmodus heraus wieder vollständig aktiviert ist. Die Energiesparfunktion
NDQQLP0DQDJHU0RGXVRGHULP(QJLQHHULQJ0RGXVDNWLYLHUWGHDNWLYLHUWZHUGHQ
STROMVERSORGUNG
INFORM ATIONEN ZU SEPARATEN
STROMKREISEN UND ELEKTRIK
„Separater Stromkreis“ bedeutet, dass an der Steckdose, an die Sie Ihr Gerät
anschließen, kein anderes Gerät angeschlossen sein darf. Am einfachsten
N¸QQHQ6LHGLHV¾EHUSU¾IHQLQGHP6LHGHQ6LFKHUXQJVNDVWHQDXVȴQGLJ
machen und die Schalter nacheinander ausschalten. Sobald ein Schalter
ausgeschaltet wurde, sollte auch nur das dazugehörige Gerät von
der Stromzufuhr abgeschnitten sein. Lampen, Verkaufsautomaten,
Ventilatoren, Audiosysteme oder sonstige Geräte sollten bei
dieser Prüfung nicht von der Stromzufuhr getrennt werden.
Eine Erdung (isoliert, ohne Erdschleife) bedeutet, dass jeder Stromkreis
einen eigenen Neutralleiter/Erdungsanschluss haben muss,
der von diesem ausgeht und an einer zugelassenen Erdung endet.
Es ist nicht möglich, einen einzelnen Neutralleiter/Erdungsanschluss
von einem Stromkreis zum nächsten zu „überbrücken“.
ELEKTRISCHE ANFORDERUNGEN
Zu Ihrer Sicherheit und um eine gute Geräteleistung zu gewährleisten,
muss
die Erdung dieses Stromkreises isoliert (ohne mögliche Erdschleife) sein.
6LHKH1(&$UWLNHOXQG'DV/DXIEDQGLVWPLWHLQHP6WURPNDEHO
und dem nachfolgend aufgeführten Stecker versehen und benötigt die
entsprechende Netzsteckdose. Jegliche Änderungen an diesem Netzkabel
können zum Erlöschen aller Garantien für dieses Produkt führen.
220-VOLT-GERÄTE
Alle Vision 220 V Laufbänder benötigen einen separaten Stromkreis
PLW9+]$VRZLHHLQHQLVROLHUWHQ1HXWUDOOHLWHU
Erdungsanschluss (ohne mögliche Erdschleife). Die Steckdose sollte eine
1(0$5VHLQXQGGLHJOHLFKH.RQȴJXUDWLRQZLHGHU1HW]VWHFNHU
haben. Bei diesem Produkt sollte kein Adapter verwendet werden.
WARN UN G!
Schließen Sie das Trainingsgerät nur an eine ordnungsgemäß geerdete Steckdose an.
• Betreiben Sie das Gerät niemals mit einem beschädigten Kabel oder Stecker,
auch wenn es normal funktioniert. Betreiben Sie niemals ein Gerät, das beschädigt
zu sein scheint oder in Wasser getaucht worden ist. Wenden Sie sich an den
technischen Kundendienst, um Ersatz oder Reparatur zu beantragen.
Die Nichteinhaltung dieser Vorgaben kann zu Schäden an Ihrem
Produkt und zum Erlöschen der Garantie führen:
• $OOH9LGHRXQG6WHFNGRVHQP¾VVHQDP7DJGHU/LHIHUXQJ0RQWDJH
des Produkts funktionsfähig sein. Der Kunde ist für etwaige zusätzliche
Installationskosten in Zusammenhang mit Gegenbesuchen verantwortlich.
• Die Stromversorgung in Ihrer Region kann schwanken. Um eine stabile Leistung
des Produkts zu gewährleisten, verwenden Sie den richtigen Kabelquerschnitt.
GEFAHR!
Ein unsachgemäßer Anschluss des Geräteschutzleiters kann zu einem Stromschlag
I¾KUHQ:HQGHQ6LHVLFKDQHLQHQTXDOLȴ]LHUWHQ(OHNWULNHURGHU6HUYLFHWHFKQLNHU
wenn Sie Zweifel haben, ob das Gerät ordnungsgemäß geerdet ist. Nehmen Sie keine
Änderungen am mitgelieferten Netzstecker vor. Passt dieser nicht in Ihre Steckdose,
ODVVHQ6LHHLQHJHHLJQHWH6WHFNGRVHYRQHLQHPTXDOLȴ]LHUWHQ(OHNWULNHULQVWDOOLHUHQ
Table of contents
Languages:
Other SportTec Treadmill manuals


