Stac Zero Halcyon User manual

1
s
Version 3.0
STAC Zero Halcyon
User Manual
2
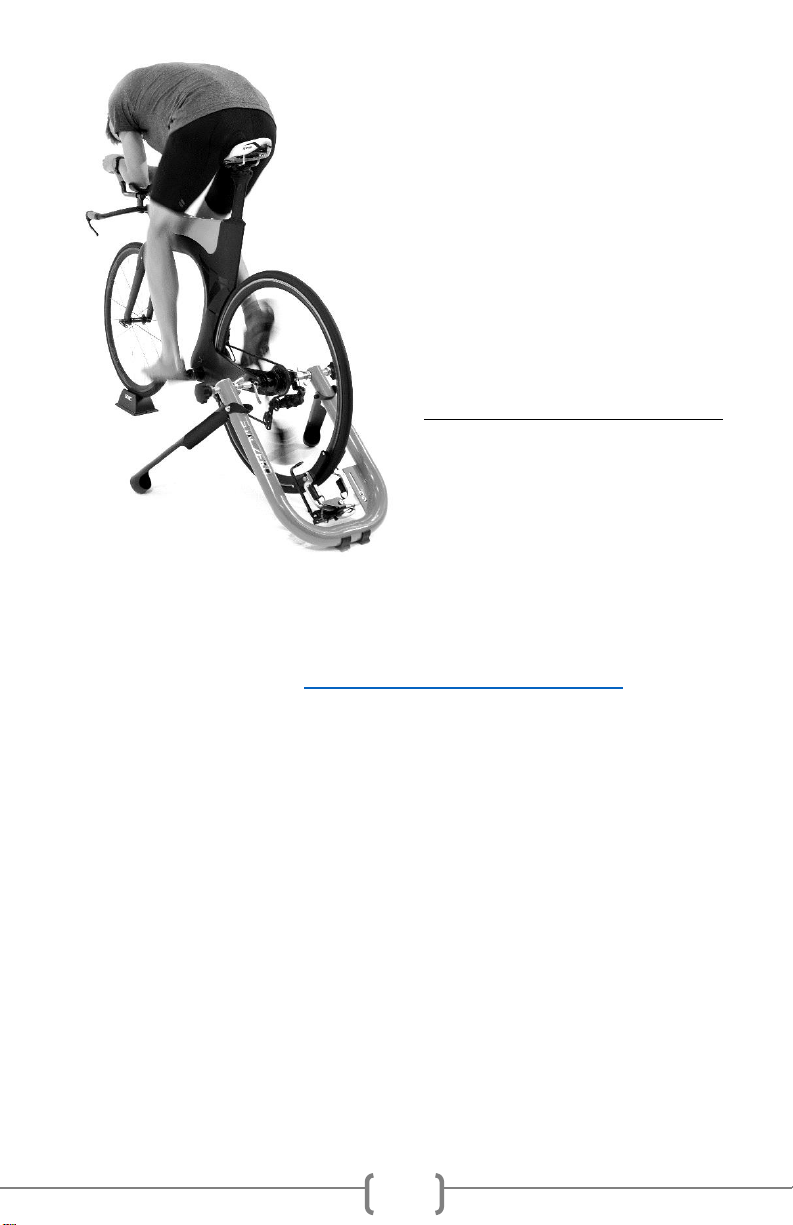
Welcome!
Congratulations on purchasing
your STAC Zero Halcyon Smart
Trainer! Please take the time to
read through and understand
the recommended set-up,
operation and safety best
practices to make sure you get
the most out of your Halcyon.
Happy riding,
-The STAC Performance team
Support Videos: Support videos, along with many helpful support
articles and a full color copy of the manual are available through our
website support portal at https://www.staczero.com/support
___________________________________________________________
Table of contents
OVERVIEW.......................................................................................................4
TRAINER SAFETY..............................................................................................5
TRAINER COMPONENT DIAGRAM ...................................................................6
MOTOR ASSEMBLY STEPS................................................................................7
FIRST TIME SET-UP & CALIBRATION.................................................................8
PRIOR TO SET-UP .....................................................................................8
A. INSTALL BIKE ON TRAINER ...................................................................8
B. INSTALL A SPOKE MAGNET.................................................................10
C. ACTIVATE AND CALIBRATE TRAINER ..................................................11

3
WHEEL WEIGHTS ...........................................................................................12
WHEEL WEIGHT INSTALLATION..............................................................12
OPTIONAL WHEEL WEIGHT ADDITION INSTALLATION.............................17
USING TRAINING APPS ..................................................................................20
COMPATIBLE APPS.................................................................................20
SIMULATION MODE...............................................................................20
ERG MODE ............................................................................................20
CONNECT VIA BLUETOOTH SMART (BLE) ................................................20
CONNECT VIA ANT+ FE-C........................................................................20
STAC CONTROL PANEL APP OVERVIEW .........................................................21
WHERE TO DOWNLOAD.........................................................................21
GETTING STARTED .................................................................................21
MENU OPTIONS.....................................................................................23
HALCYON TRAINING MODES .........................................................................25
I. SIMULATION MODE...........................................................................25
USE STAC CONTROL PANEL WITH STRAVA..............................................25
USE STAC CONTROL PANEL WITHOUT STRAVA .......................................26
ADJUST INERTIA/ ROAD FEEL .................................................................26
II. ERG MODE ........................................................................................27
USE STAC CONTROL PANELS’ ERG MODE................................................27
ADJUST ERG MODE TRANSITION SPEED..................................................28
UPLOADING WORKOUTS........................................................................28
III. RESISTANCE MODE............................................................................29
CADENCE DETECTION ....................................................................................30
STORING AND CHARGING YOUR TRAINER.....................................................31
UNDERSTANDING THE LIGHTS.......................................................................32
TROUBLESHOOTING ......................................................................................33
Table of Contents...................................................................................33
APPENDIX A: WHEEL MAGNET ALIGNMENT ...........................................41
APPENDIX B: MANUAL POSITIONING......................................................46

4
Overview
You will need:
1. Your bike, mounted on your STAC Zero Halcyon Smart Trainer.
(See First Time Set-up and Calibration, pages 8-10).
2. A training app, which tells your trainer how much resistance to
create, running on a device such as a smart phone, tablet,
laptop or personal computer.
In order to control the Halcyon, you’ll download your preferred training
app to your device, start up the app and the trainer, and then connect
to the trainer in the app via one of two wireless protocols: Bluetooth
Smart [BLE] or ANT+.
(See Page 20 for a list of training apps and connection instructions, and
page 21 to download STAC’s free app, STAC Control Panel).
Types of Smart workouts:
There are two main types of Smart workouts.
ERG MODE
Erg mode keeps you accountable; making sure you hit every power target
in your workout by increasing resistance if you slow down too soon, or
easing up if you pedal faster. Erg mode apps often come with pre-planned
interval workouts, and show your training data onscreen.
SIM MODE
Simulation Mode simulates an outdoor ride, tougher on the climbs than the
downhills. Sim mode apps often come with fun graphics and allow you to
race with other app users.
New to Smart Trainers? Start here!
The Halcyon Smart Trainer can add fun, variety, challenge and
accountability to your workouts. Here’s a summary of everything
you need to know to get started Smart Training.

5
The Halcyon also has a non-smart mode, Resistance Mode, where you use
your bike’s gears to adjust resistance. Set the magnet distance in STAC
Control Panel to use Resistance mode [page 29].
Uploaded workouts: Sometimes you just want to get on and ride. See page
28 to learn how to upload a favorite Erg workout to your trainer so it starts
automatically.
TRAINER SAFETY
oBefore using your STAC Zero Halcyon consult a doctor if you or any
member of your household have a medical device that can be
affected by strong magnetic fields, such as pacemakers or ICD’s.
oStore the trainer out of reach of children and pets.
oWhen moving the trainer, carry it by the Threaded Rods or the Knobs
to avoid closing your hands between the Legs and the Frame.
oDo not put fingers or other appendages between the Magnet Arrays.
oBe very careful when using metal tools near the Magnets.
oNever place a computer or other sensitive electronics near the
Magnets.
oBefore each use, inspect the face of the Magnet Array for any metal
debris. Wipe any debris off with a rag.
oAvoid adjusting the Calipers by hand, as this contributes to wear and
tear on the motors. To manually position the Calipers, use the STAC
Control Panel App [see page 46].
oAlways retract the Spring Pin completely before rotating the Magnet
Arrays. Never use force on the Magnet Arrays or Spring Pins.
Rotating the Magnet Arrays forcefully will damage the Spring Pins.
oBe careful not damage or pull out ribbon cables and wires.

6
TRAINER COMPONENT DIAGRAM
Frame:
1. U-Frame
2. Body Feet
3. Legs
4. Knobs
5. Threaded Rods
6. Wing Nuts
7. Skewer Cups
Resistance Unit:
8. Strain Gauge
9. Calipers
10. Spring Pins
11. Magnet Array
12. Anti-wear Stickers
13. Speed Sensor
14. Electronics Housing
15. Actuator
Accessories:
16. Wheel Weight
17. Wheel Weight Addition
(optional accessory)
18. Spoke Magnet
Not pictured above:
19. Quick Release Skewer
20. Micro USB cable
21. 4mm and 3mm Allen
Keys
7
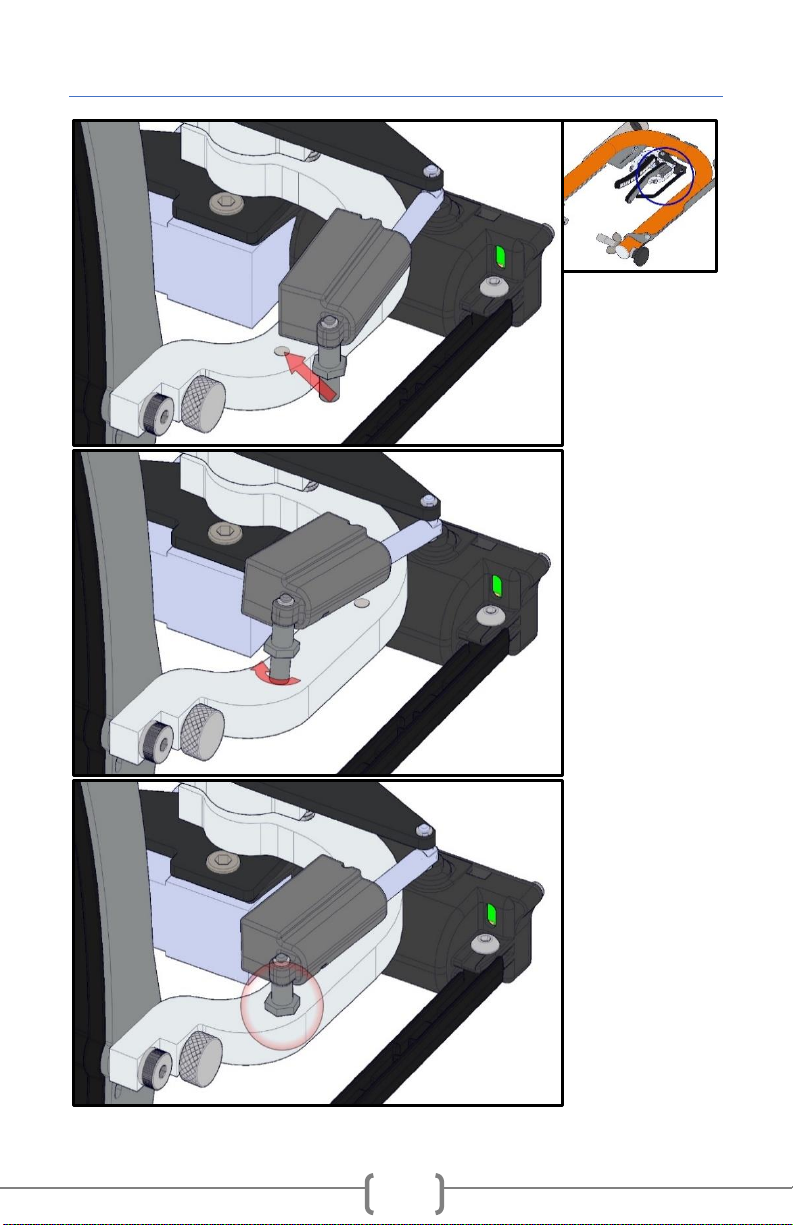
MOTOR ASSEMBLY STEPS
1. Gently move
motor post to
align with hole on
the caliper arm.
2. Using the
supplied 8mm
wrench, begin
screwing
motor post
into caliper
arm.
3. Tighten the
motor post
until the hex
section is right
against the
body of the
caliper.
Repeat with
2nd motor.

8
FIRST TIME SET-UP & CALIBRATION
Support Video: “Installing your bike on the STAC Zero Halcyon Smart
Trainer”
PRIOR TO SET-UP
1. Complete the final assembly step before beginning the first time set
up. Motors arrive detached to prevent damage to them during shipping.
2. The STAC Zero Halcyon’s battery may be low when it arrives. Charge
your trainer for 30 minutes using the included micro-USB cable to get
started. See page 28 for full charging instructions.
A. INSTALL BIKE ON TRAINER
1. Open the Legs to full extension and place the trainer flat on the
floor.
2. Pull back the Spring Pin and rotate the Magnet Arrays from
vertical to horizontal one at a time. The Spring Pin will seat itself
once the Magnet Array is in place.
3. Move the Speed Sensor to the side and out of the way.
!ALWAYS RETRACT THE SPRING PINS COMPLETELY BEFORE
ROTATING THE MAGNET ARRAYS. NEVER USE FORCE ON THE
MAGNET ARRAYS OR SPRING PINS.

9
4. Unscrew the Knobs, opening them all the way.
Tip: Moving the Calipers by hand contributes to wear and tear on the
motors.If your wheel will not easily fit between the Magnet Arrays
refer to Troubleshooting [page 34].
!ALWAYS ROTATE THE MAGNET ARRAY HORIZONTALLY AND PULL
THE SPEED SENSOR TO THE SIDE BEFORE MOUNTING THE BIKE ON
THE TRAINER TO AVOID DAMAGE TO THE TRAINER.

10
5. Install your bike on the trainer, with the Frame behind the bike,
and the Legs extended towards the front.
a. Back the bike into the trainer, aiming to keep the tire
centered over the central bolt.
b. Insert one end of the Skewer in a Skewer Cup and
tighten the Knob until the tire is centered. Repeat on
the other side.
c. Tighten both Knobs.
d. Tighten the Wing Nuts against the Frame, locking the
bike in place.
B. INSTALL A SPOKE MAGNET
1. Install the included Spoke Magnet on a spoke.
2. Align the Spoke Magnet with the tip of the Speed Sensor.
3. Adjust the Speed Sensor within 5mm-10mm (¼”-½”) of the Spoke
Magnet.
4. Turn the wheel a couple of revolutions slowly by hand. Check that
a. The Spoke Magnet will not hit your bike or the Speed Sensor.
b. The red light on the Electronics Housing flashes when the
Spoke Magnet passes the Speed Sensor.
Tip: If your wheel is not quite centered on your first try, tighten one
knob while loosening the other to shift the bike over.

11
C. ACTIVATE AND CALIBRATE TRAINER
1. Mount the bike and begin pedaling.
2. The trainer will activate and begin
measuring your wheel. The right
caliper will aproach the wheel, then
return to its starting position. The
left caliper will do the same. Keep
pedaling during this calibration. It
should take less than 30 seconds.
You are ready to ride!
Once the calipers have completed their measurements, the trainer is
ready to respond to commands from a cycling app of your choice.
___________________________________________________________
Notes:
The calibration will occur at the
beginning of each ride.
The trainer had a default mode
of 27% fixed resistance until it
receives a command from an
app. If you choose to pre-load
a workout [page 26], it will
become the new default mode.
The trainer auto-powers off
after 5 minutes of idle time.
Tip: If you experience any issues with your trainer, double-check your
spoke magnet/speed sensor alignment as a first step. If everything looks
aligned but the lights indicate the Speed Sensor has trouble sensing the
Spoke Magnet, see Troubleshooting [page 32].
Tip: You can speed
up calibration. Stop
your wheel after the
first few spins. The
calipers will squeeze
your wheel, getting a
faster read on your
wheel position.
Tip: The trainer gathers
data on your wheel
position throughout your
ride to prevent the
magnets from contacting
your wheel. If wheel
contact occurs, it should
resolve itself without
interrupting your workout,
provided your wheel is not
badly off-centre.
12
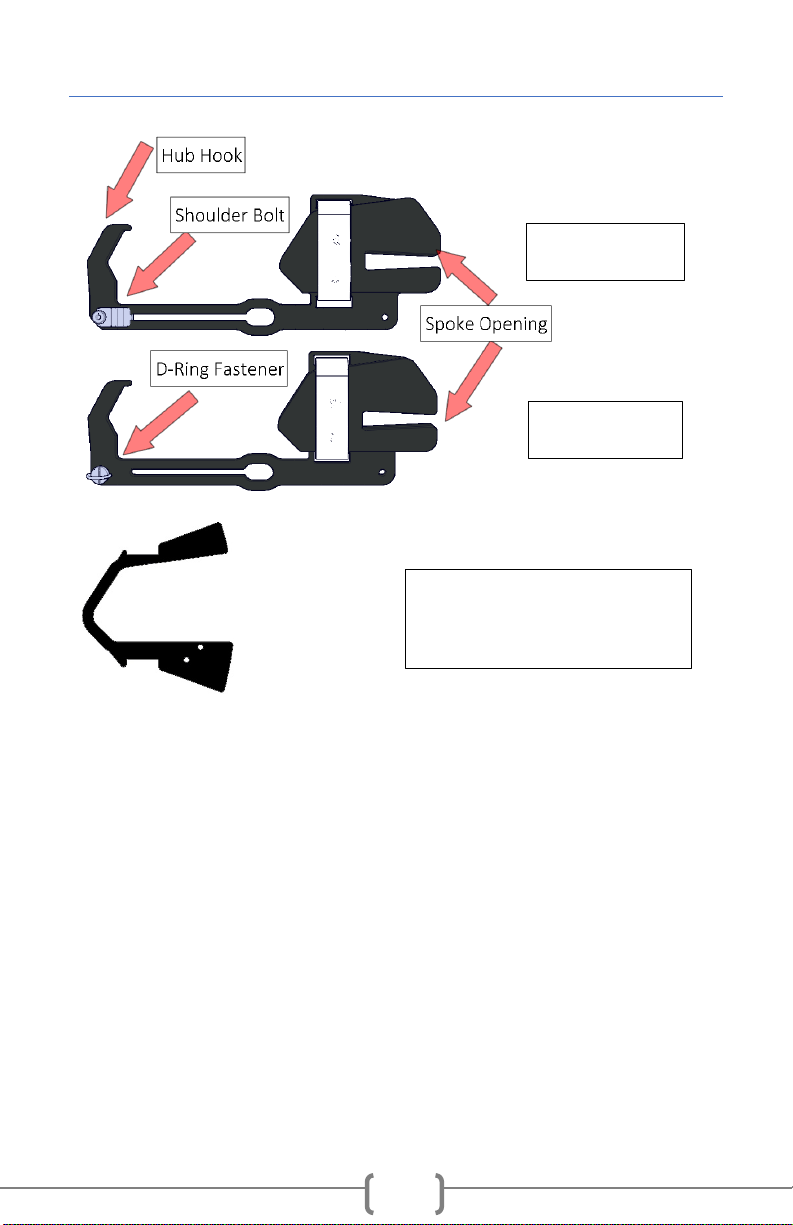
WHEEL WEIGHTS
WHEEL WEIGHT INSTALLATION
The Wheel Weights are included to improve the road feel of the STAC
Zero Halcyon. They are optional to use, but we highly recommend them
for our users who put out high watts.
Support Video: “2018 Wheel Weight Installation”
1) With your bike secured in your trainer, approach the rear wheel
from the non-drive side of your bike.
2) Undo the Velcro Straps on the Weights and loosen the D-Ring
fastener on Weight B.
3) Identify a target spoke that originates on the drive side, and
rotate it towards the ground:
a. Find two spokes that cross near the hub (circled in image).
Weight A
Weight B
Weight Addition
(optional accessory)

13
b. The target spoke will be the spoke coming from the opposite
side of the wheel that lands between the two crossed spokes.
4) Insert Weight A (with the Shoulder Bolt) into the wheel.
a. Shoulder Bolt towards the drive side.
b. Hub Hook pointed towards the front of the bike.
Seat the Spoke Opening on your target spoke, and the Hub Hook
around the wheel hub.
Tip: This applies
to a typical
spoke pattern.
For all spoke
patterns, make
sure 3 spokes
secure the
weight’s mass
once installed,
(1 in the spoke
opening, 2 on
the opposite
side). Contact
support@stac
zero.com for
more assistance

14
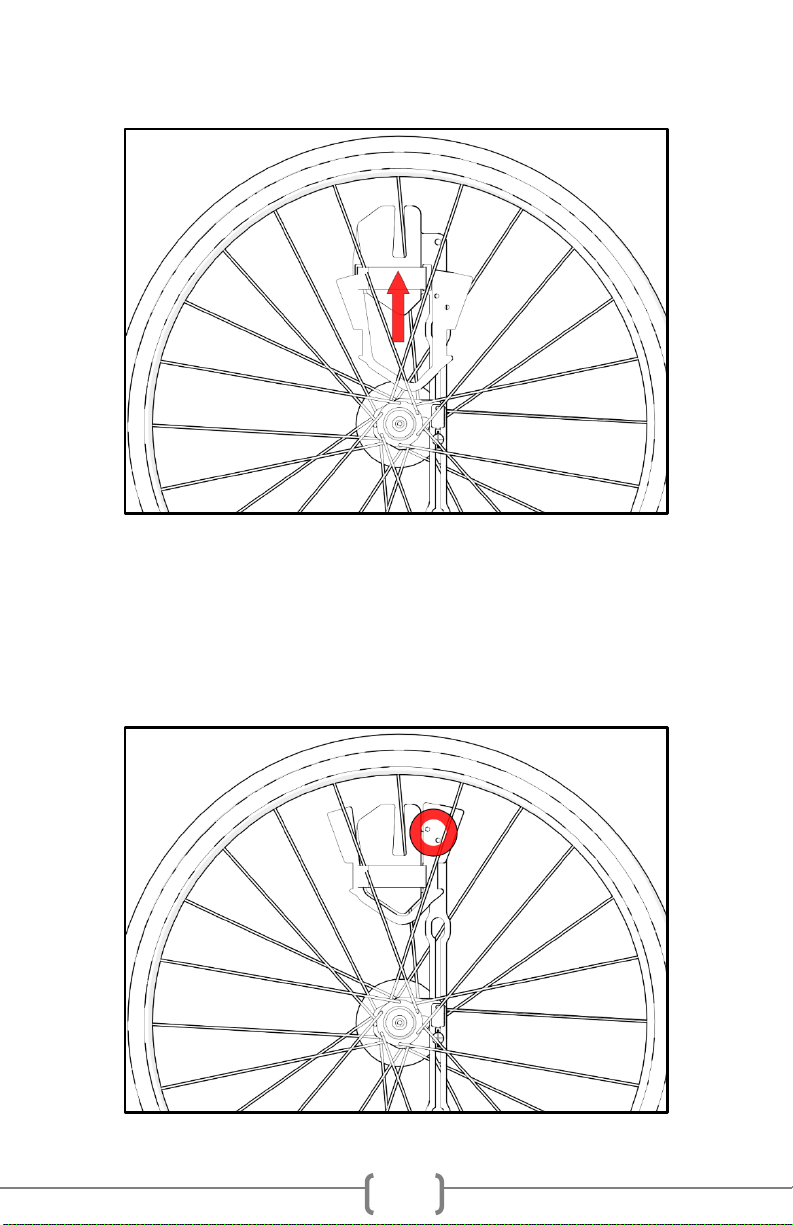
5) Insert Weight B into the wheel.
a. Spoke Opening up, Hub Hook towards the front of the bike.
b. D-Ring facing the non-drive side.
6) Line up the bars of Weights A & B. Insert the Fasteners in their
slots on the opposite part.
Note: The ring on the D-Ring Fastener must be erect and aligned
with the slot.

15
7) Secure the Weight assembly:
a. Pull Weight B upwards and seat the Spoke Opening on a target
spoke (1) opposite Weight A. In a typical wheel, this second
target spoke originates on the non-drive side.
b. Tighten the D-ring Fastener (2) securing Weights A and B
together.
c. Wrap the Velcro Straps of both Weights (3) around 3 spokes to
secure the Weight in place.
Final Checks
DO NOT SKIP THESE STEPS.
8) Check that the Weight is properly secured and cannot move in
any direction.

16
9) Rotate the wheel slowly by hand, ensuring it does not contact
your bike frame. Your wheel should be balanced and spin freely
without coming to rest in the same position.
Wheel Weight shown installed in a 24-spoke wheel
! CAUTION: IF AT ANY TIME YOU HEAR OR FEEL TICKING, RUBBING OR
A CLUNKING SOUND, STOP RIDING IMMEDIATELY AND VERIFY THE
WEIGHTS ARE PROPERLY SECURED.
For additional assistance contact support@staczero.com

17
OPTIONAL WHEEL WEIGHT ADDITION INSTALLATION
The Wheel Weight Addition is available as an optional accessory.
Inserting it provides an additional 2/3rdsthe inertia provided by the
Wheel Weight.
Support Video: “Installing the Enhanced Inertia Package (wheel weight
additions) to your 2018 Wheel Weights”
1) Insert the Addition between the spokes. The threaded holes must
end up on the same side as the bar of the Wheel Weight.
18
2) Seat the Weight Addition around the Wheel Weight with the two
ends facing the rim.
3) Thread the D-ring through one of two holes in the Weight Addition.
a) If available, thread the D-ring through the hole in the Weight
Addition and the Wheel Weight.
b) If this is not available, thread the D-ring through the Weight
Addition hole above the Wheel Weight. This stops the Weight
Addition from sliding towards the center of your wheel.

19
c) Wrap the Velcro strap around the Wheel Weight, Extension, and
3 nearby spokes.
d) Repeat the same procedure on the other side.
Final Checks
DO NOT SKIP THESE STEPS.
6) Check that the Weight and Weight Additions are properly
secured and cannot move in any direction.
7) Rotate the wheel slowly by hand, ensuring it does not contact
your bike frame. Your wheel should be balanced and spin freely
without coming to rest in the same position.
! CAUTION: IF AT ANY TIME YOU HEAR OR FEEL TICKING, RUBBING OR
A CLUNKING SOUND, STOP RIDING IMMEDIATELY AND VERIFY THE
WEIGHTS ARE PROPERLY SECURED.

20
USING TRAINING APPS
To communicate with the STAC Zero Halcyon you will need to connect
to a training app.
COMPATIBLE APPS
The STAC Zero Halcyon is compatible with any training app that
supports the ANT+ or Bluetooth Smart cycling power protocols. It has
been tested with the following apps:
SIMULATION MODE
ZWIFT
ROUVY
KINOMAP
ERG MODE
THE SUFFERFEST
TRAINERROAD
Support video: “Connecting Your STAC Zero Halcyon Smart Trainer to
Zwift on a PC via ANT+”
Support video: “Connecting Your STAC Zero Halcyon Smart Trainer to
TrainerRoad on an iPad via Bluetooth Smart”
CONNECT VIA BLUETOOTH SMART (BLE)
1. Make sure the unit is on and lights are blinking.
2. Make sure that no other devices in the area are connected to
the STAC Zero Halcyon. When the Halcyon is connected to a
device via BLE the green light on the electronics housing will
pulse bright and dim.
3. Start up your cycling app. Your trainer should show up as “STAC
Zero Halcyon” in the device list.
CONNECT VIA ANT+ FE-C
1. Plug the ANT+ stick in to your PC or Mac.
2. Activate the trainer.
3. Use your app’s connection menu to search for and connect to
the trainer.
Other manuals for Halcyon
1
Table of contents
Other Stac Zero Fitness Equipment manuals

Popular Fitness Equipment manuals by other brands


Octane Fitness
Octane Fitness CROSS CiRCUIT PRO ZR8000 Assembly & set-up instructions

Matrix
Matrix MAGNUM 2003M quick start guide

SPORT ELEC
SPORT ELEC Multisport Pro user manual

Gymstick
Gymstick Core Twister quick start guide

Master
Master MAS4A048 manual

Hoist Fitness
Hoist Fitness ROC-IT RPL-5102-A owner's manual