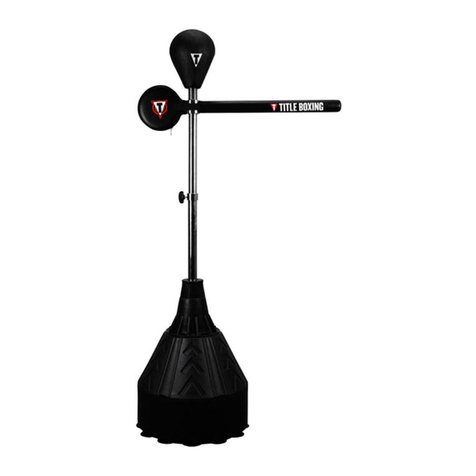
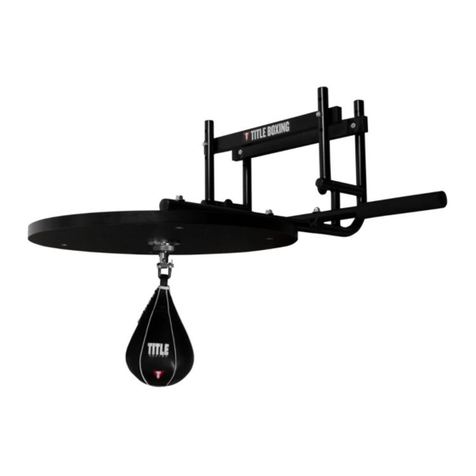
Title Boxing SBPPFS User manual

PLATFORM
Owner's Manual
FORGED STEEL
PRO SPEED BAG
SBPPFS

No. Description Q'ty
1 M10 x 45 cross recessed countersunk head screw 4
2 M5 x 30 hexagon socket button head screw 4
3 M10 nut 4
4 10 washer 8
5 10 spring washer 4
6 M5 nut 4
7 5 washer 4
8 5 spring washer 4
9 M10 x 50 screw 4
10 12 x 40 nylon expand plugs 4
Hardware Package•
PARTS LIST
1
Parts in the box•
11 Frame base 0100 1
12 Wood platform 0200 1
13 Swivel 1
x 1 pc
11 x 1 pc
12
x 1 pc
13

2
12
8
13
6
7
511
10
4
9
12
1
43
PRODUCT ASSEMBLY
2
Fix the Swivel•

DIAGRAM A:
Mounting The TITLE Forged Steel Pro Speed Bag Platform
Determine How High to Mount the Platform:
Identify the average height of the user(s) of the Speed Bag Platform.
The average adult is approximately 5’-10” tall. If you attach the
platform so the round board is at 6’ high from the ground, with the
swivel and the speed bag attached, the bag will hang at an average
ideal height for adults when installed. You can adjust the height of
mounting the platform either up or down based on who will be using
the Speed Bag Platform.
MOUNTING INSTRUCTIONS
3

Tighten to very snug fit.
MOUNTING INSTRUCTIONS
4
drilled holes.
Note: Do not wrench bolts too tight. You may strip the plugs out of the
6.
After determining the ideal height to hang the frame, hold the frame
1.
firmly to the wall with two adults and level to assure its straight. Mark
all four holes with a pencil or punch for mounting.
Use a masonry drill bit starting with 7/16". Once hole is made, try and 2.
tap the plug into the hole by gently tapping on the end with a hammer.
If this does not work then try a 1/2” size. If you are using the 1/2” drill
bit then go half way and test the plug, keep testing until it can go in far
enough to expand properly.
Helpful hint: Be sure you drill straight. If not, this will make the
mounting process difficult in leveling the unit.
Once hole is drilled, take mounting plug and test the size of hole. You 3.
should not be able to slide the plug in without resistance.
Note: Its better to have a slightly smaller hole and use a hammer to
tap it in then it is to be able to slide it in and out with your hands.
Once the size of the hole is confirmed and you have tapped in all 4 4.
plugs, lift frame up to mounting plugs. This will require two people.
Start tightening the bolts systematically on frame (corner to corner to 5.
corner to corner) until bolts start to expand plug spacer.
Cement or Masonry Wall Mount Instructions
Note: If you are mounting to a cinder block wall and can clearly see the
blocks, try to position the holes you are about to drill so they will drill
through and into the cavity section of the blocks.

the platform can loosen slightly after use from the vibration of the speed bag
workouts.
Wood lag bolts sunk into studs
Note: It is best to secure brace board(s) into the wall first, and then attach
the platform into the brace board(s). The brace board(s) should be at least
¾” thick and secured into the wood studs in the wall that are 16” apart on
center. This provides the most stability and security for wood stud wall
attachments.
After securing the brace boards at the ideal height to hang the frame, 1.
hold the frame firmly to the wall with two people and level to assure its
straight. Mark all four holes with a pencil or punch for mounting.
Using a ¼” wood drill bit, drill the marked holes approximately ¾’ to 1” 2.
deep in the designated four holes. A hard wood brace board (like oak
or maple) will require a slightly larger pre-drilled hole, while a softer
wood brace board (like pine) will require a slightly smaller pre-drilled
hole to start.
Using two adults, raise the steel frame to the and align with the pre-3.
drilled holes. Loosely tighten the wood lag bolts.
Start tightening all four bolts going from corner to corner to corner until 4.
all are secured. Do not tighten one bolt all the way to secure and then
proceed to the next. Tighten each bolt gradually and continue working
around the four corners until all are secure.
Check the unit each time before using for security and stability. Sometimes
Wood Stud Wall Mount Instructions
Wood lag bolts provided sunk into wood
MOUNTING INSTRUCTIONS
5

6
SAFETY & PRECAUTIONS
RETAIN OWNER'S MANUAL FOR FUTURE REFERENCE.
free to contact TITLE Boxing for direction.
IMPORTANT: READ ALL INSTRUCTIONS CAREFULLY BEFORE USING THIS PRODUCT.
• This exercise equipment was designed and built for optimum safety. However certain operator
and warranty information in a safe, secure location for future access.
been completely assembled and all pieces and hardware are accounted for. Place the manual
: This item is shipped in an usual sized box. Please keep the box intact until the unit has Note
assembly of the unit. If you would like further clarification during your assembly process please feel
in line art diagrams at time of production. Changes as such will not affect the performance or
• Additional features on products may be added during seasonal production but may not be featured
to use the unit in incomplete form. Please contact TITLE Boxing if you have any questions.
• In the event you should discover a defective or missing part, do not use substitute parts or attempt
safety procedures:
precautions apply whenever you operate a piece of exercise equipment. Please note the following
Keep children and pets away from this equipment.1.
Always inspect equipment prior to use to assure the structual integrity. Some parts may need 2.
occasional maintenance due to wear and tear.
Lubricate moving parts occasionally, depending on amount of use.3.
Only one person at a time should use this piece of equipment for safety reasons.4.
If dizziness, nausea, chest pains or any other abnormal symptoms are experienced while using 5.
this equipment, stop the workout at once and consult a physician immediately.
Always use this equipment on a level surface. Do not use outdoors or near water.6.
Keep hands and feet away from any moving parts that are not intended to have body parts near 7.
them while in use.
Do not add or remove any parts or hardware required for this unit. Adding or removing any parts 8.
or hardware nullifies any expressed warranty.
Before using this unit, or any exercise equipment, always perform stretching exercises to warm up.9.
Use this equipment only for its intended use as described in manual.10.
Always wear appropriate workout clothing and athletic shoes when exercising.11.
Before beginning any exercise program, consult a physician.12.
It is recommended that you always use hand wraps and well-padded bag gloves every time you
13.
train on this training equipment.
WARNING:
Table of contents
Other Title Boxing Fitness Equipment manuals
Popular Fitness Equipment manuals by other brands

G-FITNESS
G-FITNESS AIR ROWER user manual

CAPITAL SPORTS
CAPITAL SPORTS Dominate Edition 10028796 manual

Martin System
Martin System TT4FK user guide

CIRCLE FITNESS
CIRCLE FITNESS E7 owner's manual

G-FITNESS
G-FITNESS TZ-6017 user manual

Accelerated Care Plus
Accelerated Care Plus OMNISTIM FX2 CYCLE/WALK user manual


