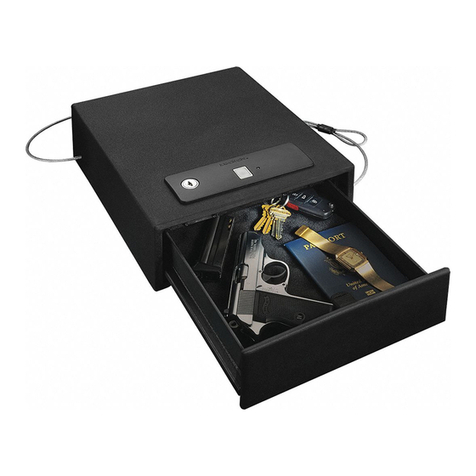
Stack-On QAS-1810-E User manual

40790-1803 114
SAFE FEATURES
1. Key Lock
2. Combinaon Buons
3. Baery Compartment (inside safe)
4. LED Light (inside safe)
5. Reset Buon (inside safe)
5
Your Electronic Safe Combination:
Serial #:
QAS-1810-E
IMPORTANT
NOTE: You can store your Key #, Serial # and
Combination on Stack-On’s SECURE website
– stackon.com under Customer Service.
Storing your Key # or Combination will provide
instant access to this important information should
you ever lose your keys or your combination.
Only you will have access to this information.
Record the serial number from the tag on the
door front.
Record your combinaon.
Keep keys and combinaon in a secure place
away from children.
DO NOT STORE YOUR KEYS OR COMBINATION
INSIDE THE SAFE.
(4) M6 x 20 mm (3/4” long) Screws
(4) Washers
Drill
Flat Head Screwdriver
10 mm Wrench
3/16" (5 mm) drill bit for drilling into wood
HARDWARE INCLUDED:
TOOLS REQUIRED:
Battery Disposal
Please dispose the used batteries
per municipal or provincial law.
®

REMOVING THE DRAWER
40790-1803 214
GETTING STARTED REMOVING THE DRAWER
Remove the foam drawer liner. Pull the drawer
all the way open. Locate the access hole.
Using a small screwdriver or pointed tool,
move the tab to the le and pull the drawer
off the slide as shown.
NOTE: You can also access the tab by reaching
under the drawer and moving the tab with your
finger. If the safe has been mounted to a
permanent shelf, you will have to remove the
drawer as described above.
When you first receive your safe you will
need to open the drawer with the key and
remove the drawer in order to install the
baeries. Baeries are included and are
located inside the drawer.
NOTE: This key has also been provided if the
baeries run low. If you lose your key, you may
purchase a replacement key by referencing the
serial number located on the front of the drawer.
See secon regarding replacement keys for
further informaon.
To open the safe, insert key into lock and
turn clockwise unl the drawer
automacally opens. NOTE: You must turn
the key back to the locked posion before
you are able to close and lock the drawer.

40790-1803 314
• For security you must program your own
combinaon aer opening the safe.
• Record your new combinaon on this form or
store your combinaon on our secure website
at stack-on.com under Customer Service. If you
write down your combinaon you must keep
this informaon in a secure place, away from
children, not inside the safe.
PROGRAMMING YOUR OWN
ELECTRONIC COMBINATION
1.
2.
Press the Reset Buon located inside the
safe. Two “beeps” will sound (if the sound is
turned on) and all 3 buons will flash blue
twice. You will have 5 seconds to begin
entering your combinaon or you will
have to start over.
Example: (RIGHT) - (LEFT) - (CENTER) -
(LEFT) - (RIGHT)
For each combinaon entry a “beep” will
sound (if the sound is turned on) and all the
buons will light up green. If you delay
more than 5 seconds between entries you
will have to start over from step 1. Aer
you have finished entering your
combinaon, you will have 5 seconds to
press the Reset Buon to record your new
combinaon or you will have to start over
from step 1.
Enter your own 3-8 buon combinaon by
pressing any combinaon of the 3 buons.
3. When you press the Reset Buon to
record your new combinaon, there will
be two “beeps” (if the sound is turned on)
and all 3 keys flash blue twice, indicang
your new combinaon has been recorded.
Reset Button
INSTALLING THE BATTERIES
NOTE: Do not mix old and new baeries.
Do not mix alkaline, standard or
rechargeable baeries.
NOTE: If the baeries are low the indicator light
will flash blue when you start scanning. Replace
with 4 new AA alkaline baeries as shown.
If your safe includes a shelf, remove it for beer
access to the baery compartment. Push the
baery cover locking tab with a screwdriver to
release the cover. Install the (4) AA alkaline
baeries as shown. Replace the cover by
inserng the rear tabs in the slots and snapping
the cover in place.

40790-1803 414
OPENING THE SAFE USING
YOUR COMBINATION
TURNING THE KEYPAD SOUND
OFF/ON
You can turn off the "Beep" sound of the
keypad by pressing all the buons at the same
me and holding for 3 seconds unl the green
light flashes.
To turn the "Beep" sound on, press the le and
middle buon at the same me and hold for 3
seconds unl the green light flashes.
Your safe comes with the "Beep" sound
turned on.
INTERNAL LED LIGHT
This safe includes an internal LED light that will
acvate when the correct combinaon is
entered and will remain on for 30 seconds.
Enter your combinaon using the buons.
The buons will light up green and there will be
one “beep” for every entry (if the sound is turned
on). If you entered the correct combinaon, the
buons will flash green and the door will open.
If the combinaon is incorrect the safe will beep
3X (if the sound is turned on) and the red light will
flash 3X. NOTE: You will have 2 seconds between
individual entries before the safe assumes you
have entered your complete combinaon.
If an incorrect security code is entered 3 mes
the light will flash red 5X and beep 5X (if the
sound is turned on) then alarm will sound for
10 seconds resulng in the safe being
automacally locked out for 1 Minute before
you can try your code again.
The safe will beep 1X (if the sound is turned on)
and the green light will flash 1X when the
lockout period is over.
If an incorrect security code is entered
1 addional me the light will flash red 5X and
beep 5X (if the sound is turned on) then alarm
will sound for 30 seconds resulng in the safe
being automacally locked out for 5 minutes
before the code can be tried again.
The safe will beep 1X (if the sound is turned on)
and the green light will flash 1X when the
lockout period is over.
To close the safe, push the door closed
unl locked.
Write your new combinaon on this instrucon
sheet or store your combinaon on our secure
website at stackon.com under Customer Service.
If you write down your combinaon you must
keep this informaon in a secure place, away
from children, not inside the safe.

STACK-ON PRODUCTS CO.
P.O. BOX 489, WAUCONDA, IL 60084
© 2018
STACK-ON PRODUCTS
40790-1803 514
NOTE: This safe is designed to be mounted to a
shelf. Aaching the safe with a cable to a fixed
object, as the sole means of securing the safe,
will compromise the safety and security
of the safe.
SELECTING A LOCATION
IMPORTANT
Keep keys in a secure place, away from children.
Keep this record of your serial number in a secure
place separate from your safe. To order a replacement
key set, follow the instrucons on the aached form.
To secure the case to a fixed object, loop the
cable around the object and place the cable’s
small end into the key hole on the side of the
safe while the drawer is open. Locking the
drawer will secure the cable end in the safe.
SECURING THE SAFE WITH THE CABLE
SECURING THE SAFE WITH HARDWARE
Using the template, mark the holes to be used.
Drill 3/16” diameter pilot holes.
Install the rear screws so there is just enough
room between the head of the screw and the
mounng surface for the key slots. (Figure 2)
Slide the unit into place and secure the front
mounng holes with the screws and washers.
(Figure 3)
FIGURE 2
The safe must be mounted to a shelf.
For opmal
safety and security, the safe should be installed
in an isolated, dry and secure area.
THE SAFE SHOULD ALWAYS BE KEPT OUT
OF THE REACH OF CHILDREN.
REINSTALLING THE DRAWER
To reinstall the drawer, align the drawer slide
members and push the drawer in unl it locks
in place.
NOTE ON LOCKING THE SAFE: The safe needs to
be in an upright posion, as shown in figure 1,
for the locking mechanism to funcon properly.
Failure to mount the safe in the corrrect
upright posion will compromise the safety
and security of the safe.
NOTE: This safe must be mounted to a shelf.
Failure to do so will compromise the safety and
security of the safe.
Do not use glass cleaners or sprays on this safe.
Clean with a damp cloth.
MAINTENANCE
FIGURE 3
FIGURE 1

40790-1803 614
®
Key / Combination / RFID Device Request
This is not a Registration Form
Verification of ownership is required in order to receive a replacement Key / Combination / RFID
devices for your security product.
In order to receive a replacement Key or Combination or RFID devices for your security product:
1. Please visit the following link: https//www.stack-on.com/customer-service/
2. Locate and click on the "Replace your lost keys/combination" icon
3. Follow the Instructions provided to receive your key, combination, or RFID devices
NOTE: You can store your Key #, Serial # and Combination on Stack-On’s SECURE website – stackon.com under
Customer Service. Storing your Key # or Combination will provide instant access to this important information
should you ever lose your keys or your combination. Only you will have access to this information.

40790-1803 714
LIMITED THREE YEAR WARRANTY
STEEL SAFES
Stack-On Products Co. (“Stack-On”) Steel Safes are warranted to be free from defects in material and
workmanship for a period of three (3) years from the date of original purchase by a consumer. This warranty
extends to the initial consumer only.
If you believe there is a defect in material or workmanship in your Steel Safe during the three-year warranty
period, please contact our customer service department online at stack-on.com/customer-service/
If Stack-On is properly notified during the three-year warranty period and, after inspection
confirms there is a defect, Stack-On will, at its sole option, provide repair parts or exchange
the product at no charge, or refund the purchase price of the product.
THIS WARRANTY DOES NOT COVER ANY PRODUCT, OR ANY PART OF ANY PRODUCT, WHICH HAS
BEEN SUBJECT TO EXCESSIVE USE, ACCIDENT, NEGLIGENCE, ABUSE OR MISUSE, INCORRECT
MAINTENANCE, ALTERATION OR REPAIR BY ANYONE OTHER THAN STACK-ON. IN ADDITION, THIS
WARRANTY DOES NOT COVER ANY ACCESSORIES OR PARTS USED WITH OR IN THE PRODUCT
WHICH ARE NOT INCLUDED WITH THE ORIGINAL PURCHASE.
THIS WARRANTY IS EXCLUSIVE AND EXPRESSLY IN LIEU OF ALL OTHER WARRANTIES
EXPRESSED OR IMPLIED INCLUDING THE WARRANTIES OF MERCHANTABILITY AND FITNESS
FOR A PARTICULAR PURPOSE, WHICH ARE HEREBY DISCLAIMED AND EXCLUDED. STACK-ON
SHALL NOT BE SUBJECT TO ANY OTHER OBLIGATIONS OR LIABILITIES. STACKON NEITHER
ASSUMES NOR AUTHORIZES ANY OTHER PERSON TO ASSUME FOR IT, ANY OTHER LIABILITY IN
CONNECTION WITH THE SALE OF STACK-ON’S STEEL SAFES.
STACK-ON WILL NOT, UNDER ANY CIRCUMSTANCES, BE LIABLE TO THE INITIAL CONSUMER FOR
ANY INCIDENTAL, CONSEQUENTIAL, SPECIAL, EXEMPLARY, OR PUNITIVE DAMAGES ARISING
OUT OF THE PURCHASE OR USE OF ANY STACK-ON PRODUCTS, INCLUDING THE SAFES.
STACK-ON’S LIABILITY FOR ANY BREACH OF THIS WARRANTY SHALL BE LIMITED EXCLUSIVELY
TO REPAIR OR REPLACEMENT OF THE DEFECTIVE PRODUCT, AS DESCRIBED ABOVE, OR A
REFUND OF THE PURCHASE PRICE OF THE PRODUCT.
IN NO EVENT SHALL STACK-ON’S OBLIGATION UNDER THIS WARRANTY EXCEED THEPRICE OF
THE PRODUCT.
THIS WARRANTY GIVES YOU SPECIFIC LEGAL RIGHTS. YOU MAY ALSO HAVE OTHER RIGHTS
WHICH VARY FROM STATE TO STATE.
February 2018
R

40790-1803 814
(4) M6 x 20 mm (3/4” long) Screws
(4) Washers
SAFE FEATURES
1. Cerradura con Llave
2. Botones de la combinación
3. Comparmiento para las baterías/pilas
(adentro de la caja fuerte)
4. LUZ LED (adentro de la caja fuerte)
5. Botón de reajuste
(adentro de la caja fuerte)
5
Instrucciones
QAS-1810-E
(4) M6 x 20 mm (3/4 "de largo) Tornillos
(4) Arandelas
®
NOTA: Usted puede almacenar su Numero de Llave y
su Nymero de Combinacion en el web site SEGURO
de - stackon.com bajo la opcion que dice Customer
Servicio Al almacenar su Numero de Llave y Numero
de Combinacion en este web site le proporcionara
acceso instantanio ha esta informacion importante en
caso de que usted pierda sus llaves o numero de
combinacion. Nadamas usted tendra acceso
ha esta informacion
IMPORTANTE
# Serie:
# Combinación Electrónica
Registre tambien el número de combinación.
Registre el número de serie que aparece en la
etiqueta en frente de la puerta.
Mantenga las llaves y la combinación en un lugar
seguro lejos de los niños.
NO GUARDE LAS LLAVES O SU NUMERO DE
COMBINACIÓN ADENTRO DE LA CAJA FUERTE.
Para Desechar las Baterías
Favor desechar las baterías usadas en
conformidad con la ley municipal o provincial.
perforar
Destornillador de cabeza plana
10 mm Llave
Taladro 3/16 "(5 mm) de bits para perforar madera
HARDWARE INCLUIDO:
HERRAMIENTAS NECESARIAS:

PARA COMENZAR ELIMINANDO EL CAJÓN
ELIMINANDO EL CAJÓN
Rere el forro del cajón de espuma. Tire del
cajón hasta el final abierto. Localizar el orificio
de acceso. Usando un pequeño destornillador o
una herramienta punaguda, mover la lengüeta
hacia la izquierda y re del cajón fuera de la
diaposiva como se muestra.
Cuando usted primero reciba su caja/cajon
fuerte usted necesitará que abrir el cajón con la
llave y quitar el cajón para instalar las
baterías/pilas. Las baterías/pilas son incluidas
y están situadas adentro del cajón.
NOTA: Esta llave se le ha proporcionado en caso
de que usted pierda o olvide que su código de
seguridad o si las baterías/pilas estan bajas. Si
usted pierde su llave, usted puede comprar una
llave de reemplazo refiriéndose al número de
serie situado en el frente de la puerta. Vease las
instruciones hacia el final de estas ojas con
respecto a llaves de reemplazo.
Para abrir la caja/cajón fuerte, inserte la llave en
la cerradura y de vuelta hacia la derecha hasta
que el cajón se abra automácamente. NOTA:
Usted debe dar vuelta de nuevo a la llave a la
posición original antes de que usted pueda
cerrar y trabar el cajon.
NOTA: Si la caja fuerte no esta montada, usted
puede tener acceso a la lengüeta alcanzando
por debajo del cajón y moviendo la lengüeta con
su dedo. Si la caja fuerte esta montada en una
localización donde el cajón se abre sobre una
superficie sólida, usted tendrá que quitar el
cajón como se describe anteriormente.
40790-1803 914

40790-1803 1014
NOTA: No mezcle las pilas nuevas con las
vejas. No mezcle las pilas alcalinas
con las recargables.
INSTALACIÓN DE LAS PILAS
Para reinstalar el cajón, alinee’ los miembros de
la diaposiva del cajón y empuje el cajón hacia
adentro hasta que se trabe en su lugar. Instale
las (4) baterias/pilas de alcalino AA como se
muestra. Regrese la cubierta insertando las
lengüetas posteriores en las ranuras y
precionando la cubierta levemente en su lugar.
NOTA: Si las baterías/pilas estan bajas la luz roja
se encenderá mientras que la caja fuerte se este
abriendo. Substuya con 4 batarias/pilas
nuevas de alcalino AA como se muestra.
Botón de
reajuste
• Para su propia seguridad usted debe de
programar su propia combinación después de
abrir la caja fuerte.
• Anote esta nueva combinación en este
formulario ni guarde la combinación de nuestro
sio web seguro en www.stack-on.com en
Servicio. Si usted escribe su combinación debe
mantener esta información en un lugar seguro,
lejos de los niños, no dentro de la caja fuerte.
PROGRAMADO SUS PROPIA
COMBINACIÓN ELECTRÓNICA
Ejemplo: (DERECHO) - (IZQUIERDO) -
(CENTRO) - (IZQUIERDO) - (DERECHO)
1.
2.
Pulse el botón Reset situado en el
interior de la caja fuerte. Dos "pidos"
sonará (si el sonido está acvado) y los
3 botones parpadean azul dos veces. Usted
tendrá 5 segundos para comenzar a
introducir su combinación o tendrás que
empezar de nuevo.
Para cada entrada de la combinación de un
"bip" sonará (si el sonido está encendido) y
todos los botones se iluminan en verde. Si
se demora más de 5 segundos entre las
entradas, tendrá que empezar de nuevo
desde el paso 1. Una vez que haya
terminado de introducir la combinación,
tendrá 5 segundos para presionar el botón
de reinicio para grabar su nueva
combinación o tendrás que empezar de
nuevo desde paso 1.
Escriba su propia combinación 3-8 botón
pulsando cualquier combinación de los 3
botones.
3. Al pulsar el botón de reinicio para grabar
su nueva combinación, habrá dos
"pidos" (si el sonido está acvado) y los
3 llaves parpadee en azul dos veces, lo
que indica que su nueva combinación ha
sido registrado.

40790-1803 11 14
Escriba su combinación con los botones. Los
botones se iluminan en verde y habrá un "beep"
para cada entrada (si el sonido está acvado). Si
ha introducido la combinación correcta, los
botones parpadean en verde y la puerta se abrirá.
Si la combinación es incorrecta la caja fuerte
pitará 3 veces (si el sonido está encendido) y la luz
roja parpadea 3 veces. NOTA: Usted tendrá 2
segundos entre las entradas individuales antes de
que el seguro asume que ha entrado en su
combinación completa.
Si se ingresa un código de seguridad incorrecto
3 veces, la luz parpadeará en rojo 5X y emirá
un pido 5X (si el sonido está encendido) y la
alarma sonará durante 10 segundos, lo que
significa que la caja fuerte se bloqueará
automácamente durante 1 minuto antes de
poder probar código de nuevo
La caja fuerte emirá un pido 1X (si el sonido
está encendido) y la luz verde parpadeará 1X
cuando finalice el período de bloqueo.
Si se ingresa un código de seguridad incorrecto
1 empo adicional, la luz parpadeará en rojo 5X
y emirá un pido 5X (si el sonido está
encendido) y la alarma sonará durante 30
segundos, lo que hará que la caja fuerte se
bloquee automácamente durante 5 minutos
antes de volver a intentar el código.
La caja fuerte emirá un pido 1X (si el sonido
está encendido) y la luz verde parpadeará 1X
cuando finalice el período de bloqueo.
Escriba su nueva combinación en esta hoja de
instrucciones o almacene su combinación en
nuestro sio web seguro en stackon.com en
Servicio al Cliente. Si escribe su combinación,
debe guardar esta información en un lugar
seguro, lejos de los niños, no dentro
de la caja fuerte.
LUZ LED INTERNA
Esta caja fuerte incluye una luz LED interna que
se acvará cuando se ingrese la combinación
correcta y permanecerá encendida durante
30 segundos.
Puede desacvar el "Beep" sonido del teclado
pulsando todos los botones al mismo empo y
la celebración durante 3 segundos hasta que la
luz verde parpadea.
Para acvar el "Beep" sonido, presione el botón
izquierdo y central al mismo empo y mantenga
pulsado durante 3 segundos hasta que la luz
verde parpadea.
ACTIVACIÓN DEL PITIDO
Su seguro viene con el sonido "Beep" encendido.
ABRIR LA CAJA FUERTE DE USAR SU
COMBINACIÓN

STACK-ON PRODUCTS CO.
P.O. BOX 489, WAUCONDA, IL 60084
© 2018
STACK-ON PRODUCTS
IMPORTANTE
Mantenga las llaves y el número de combinación en
un lugar seguro, lejos de los niños. Mantenga un
registro de su número de serie y la combinación en un
lugar seguro separado de su caja fuerte. Para pedir
una llave de recambio, siga las instrucciones en el
formulario adjunto.
SELECCIÓN DE LA UBICACIÓN
SUJETANDO LA CAJA/CAJON FUERTE
CON HERRAMIENTA
NOTA: Este seguro está diseñado para ser
montado en un estante. Colocación de la caja
fuerte con un cable a un objeto fijo, como único
medio de garanzar la seguridad, pondrá en
peligro la seguridad de la caja fuerte.
Para asegurar el portafolio a un objeto fijo,
coloque el cable alrededor del objeto y ponga
el extremo pequeño del cable en el agujero al
lado de la caja fuerte mientras que el cajón este
abierto. Fijando el cajón asegurará el cable en
la caja fuerte.
ASEGURANDO LA CAJA/CAJON
FUERTE CON EL CABLE
40790-1803 1214
Usando la planlla, marque los orificios que se
ulizarán. Taladre 3/16 "de diámetro piloto de
profundidad.
Instalar los tornillos posteriores así que hay
suficiente espacio entre la cabeza del tornillo y la
superficie de montaje para las ranuras principales.
(Figura 2)
Deslice la unidad en su lugar y apriete los agujeros
frontales de montaje con los tornillos y arandelas.
(Figura 3)
Figura 1
Figura 2
Figura 3
NOTA sobre el bloqueo del SEGURO: Las
necesidades de seguro para estar en una
posición vercal, como se muestra en la figura
1, para el mecanismo de bloqueo para
funcionar correctamente. El no montar la caja
en posición vercal corrrect pondrá en peligro
la seguridad de la caja fuerte.
La caja fuerte es para ser montado en un
estante. Por razones de seguridad y seguridad
ópmas, la caja de seguridad se debe instalar en
una zona aislada, seca y segura.
NOTA: Este seguro debe ser montado en un
estante . De no hacerlo, pondrá en peligro la
seguridad y la seguridad de la caja fuerte.
EL SEGURO SIEMPRE SE DEBE
MANTENERSE FUERA DEL
ALCANCE DE LOS NIÑOS.
REINSTALACIÓN DEL CAJÓN
Para reinstalar el cajón, alinee’ los miembros
de la diaposiva del cajón y empuje el cajón
hacia adentro hasta que se trabe en su lugar.

40790-1803 1314
®
Este no es un Formulario de Registro
Se requeire verificación de titularidad para que pueda recibir una Llave / Combinación / Dispositivo RFID
de repuesto para su producto de seguridad.
Para recibir una Llave de Repuesto o Combinación o Dispositivo RFID para
su producto de seguridad:
1. Favor visite el siguiente enlace: https//www.stack-on.com/customer-service/
2. Encuentre y haga clic sobre el icono para reponer sus llaves/combinación extraviados
("Replace your lost keys/combination")
3. Siga las instrucciones para recibir su llave, combinación, o dispositivos RFID.
NOTA: Usted puede guardar su No. de Llave, No. de Serie, y Combinación en el sitio web SEGURO de Stack-On –
stackon.com – bajo Atención al Cliente (“Customer Service”). Guardar su No. de Llave o Combinación le proveerá
acceso a esta información importante en caso que en cualquier momento se le pierdan sus llaves o su combinación.
Únicamente usted tendrá acceso a esta información
Solicitud de Llave / Combinación / Dispositivo RFID

40790-1803 1414
GARANTÍA LIMITADA DE TRES AÑOS
CAJAS FUERTES DE ACERO
Se garantiza que las Cajas Fuertes de Acero de Stack-On Products Co. (“Stack-On”) serán libres de
defectos de sus materiales y mano de obra por un periodo de tres (3) años a partir de la fecha de compra
original por un consumidor. Esta garantía se extiende al consumidor inicial únicamente.
Si usted cree que hay un defecto de los materiales o en la mano de obra de su Caja Fuerte de Acero de
durante el periodo de tres años de la garantía, por favor comuníquese con nuestro departamento de
servicio en stack-on.com/customer-service/
En caso que Stack-On sea notificado debidamente dentro del periodo de tres años de la garantía, y la
inspección posterior verifica que existe un defecto, a su discreción exclusiva, Stack-On proveerá piezas de
repuesto o intercambiará el producto sin cargo alguno, o reembolsará el precio de compra del producto.
ESTA GARANTÍA NO CUBRE NINGÚN PRODUCTO, NI CUALQUIER PARTE DE CUALQUIER PRODUC-
TO, QUE HAYA SIDO SUJETO A USO EXCESIVO, ACCIDENTE, NEGLIGENCIA, INSTALACIÓN INCOR-
RECTA, MANTENIMIENTO INCORRECTO, ALTERACIONES O REPARACIONES POR CUALQUIERA
QUE NO SEA STACK-ON. ADICIONALMENTE, ESTA GARANTÍA NO CUBRE NINGÚN ACCESORIO
NI PARTES USADAS CON O DENTRO DEL PRODUCTO QUE NO VIENEN INCLUIDOS CON LA
COMPRA ORIGINAL.
ESTA GARANTÍA ES EXCLUSIVA Y EXPRESAMENTE EN LUGAR DE TODA Y CUALESQUIER OTRA
GARANTÍA, SEA EXPRESA O IMPLÍCITA, INCLUYENDO GARANTÍAS DE COMERCIABILIDAD E
IDONEIDAD PARA PROPÓSITOS PARTICULARES, LAS CUALES SE DESCONOCEN Y EXCLUYEN
MEDIANTE LA PRESENTE. STACK-ON NO SERÁ SUJETO A CUALESQUIER OTRA OBLIGACIÓN O
RESPONSABILIDAD. STACK-ON NO ASUME, NI AUTORIZA QUE CUALQUIER OTRA PERSONA
ASUMA DE SU PARTE, CUALESQUIER OTRA RESPONSABILIDAD EN CONEXIÓN CON LA VENTA DE
LAS CAJAS FUERTES DE ACERO DE STACK-ON.
STACK-ON NO SERÁ RESPONSABLE, BAJO NINGUNA CIRCUNSTANCIA, ANTE EL CONSUMIDOR
INICIAL POR CUALESQUIER DAÑOS INCIDENTALES, CONSECUENCIALES, ESPECIALES,
EJEMPLARES, O PUNITIVOS, GENERADOS POR LA COMPRA O USO DE CUALQUIER PRODUCTO
DE STACK-ON, INCLUYENDO LAS CAJAS FUERTES.
LA RESPONSABILIDAD DE STACK-ON ANTE CUALQUIER VIOLACIÓN DE ESTA GARANTÍA SE
LIMITARÁ EXCLUSIVAMENTE A LA REPARACIÓN O REPOSICIÓN DEL PRODUCTO DEFECTUOSO,
TAL Y COMO SE DESCRIBE ARRIBA, O EL REEMBOLSO DEL PRECIO DE COMPRA DEL PRODUCTO.
BAJO NINGUNA CIRCUNSTANCIA PODRÁ LA OBLIGACIÓN DE STACK-ON BAJO ESTA GARANTÍA
EXCEDER EL PRECIO DEL PRODUCTO.
ESTA GARANTÍA LE BRINDA DERECHOS LEGALES ESPECÍFICOS. USTED TAMBIÉN PUEDE TENER
OTROS DERECHOS, QUE PUEDEN VARIAR DE UN ESTADO A OTRO.
02/2018
R
Table of contents
Languages:
Other Stack-On LCD Drawer manuals
Popular LCD Drawer manuals by other brands
Network Technologies
Network Technologies RACKMUX-V15 Installation and operation manual

Viking Range
Viking Range VEWD172 installation instructions
Rev-A-Shelf
Rev-A-Shelf 4WTCD-343FLSC installation instructions
CyberView
CyberView X117 manual
CyberView
CyberView DX117e user manual
CyberView
CyberView RP-HF117 user manual
