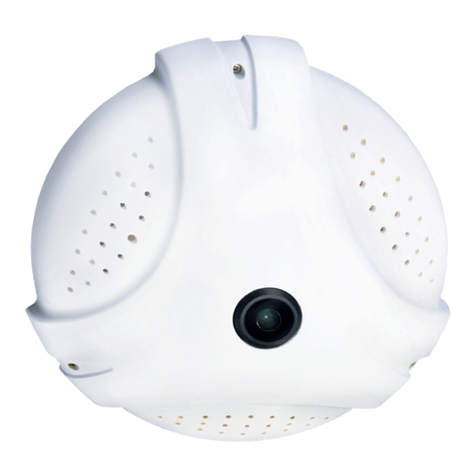
Stack ST542090-002 User manual

Stack Limited, Wedgwood Road, Bicester, Oxfordshire, OX26 4UL, England.
Tel.+44 (0) 1869 240404 Fax +44 (0) 1869 245500
WiFi Recording System
User Guide
(ST542090-002)

STACK Wireless Recording System
ST542090-002 i
WiFi Recording System
Purpose of this manual
This manual will help you install the WiFi Recording System. It explains how to set up the
WiFi system on your vehicle.
Please read this document in conjunction with the STACK Data Logging System User guide.
(ST542061)
Your team is responsible for the safe and correct installation of this system..
Standard Items supplied
Qty Description Part Number
1 WiFi Recorder module (incl. Battery) ST834-1
1 WiFi Radio Antenna + 3m lead ST390037
1 STACK Data Logging System User Guide ST542061
1 WiFi Recorder Guide (This document) ST542090

STACK Wireless Recording System
ST542090-002
ii
Contents.
WiFi Recording System............................................................................................................... i
Purpose of this manual............................................................................................................ i
Standard Items supplied ...................................................................................................... i
Contents. ................................................................................................................................ ii
System Introduction ................................................................................................................... 3
Configuration.............................................................................................................................. 3
Installation.................................................................................................................................. 3
WiFi Module Installation ......................................................................................................... 3
Antenna mounting position ................................................................................................. 4
Antenna Fixing Instructions................................................................................................. 4
Operation ................................................................................................................................... 6
WiFi Module Operation...........................................................................................................6
DataPro to WiFi Connection ............................................................................................... 6
Functions Available via the WiFi ......................................................................................... 6
Power off internal battery........................................................................................................ 6
Internal Battery management.............................................................................................. 7
WiFi Network configuration.....................................................................................................7
Other Pit lane WiFi systems ................................................................................................... 8
WiFi Channel Allocation...................................................................................................... 8
Technical Specifications............................................................................................................. 9
Wireless Recording System ................................................................................................... 9
Analogue sensor inputs ..........................................................................................................9
Pulse sensor inputs ................................................................................................................ 9
Sensor power output (S5V ) ................................................................................................... 9
Lap Marker input (LAP ) .........................................................................................................9
Battery power input B+ & B- ................................................................................................... 9
Internal Battery pack............................................................................................................. 10
WiFi ...................................................................................................................................... 10
Antenna specification:....................................................................................................... 10
Stack is a registered trademark of Stack Limited.
Information in this publication is subject to change without notice and does not represent a commitment on the part of Stack
Limited. No responsibility is accepted for error or omission. Copyright 2007 Stack Limited
United Kingdom Telephone Numbers:
Sales: +44 (0)1869 240404
Tech Support: +44 (0)1869 240420
Fax: +44 (0)1869 245500

STACK WiFi Recording System
ST542090-002
3
System Introduction
The Wireless Recording system has the following main items:
1. A WiFi Recorder Module which is permanently fitted in the vehicle cockpit and away from
water ingress.
2. The WiFi radio antenna, which is permanently fitted to the vehicle roof & 3.0m(10ft) lead.
3. A Network harness, which is installed from the 4w Mil connector to other STACK Displays
or sensor modules. The network harness includes a 1.5m cable terminated in a 4Way Jack
connector. Mount the Jack socket for easy access for connection to the CAN-USB adapter
harness. This is required to configure the system on the vehicle via the DataPro Designer
application.
4. Power connection harness. This harness is required to power the WR module.
IMPORTANT: This must be wired such that power is applied either:
a) Only to this connection.
or...
b) When used with other STACK modules that power is applied simultaneously to all
modules at all times.
Configuration
The Wireless Recording Module can be included as part of a User Defined System (UDS).
To create a configuration the includes to a WR module in Designer select:
1. File -> New to create a new configuration for your system.
2. Open the ‘Select your system’ dialogue, and at the bottom of the list choose ‘UDS’.
3. Open the ‘Modules’ dialogue and in the Recorder section select either WR or WSR
4. Select all other modules and displays that comprise your system.
5. Once all of your system modules are defined then click ‘Continue’ to proceed to the
detailed configuration of the system.
Installation
WiFi Module Installation
The housing MUST be orientated so that the internal 3 axis g sensor can measure accurate
Lateral, Longitudinal & Vertical g. To ensure accurate g values, the module should be aligned
exactly with the three main axis of the vehicle.
The module must be secured to a rigid surface with easy access to the connectors on the
module on the top face.

STACK WiFi Recording System
ST542090-002
4
WiFi Car Antenna installation
Antenna mounting position
•The antenna must be mounted as high as possible on the vehicle.
•The mounting position must give clear line of sight between the vehicle antenna & the pit
lane antenna when the vehicle is travelling in the pit lane.
•The surface to which the antenna is attached should be flat. A maximum contour of 12mm
(0.5”) is allowed within a diameter of 0.2m (8”).
•The mounting surface should be horizontal to within +/- 10deg max.
•The antenna should be adjusted to keep the antenna within +/- 5deg of vertical.
•No structural material or bodywork, should be higher than 25mm (1”) within 0.6m (2ft)
radius of the antenna base.
•The antenna must be mounted so that the connecting cable to the STACK module is 3m
(10ft) or less.
•The connecting cable to the STACK module must be kept away from water ingress.
•Minimum distances to any other radio or telemetry antenna must be greater than 0.5m.
(18”)
Antenna Fixing Instructions.
The Antenna mount is suited for panel / roof mounting. The Antenna requires a minimum
90mm (3.5”) diameter metal ground plane to be fixed under the antenna. If the fixing panel is
non metallic then a metal disk of the required diameter must be fitted under the panel.
Installation can be done in an 18mm (0.71”) dia. hole with access from the outside only if
required.
The Whip antenna should be tightened with a 9mm fork spanner.
The mount has a bendable section (+/- 15deg) to adjust the antenna into an upright position.
The antenna cable must be routed from the antenna to the Monitor module as follows:
•Minimum allowed bend radius is 30mm. (1.25”)
•Take care not to over tighten any cable ties such that they deform (pinch) the cable.
•Should be secured in such a way as to stop mating connectors from being pulled apart.
•Such that it will not be trapped or crushed by any other item on the vehicle.
•It is essential to ensure that the Monitoring System and harnesses are NOT mounted in a
position which is close to any devices, or associated wiring, similar to the following:
Suggested Wiring Clearances Min Clearance
Ignition HT & coil leads 75mm (3”)
Radio transmitters 50mm (2”)
Fast switching inductive loads like fuel injectors,
hydraulic solenoids.
50mm (2”)
Any powerful source of heat Shield with reflective material

STACK WiFi Recording System
ST542090-002
5
Mount hole dimensions (mm) as shown:
Installation sequence shown for fixing into a metal panel:
NB, Fixing to a non metallic panel:
Remember to place the metal ground plane disk under the panel before commencing stage 2.
Recommended Installation Torque 3.5Nm
The completed antenna installation is approx. 140mm (5.5”) high

STACK WiFi Recording System
ST542090-002
6
Operation
WiFi Module Operation
DataPro to WiFi Connection
Selecting the required Logger connection using the Active Connection Dropdown List.
Both DataPro and DataPro Designer now have an
Active Connection dropdown list within their
respective toolbars. All the Recorder menu options in
DataPro require you to have an active connection
selected in this dropdown before communication can
take place. This also applies to the Calibrate, Chat
and Upload options within DataPro Designer.
On standard systems, when the CAN USB adapter is plugged into the PC, the active
connection should show Canusb1.
On systems, where WiFi recorders are being used, the dropdown list will also show the vehicle
names of the WiFi recorders you have registered in the Download & Registration Manager.
WiFi recorders that have been registered but are currently out of range are shown in red on
this dropdown list and cannot be selected until the list item becomes black showing that the
WiFi recorder is within range.
Functions Available via the WiFi
The following WiFi functions are fully supported from the DataPro -> Recorder:
•Download Erase Memory… [F5]
•Download Save Memory… [F6]
---------------------------------------------------------
•Erase Memory…
•Recorder Status… Ctrl R
---------------------------------------------------------
•Start Logging… [F7]
•Stop Logging… [F8]
---------------------------------------------------------
•Recorder Status… Ctrl R
Refer to the DataPro Quick Start Guide & the DataPro User Guide supplied on the CD for a full
description of how these functions operate.
The following WiFi functions are fully supported from the DataPro -> Wireless menu:
•Power off internal battery…
•Prevent connection…
•Connection status log…
Power off internal battery
When the module is powered from the internal battery only, then use this option to power off
the module remotely via the WiFi.

STACK WiFi Recording System
ST542090-002
7
Prevent connection
Use this option to stop any communication to the module remotely via the WiFi.
Connection status log
This option will show a historical log of any connections made to the current WiFi recorder.
The following functions are NOT fully supported via a WiFi connection:
•Data Monitor…
•Data Monitor (Raw)…
•Chat Terminal…
•Network information…
Note: The above functions will respond with information from the WR module ONLY and NOT
from any other modules comprising the system.
Internal Battery management
The module contains an internal battery pack to provide power temporarily once the vehicle
power is removed. This allows the module to be downloaded via the Wifi even with power
removed. The internal power will automatically turn off under the following conditions:
•Recorded data present then power off after 10 min from Ignition off.
•No Recorded data present then power off after 5 min from Ignition off.
•Internal battery below 9.0 volts then power off immediately.
Notes:
a) The module will not power off when the vehicle power is available.
b) Depending on the normal running cycle of the vehicle, it may be necessary to fully recharge
the internal battery by connecting to a 13 to 20v DC supply for more than 15 Hr.
WiFi Network configuration
Configuring the WR module to connect to your WiFi network is covered in the DataPro Manual
Supplement. ST542085.
IMPORTANT When the WiFi network configuration is completed the WiFi module will need to
have its TAG & PIN code Authorised. This process MUST be performed using the wired CAN
connection and NOT via the WiFi connection.

STACK WiFi Recording System
ST542090-002
8
WiFi Antenna Safe operating distance
RF safety is always a concern when working around microwave radiation. The FCC has set
safety standards that are meant to guard against potentially harmful RF fields. In a "controlled"
environment (where the people near the antenna know of the hazards), the FCC limit is 5.0
mw/cm2. In an "uncontrolled" environment (where the people near the antenna are unaware of
the hazard), the FCC limit is 1.0 mw/cm2.
IMPORTANT Do NOT touch the antenna when the WiFi is operating. Based on the FCC
"uncontrolled" environment ‘ limit: Keep a Minimum safe distance of 25mm (1”) from the
antenna.
Other Pit lane WiFi systems
IMPORTANT
The use of WiFi systems may be restricted or prohibited in accordance with the Regulations
of the Championship. Please refer to the Regulations.
WiFi Channel Allocation.
WiFi channels are allocated a channel number from 1 to 14 in Europe & 1 to 11 in the U.S.A.
The STACK system is allocated to channel 6. (default).
However each WiFi network occupies the 2 channels either side of the chosen channel, 5 in
total, as shown in the diagram below.
IMPORTANT In practice the best use of ALL WiFi channels is to operate on channels 1,
6 and 11, ONLY. As follows:-
For adjacent pit garages use the WiFi Channel sequence 1, 6 ,11, 1, 6, 11 … etc. to minimise
the interference between networks.

STACK WiFi Recording System
ST542090-002
9
Technical Specifications
Wireless Recording System
Power supply 9 to 18v DC @ 0.3A typ 1Amp max (fuse @ 5A )
Working Temp. -20 to +70 Degrees Centigrade
Size 180mm x 160mm x 50mm (7” x 6¼ x 2”)
Weight 1.0kg
Vibration 30G, 50 to 2000 Hz, 1 Octave / min, 36 Hours
Humidity 0 to 100% condensing (Fully sealed)
Immersion IP67
Analogue sensor inputs
Interface characteristics
Input Description Value Units & Notes
I/p Impedance >1.0 M Ohms (to +6.25V)
Input voltage measurement range 0 to +5.0 Volts min/max
Input over-voltage range -2 to +18 Volts min/max
Input resolution 10bit (~5mV) 0-1023
Pulse sensor inputs
Interface characteristics
Input Description Value Units & Notes
Input pull-up 18mA to +6.25V
Input edge threshold 5.5 +/-0.5 Volts (Note: Add 390R in series for 2.25v)
Input over-voltage range -2 to +18 Volts min/max.
Max i/p Frequency 2.5 KHz
High period pulse width 0.1 ‘mS Min
Low period pulse width 0.1 ‘mS Min
Sensor power output (S5V )
Interface characteristics
Output Description Value Units & Notes
Sensor 5v supply voltage 5.0 +/- 0.05 Volts
Sensor 5v supply current 100.0 mA max
Lap Marker input (LAP )
Interface characteristics
Description Value Units & Notes
I/p Impedance 5.0 +/- 0.5 k Ohms (to +5V)
Negative edge threshold 2.5 +/-0.5 Volts
Input over-voltage range -2 to +18 Volts min/max
High period pulse width 5 mS Min
Low period pulse width 5 mS Min
Lap Marker blanking period 10 Seconds min
Battery power input B+ & B-
Interface characteristics
Input Description Value Units & Notes
Input voltage operating (B+ & B-) 9 to +20 Volts min/max
Input over-voltage range -20 to +25 Volts min/max
Supply current 0.3 – 1.0 Amps typical – Max (fuse at 5A )

STACK WiFi Recording System
ST542090-002
10
Internal Battery pack
Interface characteristics
Input Description Value Units & Notes
Input voltage for charging 13 to +20 Volts min/max
Internal battery voltage 9.6 Volts typical
Battery capacity 0.6 AHr @ 10 – 30 DegC
Charging current 0.06 Amps typical
Full charge time 15 Hr. typical
Discharge time 3 Hr. typical. Dependant on WiFi activity.
WiFi
Interface characteristics
Description Value Units & Notes
Transmitted power 14 +/- 1 DBm
Receiver sensitivity -82 to –93 dBm 11Mb to 1Mb respectively
Module connector SMA (R) Reverse SMA Jack (fixed receptacle with pin)
Network standard 802.11B
Frequency range 2.412 – 2.484 GHz
Antenna specification:
Parameter Value
Antenna type Colinear mobile whip antenna
Frequency 2.4 GHz
Transmitted EIRP 17dBm max 16dBm (25mW) typ
Polarisation Vertical Vertical
Gain 2 dB
Height 140mm (5.5”)
Weight 34g (1.2oz)
Mounting hole 18mm (0.75”)
Footprint 32mm (1.26”)
Ground plane diameter 90mm (3.5”) minimum
Minimum Safe working distance 25mm (1.0”)
Table of contents
