Stadler Form Robert User manual

Robert
Gebrauchsanweisung
Operating instructions
Mode d‘emploi
Инструкция по эксплуатации

2
Robert
1
5
6
7
8
15
16
17
18
9
4
12
11
10
14
13
3

Gratulation! Sie haben soeben den aussergewöhnlichen Luftwäscher
(Luftreiniger und Befeuchter) ROBERT erworben. Er wird Ihnen viel Freude
machen und die Raumluft für Sie verbessern.
Wie bei allen elektrischen Haushaltsgeräten wird auch bei diesem Gerät zur
Vermeidung von Verletzungen, Brand- oder Geräteschäden besondere Sorg-
falt verlangt. Bitte studieren Sie die vorliegende Betriebsanleitung vor der
Inbetriebnahme und beachten Sie die Sicherheitshinweise auf dem Gerät.
Gerätebeschreibung
Das Gerät besteht aus den folgenden Hauptkomponenten:
1. Luftwäscher Gehäuse mit Motor
2. Luftwäscher Wasserwanne
3. Netzkabel für die Stromversorgung
4. Ein-/Aus-Schalter
5. Wassertank mit Tragegriff
6. Wassertankdeckel
7. Antikalkkartusche (optional)
8. Verdunsterscheiben
9. Bewegungssensor (Bewegung über dem Display aktiviert Tasten)
10. Taste für die Wahl der gewünschten Luftfeuchtigkeit
(Hygrostat: 35-65% und Dauerbetrieb «CO»), Anzeige «Air Humidity»
11. Taste für die Wahl der Ventilator Geschwindigkeitsstufe
(1, 2, 3, 4 = Turbo), Anzeige «Speed»
12. Taste für die Modus-Wahl (Auto-Modus, Nacht-Modus,
Reinigungs-Modus)
13. Anzeige des gewählten Modus («Auto Mode», «Night Mode»,
«Clean Mode»)
14. Symbol für niedrigen Wasserstand, Anzeige «No Water»
15. Duftstoffbehälter
16. Ionic Silver Cube™
17. Lufteintritt
18. Luftaustritt
Wichtige Sicherheitshinweise
Bitte lesen Sie die Gebrauchsanleitung genau durch, bevor Sie das Gerät
das erste Mal in Betrieb nehmen und bewahren Sie sie zum späteren Nach-
schlagen gut auf, geben Sie sie ggf. an den Nachbesitzer weiter.
•Für Schäden, die durch Nichtbeachten dieser Gebrauchsanleitung entste-
hen, lehnt Stadler Form jegliche Haftung ab.
•Das Gerät ist nur im Haushalt für die in dieser Gebrauchsanweisung
beschriebenen Zwecke zu benutzen. Ein nicht bestimmungsgemässer
Gebrauch sowie technische Veränderungen am Gerät können zu Gefahren
für Gesundheit und Leben führen.
•Dieses Gerät kann von Kindern ab 8 Jahren und Personen mit einge-
schränkten körperlichen, sensorischen oder geistigen Fähigkeiten, aber
auch von unerfahrenen und unwissenden Personen verwendet werden,
sofern diese das Gerät unter Aufsicht verwenden oder von einer anderen
Person über die sichere Verwendung des Gerätes unterwiesen wurden
und sich der damit verbundenen Gefahren bewusst sind. Kinder sollten
nicht mit dem Gerät spielen. Kinder sollten das Gerät nur unter Aufsicht
reinigen und pflegen.
Deutsch

5. Ist kein Modus gewählt, kann die gewünschte Luftfeuchtigkeit (35-
65% und Dauerbetrieb «CO») eingestellt werden: Drücken Sie die Taste
«Air Humidity». Die Anzeige blinkt. Nun können Sie durch mehrmaliges
Drücken der Taste «Air Humidity» die gewünschte Luftfeuchtigkeit in
5er Schritten wählen (Anzeige blinkt während Eingabe). Nach ca. 10
Sekunden ohne Eingabe wird der gewählte Wert gespeichert. Die An-
zeige wechselt auf die aktuell gemessene Luftfeuchtigkeit.
Info: Wenn die gewünschte Luftfeuchtigkeit erreicht ist, stoppt das Ge-
rät und die Anzeige blinkt. Die aktuelle Luftfeuchtigkeit wird dann ca.
alle 30 Minuten gemessen (der Ventilator läuft für 1-2 Minuten). Sinkt
die gemessene aktuelle Luftfeuchtigkeit unter den eingestellten Wert,
beginnt das Gerät wieder zu befeuchten.
6. Die Befeuchtungsleistung hängt von der Geschwindigkeit des Venti-
lators ab. Ist kein Modus eingestellt, kann die Geschwindigkeitsstufe
verändert werden: Drücken Sie die Taste «Speed» (ev. zuerst Anzeige
durch Handbewegung aktivieren). Die Anzeige blinkt. Durch mehrmali-
ges Drücken der Taste «Speed» wählen Sie nun die Geschwindigkeits-
stufe 1, 2, 3 oder 4 (Turbo). Die Stufen werden durch horizontale Balken
angezeigt (z.B. 1 Balken = Stufe 1).
7. Robert verfügt über 3 verschiedene vorprogrammierte Modi: Auto-
Modus («Auto Mode»), Nacht-Modus («Night Mode») und Reinigungs-
Modus («Clean Mode»). Drücken Sie die Taste «Mode» (ev. zuerst
Anzeige durch Handbewegung aktivieren). Die Anzeige blinkt. Durch
mehrmaliges Drücken der Taste «Mode» wählen Sie den Modus aus:
– «Auto Mode»: Robert hält die Luftfeuchtigkeit automatisch bei 45%.
Je tiefer die aktuelle Luftfeuchtigkeit ist, desto höher wird die Ge-
schwindigkeitsstufe des Ventilators automatisch eingestellt (z.B. unter
30% = Stufe 3 , von 31% bis 40% = Stufe 2, von 41% bis 45% = Stufe 1).
– «Night Mode»: Die Beleuchtung der Anzeige wird auf ein Minimum re-
duziert und die Geschwindigkeit des Ventilators auf Stufe 1 eingestellt.
Die gewünschte Luftfeuchtigkeit und die Ventilatorgeschwindigkeit
können manuell verändert werden.
– «Clean Mode»: Dieser Modus wird benutzt, um das Gerät zu reinigen
und zu entkalken. Dabei drehen die Verdunsterscheiben, aber der Ven-
tilator läuft nicht. Somit wird keine Luft in den Raum geblasen. Nach 20
Minuten im Reinigungs-Modus stoppt das Gerät und die «Clean Mode»
Anzeige blinkt (siehe Kapitel «Reinigung»).
8. Sie können mit Robert Duftstoffe im Raum verteilen. Wir bitten Sie im
Umgang mit Duftstoffen äusserst sparsam zu sein, da eine zu grosse
Dosierung zu Fehlfunktionen und zu Schäden am Gerät führen kann.
Zur Verwendung von Duftstoffen entnehmen Sie den Wassertank (5)
und ziehen den Duftstoffbehälter (15) aus dem Gerät. Träufeln Sie die
Duftstoffe direkt auf die Watte im Behälter. Geben Sie maximal 1-2
Tropfen des Duftstoffes in den Behälter.
Tipp: Um den Duftstoff zu wechseln, ziehen Sie den Duftstoffbehälter
aus dem Gerät, entfernen Sie die Watte und reinigen Sie den Behälter
mit Seife. Sie können nun ein neues Watte-Pad (handelsübliche Watte)
einsetzen und mit Duftstoff beträufeln.
9. Sobald das Symbol «No Water» aufleuchtet (14), muss Wasser nach-
gefüllt werden. Entfernen Sie dafür den Wassertank (5) und füllen Sie
diesen mit sauberem und kaltem Leitungswasser. Nach dem Einsetzen
•Schliessen Sie das Kabel nur an Wechselstrom an. Achten Sie auf die
Spannungsangaben auf dem Gerät.
•Keine beschädigten Verlängerungskabel verwenden.
•Das Netzkabel nicht über scharfe Kanten ziehen oder einklemmen.
•Den Stecker nie am Netzkabel oder mit nassen Händen aus der Steckdose
ziehen.
•Das Gerät nicht in unmittelbarer Nähe einer Badewanne, einer Dusche
oder eines Schwimmbeckens benutzen (Mindestabstand von 3 m einhal-
ten). Gerät so aufstellen, dass Personen das Gerät von der Badewanne
aus nicht berühren können.
•Gerät nicht in der Nähe einer Wärmequelle aufstellen. Das Netzkabel
keiner direkten Hitzeeinwirkung (wie z.B. heisse Herdplatte, offene
Flammen, heisse Bügelsohle oder Heizöfen) aussetzen. Netzkabel vor Öl
schützen.
•Darauf achten, dass das Gerät beim Betrieb eine gute Standfestigkeit be-
sitzt und nicht über das Netzkabel gestolpert werden kann.
•Das Gerät ist nicht spritzwassergeschützt.
•Das Gerät ist nur zur Verwendung in Innenräumen geeignet.
•Das Gerät nicht im Freien aufbewahren.
•Das Gerät an einem trockenen und für Kinder unzugänglichen Ort aufbe-
wahren (einpacken).
•Wenn das Netzkabel beschädigt ist, muss es vom Hersteller oder in einer
vom Hersteller zugelassenen Werkstatt oder von ähnlich qualifizierten
Personen ersetzt werden, um Schäden zu vermeiden.
•Vor jeder Wartung, Reinigung und nach jedem Gebrauch das Gerät aus-
schalten und das Netzkabel von der Steckdose trennen.
•Der Wasserstand darf die Füllmarke ‹max› nicht überschreiten.
Inbetriebnahme/Bedienung
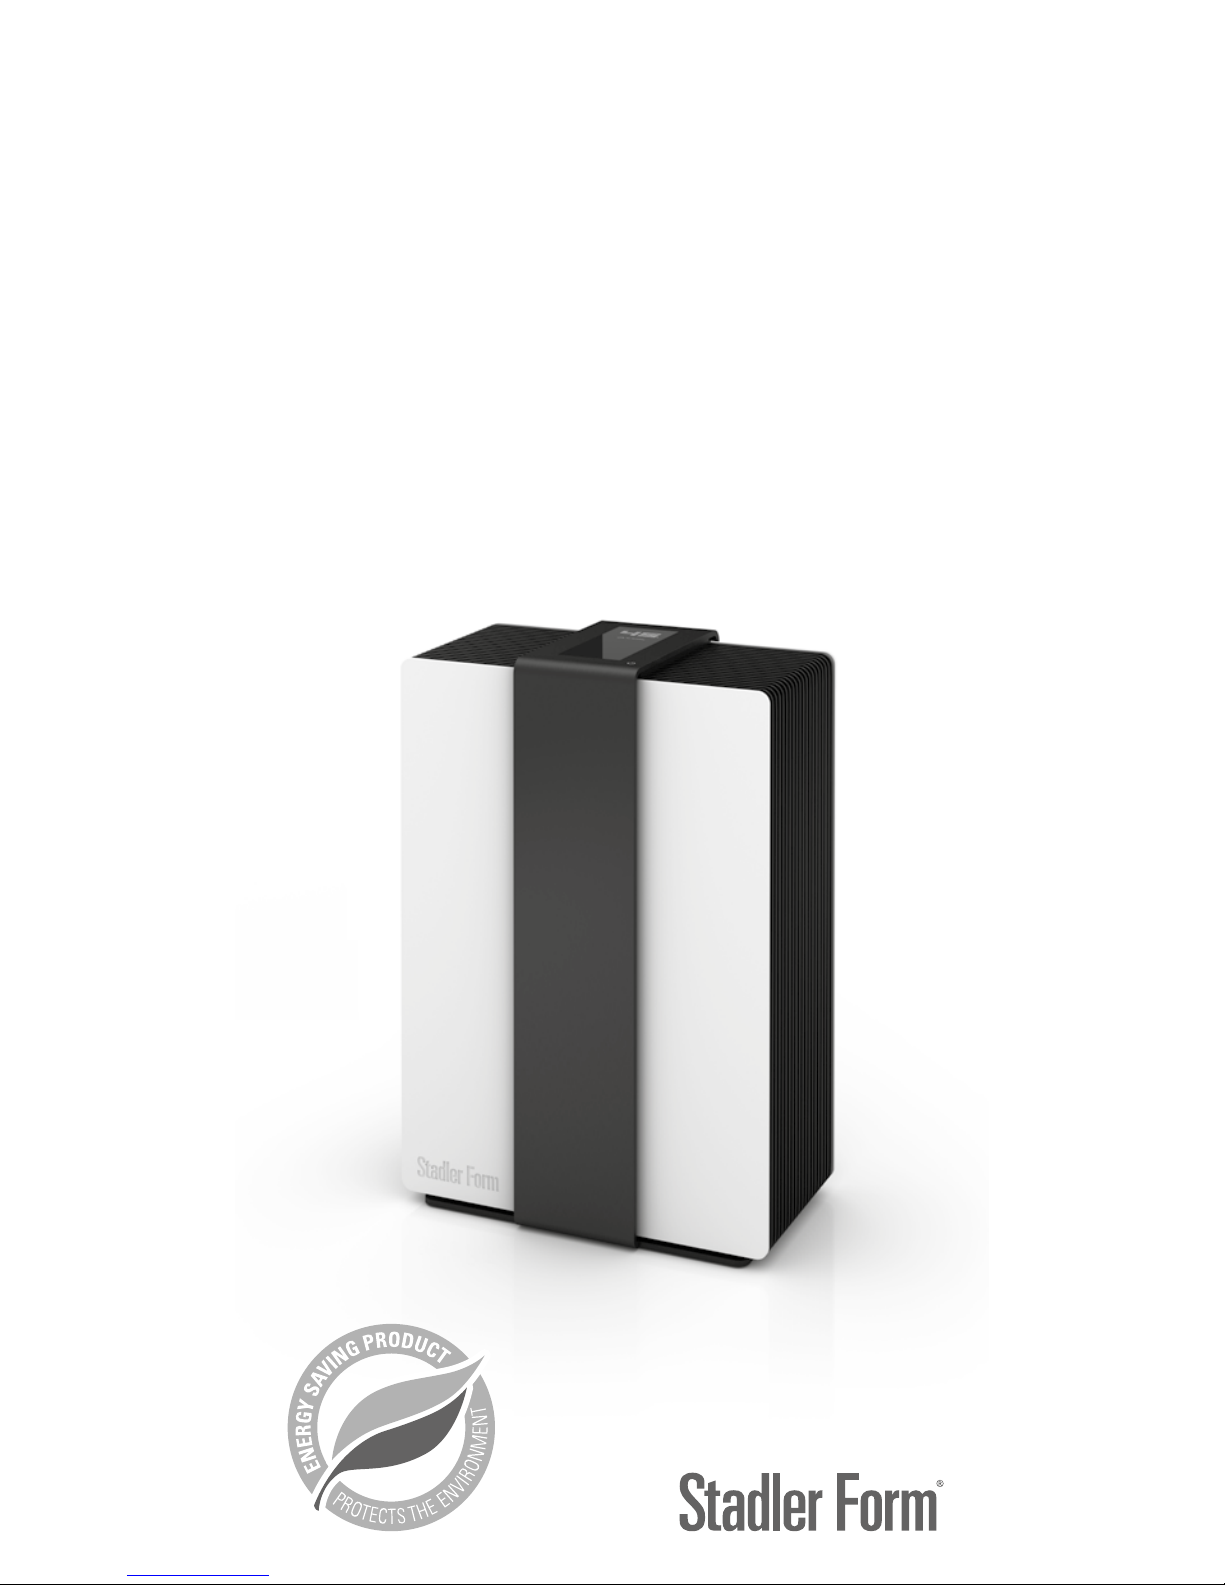
1. Stellen Sie Robert an den gewünschten Platz auf einen flachen Unter-
grund. Schliessen Sie das Netzkabel (3) an eine geeignete Steckdose
an.
2. Entnehmen Sie den Wassertank (5), indem Sie diesen am Griff halten
und leicht nach hinten ziehen. Schrauben Sie den Wassertankdeckel (6)
ab und füllen Sie den Wassertank mit sauberem und kaltem Leitungs-
wasser. Schrauben Sie anschliessend den Deckel wieder an den Was-
sertank. Platzieren Sie den Wassertank auf der Wasserwanne (2). Die
Wasserwanne füllt sich nun langsam mit dem Wasser aus dem Was-
sertank. Wichtig: Bitte transportieren Sie Robert nicht, solange dieser
mit Wasser gefüllt ist. Das Wasser könnte überschwappen.
3. Schalten Sie Robert durch Drücken des Ein-/Aus-Schalter ein (4). Die
aktuelle relative Luftfeuchtigkeit in % wird im Display angezeigt («Air
Humidity»). Leuchtet die «No Water» Anzeige (14), ist zu wenig Wasser
im Gerät. Die Geschwindigkeitsstufe ist auf die niedrigste Stufe und
die gewünschte Luftfeuchtigkeit auf Dauerbetrieb eingestellt.
4. Stellt der Bewegungssensor während 10 Sekunden keine Bewegung
fest, erlischt die Beleuchtung der Tasten und der Symbole (nur aktuelle
relative Luftfeuchtigkeit in % und «Air Humidity» werden angezeigt).
Aktivieren Sie die Tasten durch eine Handbewegung über dem Display
(9). Alternativ kann das Display auch durch Berührung mit der Hand im
unteren Bereich aktiviert werden.

des Wassertanks nimmt das Gerät nach ein paar Sekunden seinen Be-
trieb automatisch wieder auf.
10. Möchten Sie das Wasser während dem Betrieb nachfüllen, können Sie
den Wassertank entfernen und auffüllen. Das Gerät wird mit dem ver-
bleibenden Wasser mind. 30 min. weiter funktionieren. Setzen Sie den
Wassertank in dieser Zeitdauer wieder ein und das Gerät kann seinen
Dienst ohne Unterbruch fortführen.
Wichtiger Hinweis
Die Befeuchtung mit einem Luftwäscher nimmt etwas Zeit in Anspruch. Ein
Luftwäscher funktioniert nach dem Verdunstungsprinzip. Dabei nimmt die
Luft nur so viel Wasser auf, wie sie bei der aktuellen Temperatur benötigt
(selbstregulierende Befeuchtung). Das heisst, es kann mehrere Stunden
dauern, um ein messbares Befeuchtungsergebnis zu erreichen. Sollten Sie
den Luftwäscher in einer sehr trockenen Umgebung in Betrieb nehmen,
empfehlen wir Ihnen das Gerät in den ersten Tagen auf Dauerbetrieb («Air
Humidity») und Stufe 3 oder Turbo («Speed») zu betreiben, um die Luftfeuch-
tigkeit wirksam ansteigen zu lassen. Dabei spielt die Raumgrösse und die
Lüftungsintervalle ebenfalls eine Rolle.
(Siehe auch www.stadlerform.ch/faq)
Reinigung
Vor jeder Wartung, Reinigung und nach jedem Gebrauch das Gerät ausschal-
ten und das Netzkabel (3) von der Steckdose trennen.
Achtung: Das Gerät nie ins Wasser tauchen (Kurzschlussgefahr).
•Zur äusseren Reinigung mit einem feuchten Lappen abreiben und danach
gut trocknen.
•Zur internen Reinigung den Wassertank (5) abnehmen und dann die Was-
serwanne (2) mit den Verdunsterscheiben (8) herausziehen (Griff auf der
Unterseite der Wanne).
•Spülen Sie die Wasserwanne (2) und die Verdunsterscheiben (8) einmal
pro Woche mit sauberem Wasser aus, um die aus der Luft gereinigten
Schmutzpartikel auszuwaschen.
•Reinigen Sie die Wasserwanne (2), Verdunsterscheiben (8) und den
Wassertank (5) alle 2 Wochen gründlich mit einer weichen Bürste oder
Schwamm und warmem Wasser. Bei Kalkablagerungen in der Wasser-
wanne oder Wassertank verwenden Sie mit Wasser verdünntes Entkal-
kungsmittel (Mischverhältnis nach Herstellerangaben). Wanne und Tank
danach gut mit Leitungswasser ausspülen.
•Die Verdunsterscheiben (8) je nach Wasserhärtegrad ca. alle 4 Wochen
entkalken. Entleeren Sie zuerst das Restwasser aus der Wasserwanne
(2). Danach Entkalkungsmittel (Mischverhältnis mit Wasser nach Herstel-
lerangaben) bis 2 cm unter der Wannenkante einfüllen (die Verdunster-
scheiben dabei in der Wanne lassen). Schieben Sie nun die Wasserwanne
zurück in das Gerät (Tank muss nicht eingesetzt werden). Aktivieren Sie
die Tasten mit einer Handbewegung über dem Display. Drücken Sie die
«Mode» Taste dreimal, um den Reinigungs-Modus zu starten. Das Symbol
«Clean Mode» leuchtet. Dabei drehen die Verdunsterscheiben, aber der
Ventilator läuft nicht. Somit wird keine Luft in den Raum geblasen. Nach
20 Minuten im Reinigungs-Modus stoppt das Gerät und die «Clean Mode»
Anzeige blinkt. Je nach Stärke der Verkalkung können Sie den Reinigungs-
Modus mehrmals laufen lassen (siehe auch Punkt 7 bei «Bedienung/Inbe-
triebnahme»). Wenn die Reinigung abgeschlossen ist, schalten Sie das
Gerät mit dem Ein-/Aus-Schalter aus (4). Entleeren Sie die Wasserwanne
und spülen sie gründlich mit Leistungswasser aus.
Silber Würfel – Ionic Silver Cube™
Der Silber Würfel (16) verhindert durch stetige Abgabe von Silberionen das
Keim- und Bakterienwachstum im Luftbefeuchter. Der Einsatz des Silber
Würfels führt zu einem hygienischen Raumklima. Die Wirkzeit des Silber
Würfels ist ein Jahr. Wir empfehlen deshalb, vor jeder neuen Befeuchtungs-
saison den Silber Würfel zu ersetzen. Der Silber Würfel wirkt, sobald er
mit dem Wasser im Gerät in Berührung kommt und auch wenn das Gerät
ausgeschaltet ist.
Antikalkkartusche (optionales Zubehör)
Die Antikalkkartusche (7) vermindert den Kalkgehalt im Wasser und redu-
ziert damit die Entkalkungsintervalle. Je nach Wasserhärtegrad muss die
Kartusche alle ein bis drei Monate ersetzt werden (siehe Tabelle).
Ab einer Wasserhärte von über 21 °dH empfehlen wir Ihnen den Einsatz der
Antikalkkartusche.
Wichtig: Legen Sie die Antikalkkartusche vor der ersten Verwendung 24
Stunden in Wasser ein (nicht im Wassertank!). Das Granulat muss zuerst
Wasser aufnehmen, um die volle Leistungsfähigkeit zu erreichen.
Die Wirkungsdauer der Kartusche hängt von der Wasserhärte ab. Mit dem
mitgelieferten Teststreifen kann diese getestet werden (Teststreifen klebt
auf der Rückseite dieser Bedienungsanleitung).
1. Teststreifen eine Sekunde lang ins Wasser tauchen.
2. Nach ca. einer Minute ist das Ergebnis auf dem Teststreifen sichtbar.
Einige der grünen Felder wechseln ihre Farbe zu rosa. Die Wasserhärte wird
durch die Anzahl rosafarbener Felder angezeigt. Beispiel: Bei drei rosafarbi-
gen Feldern hat das Wasser den Härtegrad >14° dH.
Rosa Felder Wasserhärte Härtegrad
(°dH)
Kartusche reicht für
(bei 6 Liter/Tag)
Tage Liter
0/1 Weich Ab 4°dH 60 Tage ca. 360 L
2Mittelhart Ab 7°dH 30 Tage ca. 180L
3 Eher hart Ab 14°dH 20 Tage ca. 120L
4 Sehr hart Ab 21°dH 10 Tage ca. 60 L
Die Kartusche wird auf die Innenseite des Wassertankdeckels (6) ge-
schraubt. Schrauben Sie zuerst den Tankdeckel (6) vom Wassertank (5) und
befestigen Sie dann die Kartusche an die Innenseite des Tankdeckels. Ent-
sorgen Sie verbrauchte Kartuschen im Hausmüll. Werfen Sie den Tankde-
ckel beim Kartuschenwechsel nicht weg!

Congratulations! You have just purchased the exceptional air washer (air
purifier and humidifier) ROBERT. He will give you great pleasure and improve
the indoor air for you.
As with all domestic electrical appliances, particular care is needed with
this model also, in order to avoid injury, fire damage or damage to the appli-
ance. Please study these operating instructions carefully before using the
appliance for the first time and follow the safety advice on the appliance
itself.
Description of the appliance
The appliance consists of the following main components:
1. Air washer housing with motor
2. Air washer water tray
3. Mains cable for power supply
4. On/off switch
5. Water tank with carrying handle
6. Water tank lid
7. Anticalc cartridge (optional)
8. Evaporator discs
9. Motion sensor (movement over the display activates buttons)
10. Button for the selection of the desired humidity (hygrostat: 35-65%
or continuous operation «CO»), symbol «Air Humidity»
11. Button for the selection of the fan speed (1, 2, 3, 4 = Turbo),
symbol «Speed»
12. Button for the selection of the mode (Auto Mode, Night Mode,
Clean Mode)
13. Symbol of the selected mode («Auto Mode», «Night Mode»,
«Clean Mode»)
14. Indicator for low water level, symbol «No Water»
15. Fragrance container
16. Ionic Silver Cube™
17. Air inlet
18. Air outlet
Important safety instructions
Please read through the operating instructions carefully before you use the
appliance for the first time and keep them safely for later reference; if nec-
essary pass them on to the next owner.
•Stadler Form refuses all liability for loss or damage which arises as a
result of failure to follow these operating instructions.
•The appliance is only to be used in the home for the purposes described in
these instructions. Unauthorised use and technical modifications to the
appliance can lead to danger to life and health.
•This appliance can be used by children aged from 8 years and above and
persons with reduced physical, sensory or mental capabilities or lack of
experience and knowledge if they have been given supervision or instruc-
tion concerning use of the appliance in a safe way and understand the
hazards involved. Children shall not play with the appliance. Cleaning and
user maintenance shall not be made by children without supervision.
•Only connect the cable to alternating current. Observe the voltage infor-
mation given on the appliance.
Reparaturen/Entsorgung
•Reparaturen an Elektrogeräten (Wechseln des Netzkabels) dürfen nur
von instruierten Fachkräften durchgeführt werden. Bei unsachgemässen
Reparaturen erlischt die Garantie und jegliche Haftung wird abgelehnt.
•Nehmen Sie das Gerät nie in Betrieb, wenn ein Kabel oder Stecker be-
schädigt ist, nach Fehlfunktionen des Gerätes, wenn dieses herunterge-
fallen ist oder auf eine andere Art beschädigt wurde (Risse/Brüche am
Gehäuse).
•Nicht mit irgendwelchen Gegenständen in das Gerät eindringen.
•Ausgedientes Gerät sofort unbrauchbar machen (Netzkabel durchtren-
nen) und bei der dafür vorgesehenen Sammelstelle abgeben.
•Entsorgen Sie elektrische Geräte nicht im Hausmüll, nutzen Sie die Sam-
melstellen der Gemeinde.
•Fragen Sie ihre Gemeindeverwaltung nach den Standorten der Sammel-
stellen.
•Wenn elektrische Geräte unkontrolliert entsorgt werden, können wäh-
rend der Verwitterung gefährliche Stoffe ins Grundwasser und damit in
die Nahrungskette gelangen, oder die Flora und Fauna auf Jahre vergiftet
werden.
•Wenn Sie das Gerät durch ein neues ersetzen, ist der Verkäufer gesetzlich
verpflichtet, das alte mindestens kostenlos zur Entsorgung entgegenzu-
nehmen.
Technische Daten
Nennspannung 220 - 240 V / 50Hz
Nennleistung 7 - 30W
Befeuchtungsleistung bis 550 g/h
Abmessungen 321 x 471 x 235 mm
(Breite x Höhe x Tiefe)
Gewicht 8.2 kg
Wasserkapazität 6.3Liter
Schalldruckpegel 27 - 56dB(A)
Erfüllt EU-Vorschrift CE/ WEE / RoHS
Technische Änderungen vorbehalten
English

•Do not use damaged extension cords.
•Do not run the power cord over sharp edges and make sure that it does
not get trapped.
•Do not pull the plug from the socket with wet hands or by holding on to
the power cord.
•Do not use the appliance in immediate vicinity of a bath tub, a shower or a
swimming pool (observe a minimum distance of 3 m). Place the appliance
such that a person in the bath tub cannot touch the appliance.
•Do not place the appliance near a heat source. Do not subject the power
cord to direct heat (such as a heated hotplate, open flames, hot iron sole
plates or heaters for example). Protect power cords from oil.
•See to it that the appliance is properly positioned to ensure a high stabil-
ity during its operation and make sure that no one can trip over the power
cord.
•The appliance is not splash-proof.
•For indoor use only.
•Do not store the appliance outdoors.
•Store the appliance in a dry place inaccessible to children (pack the ap-
pliance).
•If the power cord is damaged, it must be replaced by the manufacturer
or a repair shop authorized by the manufacturer or by similarly qualified
persons in order to prevent damage.
•Prior to any maintenance, cleaning and after each use, switch off the ap-
pliance and unplug the mains cable from the socket.
•Do not overfill the water tank beyond the maximum water level mark
‘max’.
Setting-Up/Operation
1. Place Robert at the desired position on a flat surface. Connect the
mains cable (3) to a suitable plug socket.
2. Remove the water tank (5) by holding it by the handle and gently pull-
ing it back. Screw off the water tank lid (6) and fill the water tank with
clean, cold tap water. Then screw the lid back onto the water tank.
Place the water tank on the water tray (2). The water tray now fills
slowly with the water from the water tank. Important: please do not
transport Robert as long as he is filled with water. The water could
spill over.
3. To switch Robert on, press the On/Off switch (4). The current relative
humidity is shown in the display in % («Air Humidity»). The «No Water»
indicator (14) lights up when there is not enough water in the appliance.
The speed level is set to the lowest speed and the desired air humidity
is set to continuous operation.
4. If the motion sensor does not detect any motion for 10 seconds, the
illumination of the buttons and the symbols goes out (only the current
relative humidity «Air Humidity» will be displayed in %). Activate the
buttons by moving your hand over the display (9). Alternatively, the dis-
play can also be activated by touching the lower part with your hand.
5. If no mode has been set, the desired air humidity can be adjusted (be-
tween 35-65% and continuous operation «CO»): Push the «Air Humid-
ity» button. The display will blink. You may now select the desired air
humidity in increments of 5% by repeatedly pressing the «Air Humidi-
ty» button (the display will blink while settings are being adjusted). The
selected value is saved if no other adjustments are made after approx.
10 seconds. The display changes to the current measured air humidity.
Info: Once the desired air humidity is reached, the appliance stops and
the display blinks. The current air humidity is then measured approx.
every 30 minutes (the fan runs for 1-2 minutes). Should the measured
current air humidity fall below the set value, the appliance begins to
humidify again.
6. The humidification performance depends on the speed of the fan. If
no specific mode has been set, the speed level may be changed: Press
the «Speed» button (if necessary, first activate the display with a hand
motion). The display will blink. Now select the speed level 1, 2, 3 or
4 (Turbo) by repeatedly pressing the «Speed» button. The levels are
displayed using horizontal bars (e.g. 1 bar = level 1).
7. Robert is equipped with 3 different pre-programmed modes: «Auto
Mode», «Night Mode» and «Clean Mode». Press the «Mode» button (if
necessary, first activate the display with a hand motion). The display
will blink. Select the mode by repeatedly pressing the «Mode» button:
– «Auto Mode»: Robert automatically maintains the air humidity level
at 45%. The lower the current air humidity level is, the higher the speed
level of the fan will automatically be set (e.g. under 30% = level 3, from
31% to 40% = level 2, from 41% to 45% = level 1).
– «Night Mode»: The display illumination is reduced to minimum and
the fan speed is set on level 1. The desired air humidity level and the
fan speed can be adjusted manually.
– «Clean Mode»: This mode is used in order to clean and descale the
appliance. Here the evaporator discs rotate but the fan does not run.
Thus no air is blown into the room. After 20 minutes in cleaning mode,
the appliance stops and the «Clean Mode» display blinks (see «Clean-
ing» chapter).
8. You can use Robert to disperse fragrances in the room. It must be em-
phasised to please use fragrances extremely sparingly because an ex-
cessive dosage can result in malfunctioning of and damages to the ap-
pliance. In order to use fragrances, remove the water tank (5) and pull
the fragrance container (15) out of the appliance. Let the fragrance drip
directly onto the cotton pad in the fragrance container. Add a maximum
of 1-2 drops of fragrance into the fragrance container.
Tip: In order to change the fragrance, pull the fragrance container out
of the appliance, remove the cotton pad and clean the container with
soap. Now you may insert a new cotton pad (commercially available)
and add drops of the desired fragrance.
9. As soon as the «No Water» symbol (14) lights up, the appliance must be
refilled with water. To do this, remove the water tank (5) and fill it with
clean, cold tap water. After replacing the water tank, the appliance
automatically resumes operation after a few seconds.
10. If you would like to refill the water during operation, you may remove
the water tank and refill it. The appliance will continue to operate us-
ing the water still in the appliance for at least 30 minutes. As long as
the water tank is replaced within this period of time, the appliance can
continue its service without interruption.

Important information
Humidification with an air washer takes some time. An air washer works ac-
cording to the evaporation principle. In this process the air only absorbs as
much water as it needs at the current temperature (self-regulating humidifi-
cation). This means that it could take several hours to achieve a measurable
humidification result. If you put the air washer into operation in a very dry
environment, we recommend that you set the appliance to continuous oper-
ation («Air Humidity») and the speed level to 3 or Turbo («Speed») in order to
effectively increase the air humidity level. Here the size of the room and the
ventilation intervals also play a role. (Also see www.stadlerform.ch/faq).
Cleaning
Prior to any maintenance, cleaning and after each use, switch off the appli-
ance and unplug the mains cable (3) from the socket.
Attention: Never submerge the appliance in water (danger of short-circuit).
•For external cleaning, rub with a damp cloth and then dry thoroughly.
•For internal cleaning, remove the water tank (5) and then pull out the
water tray (2) with the evaporator discs (8) (grab underneath the tray).
•Rinse the water tray (2) and the evaporator discs (8) with clean water
once per week, in order to wash out the particles of dirt removed from
the air.
•Clean the water tray (2), evaporator discs (8) and the water tank (5) thor-
oughly every 2 weeks with a soft brush or sponge and warm water. If
there are lime scale deposits in the water tray or water tank, use a des-
caling solution diluted with water (for mixture ratio, see manufacturer’s
instructions). Subsequently rinse the tray and tank with tap water thor-
oughly.
•Descale the evaporator discs (8) approx. every 4 weeks, depending on the
water hardness level. To do so, first empty out any water remaining in the
water tray (2). Then fill the water tray with a descaling solution (mixture
ratio of solution/water according to the manufacturer’s instructions) up
to 2 cm below the edge of the tray (leave the evaporator discs in the tray).
Now push the water tray back into the appliance (the tank does not have
to be inserted). Activate the buttons with a hand motion over the display.
Press the «Mode» button three times in order to start the cleaning mode.
The «Clean Mode» symbol lights up. Here the evaporator discs rotate but
the fan does not run. Thus no air is blown into the room. After 20 min-
utes in cleaning mode, the appliance stops and the «Clean Mode» display
blinks. The cleaning process may be run several times depending on the
thickness of the limescale deposits (also see Point 7 under «Setting-Up/
Operation»). Once the cleaning process is finished, switch the appliance
off using the On/Off switch (4). Empty the water tray and clean it thor-
oughly with tap water.
Ionic Silver Cube™
The Ionic Silver Cube (16) prevents the growth of germs and bacteria in the
humidifier due to the continuous release of silver ions. The use of the Ionic
Silver Cube leads to a hygienic room climate. The lifetime of the Ionic Silver
Cube is around one year. We therefore recommend that you replace the
Ionic Silver Cube at the beginning of every humidifying season. The Ionic
Silver Cube starts working as soon as it comes into contact with water, and
also works when the appliance is switched off.
Anticalc cartridge (optional accessory)
The anticalc cartridge (7) decreases the limescale in the water and thus
reduces the decalcification intervals. The cartridge has to be replaced every
one to three months, depending on the water hardness (see table).
With a water hardness above 21 °dH, we recommend the use of the anticalc
cartridge.
Important: Soak the anticalc cartridge in a water bath for 24 hours before
the first use (not in the water tank!). The resin has to absorb water to reach
high performance.
The period of time that the cartridge is effective for depends on the hard-
ness of the water. This can be tested using the testing strips provided (strips
are stuck to the reverse side of these instructions for use).
1. Dip the testing strips into the water for a second.
2. After around one minute, the results can be seen on the testing strips.
Some of the green boxes change colour into pink. The water hardness is
shown by how many boxes turn pink. Example: If three boxes are pink, then
the water hardness is > 14° dH.
Number of
pink boxes
Water
hardness
Degree of
hardness
(°dH)
Cartridge will last for
(with 6 liter/day)
Days Liter
0/1 Soft From 4°dH 60 days approx. 360L
2Moderately
hard
From 7°dH 30 days approx. 180 L
3Hard From 14°dH 20 days approx. 120L
4 Very hard From 21°dH 10 days approx. 60 L
The cartridge is screwed onto the inside of the water tank lid (6). First,
screw the tank lid (6) off of the water tank (5) and then affix the cartridge to
the inside of the tank lid. Dispose of used cartridges in the household waste.
Do not throw away the water tank lid when changing the cartridge!
Repairs/disposal
•Repairs to electrical appliances must only be carried out by a qualified
electrical technician. If improper repairs are carried out, the warranty
lapses and all liability is refused.
•Never operate the appliance if the adaptor or plug is damaged, after it has
malfunctioned, if it has been dropped or has been damaged in any other
way (cracks/breaks in the casing).
•Do not push any object into the appliance.
•If the appliance is beyond repair, make it unusable immediately by cutting
through the cable and hand it in at the collection point provided for the
purpose.

•Do not dispose of electrical appliances in the domestic waste. Please use
the communal collection points.
•Ask your local authority if you do not know where the communal collec-
tion points are located.
•If electrical appliances are disposed of thoughtlessly, exposure to the ele-
ments may cause hazardous substances to find their way into the ground-
water and from there into the food chain, or to poison the flora and fauna
for many years to come.
•If you are replacing the appliance with a new one, the seller is legally
obliged to take back the old one at least free of charge for disposal.
Specifications
Rated voltage 220 - 240 V / 50Hz
Rated power 7 - 30 W
Humidity output up to 550 g/h
Dimensions 321 x 471 x 235 mm
(width x height x depth)
Weight 8.2kg
Tank capacity 6.3Liter
Sound level 27 - 56dB(A)
Complies with EU
regulations CE/ WEE / RoHS
All rights for any technical modifications are reserved
Félicitation ! Vous venez d‘acheter le superbe laveur d’air (purificateur et
humidificateur d’air) ROBERT. Nous espérons que cet appareil vous donnera
entière satisfaction et améliorera l’air intérieur pour vous.
Comme pour tous les appareils ménagers électriques, il est important
d‘entretenir cet appareil correctement afin d’éviter les blessures, les incen-
dies ou les dommages. Veuillez lire attentivement le présent mode d’emploi
avant la mise en service et respecter les conseils de sécurité indiqués sur
l’appareil.
Description de l’appareil
L’appareil est composé des éléments principaux suivants:
1. Boîtier du laveur d’air avec moteur
2. Base d’eau du laveur d’air
3. Cordon électrique pour l’alimentation
4. Interrupteur marche-arrêt
5. Réservoir d‘eau avec une poignée
6. Couvercle du réservoir d‘eau
7. Cartouche anticalcaire (optionnelle)
8. Disques d’évaporation
9. Capteur de mouvement (le mouvement sur l’écran active les touches)
10. Touche pour la sélection de l’humidité désirée (hygrostat : 35 à 65% ou
fonctionnement « CO » continu), symbole « Air Humidity »
11. Touche pour la sélection de la vitesse du ventilateur (1, 2, 3, 4 = Turbo),
symbole « Speed »
12. Touche pour la sélection du mode (mode automatique, mode nuit,
mode nettoyage)
13. Symbole du mode sélectionné (« Auto Mode », « Night Mode »,
« Clean Mode »)
14. Indicateur du niveau d’eau bas, symbole « No Water »
15. Tiroir pour parfum
16. Ionic Silver Cube™
17. Entrée d’air
18. Sortie d’air
Conseils de sécurité importants
Veuillez lire attentivement le mode d‘emploi avant la première mise en
service de l’appareil et conservez-le pour toute consultation ultérieure ou
remettez-le, le cas échéant, au nouveau propriétaire.
•La société Stadler Form décline toute responsabilité des dommages
résultant du non-respect des indications données dans ce mode d‘emploi.
•Cet appareil ne doit être utilisé qu’aux fins domestiques décrites dans ce
mode d‘emploi. Toute utilisation contraire à sa destination ainsi que toute
modification technique apportée à l‘appareil peut entraîner des risques
pour la santé et la vie.
•Cet appareil peut être utilisé par les enfants âgés de 8 ans et plus et les
personnes aux capacités physiques, sensorielles ou mentales réduites
ou ne disposant pas de l’expérience ou de la connaissance nécessaire,
sous surveillance ou s’ils ont reçu les instructions concernant l’utilisation
de l’appareil et s’ils comprennent les dangers impliqués. Les enfants ne
doivent pas jouer avec l’appareil. Les opérations de nettoyage et d’entre-
tien ne doivent pas être effectuées par des enfants sans surveillance.
Français

5. Si aucun mode n’a été réglé, l’humidité de l’air désirée peut être réglée
(entre 35 et 65% et un fonctionnement continu « CO ») : Appuyez sur
la touche « Air Humidity ». L’écran se mettra à clignoter. Vous pouvez
à présent choisir l’humidité de l’air désirée par incréments de 5% en
appuyant plusieurs fois sur la touche « Air Humidity » (l’écran cligno-
tera pendant le réglage des paramètres). La valeur sélectionnée est
enregistrée si aucun autre réglage n’est effectué pendant environ 10
secondes. L’écran retourne à l’humidité de l’air mesurée.
Info : Une fois que l’humidité de l’air souhaitée est atteinte, l’appareil
s’arrête et l’écran clignote. L’humidité de l’air réelle est alors mesurée
environ toutes les 30 minutes (le ventilateur fonctionne pendant 1 à 2
minutes). Si l’humidité de l’air réelle mesurée tombe en dessous de la
valeur définie, l’appareil commence à humidifier de nouveau.
6. La performance d’humidification dépend de la vitesse du ventilateur.
Si aucun mode spécifique n’a été réglé, le niveau de vitesse peut être
changé : Appuyez sur la touche « Speed » (si nécessaire, commencez
par activer l’écran avec un mouvement de la main). L’écran se met-
tra à clignoter. À présent, choisissez le degré de vitesse 1, 2, 3 ou 4
(Turbo) en appuyant plusieurs fois sur la touche « Speed ». Les niveaux
s’affichent au moyen de barres horizontales (ex : 1 barre = niveau 1).
7. Robert est équipé de 3modes préprogrammés différents :« Auto Mode »,
« Night Mode » et « Clean Mode ». Appuyez sur la touche « Mode » (si
nécessaire, commencez par activer l’écran avec un mouvement de la
main). L’écran se mettra à clignoter. Sélectionnez le mode en appuyant
sur la touche « Mode » plusieurs fois :
– « Auto Mode » : Robert maintient automatiquement le niveau d’humi-
dité de l’air à 45%. Plus le niveau d’humidité réelle sera faible, plus la
vitesse élevée du ventilateur se règlera automatiquement (ex : avec
30% = niveau 3, entre 31% et 40% = niveau 2, entre 41% et 45% =
niveau 1).
– « Night Mode » : L’illumination de l’écran est réduite au minimum et
la vitesse du ventilateur est réglée sur le niveau 1. Le niveau d’humidité
de l’air désiré et la vitesse du ventilateur peuvent être réglés manuel-
lement.
– « Clean Mode » : Ce mode est utilisé pour nettoyer et détartrer l’ap-
pareil. Ici, les disques d’évaporation tournent, mais le ventilateur ne
fonctionne pas. Par conséquent, aucun air n’est soufflé dans la pièce.
Après 20 minutes en mode nettoyage, l’appareil s’arrête et l’affichage
« Clean Mode » clignote (voir le chapitre « Nettoyage »).
8. Vous pouvez utiliser Robert pour disperser des parfums dans la pièce.
Il convient d’insister sur le fait que les parfums doivent être utilisés
avec beaucoup de précaution, car un dosage excessif pourrait aboutir
à des dysfonctionnements et des dégâts sur l’appareil. Afin d’utiliser
les parfums, enlevez le réservoir d’eau (5) et sortez le tiroir de parfum
(15) hors de l’appareil. Versez le parfum directement sur le coton dans
le tiroir de parfum. Ajoutez au maximum 1 à 2 gouttes de parfum dans
le tiroir de parfum.
Renseignement : Pour changer le parfum, sortez le tiroir de parfum hors
de l’appareil, enlevez le coton et nettoyez le tiroir avec du savon. À
présent, vous pouvez insérer un nouveau coton (disponible dans le com-
merce), et ajouter des gouttes du parfum désiré.
•Ne branchez le câble qu’au courant alternatif. Tenez compte des indica-
tions de tension situées sur l‘appareil.
•Ne pas utiliser de rallonge électrique endommagée.
•Ne pas faire passer ou coincer le câble d’alimentation par-dessus des
arêtes vives.
•Ne jamais retirer la fiche de courant de la prise en tirant sur le câble
d’alimentation ou en ayant les mains mouillées.
•Ne pas utiliser l’appareil à proximité immédiate d’une baignoire, d’une
douche ou d’une piscine (respecter une distance minimum de 3 m). Placer
l’appareil de telle façon à ce que personne ne puisse le toucher à partir
de la baignoire.
•Ne pas placer l’appareil à proximité directe d‘ une source de chaleur. Ne
pas exposer le câble d’alimentation à la chaleur (comme p. ex. une plaque
chaude de cuisinière, flammes nues, semelle chaude de fer à repasser ou
poêles). Protéger le câble d’alimentation de tout contact avec de l‘huile.
•Veiller à ce que l’appareil ait une bonne stabilité lors de son fonction-
nement et que l’on ne puisse pas trébucher sur le câble d’alimentation.
•Cet appareil n’est pas protégé contre les projections d’eau.
•Pour usage intérieur uniquement.
•L’appareil ne doit pas être conservé à l’extérieur.
•Conserver l’appareil à un endroit sec et hors de portée des enfants (l’em-
baller).
•Si le cordon d’alimentation est endommagé, le faire remplacer par le
fabricant ou par un atelier agréé par le fabricant ou des personnes qua-
lifiées.
•Avant toute opération d’entretien, de nettoyage et après chaque utilisa-
tion, éteignez l’appareil et débranchez le câble secteur de la prise.
•Ne pas remplirle réservoir au-delà le niveau maximal ‘max’.
Mise en marche/utilisation
1. Posez Robert à l’endroit voulu sur une surface plane. Branchez le cor-
don électrique (3) sur la prise appropriée.
2. Enlevez le réservoir d’eau (5) en le tenant par la poignée et en le tirant
doucement vers l’arrière. Dévissez le couvercle du réservoir d’eau (6)
et remplissez-le avec de l’eau du robinet propre et froide. Puis, revis-
sez le couvercle sur le réservoir d’eau. Placez le réservoir d’eau sur le
bac d’eau (2). Le bac d’eau se remplit à présent doucement avec l’eau
du réservoir. Important : Veuillez ne pas déplacer Robert tant qu’il est
rempli d‘eau. L’eau pourrait se renverser.
3. Pour allumer Robert, appuyez sur l’interrupteur M/A (4). L’humidité
relative réelle s’affiche sur l’écran en % (« Air Humidity »). L’indicateur
« No Water » (14) s’allume lorsqu’il n y a pas suffisamment d’eau dans
l’appareil. Le degré de vitesse est réglé sur la vitesse la plus basse
et l’humidité de l’air de votre choix est réglée sur le fonctionnement
continu.
4. Si le capteur de mouvement ne détecte aucun mouvement pendant
10 secondes, l’illumination des touches et les symboles disparaissent
(seule l’humidité relative réelle « Air Humidity » s’affichera en %).
Activez les touches en bougeant votre main sur l’écran (9). Autrement,
l’écran peut également être activé en touchant la partie inférieure avec
votre main.

quent, aucun air n’est soufflé dans la pièce. Après 20 minutes en mode
nettoyage, l’appareil s’arrête et l’affichage « Clean Mode » clignote. Le
processus de nettoyage peut être activé plusieurs fois en fonction de
l’épaisseur des dépôts de calcaire (voir également le point 7 dans le cha-
pitre « Mise en marche/utilisation »). Une fois le processus de nettoyage
terminé, éteignez l’appareil avec l’interrupteur M/A (4). Videz le bac d’eau
et nettoyez abondamment avec de l’eau courante.
Cube d‘argent – Ionic Silver Cube™
Le cube d‘argent (16) empêche la croissance des bactéries et des germes
dans l‘humidificateur en libérant constamment des ions d‘argent. L’uti-
lisation du cube d‘argent garantit un climat ambiant hygiénique. Le cube
d‘argent est efficace pendant un an. C‘est pourquoi nous recommandons de
changer le cube d‘argent à chaque nouvelle saison humide. Le cube d’argent
ionique est efficace dès qu‘il est en contact avec de l‘eau dans l‘appareil et
même lorsque l‘appareil est éteint.
Cartouche anticalcaire (accessoire optionnel)
La cartouche anticalcaire (7) diminue le calcaire dans l’eau et réduit par
conséquent les intervalles de décalcification. La cartouche doit être rem-
placée par intervalle de un mois à trois mois, en fonction de la dureté de
l’eau (voyez le tableau).
Avec une dureté d’eau supérieure à 21 °dH, nous conseillons l’utilisation de
la cartouche anticalcaire.
Important: Veuillez svp mettre la cartouche anticalcaire dans un bain d’eau
pour 24 heures avant la première utilisation (ne pas dans le réservoir d’eau!).
Ceci permet les granulés d’absorber de l’eau pour atteindre la capacité
maximale.
La durée d‘efficacité de la cartouche dépend de la dureté de l‘eau. Vous
pouvez la tester à l‘aide de la bandelette test fournie (la bandelette test est
collée au dos de ce mode d‘emploi).
1. Plongez la bandelette test une seconde dans l’eau.
2. Le résultat est visible sur la bandelette au bout d‘une minute environ.
Certains champs verts virent au rose. La dureté de l‘eau est indiquée par le
nombre de champs de couleur rose. Exemple : Trois champs de couleur rose
indiquent que l‘eau a un degré de dureté de > 14° dH.
Champs
de couleur
rose
Dureté de
l’eau
Degré de
dureté (°dH)
Cartouche sufsante pour
(avec 6 litres/jour)
Jours Litres
0/1 Douce à partir de 4°dH 60 jours env. 360L
2Moyennement
dure
à partir de 7°dH 30 jours env. 180L
3Plutôt dure à partir de 14°dH 20 jours env. 120L
4Très dure à partir de 21°dH 10 jours env. 60 L
9. Dès lors que le symbole « No Water » (14) apparait, l’appareil doit être
rechargé en eau. Pour ce faire, enlevez le réservoir d’eau (5) et rem-
plissez avec de l’eau du robinet propre et froide. Après avoir replacé
le réservoir d’eau, l’appareil reprend son fonctionnement automatique-
ment après quelques secondes.
10. Si vous souhaitez recharger en eau pendant le fonctionnement, vous
pouvez enlever le réservoir d’eau et le remplir. L’appareil continuera de
fonctionner avec l’eau qu’il contient déjà pendant au moins 30 minutes.
Du moment que le réservoir d’eau est replacé pendant ce délai, l’appa-
reil peut continuer à fonctionner sans interruption.
Remarque importante
L‘humidification avec un laveur d’air prend du temps. Un laveur d’air fonc-
tionne sur le principe de l’évaporation. Dans ce processus l’air n’absorbe
que la quantité d’eau dont il a besoin à la température actuelle (humidi-
fication auto régulée). Cela signifie que plusieurs heures seront peut-être
nécessaires pour obtenir un résultat d’humidification mesurable. Si vous
mettez le laveur d’air en fonctionnement dans un environnement très sec,
nous vous conseillons de régler l’appareil sur fonctionnement continu (« Air
Humidity ») et le niveau de vitesse à 3 ou turbo (« Speed ») afin d’augmenter
efficacement le niveau d’humidité. Ici, la taille de la pièce et les intervalles
de ventilation jouent également un rôle.
(Voir également www.stadlerform.ch/faq)
Nettoyage
Avant toute opération d’entretien, de nettoyage et après chaque utilisation,
éteignez l’appareil et débranchez le câble secteur (3) de la prise.
Attention : Ne jamais plonger l’appareil dans l’eau (risque de court-circuit).
•Pour le nettoyage extérieur, utilisez un chiffon humide et séchez bien
l‘appareil.
•Pour le nettoyage interne, enlevez le réservoir d’eau (5) et sortez le bac
d’eau (2) avec les disques d’évaporation (8) (attrapez sous le bac).
•Rincez le bac d’eau (2) et les disques d’évaporation (8) à l’eau claire une
fois par semaine, afin de laver les particules de saletés prises dans l’air.
•Nettoyez le bac d’eau (2), les disques d’évaporation (8) et le réservoir d’eau
(5) à fond toutes les 2 semaines avec une brosse souple ou une éponge et
de l’eau chaude. Si des dépôts de calcaire apparaissent dans le bac d’eau
ou le réservoir d’eau, utilisez une solution anti calcaire diluée dans l’eau
(pour le ratio de mélange, suivez les instructions du fabricant). Par la suite,
rincez abondamment le bac et le réservoir avec de l’eau courante.
•Détartrez les disques d’évaporation (8) environ toutes les 4 semaines,
en fonction du niveau de dureté de l’eau. Pour ce faire, commencez par
vider l’eau restante dans le bac d’eau (2). Puis, remplissez le bac avec une
solution anti calcaire (le ratio solution/eau du mélange doit être conforme
aux instructions du fabricant) jusqu’à 2 cm en dessous du rebord du bac
(laissez les disques d’évaporation dans le bac). À présent, enfoncez le
bac d’eau dans l’appareil (le réservoir ne doit pas nécessairement être
inséré). Activez les touches avec un mouvement de la main au-dessous
de l’écran. Appuyez sur la touche « Mode » trois fois afin de démarrer le
mode de nettoyage. Le symbole « Clean Mode » s’allume. Ici, les disques
d’évaporation tournent, mais le ventilateur ne fonctionne pas. Par consé-

La cartouche est vissée à l’intérieur du couvercle du réservoir (6). D’abord,
dévissez le couvercle du réservoir (6) du réservoir (5), puis fixez la cartouche
à l’intérieur du couvercle du réservoir. Jetez les cartouches usagées avec
les ordures ménagères. Ne jetez pas le couvercle du réservoir d’eau lorsque
vous changer la cartouche.
Réparations/élimination
•Les réparations sur les appareils électriques ne doivent être effectuées
que par des électriciens qualifiés. La garantie s’éteint et toute responsa-
bilité est exclue en cas de réparations non conformes aux règles de l‘art.
•Ne mettez jamais l‘appareil en service en cas d’endommagement d’un
cordon ou d’une fiche, après un dysfonctionnement de l’appareil causé
par une chute ou par une autre détérioration de l’appareil (boîtier fissuré/
cassé).
•Ne pas pénétrer avec des objets quelconques dans l’appareil.
•Arrivé au bout de sa durée de vie, l’appareil doit immédiatement être ren-
du inutilisable (sectionner le cordon d’alimentation) et être déposé dans
une déchetterie prévue à cet effet.
•Ne jetez pas vos appareils électriques avec les ordures ménagères, utili-
sez les points de collecte municipaux.
•Veuillez consulter vos services municipaux pour connaître les points de
collecte.
•La mise au rebut incontrôlée des appareils électriques peut entraîner,
lors de précipitations, la filtration de matières dangereuses dans les eaux
souterraines pouvant contaminer la chaîne alimentaire ou intoxiquer
durablement la flore et la faune.
•Si vous remplacez un vieil appareil par un neuf, le vendeur a l’obligation
légale de reprendre votre vieil appareil, au mieux gratuitement.
Caractéristiques techniques
Tension nominale 220 - 240 V / 50Hz
Puissance nominale 7 - 30 W
Émission d’humidité jusqu’à 550g/h
Dimensions 321 x 471 x 235 mm
(largeur x hauteur x profondeur)
Poids 8,2 kg
Contenance du reservoir 6,3Litres
Niveau de bruit 27 - 56dB(A)
Conforme à la
réglementation UE CE/ WEE / RoHS
Sous réserve de modifications techniques
Русский
МОЙКА ВОЗДУХА ROBERT
Поздравляем с приобретением устройства премиум-класса
мойки воздуха Robert!
Использование этого устройства позволит улучшить воздух в помеще-
нии, а эксплуатация доставит несомненное удовольствие.
При эксплуатации мойки воздуха, а также иных электроприборов, сле-
дует обращать особое внимание на меры безопасности. Прежде, чем
использовать этот электроприбор, внимательно прочтите инструкцию.
Во избежание травм или повреждений имущества, строго следуйте при-
веденным в данной инструкции рекомендациями.
Для получения дополнительной информации посетите наш сайт:
www.stadlerform.ru
ВАЖНЫЕ УКАЗАНИЯ ПО БЕЗОПАСНОСТИ
Прежде чем использовать этот электроприбор, пожалуйста, вниматель-
но ознакомьтесь с инструкцией по эксплуатации.
•Изготовитель не несет ответственности за любые травмы или ущер-
бы, возникшие вследствие неправильной эксплуатации электропри-
бора.
•Мойка воздуха является бытовым электроприбором и предназначе-
на для использования только в домашних условиях в строгом соот-
ветствии с инструкцией по эксплуатации. Неправильная эксплуата-
ция и техническая модификация устройства могут создать условия,
опасные для жизни и здоровья пользователя.
•Этот электроприбор не предназначен для использования детьми
или недееспособными взрослыми без надлежащего контроля, а так-
же лицами, не имеющими достаточных навыков по использованию
электро-приборов и не знакомыми с инструкцией по эксплуатации.
•Перед подключением мойки воздуха к электросети удостоверьтесь
в том, что напряжение электросети соответствует напряжению, па-
спортизированному для данного электроприбора.
•Не используйте при подключении поврежденные или перегруженные
удлинители.
•Следите за тем, чтобы сетевой шнур не касался поверхностей, спо-
собных повредить шнур, не запутывался и не перекручивался.
•Не прикасайтесь к сетевому шнуру или его вилке мокрыми руками.
•Не эксплуатируйте электроприборы в местах с повышенной влажно-
стью. Во избежание поражения электрическим током запрещается
эксплуатировать мойку воздуха в непосредственной близости ванны,
душа или бассейна (минимальное расстояние 3 метра).
•Не устанавливайте мойку воздуха рядом с источниками тепла. Не до-
пускайте, чтобы сетевой шнур касался горячих поверхностей любых
нагревательных приборов, не допускайте контакта сетевого шнура с
маслянистыми веществами.
•Следите за тем, чтобы нельзя бы споткнуться о сетевой шнур при
хождении по комнате.
•Не допускайте попадания на устройство брызг воды и не эксплуати-
руйте устройство вне помещений.

•Для хранения упакуйте мойку воздуха в коробку и храните в сухом
помещении, в местах, недоступных для детей.
•Сохраните эту инструкцию для дальнейших справок, а в случае пере-
дачи мойки воздуха другому владельцу, передайте инструкцию вме-
сте с электроприбором.
•Не наполняйте резервуар выше уровня максимальной отметки «max».
ОПИСАНИЕ УСТРОЙСТВА
Прибор состоит из следующих основных компонентов:
1. Корпус мойки воздуха с двигателем
2. Лоток для воды мойки воздуха
3. Сетевой кабель для подачи электропитания
4. Выключатель
5. Резервуар для воды с ручкой для переноски
6. Крышка резервуара для воды
7. Картридж против накипи (опционально)
8. Диски испарителя
9. Датчик движения (перемещение по дисплею активирует кнопки)
10. Кнопка для выбора желаемой влажности (гигростат: 35-65% или
непрерывная эксплуатация «CO»), символ «Air Humidity» (Влажность
воздуха)
11. Кнопка для выбора скорости вентилятора (1, 2, 3, 4 = турбо), символ
«Speed» (Скорость)
12. Кнопка для выбора режима («Auto Mode» (Автоматический режим),
«Night Mode» (Ночной режим), «Clean Mode» (Режим самоочистки))
13. Символ выбранного режима («Автоматический режим», «Ночной ре-
жим», «Clean mode»)
14. Индикатор низкого уровня воды, символ «No water» (Нет воды)
15. Контейнер с ароматизатором
16. Ionic silver Cube™ (антибактериальный картридж)
17. Отверстие для впуска воздуха
18. Отверстие для выпуска воздуха
УСТАНОВКА/ЭКСПЛУАТАЦИЯ
1. Установите прибор Robert в желаемое положение на плоскую поверх-
ность. Подключите сетевой кабель (3) к штепсельной розетке.
2. Снимите резервуар для воды (5), удерживая его за ручку и аккуратно
оттягивая назад. Снимите крышку резервуара для воды (6) и напол-
ните резервуар чистой холодной водопроводной водой. Закройте ре-
зервуар крышкой. Поместите резервуар на лоток для воды (2). Теперь
лоток медленно наполняется водой из резервуара.
ВАЖНАЯ ИНФОРМАЦИЯ:
Не перемещайте прибор Robert, когда он наполнен водой. От этого вода
может пролиться.
3. Для включения прибора нажмите на кнопку выключателя (On/Off) (4).
На дисплее отобразится текущая относительная влажность воздуха
в % («Air Humidity»). Индикатор «No Water» (14) загорается, когда в
приборе не достаточно воды. Автоматически устанавливается мини-
мальный уровень скорости, желаемая влажность воздуха устанавли-
вается в режим непрерывной эксплуатации.
4. Если датчик движения не распознает движения в течение 10 секунд,
подсветка кнопок и символов гаснет (на дисплее отображается толь-
ко текущая относительная влажность воздуха «Air Humidity» в %) .
Активируйте кнопки, проведя рукой по дисплею (9). Дисплей можно
также активировать, прикоснувшись рукой к его нижней части.
5. Если режим не задан, можно настроить желаемую влажность воз-
духа (между 35-65% и непрерывную эксплуатацию «CO»): Нажмите
кнопку «Air Humidity». Дисплей начнет мигать. Теперь Вы можете вы-
брать желаемую влажность воздуха с интервалом 5%, постоянно на-
жимая кнопку «Air Humidity» (при изменении настроек дисплей будет
мигать). Выбранное значение сохранится, если новые настройки не
задаются в течение порядка 10 секунд. Дисплей отобразит текущую
измеренную влажность воздуха. Информация: при достижении же-
лаемой влажности воздуха прибор прекращает работу, и дисплей на-
чинает мигать. Затем текущая влажность воздуха измеряется при-
мерно каждые 30 минут (вентилятор работает порядка 1-2 минут).
Если измеренная текущая влажность воздуха падает ниже заданно-
го значения, прибор снова начинает увлажнять воздух.
6. Увлажнение зависит от скорости вентилятора. Если не задан опреде-
ленный режим, уровень скорости можно изменить: Нажмите кнопку
«Speed» (при необходимости сначала активируйте дисплей движени-
ем руки). Дисплей начнет мигать. Теперь выберите уровень скорости
1, 2, 3 или 4 (турбо), постоянно нажимая кнопку «Speed». Уровни ото-
бражаются полосками (напр., 1 полоска = уровень 1).
7. Прибор имеет 3 различных запрограммированных режима: «Auto
Mode» (Автоматический режим), «Night Mode» (Ночной режим),
«Clean Mode» (Режим самоочистки). Нажмите кнопку «Mode» (при
необходимости сначала активируйте дисплей движением руки). Ди-
сплей начнет мигать. Теперь выберите режим, постоянно нажимая
кнопку «Mode»:
•Автоматический режим: прибор автоматически поддерживает
уровень влажности воздуха 45%. Чем ниже текущий уровень влаж-
ности воздуха, тем выше будет задан уровень скорости вентилятора
(напр., при влажности ниже 30% – уровень 3, от 31% до 40% – уро-
вень 2, от 41% до 45% – уровень 1).
•Ночной режим: подсветка дисплея сокращается до минимума, и
скорость вентилятора устанавливается на уровень 1. Желаемый
уровень влажности воздуха и скорость вентилятора можно отрегу-
лировать вручную.
•Режим самоочистки: этот режим используется для очистки при-
бора и удаления накипи. При этом диски испарителя вращаются, но
вентилятор не работает. Таким образом, воздух не выдувается в
помещение. Через 20 минут работы в режиме очистки прибор вы-

ключается, и на дисплее мигает индикатор «Clean mode» (см. главу
«Очистка»).
8. Вы можете использовать прибор Robert для распыления аромати-
затора в помещении. Рекомендуется использовать ароматизаторы
очень экономно, поскольку применение чрезмерного количества
может привести к неисправности или повреждениям прибора. Для
использования ароматизаторов снимите резервуар для воды (5) и
вытащите контейнер для ароматизатора (15) из прибора. Нанесите
ароматизатор на ватный диск и положите его в контейнер. Добавьте
максимум 1-2 капли ароматизатора в контейнер.
СОВЕТ
Для изменения аромата вытащите контейнер для ароматизатора из
устройства, удалите ватный диск и прочистите контейнер мылом. Теперь
Вы можете вставить новый ватный диск (имеется в продаже) и капнуть
желаемый ароматизатор.
9. Сразу при появлении индикатора «No Water» (14) прибор необходимо
снова наполнить водой. Для этого снимите резервуар для воды (5) и
наполните его чистой холодной водопроводной водой. После уста-
новки резервуара для воды на место прибор автоматически возоб-
новит работу через несколько секунд.
10. Если Вы хотите заново наполнить прибор водой во время работы,
снимите резервуар для воды и заново наполните его водой. Прибор
продолжит работать при использовании находящейся в нем воды в
течение минимум 30 минут. Если в данный промежуток времени Вы
установите резервуар для воды на место, прибор продолжит непре-
рывную работу.
ВАЖНАЯ ИНФОРМАЦИЯ
Увлажнение воздуха с помощью мойки воздуха займет определенное
время. Мойка воздуха работает по принципу испарения. При этом воздух
поглощает столько воды, сколько ему требуется при текущей темпера-
туре (саморегулируемое увлажнение). Это означает, что для достижения
соизмеримого увлажняющего результата может потребоваться несколь-
ко часов. Если Вы используете мойку воздуха при очень сухом воздухе,
мы рекомендуем установить прибор в режим непрерывной эксплуатации
(«Air Humidity») и выбрать уровень скорости 3 или турбо («Speed») для
эффективного увеличения уровня влажности воздуха. При этом размер
помещения и интервалы проветривания имеют важное значение. (Также
см. информацию на сайте www.stadlerform.ru/faq/).
ОЧИСТКА
До проведения любого технического обслуживания, очистки, а также по-
сле каждого использования выключите прибор и отсоедините сетевой
кабель (3) от штепсельной розетки.
ВНИМАНИЕ
Никогда не погружайте прибор в воду (во избежание короткого замы-
кания).
•Для наружной очистки протрите корпус влажной тряпочкой, а затем
тщательно высушите.
•Для внутренней очистки снимите резервуар для воды (5), вытащите
лоток для воды (2) с дисками испарителя (8) (под лотком).
•Споласкивайте лоток для воды (2) и диски испарителя (8) чистой во-
дой раз в неделю для удаления грязи, скопившейся на деталях в про-
цессе очистки воздуха.
•Тщательно прочищайте лоток для воды (2), диски испарителя (8) и
резервуар для воды (5) каждые 2 недели мягкой щеткой или губкой
и теплой водой. При появлении известкового налета в лотке или ре-
зервуаре для воды используйте раствор для удаления накипи, раз-
бавленный водой (для получения информации о соотношении ком-
понентов в смеси см. инструкции производителя). Затем тщательно
сполосните лоток и резервуар водой.
•Удаляйте накипь с дисков испарителя (8) примерно каждые 4 недели
в зависимости от уровня жесткости воды. Для этого сначала вылей-
те оставшуюся воду из лотка для воды (2). Затем заполните лоток
раствором для удаления накипи (для получения информации о соот-
ношении раствора/воды в смеси см. инструкции производителя), не
доливая до края лотка на 2 см (оставьте диски испарителя в лотке).
Затем вставьте лоток обратно в прибор (не вставляйте резервуар).
Активируйте кнопки движением руки по дисплею. Нажмите кнопку
«Mode» три раза для выбора режима очистки. При этом загорится
символ «Clean mode». В этом режиме диски испарителя вращаются,
но вентилятор не работает. Таким образом, воздух не выдувается в
помещение. Через 20 минут после работы в режиме очистки прибор
выключается, и на дисплее начинает мигать символ «Clean mode».
Процесс очистки можно повторить несколько раз в зависимости от
толщины слоя накипи (также см. Пункт 7 «Настройка/Эксплуатация»).
По окончании процесса очистки выключите прибор, нажав выключа-
тель On/Off (4). Удалите остатки жидкости из лотка и тщательно про-
мойте его водопроводной водой.
БАКТЕРИЦИДНЫЙ ФИЛЬТР
С ИОНАМИ СЕРЕБРА SILVER CUBE™
Фильтр предотвращает размножение болезнетворных бактерий и
микробов, оказывая бактерицидное воздействие и улучшая гигиени-
ческие показатели воздуха в помещении. Высокая эффективность
ионов серебра сохраняется в течение 1 года. По истечении этого срока
мы рекомендуем заменить фильтр. Наиболее эффективным является
замена фильтра в начале сезона, в течение которого Вы используете
мойку воздуха максимально часто. Фильтр с ионами серебра начинает
работу сразу после включения мойки воздуха и продолжает оказывать
бактерицидное воздействие после выключения прибора.

КАРТРИДЖ ПРОТИВ НАКИПИ (АКСЕССУАР, ОПЦИОНАЛЬНО)
Картридж против накипи (7) уменьшает жесткость воды, тем самым,
уменьшая интервалы удаления накипи. Картридж необходимо менять
каждые три месяца в зависимости от жесткости воды (см. таблицу).
Мы рекомендуем использовать картридж против накипи при жесткости
воды более 21 °Ж.
ВАЖНАЯ ИНФОРМАЦИЯ:
Перед первым использованием опустите картридж против накипи в
ванночку с водой на 24 часа (не в резервуар для воды!). Каучук должен
впитать воду для увеличения эффективности работы.
Срок эксплуатации картриджа зависит от жесткости воды. Ее можно
проверить с помощью поставляемых тест-полосок (идут в комплекте с
прибором).
1. Опустите тест-полоску в воду на одну секунду.
2. Примерно через минуту на тест-полосках отобразится результат. Не-
которые зеленые ячейки станут розовыми. Жесткость воды зависит
от того, сколько ячеек стали розовыми. Пример: Если три ячейки ста-
ли розовыми, жесткость воды > 14° Ж.
Количество
розовых
ячеек
Жесткость
воды
Степень
жесткости
(°Ж)
Картриджа хватит на
(при использовании
6 литров в день)
дни литры
0/1 мягкая От 4°Ж ~ 60 дней 360 л
2умеренно
жесткая
От 7°Ж ~ 30 дней 180 л
3жесткая От 14°Ж ~ 20 дней 120 л
4очень
жесткая
От 21°Ж ~ 10 дней 60 л
Картридж прикручивается на внутреннюю сторону крышки резервуара
для воды (6). Сначала снимите крышку (6) с резервуара для воды (5),
затем прикрепите картридж к внутренней стороне крышки. Не выбрасы-
вайте крышку резервуара для воды при замене картриджа!
РЕМОНТ И УСТРАНЕНИЕ НЕИСПРАВНОСТЕЙ
•В целях безопасности ремонт электроприбора должен осущест-
вляться только квалифицированными специалистами авторизован-
ного сервисного центра.
•Гарантия не распространяется на неисправности, обусловленные не-
квалифицированным ремонтом, а также неправильной эксплуатаци-
ей электроприбора.
•Запрещается использование неисправного электроприбора, а также
при механических или иных повреждениях самого электроприбора,
сетевого шнура или его вилки.
•Запрещается вставлять посторонние предметы в отверстия в корпу-
се электроприбора.
•Если электроприбор не подлежит ремонту, его необходимо утилизи-
ровать в соответствии с действующим законодательством.
УТИЛИЗАЦИЯ
•Позаботьтесь об окружающей среде! Не выбрасывайте неисправные
электроприборы вместе с бытовыми отходами. Обратитесь для этих
целей в специализированный пункт утилизации электроприборов.
•Адреса пунктов приема бытовых электроприборов на переработку
Вы можете получить в муниципальных службах Вашего города.
•Неправильная утилизация электроприборов наносит непоправимый
вред окружающей среде.
•При замене неисправного электроприбора на новый юридическую от-
ветственность за утилизацию должен нести продавец.
СПЕЦИФИКАЦИЯ
Электропитание: 220–240 В / 50 Гц
Мощность: 7–30 Вт
Производительность: до 550 мл/ч
Габариты (ширина х высота х глубина): 321 x 471 x 235 мм
Вес: 8,2 кг
Емкость резервуара: 6,3 л
Уровень шума: 27–56 дБ
Соответствует европейским правилам безопасности CE/ WEE / RoHS
Производитель сохраняет за собой право на внесение изменений в тех-
нические характеристики, комплектацию и конструкцию данной модели
без предварительного уведомления.
Электронную версию инструкции можно скачать на нашем сайте:
www.stadlerform.ru

ИНФОРМАЦИЯ О СЕРТИФИКАЦИИ
Товар сертифицирован в соответствии с законом «О защите прав по-
требителей»
Установленный производителем в соответствии с п.2 ст.5 Федераль-
ного Закона РФ «О защите прав потребителей» срок службы для дан-
ного изделия равен 5 годам, при условии, что изделие используется
в строгом соответствии с настоящей инструкцией по эксплуатации и
применяемыми техническими стандартами.
45
13
12345
- сорок пятая неделя
- последние две цифры года
- номер продукта
4513 - 12345
неделя | год номер продукта
Дата изготовления
Дата изготовления зашифрована в виде группы цифр в серийном
номере, расположенном на корпусе прибора.
Дату изготовления следует читать:
4513 - 12345 - 45-я неделя 2013 года
П Р И М Е Р

www.stadlerform.ch
www.stadlerform.ru
Making life colorful and enjoy is the goal and endeavour of
us all. This also includes designer items of practical use:
This is our guiding principle!
A lot of household appliances are important and useful
occupants of our homes however, they are often the
ugly ducklings of the family. That’s why we came up with
the idea to develop attractive and appealing household
products.
Martin Stadler, CEO Stadler Form
Наша общая цель — наслаждаться процессом, делая
жизнь яркой. Она также подразумевает внедрение ди-
зайнерских вещей в повседневную жизнь человека —
это наш основной принцип!
Множество бытовых приборов являются важными и
полезными обитателями нашего дома, вместе с тем,
они часто «гадкие утята» в семье. Именно поэтому мы
пришли с идеей развивать привлекательную и стиль-
ную технику для дома.
Martin Stadler,
генеральный директор Stadler Form.
Other manuals for Robert
3
Table of contents
Languages: