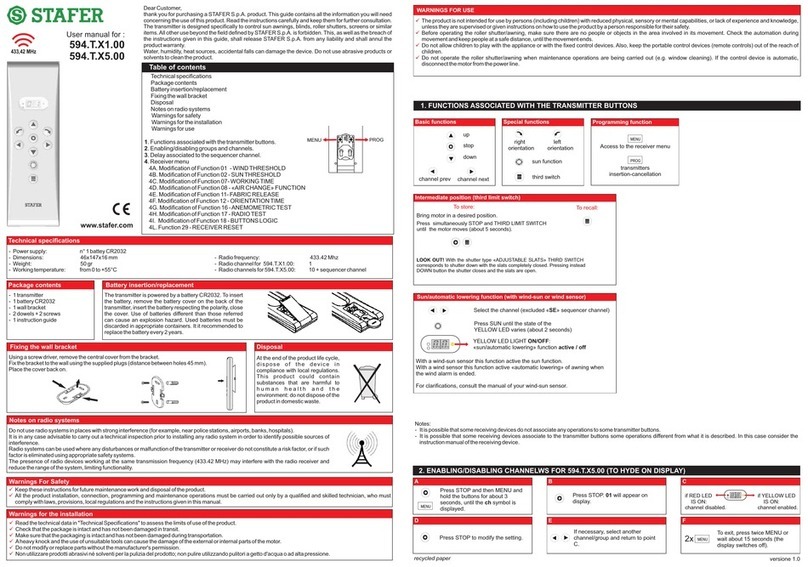
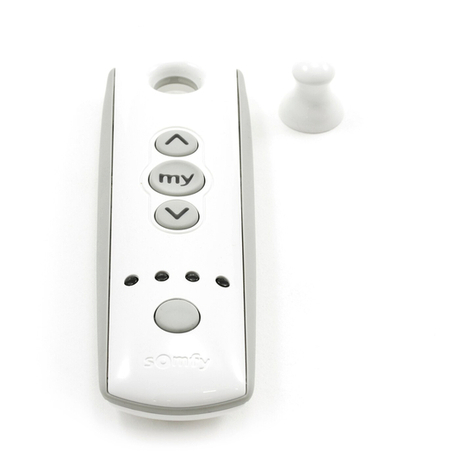
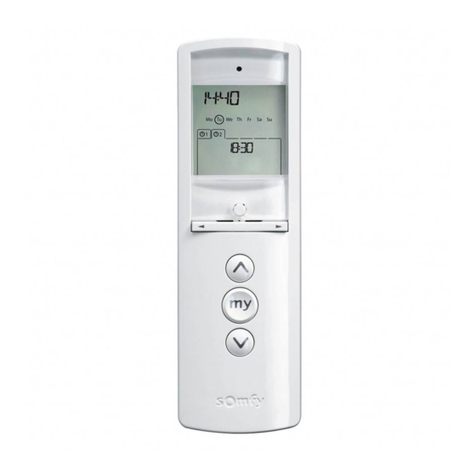
Stafer 593.T.X1.00 User manual

8. SMALTIMENTO
Al termine del ciclo di vita del prodotto, smaltirlo secondo quanto previsto dai
regolamenti locali. Questo prodotto contiene sostanze inquinanti per l'ambiente
e pericolose per la salute, è vietato smaltire il prodotto gettandolo nei rifiuti
domestici. E’ possibile riciclare gusci e cornice (vedi fig.B).
6. SOSTITUZIONE DELLA BATTERIA
Svitare le viti (6) e rimuovere la parte posteriore. Sfilare la batteria esausta (fig. A) e
sostituirla con una batteria carica dello stesso tipo, rispettando le polarità. Riposizionare
la parte posteriore (fig. B) e bloccarla con le viti (6). Smaltire la batteria esausta negli
appositi contenitori.
4. POSIZIONE PREFERITA (terzo finecorsa) SOLO CON MOTORI RX-E
Porta il motore nella posizione desiderata. Premi brevemente 6 volte STOP, poi GIU
per 5 sec. Il motore segnala con 2 movimenti. Memorizzato!
Per richiamare il terzo finecorsa:
Premi brevemente 3 volte STOP e attendi 2 sec..
3. FUNZIONE SOLE – DISCESA AUTOMATICA
Se LED (4) lampeggia durante la trasmissione, la “funzione sole” è inattiva. Se LED (4)
rimane acceso fisso durante la trasmissione, la “funzione sole” è attiva.
Per abilitare/disabilitare la “funzione sole” premi assieme STOP e SALITA per 3 secondi.
1. AVVERTENZE
Acqua, umidità, fonti di calore, cadute accidentali possono
danneggiare il dispositivo. Non utilizzare solventi o prodotti
abrasivi per la pulizia del prodotto. Tutti i prodotti e le
specifiche tecniche citati in questo documento sono soggetti
a variazioni senza preavviso. Il dispositivo deve essere
utilizzato esclusivamente con dispositivi riceventi della
stessa casa costruttrice. Il costruttore non può essere
considerato responsabile per eventuali danni derivanti da
usi impropri, erronei o irragionevoli.
593.T.X1.00
433,42 MHz
versione 1.0
1 - tasto SALITA
2 - tasto STOP
3 - tasto DISCESA
4 - LED
5 - tasto PROG
6 - Viti di chiusura
1 - UP button
2 - STOP button
3 - DOWN button
4 - LED
5 - PROG button
6 - Closing screw
A B
Descrizione
delle parti
Description
of parts
1
2
4
3
5
6
6
carta riciclata
MANUALE D’USO
www.stafer.com
DICHIARAZIONE DI CONFORMITA’ SEMPLIFICATA
Il fabbricante STAFER s.p.a. dichiara che il tipo di apparecchiatura radio è conforme alla
direttiva 2014/53/UE.
2. MEMORIZZARE/CANCELLARE UN ALTRO RADIOCOMANDO O DISPOSITIVO
RADIO
Porta il motore in posizione intermedia. Premi PROG di un trasmettitore già in memoria
per 5 secondi. Il motore effettua due movimenti in salita. Entro 15 secondi, per
memorizzare/cancellare:
un radiocomando: premi STOP del radiocomando da memorizzare/cancellare.
un sensore sole/vento: premi P1 del sensore da memorizzare/cancellare
un sensore pioggia: premi P2 del sensore da memorizzare/cancellare
Il motore eseguirà:
1 movimento su: dispositivo memorizzato!
1 movimento giù: dispositivo cancellato!
2 movimenti giù: errore!
7. RIPRISTINO DELLE CONDIZIONI DI FABBRICA (reset)
Porta il motore in posizione intermedia. Mantenendo premuto STOP premi anche PROG
per circa 1 sec., finchè il led si accende. Premi 2 volte SU e 9 volte GIU. Premi STOP. Il led
lampeggia, il motore effettua 8 movimenti. Premi SU e GIU contemporaneamente per
circa 2 sec., finchè il motore segnala che il reset è stato effettuato (2 movimenti su/giù).
Installa nuovamente il motore seguendo le istruzioni contenute nella confezione motore.
Di seguito l’elenco di alcune funzioni del radiocomando. Per visionare
tutte le funzioni complete vedere le istruzioni motore.
1 - bouton UP
2 - bouton STOP
3 - bouton DOWN
4 - LED
5 - bouton PROG
6 - Vis de fermeture
Description
des pièces
1 - aufwarts
2 - stop
3 - abwarts
4 - LED
5 - prog
6 - schraube
Beschreibungen
der Teile
1 - UP (Arriba)
2 - STOP (Paro)
3 - DOWN (Abajo)
4 - LED
5 - PROG (Programaciòn)
6 - Tornillo de cierre
Descripciones
de las partes
CARATTERISTICHE TECNICHE / TECHNICAL SPECIFICATIONS /
CARACTERISTIQUES TECHNIQUES / TECHNISCHE EIGENSCHAFTEN /
CARATERISTICAS TECNICAS
Alimentazione / Power supply / Alimentation / Stromversorgung / Alimentacion:
n°1 batteria/battery/pile/batterie/bateria Cr2032
Temperatura di esercizio / Working temperature / Température de travail /
Betriebstemperatur / Temperatura ejercicio: 0°C / +55 °C
Dimensioni / Dimensions / Dimensions / Abmessungen / Dimensiones: 30x100x15 mm
Canali radio / Channels / Canaux radio / Funkkanäle / Canales: 01
Frequenza radio / Frequency / Fréquence radio / Funkfrequenz / Frecuencia radio:
433.42 MHz
5. ORIENTAMENTO
Permette di muovere a brevi scatti il motore. Utile con stecche orientabili. E’ possibile
regolare la durata degli scatti impostando un valore che va da 1 (non attivo) a 5.
Portare il motore in posizione intermedia. Mantenendo premuto STOP premi anche
PROG per circa 1 sec., finchè il led si accende. Premi una volta SU e 2 volte GIU.
Premi STOP. Il motore segnala il valore corrente (da 1 a 5). Premi GIU il numero di
volte pari all’impostazione desiderata (da 1 a 5). Premi STOP. Il motore segnala la
nuova impostazione (da 1 a 5 movimenti).
Per orientare premi brevemente 2 volte STOP e poi mantieni premuto SU o GIU.
GUSCI CORNICE
8. DISPOSAL
At the end of the product life cycle, dispose materials complying with the law in
force in your locality. This product may have substances that are polluting for the
environment and dangerous for the health. It is strictly forbidden to dispose the
product on the domestic waste. Shells and frame can be recycled (see fig. B).
6. REPLACING THE BATTERY
Unscrew the screws (6) and remove the back. Remove the old battery (fig. A) and replace
it with a new battery of the same type, observing the polarity. Replace the back (fig. B)
and block with screws (6). Dispose of the old battery in the specific containers.
4. INTERMEDIATE LIMIT SWITCH (third limit switch) ONLY FOR RX-E MOTOR
Bring the motor to the preferred position. Press briefly 6 times STOP, then DOWN for
5 seconds. The motor makes 2 movements. Memorized!
To recall the preferred position:
Press briefly 3 times STOP and wait 2 seconds.
3. SUN FUNCTION – AUTOMATIC LOWERING FUNCTION
If the LED (4) flashes during transmission, the "sun function" is inactive. If the LED (4)
stays ON during transmission, the "sun function" is active.
To enable/disable the "sun function" press STOP and UP together for 3 seconds.
1. WARNING
Water, moisture, heat, accidental falls can damage the
device. Do not use solvents or abrasives to clean the
product. All products and technical characteristics on this
document are subjects to variations without any notice. The
device must be used only with receiving devices of the
same manufacturer. The manufacturer cannot be consider
responsible for damage caused by improper, incorrect or
unreasonable uses.
SIMPLIFIED DECLARATION OF CONFORMITY
The manufacturer, STAFER S.p.A., hereby declares that the type of radio device
complies with the provisions of Directive 2014/53/EU.
2. MEMORIZATION/DELETION OF ANOTHER TRANSMITTER OR RADIO DEVICE
Bring the motor to the intermediate position. Press PROG for a transmitter already saved
for 5 seconds. The motor will drive two ascent movements. Within 15 seconds, either to
save or delete:
a remote control: press STOP of the remote control you want to save or delete;
a sun/wind sensor: press P1 of the sensor you want to save or delete;
a rain sensor: Press P2 of the sensor you want to save or delete.
The motor will drive:
1 step up: Device saved!
1 step down: Device deleted!
2 steps down: Error!
7. RESET
Bring the motor to the intermediate position. While press STOP also press PROG for
about 1 sec., until the LED lights up. Press twice UP and 9 times DOWN. Press STOP.
The LED flashes, the motor performs 8 movements. Press UP and DOWN
simultaneously for about 2 sec., until the motor indicates that the reset has been carried
out (2 movements up/down). Reinstall the motor following the instructions contained in
the motor box.
Find below the list of some remote control functions. For the full list
of functions consult the motor instructions.
5. ORIENTATION
This function allows you to move the motor with small steps. Function useful for roller
blind composed of orientable elements. You can adjust the duration of the steps by
setting a value ranging from 1 (not active) to 5. Bring the motor to the intermediate
position. While press STOP also press PROG for about 1 sec., until the LED lights up.
Press once on UP and twice on DOWN. Press STOP. The motor shows the current
value (from 1 to 5). Press DOWN as many times as the setting you want (from 1 to 5).
Press STOP. The motor shows the new setting (from 1 to 5 movements).
For orientation press briefly twice STOP than press UP or DOWN.
ABS MABS
STAFER

8.ENTSORGUNG
Am Ende seines Lebenszyklus ist das Produkts gemäß den örtlichen Gesetzen und
Vorschriften zu entsorgen. Dieses Produkt kann umwelt und gesundheitsschädliche
Stoffe enthalten und darf daher nicht mit dem Haushaltsmüll entsorgt werden.
Verpackung und RAHMEN (SIEHE ABB. b) können recycled werden.
6. WECHSELN DER BATTERIE
Lösen Sie die Schraube (6) und entfernen Sie der Boden. Die leeren Batterien (Bild A)
durch neue Batterien des gleichen Typs ersetzen, die Polarität beachten. Einstecken
Sie der Boden (Bild B) und anschrauben die Schraube (6). Entsorgen Sie die Leere
Batterie in den speziellen Sammelbehältnissen.
Bringen Sie den Motor in die gewünschte Stellung. Kurz 6mal STOP drücken, dann 5
Sek. lang ABWÄRTS. Der Motor signalisiert mit 2 Bewegungen. Gespeichert!
Den dritten Endanschlag erneut aufrufen:
Kurz 3 mal STOP drücken und 2 Sek. warten.
3. FUNKTION SONNE – ABWÄRTS AUTOMATISCH
Wenn die LED (4) blinkt während der Übertragung, die “Funktion Sonne” nicht aktiv ist.
Wenn die LED (4) leuchtet während der Übertragung, die “Funktion Sonne” aktiv ist. Zu
ermöglichen/deaktivieren die “Funktion Sonne”, STOP und AUFWÄRTS zusammen für 3
Sekunden lang drücken.
1. HINWEISEN
Wasser, Feuchtigkeit, Wärmequellen, Stürzen zufällig
können Ihr Gerät ernst beschädigen. Nicht verwenden
Lösungsmittelen oder schleif Produkten für Produkt
Reinigung. Alle Produkte und die in diesem Heft
angegebenen technischen Spezifikationen können ohne
Vorankündigung abgeändert werden. Der Hersteller haftet
nicht für eventuelle Schäden, die auf einen
unsachgemäBen, falschen oder unvernünftigen Gebrauch
zurückzuführen sind.
VEREINFACHTE KONFORMITÄTSERKLÄRUNG
Der Hersteller STAFER S.p.a. erklärt hiermit, dass diese Art Funkgerät mit den
Richtlinien 2014/53/EU konform ist.
2. SPEICHERN/LÖSCHEN EINER ANDEREN FERNBEDIENUNG ODER
FUNKGERÄTS
Den Motor auf die mittlere Stellung bringen. Auf einem schon gespeicherten Sendegerät 5
Sekunden lang PROG drücken. Der Motor führt zwei Bewegungen aufwärts aus. Zum
Speichern/Löschen innerhalb von 15 Sekunden:
Einer Fernbedienung: STOP auf der Fernbedienung drücken, die gespeichert/gelöscht
werden soll.
Eines Sensors Sonne/Wind: P1 auf dem Sensor drücken, der gespeichert/gelöscht werden
soll.
Eines Regensensors: P2 auf dem Sensor drücken, der gespeichert/gelöscht werden soll. Der
Motor wird Folgendes ausführen:
1 Bewegung aufwärts: Gerät gespeichert!
1 Bewegung abwärts: Gerät gespeichert!
2 Bewegungen abwärts: Fehler!
7. DIE FABRIKEINSTELLUNGEN WIEDER HERSTELLEN (Reset)
Den Motor auf die mittlere Stellung bringen. STOP und PROG gemeinsam 1 Sek. lang
gedrückt halten, bis die LED aufleuchtet. 2mal AUFWÄRTS und 9mal ABWÄRTS
drücken.STOP drücken. Die LED blinkt, der Motor führt 8 Bewegungen aus. AUFWÄRTS
und ABWÄRTS gleichzeitig 2 Sek. lang drücken, bis der Motor signalisiert, dass der
Reset stattgefunden hat (2 Bewegungen aufwärts/abwärts). Den Motor neu installieren,
wobei die, in der Motorverpackung beiliegenden Anleitungen befolgt werden.
Im Folgenden die Auflistung einiger Funktionen der Fernbedienung. Um wirklich
alle Funktionen kennenzulernen, die Gebrauchsanweisung zum Motor lesen.
5. ORIENTIERUNG
Ermöglicht den Motor stoßartig zu bewegen. Nützlich bei orientierbaren Stäben.Die
Stoßbewegungen können in ihrer Dauer reguliert werden, ein Wert, der von 1 (nicht
aktiv) bis 5 betragen kann. Den Motor in die mittlere Stellung bringen. STOP und PROG
gemeinsam 1 Sek. lang gedrückt halten, bis die LED aufleuchtet. Einmal AUFWÄRTS
und 2mal ABWÄRTS drücken. STOP drücken. Der Motor gibt den momentanen Wert an
(von 1 bis 5). ABWÄRTS so oft, wie die gewünschte Einstellung betragen soll, drücken
(von 1 bis 5). STOP drücken. Der Motor signalisiert die neue Einstellung (von 1 bis 5
Bewegungen). Zur Orientierung 2mal kurz STOP drücken und dann AUFWÄRTS oder
ABWÄRTS gedrückt halten.
8. SMALTIMENTO
À la fin du cycle de vie du produit, l’éliminer conformément aux règlements
locaux prévus. Ce produit pourrait contenir des substances polluantes pour
l’environnement et dangereuses pour la santé. Il est interdit d’éliminer ce
produit en le jetant dans les déchets domestiques. Il est possible de recycler les
coques et le CADRE (VOIR FIG. b).
6. REMPLACEMENT DE PILE
Dévisser la vis (6) et enlever le dos. Retirez la pile usé (fig. A) et le remplacer par une
nouvelle pile du même type, en respectant la polarité. Remetre le dos (fig. B) et fixer
avec la vis (6). Jeter le pile dans les conteneurs appropriés.
4. POSITION PRÉFÉRÉE (troisième fin de course) UNIQUEMENT AVEC
MOTEURS RX-E
Mettre le moteur dans la position souhaitée.Pousser brièvement 6 fois sur STOP, puis
sur BAS pendant 5 sec. Le moteur signale par 2 mouvements. Enregistré !
Pour rappeler le troisième fin de course: pousser brièvement 3 fois sur STOP et
patienter 2 sec.
3. FONCTION SOLEIL – DESCENTE AUTOMATIQUE
Si le LED (4) clignote la fonction "soleil" est inactif. Lors de la transmission, si le LED (4)
reste allumé la fonction "soleil" est actif.
Pour activer/désactiver la fonction "soleil" appuyez sur STOP et HAUT pendant 3
secondes.
1. AVERTISSEMENTS
L'eau, l'humidité, la chaleur, les chutes accidentelles peuvent
endommager l'appareil. Ne pas utiliser de produits abrasifs pour
nettoyer le produit. Tous les produits et les spécifications
techniques cités dans ce document sont sujets à variations sans
aucun préavis. Sauf dans le cas d’autorisations et de cas
spécifiques convenus préalablement par la maison de production,
ce dispositif doit être employé exclusivement avec des dispositifs
récepteurs de la même maison de production. Le constructeur ne
peut pas être considéré responsable des dommages causés par
une utilisation impropre, erronée ou irrationnelle.
DÉCLARATION DE CONFORMITÉ SIMPLIFIÉE
Le fabricant STAFER spa déclare que le présent type d'appareillage radio est conforme à
la directive 2014/53/UE.
2. ENREGISTRER/EFFACER UNE AUTRE RADIOCOMMANDE OU UN DISPOSITIF
RADIO
Mettre le moteur en position intermédiaire. Pousser sur PROG d'un transmetteur
enregistré en mémoire pendant 5 secondes. Le moteur fait deux mouvements en
montée. Dans les 15 secondes, pour enregistrer/effacer :
une radiocommande : pousser sur STOP sur la radiocommande à enregistrer/effacer.
un capteur soleil/vent : pousser sur P1 du capteur à enregistrer/effacer.
un capteur pluie : pousser sur P2 du capteur à enregistrer/effacer.
Le moteur fera :
1 mouvement vers le haut : dispositif enregistré !
1 mouvement vers le bas : dispositif enregistré !
2 mouvements vers le bas : erreur !
7. RESTAURATION DES CONDITIONS D'ORIGINE (reset)
Mettre le moteur en position intermédiaire. En poussant sur STOP, pousser également
sur PROG pendant environ 1 sec, jusqu'à ce que la LED s'allume. Pousser 2 fois sur
HAUT et 9 fois sur BAS. Pousser sur STOP. La LED clignote, le moteur fait 8
mouvements. Pousser sur HAUT et BAS simultanément pendant environ 2 sec jusqu'à
ce que le moteur signale que le reset a été effectué (2 mouvements vers le haut/bas).
Réinstaller le moteur en suivant les instructions figurant dans l'emballage.
Voici la liste de certaines fonctions de la radiocommande. Pour
visionner les fonctions au complet, voir les instructions du moteur.
5. ORIENTATION
Permet d'actionner le moteur par petits à-coups. Utile avec des lames orientables. Il
est possible de régler la durée des à-coups en programmant une valeur de 1 (inactif)
à 5. Mettre le moteur en position intermédiaire. En poussant sur STOP, pousser
également sur PROG pendant environ 1 sec, jusqu'à ce que la LED s'allume. Pousser
une fois sur HAUT et 2 fois sur BAS. Pousser sur STOP. Le moteur signale la valeur
courante (de 1 à 5). Pousser sur BAS autant de fois que programmé (de 1 à 5).
Pousser sur STOP. Le moteur signale le nouveau réglage (de 1 à 5 mouvements).
Pour orienter, pousser brièvement 2 fois sur STOP puis pousser sur HAUT ou BAS en
maintenant.
8. ELIMINACIÓN
Al fin de ciclo de vida del producto, disponerlo según las regulaciones locales.
Este producto podría contener sustancias tóxicas para el medio ambiente y
peligrosas para la salud. Está prohibido disponer el producto tirándolo en rechazo
doméstico. Es posible reciclar los armazones y el MARCO (VER FIG. b).
6. SUSTITUCIÓN DE LA BATERÍA
Quitar los tornillos (6) y la parte posterior. Quitar la batería gastada (fig. A) y sustituirla
con una batería cargada del mismo tipo, respetando la polaridad. Poner de nuevo la
parte posterior (fig. B) y bloquearla con los tornillos (6). Disponer la batería gastada en
un contenedor especial para baterías.
4. POSICIÓN PREFERIDA (tercero final recorrido) SOLO CON MOTORES RX-E
Llevar el motor a la posición deseada. Pulsar brevemente 6 veces STOP, luego
ABAJO durante 5 seg. El motor indica con 2 movimientos. Guardado!
Para seleccionar el tercero final recorrido: Pulsar brevemente 3 veces STOP y
esperar 2 segundos.
3. FUNCIONES SOL/BAJADA AUTOMÁTICA
Si el LED (4) parpadea durante la transmisión, la función sol es inactiva. Si el LED (4)
queda fijo durante la transmisión, la función sol está activada.
Para habilitar o deshabilitar la función sol, apretar a la vez STOP y ARRIBA por 3
segundos.
1. ADVERTENCIAS
Agua, humedad, fuentes de calor y/o caídas accidentales puede
dañar el dispositivo. No utilizar disolventes o productos abrasivos
para la limpieza del producto. Todos los productos y las
específicas técnicas citadas en este documento están sometidos a
variaciones sin preaviso. Salvo concesiones y casos específicos
concordados preventivamente con la casa constructora, el aparato
tiene que ser utilizado exclusivamente con receptores de la misma
casa constructora. El constructor no puede ser considerado
responsable por eventuales daños consiguientes de empleos
impropios, erróneos o irrazonables.
DECLARACIÓN DE CONFORMIDAD SIMPLIFICADA
El fabricante STAFER s.p.a. declara que el tipo de equipo de radio guarda conformidad
con la directiva 2014/53/UE.
2. GUARDAR/ELIMINAR OTRO MANDO A DISTANCIA O DISPOSITIVO DE RADIO
Llevar el motor a la posición intermedia. Pulsar PROG de un transmisor ya guardado
durante 5 segundos. El motor efectúa dos movimientos en ascenso. En 15 segundos,
para guardar/eliminar:
un mando a distancia: pulsar STOP del mando que se desea guardar/eliminar.
un sensor sol/viento: pulsar P1 del sensor que se desea guardar/eliminar
un sensor lluvia: pulsar P2 del sensor que se desea guardar/eliminar
El motor ejecutará:
1 movimiento hacia arriba: dispositivo guardado!
1 movimiento hacia abajo: dispositivo guardado!
2 movimientos hacia abajo: error!
7. RESTABLECIMIENTO DE LAS CONDICIONES DE FÁBRICA (reset)
Llevar el motor a la posición intermedia. Manteniendo pulsado el botón STOP pulsar
también PROG durante aprox. 1 seg., hasta que el led se encienda. Pulsar 2 veces
ARRIBA y 9 veces ABAJO. Pulsar STOP. El led parpadea, el motor efectúa 8 movimientos.
Pulsar ARRIBA y ABAJO al mismo tiempo durante aprox. 2 seg., hasta que el motor
indique que el restablecimiento se ha efectuado (2 movimientos hacia arriba/hacia abajo).
Instalar nuevamente el motor siguiendo las instrucciones que se incluyen en el embalaje
del motor.
A continuación, la lista de algunas funciones del mando a distancia. Para
visualizar todas las funciones completas, ver las instrucciones del motor.
5. ORIENTACIÓN
Permite mover el motor con saltos breves. Útil con varillas orientables. Es posible
regular la duración de los saltos configurando un valor que va de 1 (no activo) a 5.
Llevar el motor a la posición intermedia. Manteniendo pulsado el botón STOP pulsar
también PROG durante aprox. 1 seg., hasta que el led se encienda. Pulsar una vez
ARRIBA y 2 veces ABAJO. Pulsar STOP. El motor indica el valor actual (de 1 a 5).
Pulsar DOWN la misma cantidad de veces que la configuración deseada (de 1 a 5).
Pulsar STOP. El motor indica la nueva configuración (de 1 a 5 movimientos).
Para orientar, pulsar brevemente 2 veces STOP y, luego, mantener pulsado ARRIBA
o ABAJO.
4. BEVORZUGTE POSITION (dritter Endanschlag) NUR BEI RX-E MOTOREN
Other Stafer Remote Control manuals
Popular Remote Control manuals by other brands
marinco
marinco SPLR-2 instructions
Mitsubishi Electric
Mitsubishi Electric Ecodan PAR-WT50R-E Operation manual
MELICONI
MELICONI Fully 8.1 manual
Soundstream
Soundstream AirBass Owners and installation manual
LUZ NEGRA
LUZ NEGRA ecoled 41.092 quick start guide
One Forall
One Forall Contour TV URC1210 user manual
